Excellent software and practical tutorials
Redmi AX6000 Unlock SSH Install ShellClash Unlock steps for AX6000 and AX9000
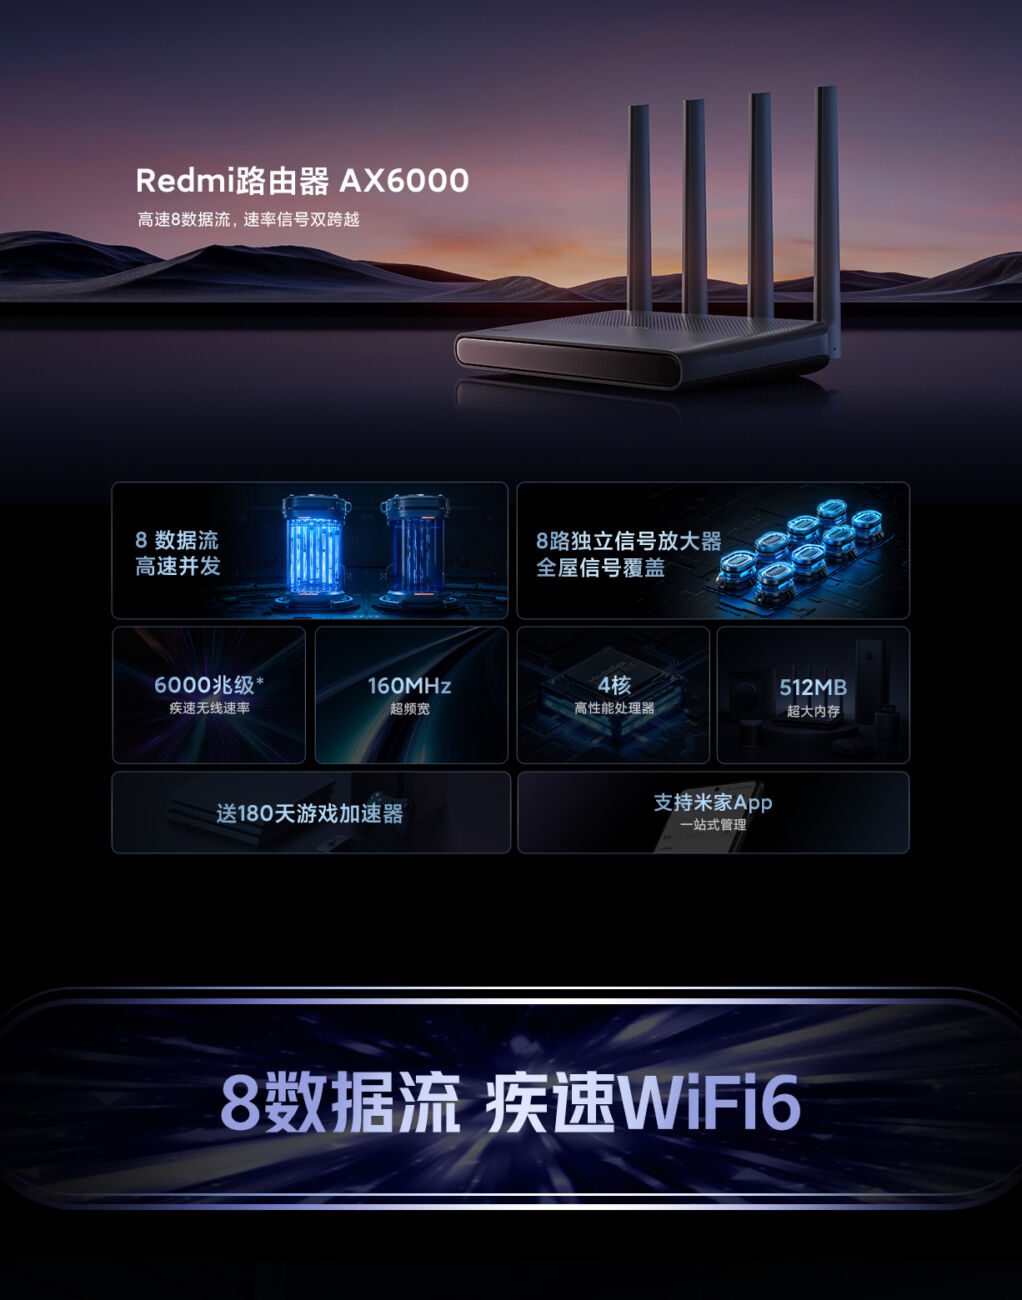
Redmi AX6000 Install ShellClash Redmi AX6000 Router, the most criticized thing about the configuration of Redmi AX6000 is that it does not have a 2.5G network port, all of which are Gigabit network ports. The Redmi AX6000 is equipped with the mt7986a released by MTK in 2021, a quad-core ARM A53 architecture, a main frequency of up to 2.0GHz, and an extremely advanced 12nm process. In addition, it has 512M memory and 128M flash memory. Unlock SSH installs ShellClash to see how powerful the performance is.
Redmi ax6000 official website:Redmi Router AX6000
Redmi AX6000 Preparation
- A Redmi AX6000 (product model RB06)
- A computer (Mac, Win, Linux, etc.)
- Download and install Termius (Any ssh tool will do, termius is simple and suitable for beginners)
- Download Redmi AX6000 firmware 1.2.8 version
Redmi AX6000 Unlock SSH
Redmi AX6000 upgraded to the specified version of firmware
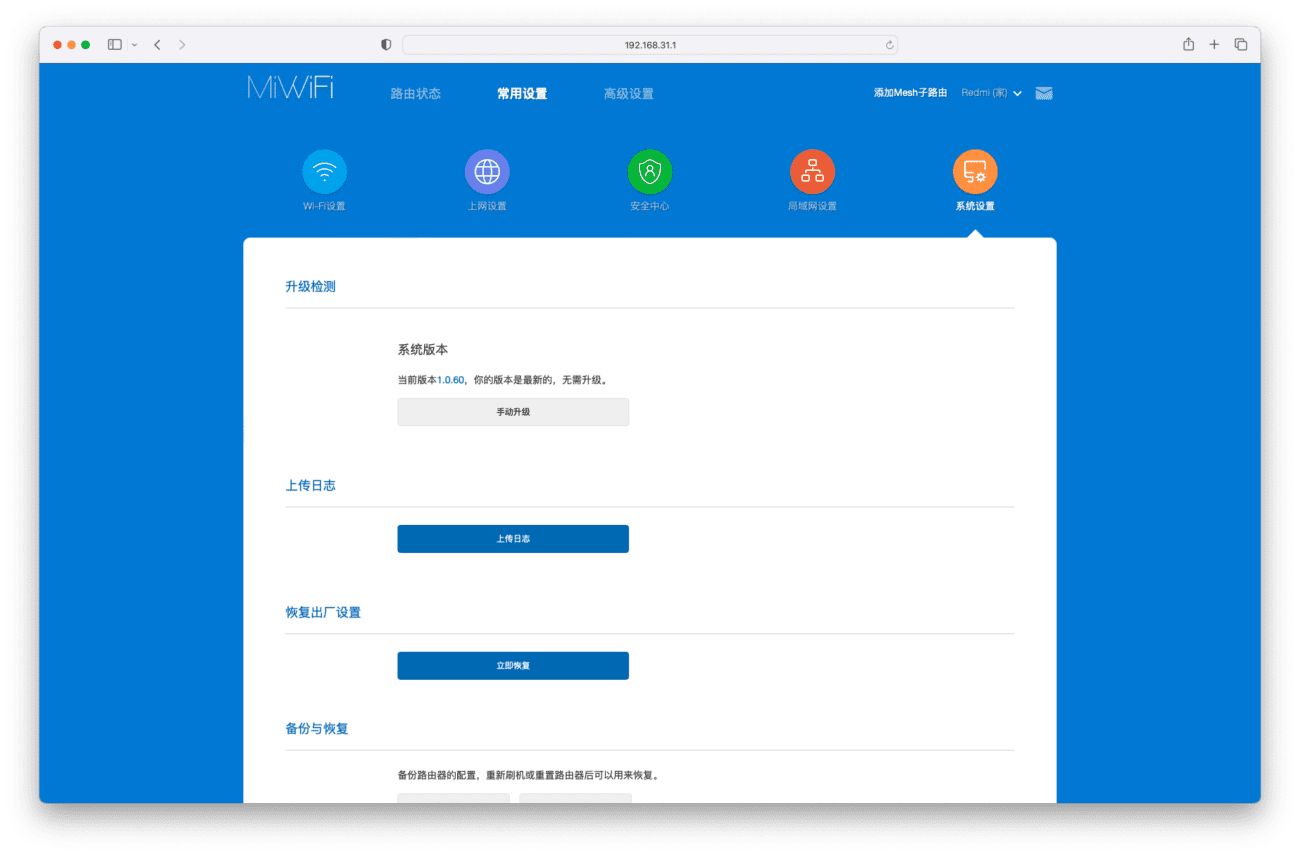
In the Xiaomi router background, Redmi AX6000 Firmware Manually upgrade to Version 1.2.8
Get router stock
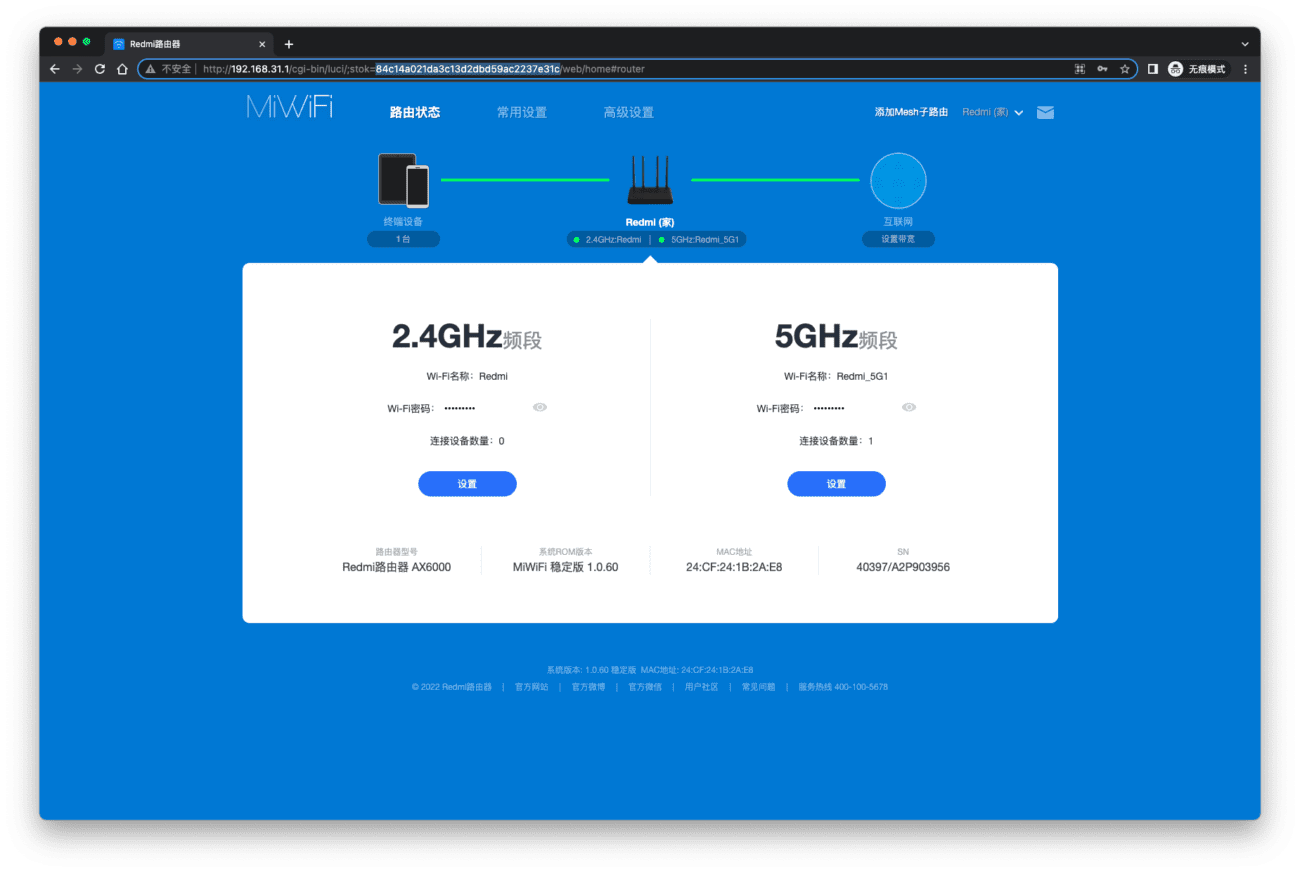
After logging into the backend of Xiaomi router, the content after stok= in the browser address bar is (the selected part), which is ready for use.
Enable debug mode
Open your browser, copy the following content into the address bar, and replace {STOK}
http://192.168.31.1/cgi-bin/luci/;stok={token}/api/misystem/set_sys_time?timezone=%20%27%20%3B%20zz%3D%24%28dd%20if%3D%2Fdev%2Fzero%20bs%3D1%20count%3D2%202%3E%2Fdev%2Fnull%29%20%3B%20printf%20%27%A5%5A%25c%25c%27%20%24zz%20%24zz%20%7C%20mtd%20write%20-%20crash%20%3B%20My replacement is as above. Copy the replaced value to the browser request. If {"code":0} is displayed as above, it means success.
Request a restart via your browser
Open the browser again, copy the following content into the address bar, and replace {STOK}
http://192.168.31.1/cgi-bin/luci/;stok={token}/api/misystem/set_sys_time?timezone=%20%27%20%3b%20reboot%20%3b%20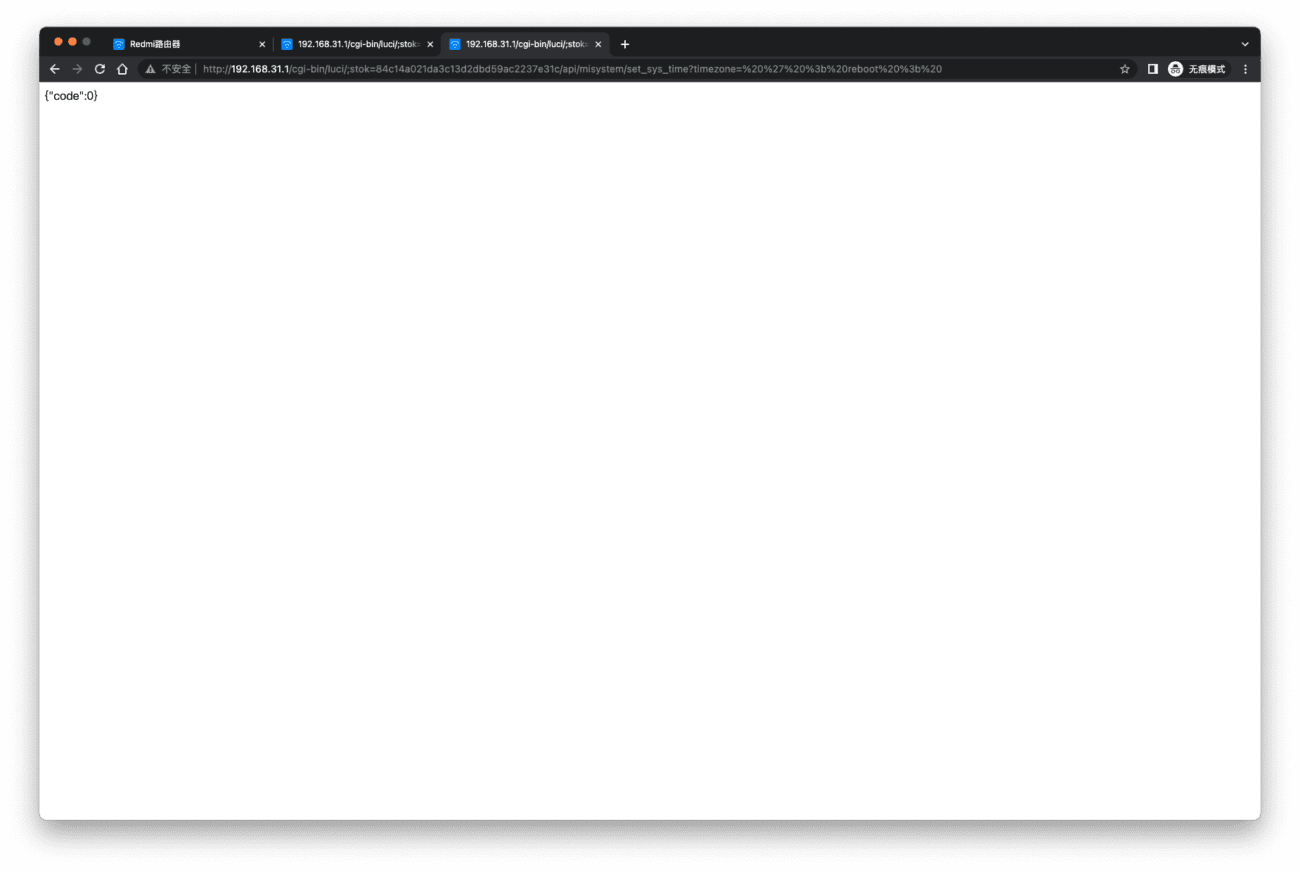
After executing this step through the browser, the router will restart. Wait for the restart to complete.
Set Bdata to permanently enable telnet
After the restart is complete, open the router backend (note: after the router restarts, you need to log in again to get a new stok), then open the browser, copy the following content into the address bar, and replace {STOK}.
http://192.168.31.1/cgi-bin/luci/;stok={token}/api/misystem/set_sys_time?timezone=%20%27%20%3B%20bdata%20set%20telnet_en%3D1%20%3B%20bdata%20set%20ssh_en%3D1%20%3B%20bdata%20set%20uart_en%3D1%20%3B%20bdata%20commit%20%3B%20Then execute step 4 again, "Request a restart through the browser", and wait for the restart to complete.
Telnet connection opens ssh
Open Termius and choose Continue Without Account without logging in.
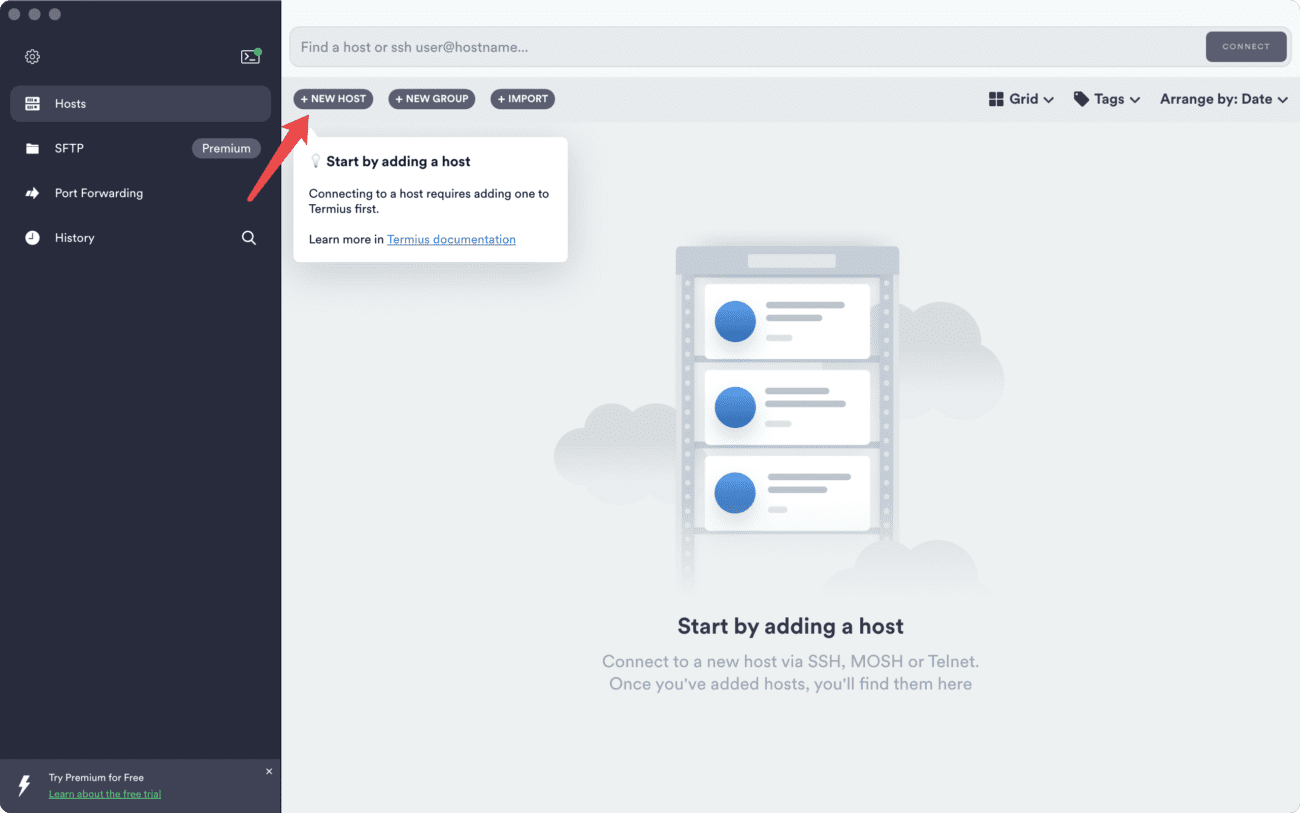
Click New Host to add
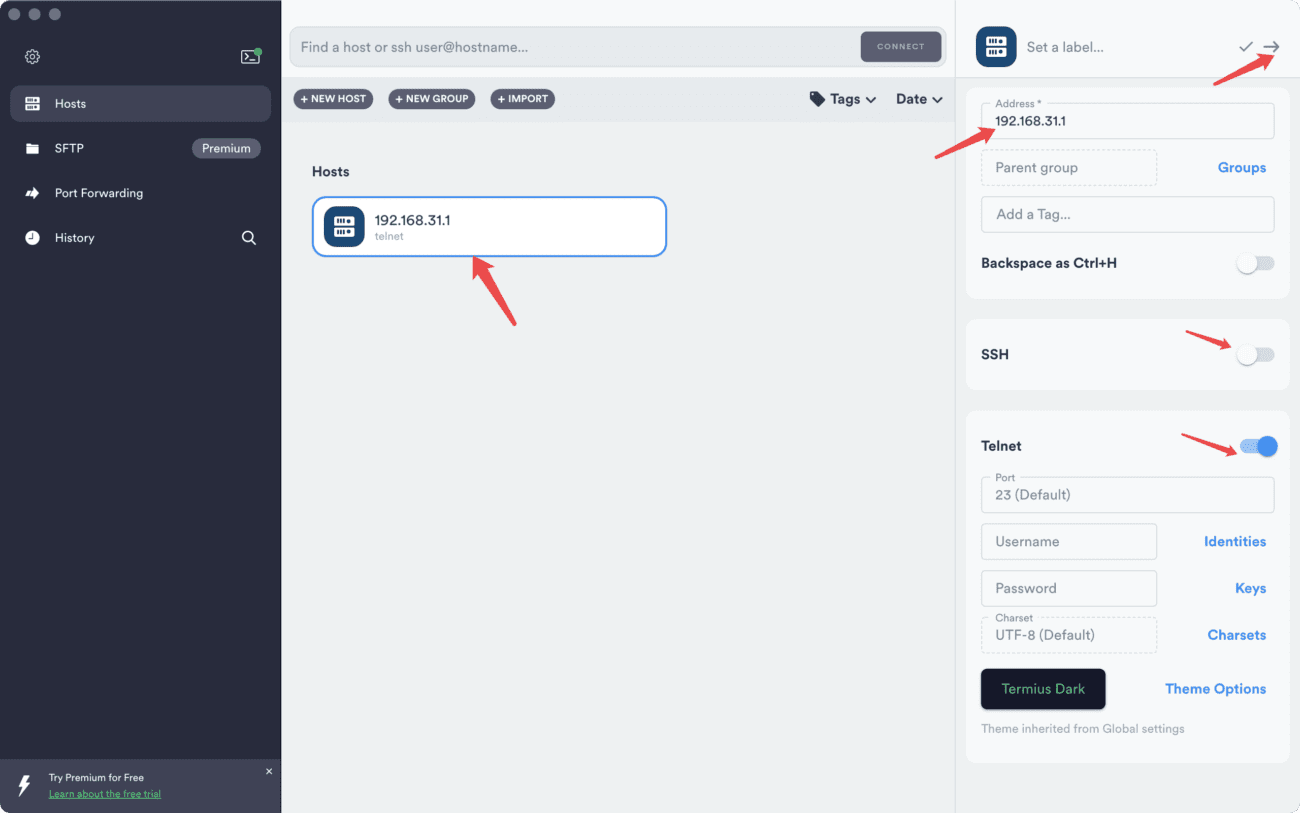
Address: 192.168.31.1
SSH: Uncheck
Telnet: Check
Then click the right arrow, and finally select "192.168.31.1" in Hosts to start the telnet connection. (No need to enter the user name and password)
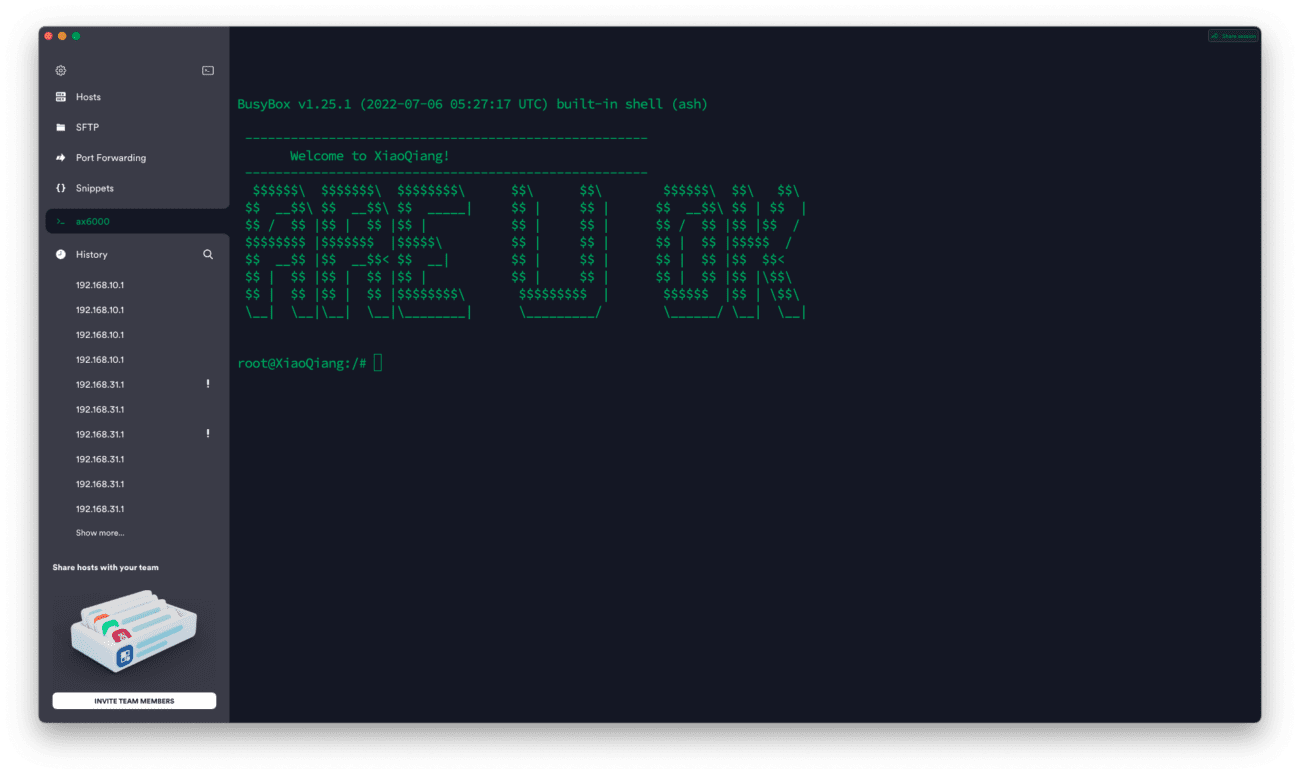
Permanently open and solidify ssh
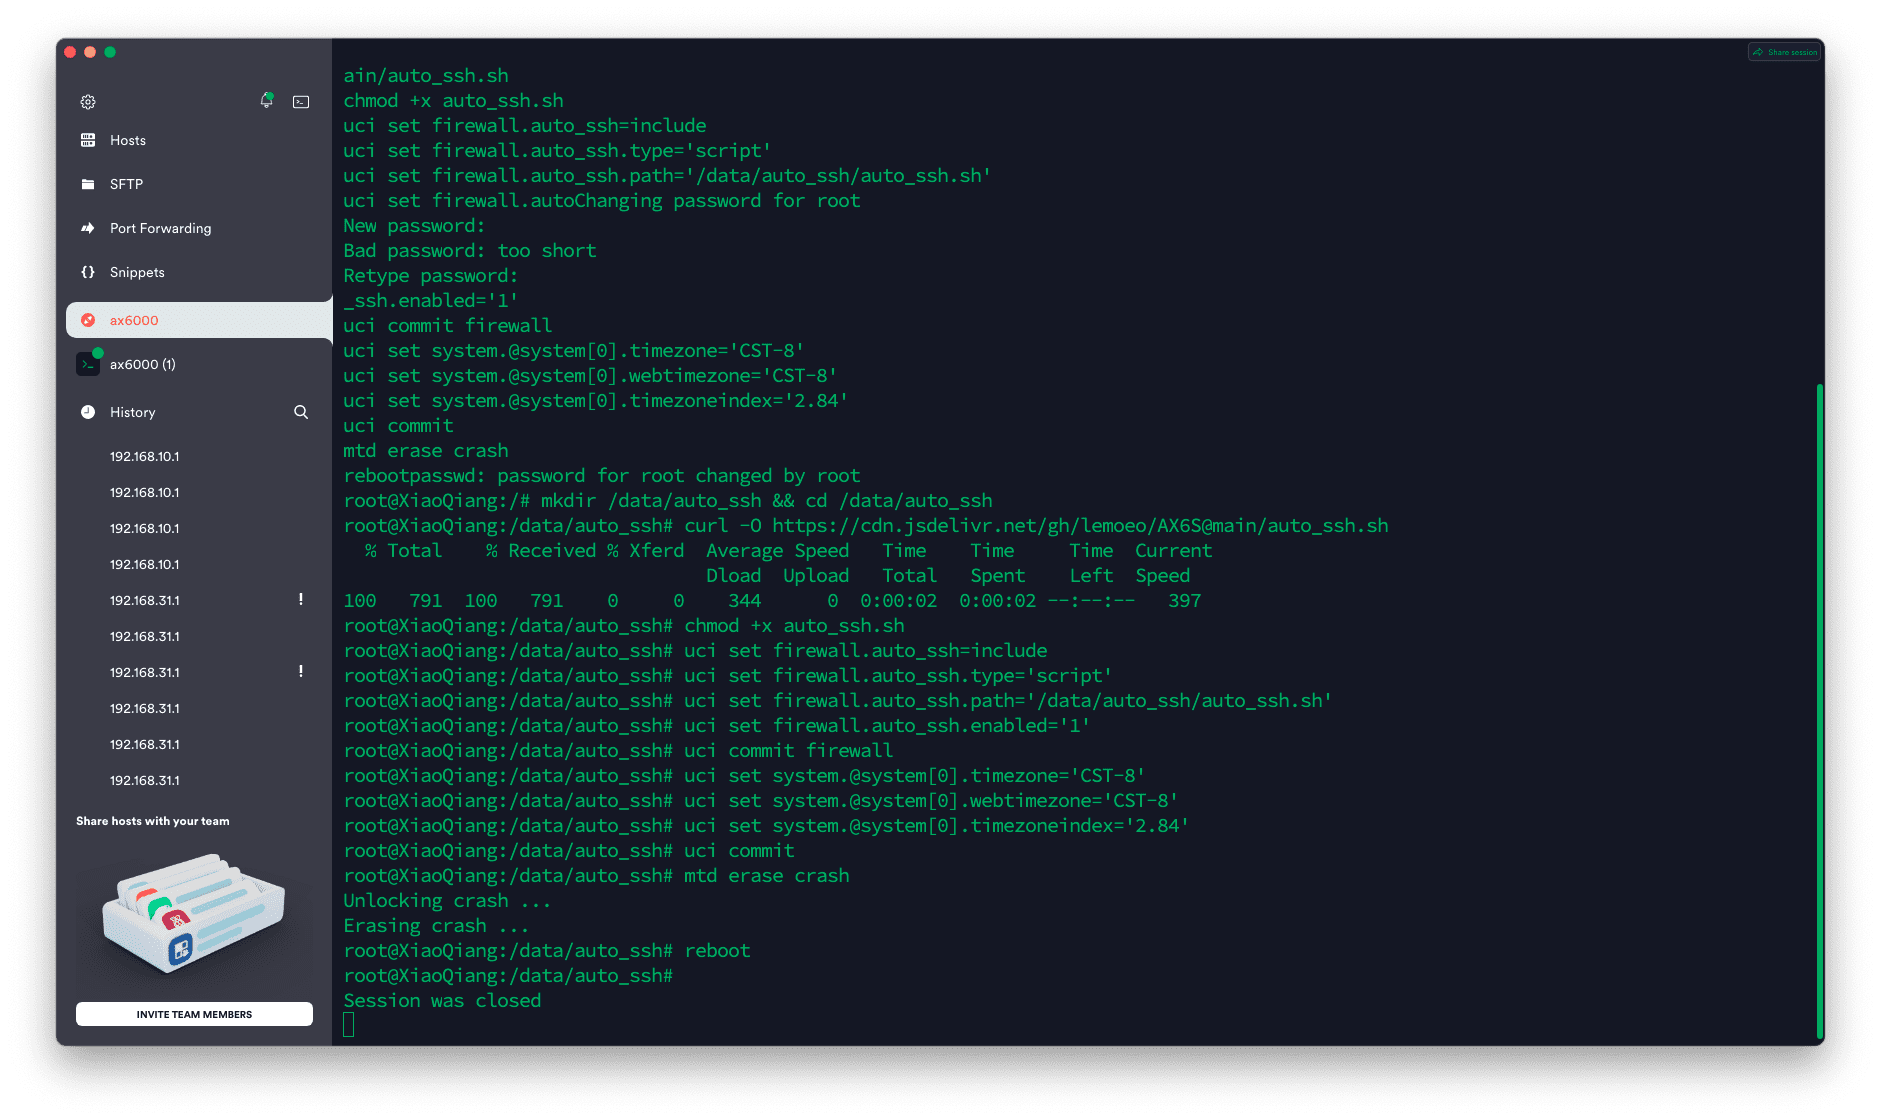
echo -e 'admin\nadmin' | passwd root nvram set ssh_en=1 nvram set telnet_en=1 nvram set uart_en=1 nvram set boot_wait=on nvram commit sed -i 's/channel=.*/channel="debug"/g' /etc/init.d/dropbear /etc/init.d/dropbear restart mkdir /data/auto_ssh cd /data/auto_ssh curl -O https://fastly.jsdelivr.net/gh/lemoeo/AX6S@main/auto_ssh.sh chmod +x auto_ssh.sh uci set firewall.auto_ssh=include uci set firewall.auto_ssh.type='script' uci set firewall.auto_ssh.path='/data/auto_ssh/auto_ssh.sh' uci set firewall.auto_ssh.enabled='1' uci commit firewall uci set system.@system[0].timezone='CST-8' uci set system.@system[0].webtimezone='CST-8' uci set system.@system[0].timezoneindex='2.84' uci commit mtd erase crash reboot
Copy the above command to the termius terminal and execute it. This will set the ssh password to admin, permanently enable SSH, change from development mode back to normal mode, and restart. After the restart is complete, you can connect to ssh.
Try to ssh to the router
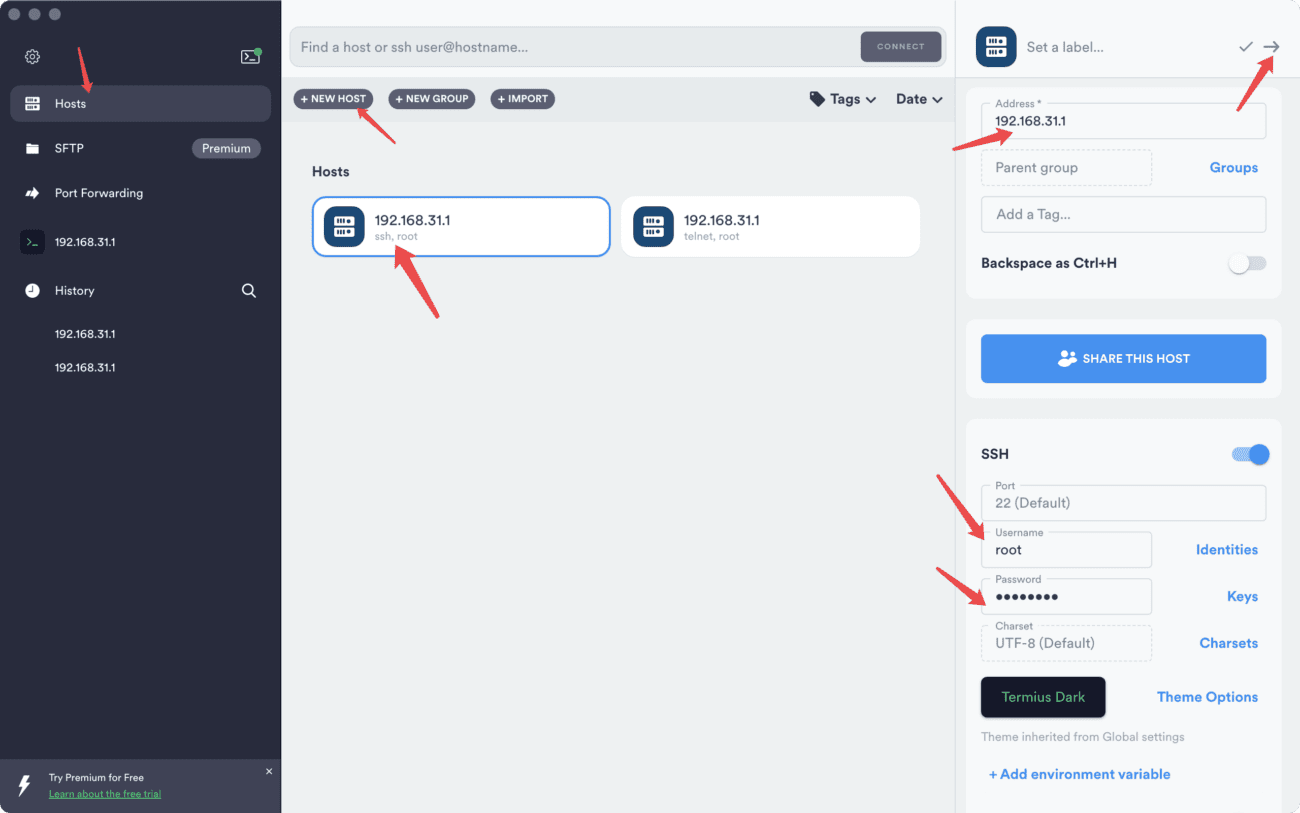
Select Hosts-click New Host to add:
Address: 192.168.31.1
Fill in the SSH username: root
Password is:admin
Click the arrow in the upper right corner, then click 192.168.31.1 in Hosts and you should be able to connect to SSH. (Note that you should select ssh instead of telnet)
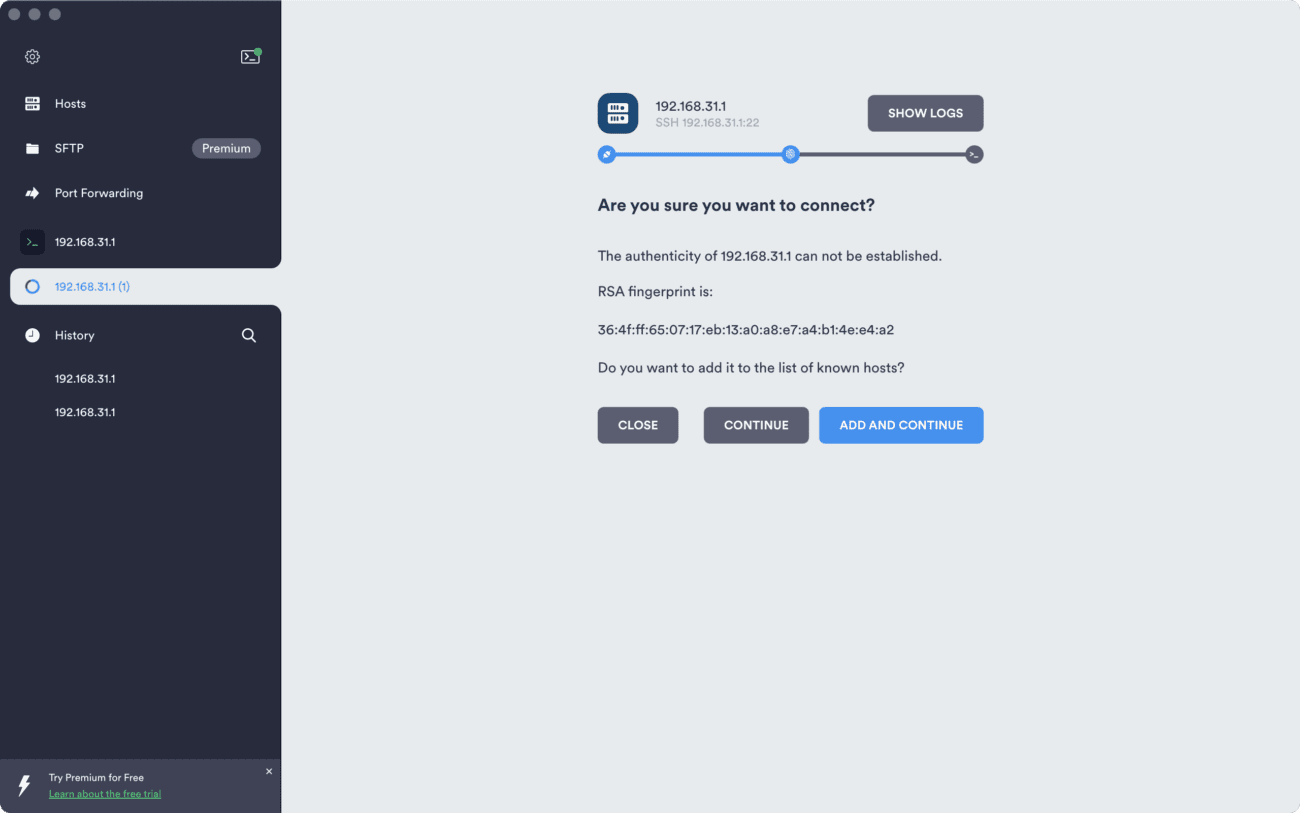
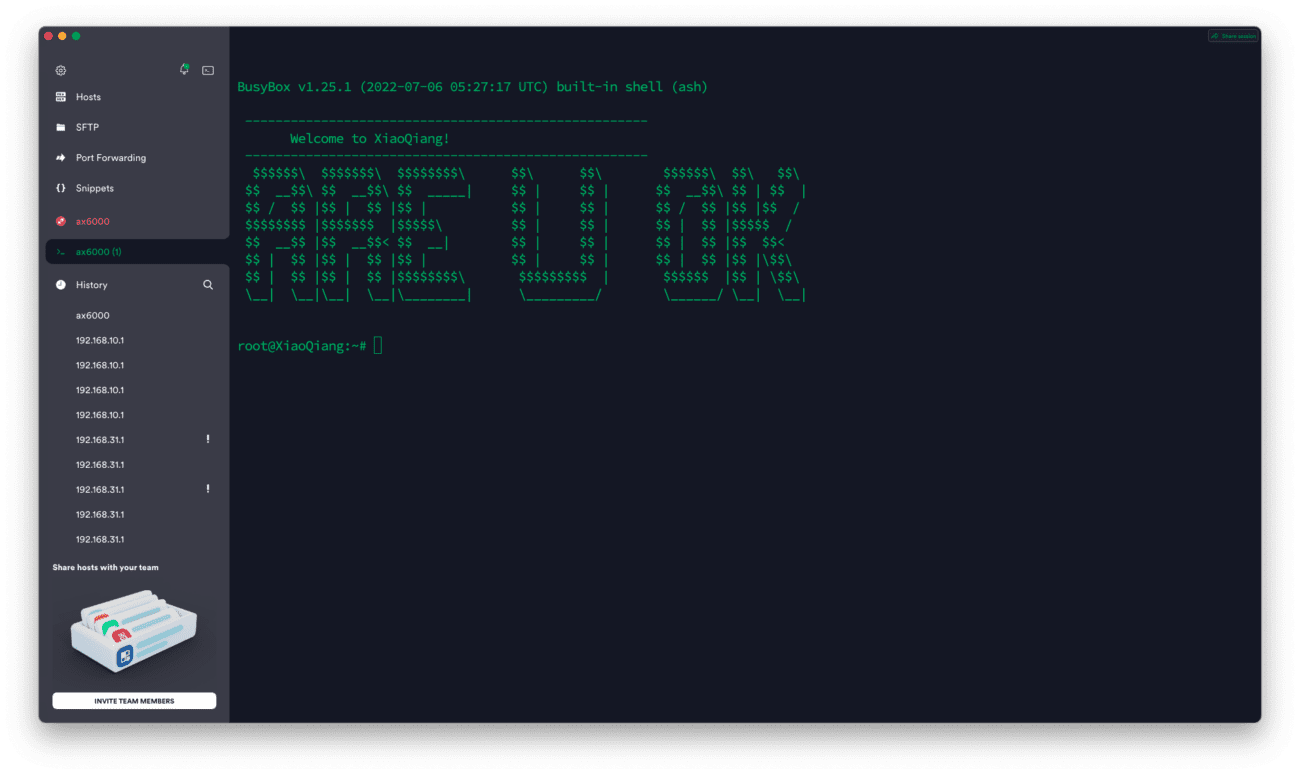
Select ADD AND CONTINUE and you will enter the ssh connection.
Install ShellClash
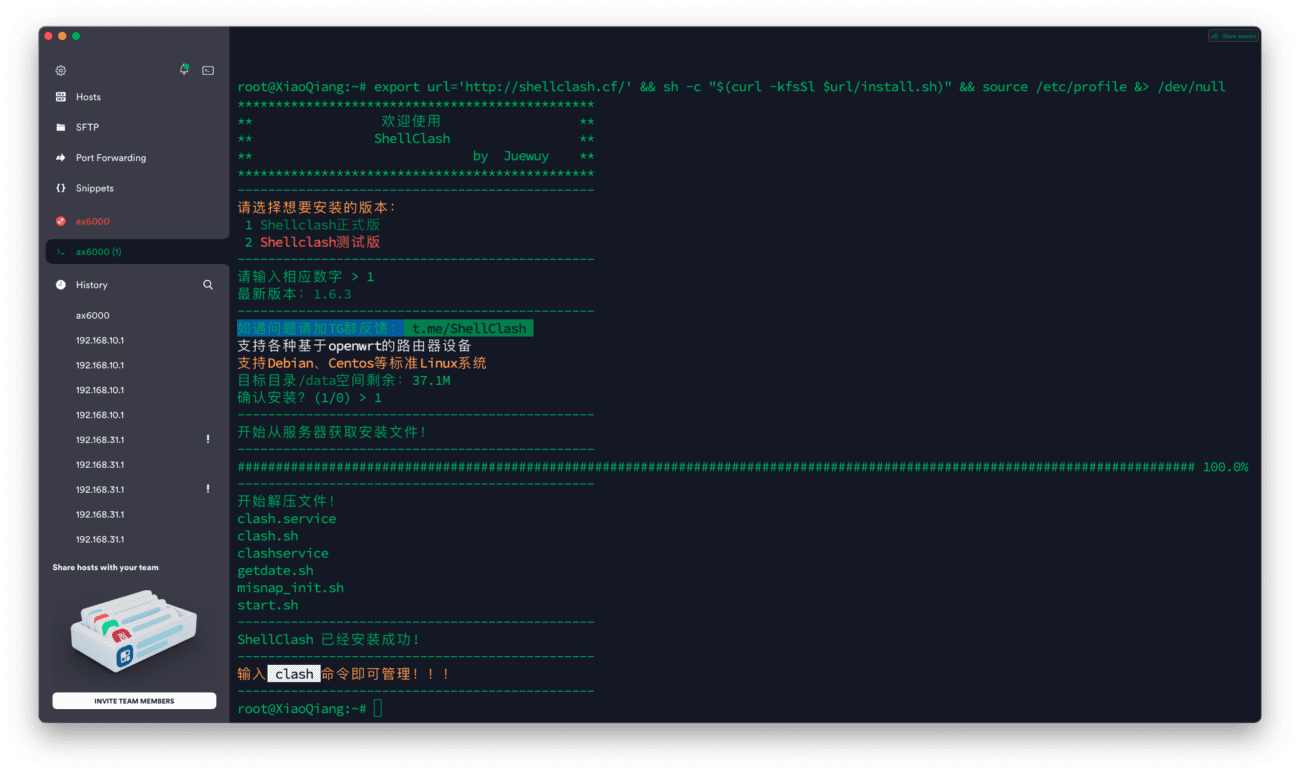
Copy this command in SSH to start installing ShellClash
export url='https://raw.fastgit.org/juewuy/ShellClash/master' && sh -c "$(curl -kfsSl $url/install.sh)" && source /etc/profile &> /dev/null
Select 1 Official version, and then select 1 Confirm installation.
Configuring Clash
Type Clash and press Enter to configure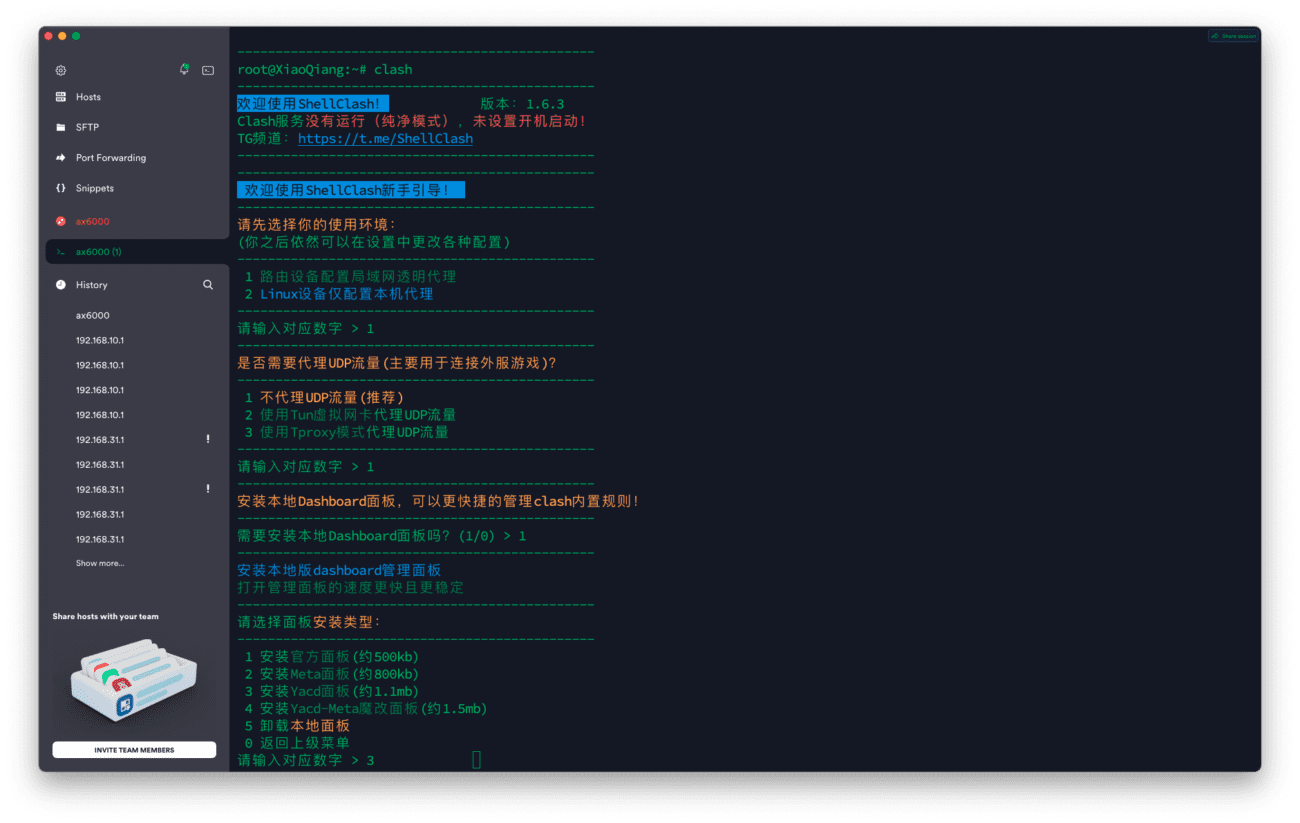
- Select 1 Host or Bypass
- Select 1: Do not proxy UDP
- Select 1 to install the Dashboard panel
- Select 3 YACD panels, or choose the one you are familiar with.
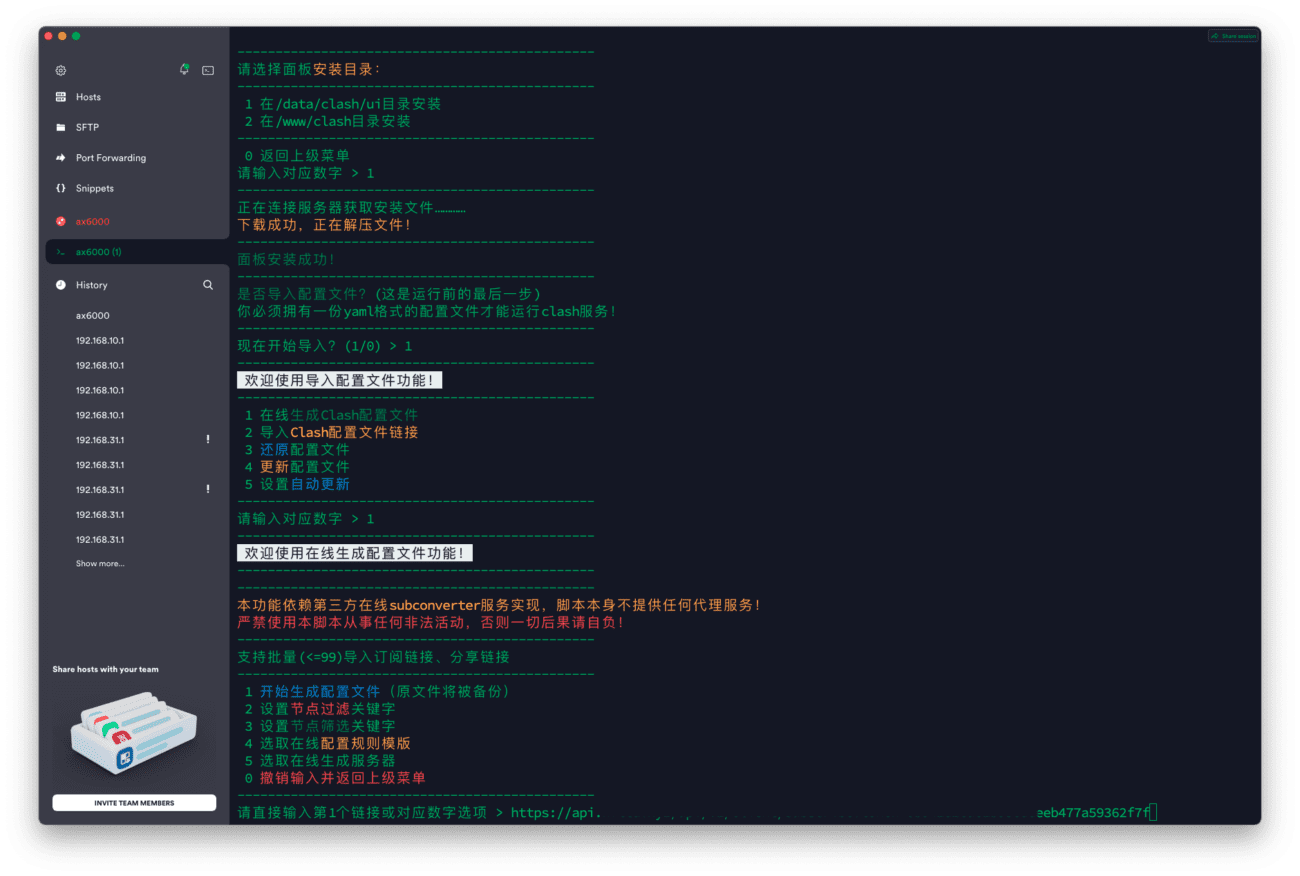
- Select 1 path
- 1 Start importing
- 1 Online generation
- Paste your subscription link. For more information about Clash subscription, please refer to:Subscribe with Clash
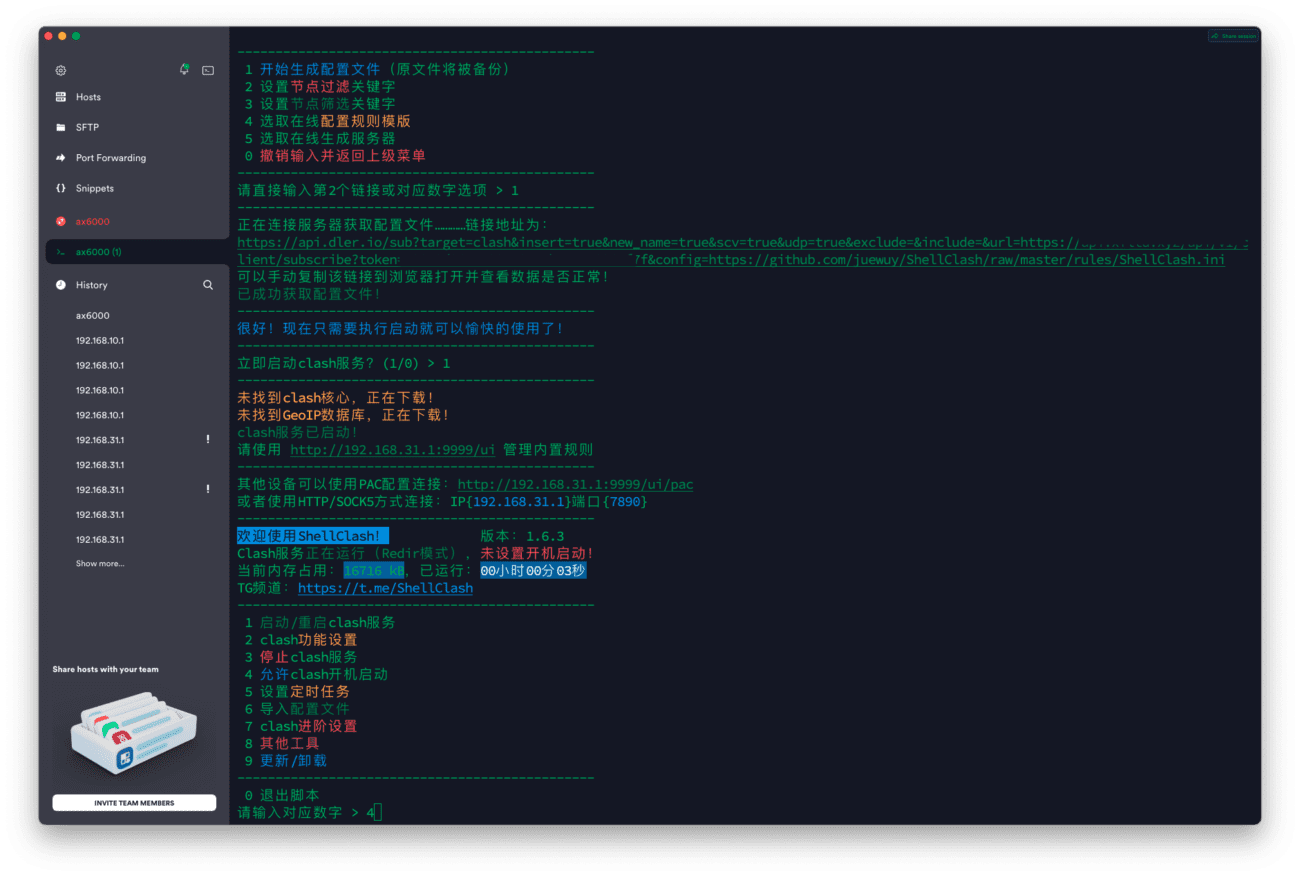
- 1 Start generating configuration files
- 1 Start Clash service immediately
- Select 4 to allow startup
- Finally, select 0 to exit the script.
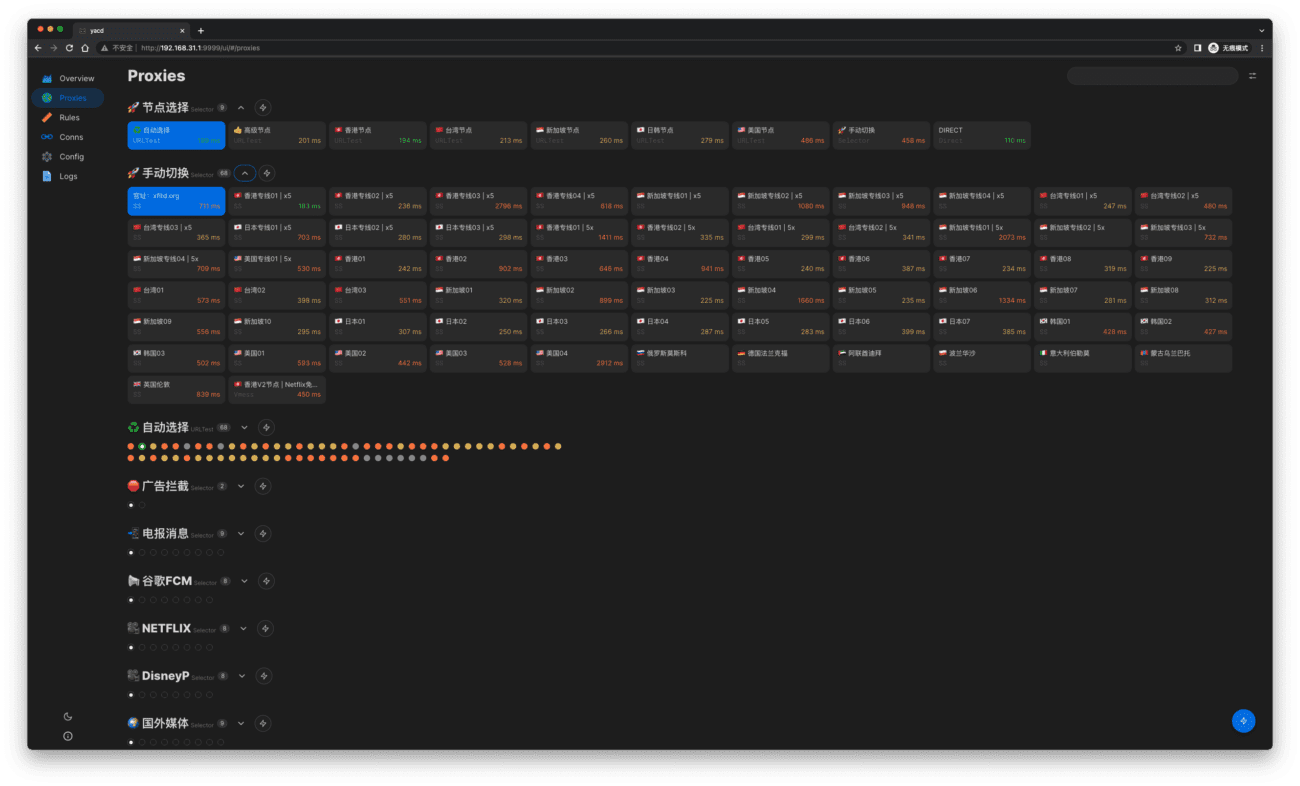
Now it should work fine. Open it in your browser. http://192.168.31.1:9999/ui, you can access the control backend.
Speed test performance
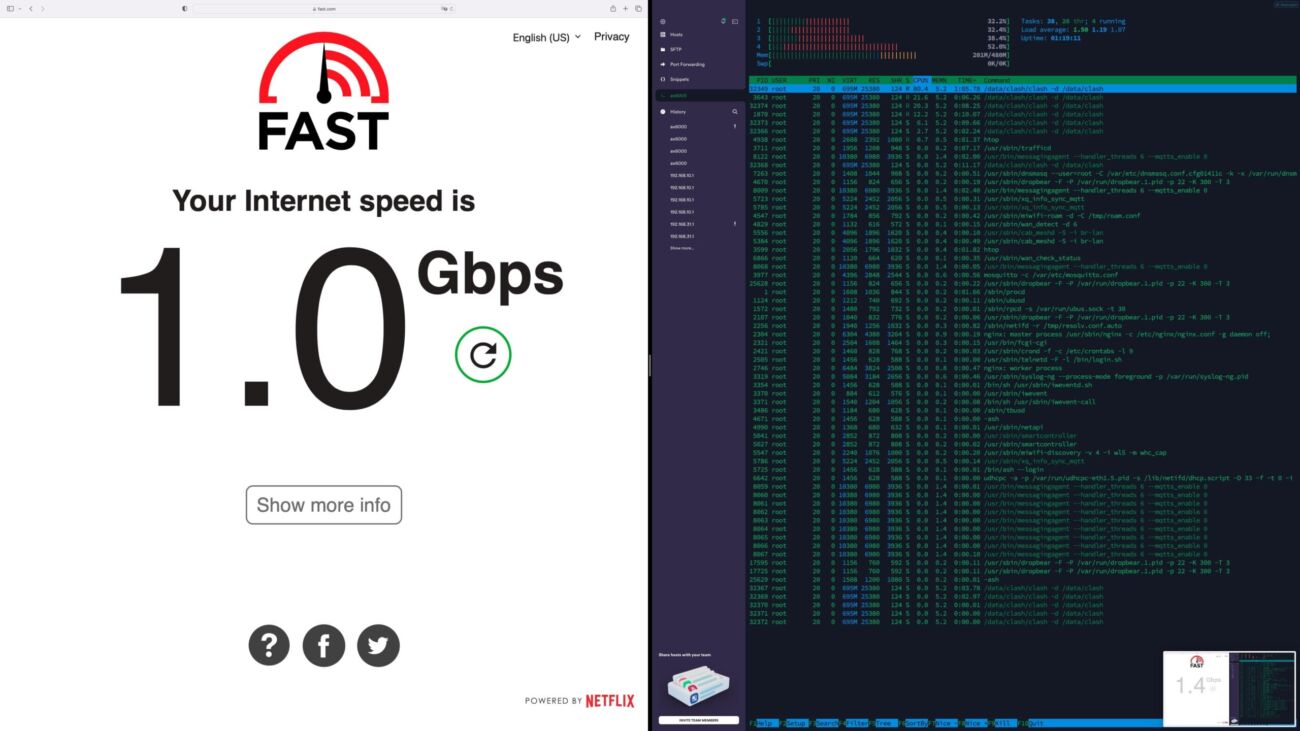
Running at full 1000M bandwidth, the CPU occupies less than 50%! And the heat generation is really low.
How to restore SSH after resetting, upgrading, or flashing
Whether you have upgraded the system, restored the system to factory default, or flashed another version of the system or flashed back to openwrt, telnet is actually open because it is written in the bdata partition. However, the telnet password will be restored to the default. We need to calculate it using the SN number in the lower right corner of the router backend. Here are two websites for direct online calculation:
- Oxygen7
- Miwifidev
After telnet is connected, execute:
sed -i 's/channel=.*/channel="debug"/g' /etc/init.d/dropbear /etc/init.d/dropbear restart
After that, ssh is enabled, and the default ssh password is the same as calculated above.









After flashing the firmware, I found that the 5G network could not be searched. Is there any solution?
Mozilla/5.0 (Linux; Android 10; K) AppleWebKit/537.36 (KHTML, like Gecko) Chrome/123.0.0.0 Mobile Safari/537.36 EdgA/123.0.0.0
Use the Xiaomi router repair software to flash back to 1.0.6 and then upgrade the router firmware through the Mi Home mobile phone router management.