Excellent software and practical tutorials


GL.iNet router flash, install the latest openwrt system
GL.iNet routerIt is a system flashing tool with low price, excellent performance and U-boot boot that never fails. It is more suitable for novice users.
When I first started flashing the router system, I was a little confused. I didn't know which system or version to flash! Later, after some exploration, I sorted out a way of thinking. In fact, flashing the router is not as difficult as I imagined!
The router is installed with an embeddedlinuxsystemfirmware, because the router CPU is different, the system is also different. For exampleMediaTek(MediaTek.Inc)'s MT7660 series CPU, you need to flash the Linux system firmware that supports MT7660.
Download and install openwrt firmware system
View FirstGL.iNet RouterFor CPU models, you need to flash the corresponding Linux system firmware, which is generally a .bin file.
Download the latest firmware from the official website.openwrtOfficial website:https://openwrt.org/
As of October 30, 2022, the firmware version has been upgraded toOpenWrt 22.03.2,Click to download OpenWrt 22.03.2 firmware, upgrade. The following uses OpenWrt 19.07 as an example. The method of flashing the firmware is similar. Download the latest version of the firmware and flash it.
Go to the firmware download page and search for the firmware that is suitable for GL-AR150The latest firmware for your router.Click to enter the firmware download page of openwrt system
Since there are many firmwares, press Ctrl+F on the browser page to search for the keyword AR150. The latest firmware download is on line 326.

19.07.2 Firmware upgrade address:http://downloads.openwrt.org/releases/19.07.2/targets/ath79/generic/openwrt-19.07.2-ath79-generic-glinet_gl-ar150-squashfs-sysupgrade.bin
19.07.7 Firmware upgrade address:http://downloads.openwrt.org/releases/19.07.7/targets/ath79/generic/openwrt-19.07.7-ath79-generic-glinet_gl-ar150-squashfs-sysupgrade.bin
22.03.2 Firmware upgrade address:https://downloads.openwrt.org/releases/22.03.2/targets/ath79/generic/openwrt-22.03.2-ath79-generic-glinet_gl-ar150-squashfs-sysupgrade.bin
After downloading the firmware, start flashing the router!
Step 1: Connect the router to your computer
Set the network card on the computer to 192.168.1.2 gateway 255.255.255.0, and no other settings are required.
On the Network Connections page, select the network card you want to set, right-click Properties -internetProtocol version 4 (TCP/IPv4) properties, confirm after modification!

Use an Ethernet cable to connect the LAN port of the AR150 router. Note that it is the LAN port. Also, make sure that your computer network card port is connected correctly. It must be the network card port with the IP address 192.168.1.2.
according towindowsPress key + R to switch to the run window and enter ping 192.168.1.1 -t

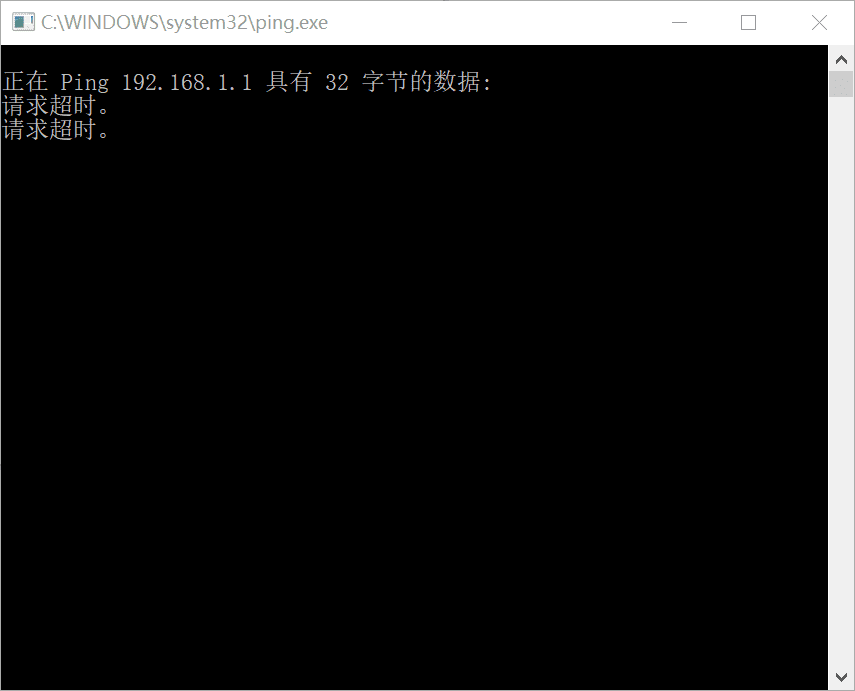
Ping the router's IP in the command line window, and then start setting up the router. There are some tips here. I tried several times at the beginning but failed.
After the router and computer are connected, do not turn on the power yet, press and hold the RESET button on the router. Note that you must press and hold it, do not release it.
After pressing the RESET button, plug in the power supply. The green light will turn on. Then the red light next to it will start to flash regularly. Please note that you should release the RESET button immediately after the red light flashes 5 times. After the recovery is successful, the red light will flash several times quickly, then go out, and the green light will stay on.
After the red light flashes quickly and then goes off, the address 192.168.1.1 on the screen can be pinged.

Step 2: Flash the openwrt firmware to the router
Visit http://192.168.1.1 in the browser, and you can now enter the u-boot flashing page.

Click Select File, select the firmware file you downloaded on your computer, and press Update firmware

Next, wait for 2-3 minutes and the router firmware system will be flashed.
This is a brand new openwrt19.07 system. There are still many things to set up after installing the system. You also need to install the software package.
In addition, a compiled OpenWrt firmware system is introduced
If you don’t want to go through all this trouble, there are also firmware systems compiled by experts that are all pre-configured.The software installation space of ar150 is relatively small, and it is only used for entry-level technical exchanges. If you want to install other software, you need to mount USB storage.
OpenWrt R9.3.7 By Lean
The source code comes from Lean, github address:https://github.com/coolsnowwolf/lede
Login information: 192.168.10.1 Username: root Password: password (I think this is related to your flashing method. I used the original uboot to flash, the address is 192.168.1.1)
Use putty orxshellOnce connected to the router, enter:
echo 0xDEADBEEF > /etc/config/google_fu_mode
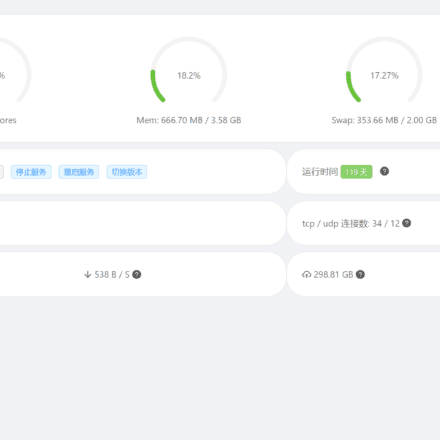
The effect of enabling hidden functions can be seen in the following figure (screenshot from the USB150 version):

Just to selflessly share with those in need, I personally haven't used it yet, but a friend in the community left me a message saying that I needed this, so I compiled it
Router model: GL-inet AR150 AR300M MT300N
Note: AR150 chip is AR9331, AR300M is AR9531, MT300N is 7628NN
The basic functions are shown in the figure. I compiled the rosy theme version of several GL-inet routers. Friends in need can download it.
Network disk link: https://pan.baidu.com/s/1nTqQ-NLqtp0PAHOOqzR7CA
Extraction code: avq9
How to use OpenWrt to mount USB and install software on a USB drive
Refer to the official documentation for mounting USB:https://openwrt.org/docs/guide-user/storage/usb-drives-quickstart
If your router has a small memory and the installation space is not that large, you can consider mountingUSB flash driveAs system storage, you don't have to worry about the size of the software when installing the software package on a USB flash drive.
First you need to update the software list:
Step 1: Install the required software to mount the USB
Install kmod-usb-ohci USB chip driver.kmod-usb2,kmod-usb3 USB2.0, USB3.0 driver.kmod-usb-storage,kmod-usb-storage-extraUSB,kmod-usb-storage-uasStorage driver.block-mount,blockedMount the program (after the installation is complete and the reboot is complete, the mount point option will appear under the system in the LuCI interface).
kmod-fs-ext4,kmod-fs-vfat,ntfs-3g,kmod-fs-ntfsThey are ext4 partition format support, FAT partition format support, and NTFS partition format support.kmod-fs-ntfIt is the kernel driver of NTFS.
Software to be installed:
- kmod-usb-ohci
- kmod-usb2
- kmod-usb3
- kmod-usb-core
- kmod-usb-storage
- kmod-usb-storage-extras
- kmod-usb-storage-uas
- block-mount
- blocked
- kmod-fs-msdos
- kmod-fs-ext4
- kmod-fs-vfat
- kmod-fs-ntfs
- ntfs-3g
- e2fsprogs
- cfdisk
- hd-idle
- luci-i18n-hd-idle-zh-cn
- smartmontools
You can install it in the system's operation interface or on the router through SSH. After the installation is complete, restart the router.
opkg update opkg install kmod-usb-ohci kmod-usb2 kmod-usb3 kmod-usb-core kmod-usb-storage kmod-usb-storage-extras kmod-usb-storage-uas block-mount blockd opkg install kmod-fs-msdos kmod-fs-ext4 kmod-fs-vfat kmod-fs-ntfs ntfs-3g e2fsprogs cfdisk hd-idle luci-i18n-hd-idle-zh-cn smartmontools
Step 2: Set the mount point
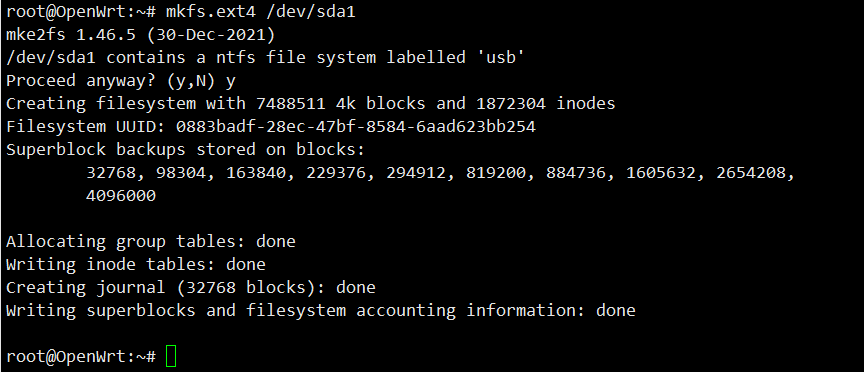
First, format the USB drive, convert it to ext4, SSH to the router, and use the command to format the USB drive to ext4. If e2fsprogs has not been installed before, you need to install e2fsprogs to format the USB drive. You can see the USB drive by looking at the /dev/ directory. If the USB drive has only one partition, the OpenWrt system will automatically recognize it as /dev/sda1
ls -al /dev/sd* mkfs.ext4 /dev/sda1 block detect | uci import fstab uci set fstab.@mount[0].enabled='1' && uci set fstab.@global[0].anon_mount='1' && uci commit fstab /sbin/block mount && service fstab enable # After the settings are complete, restart the router reboot
Create a new mount point
In the LUCI interface of Openwrt, System->Mount Point, Automatic Load Configuration, click Add at the mount point, and use UUID to mount, so that after restarting, the correct boot hard disk is always mounted. In this way, you can configure the automatic mounting of the USB flash drive. Select /overlay as the mount point and confirm, click Save and Apply.

After restarting the router, the USB disk is mounted successfully. You can see that in the mounted file system, /dev/sda1 has been mounted on /overlay.
The system enters the U disk system mode. At this time, the system is factory set. You need to reinstall the required software sources and software packages. Install the software in the U disk system, the LUCI management interface and the Linux system. All can be installed normally.

Regarding the swap partition, after the mount point is configured, you can generate a swap file swapfile in the parent system as a swap partition. Then restart and enter the new subsystem of the USB flash drive.
Enable swap partition
In the subsystem of the USB disk, reinstall the mount point related software, then SSH the router and create a swap file in the system with a size of 200MB as a swap partition. Please be patient when creating the swap partition.
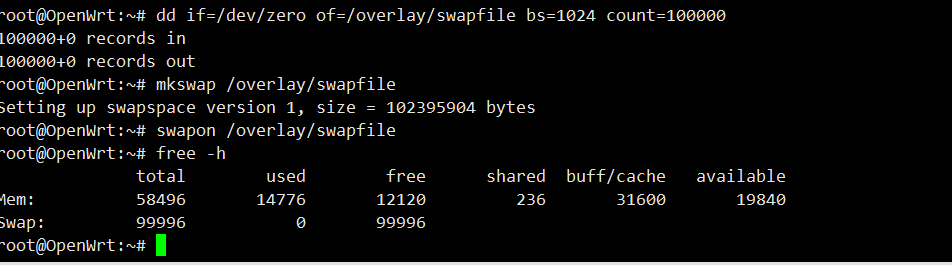
SSH into the router and enter the following command to create a new swap partition:
#Create a new swapfile swap partition dd if=/dev/zero of=/overlay/swap bs=1M count=500 #Check whether the creation is successful du -sh /overlay/swap ls -lh /overlay/swap #Grant authority chmod 600 /overlay/swap #Set swapfile as swap space mkswap /overlay/swap #Enable swap space swapon /overlay/swap #Check whether to add a swap partition free -h #If the command is not installed, you need to install the sudo command first okpg install sudo #Set auto-start echo '/overlay/swap swap swap sw 0 0' | sudo tee -a /etc/fstab
If you want to delete the swap partition, you need to turn off the swap partition first and then delete it.
swapoff /overlay/swap rm /overlay/swap
Configuring swap partition
On the OpenWrt management page, System -> Mount Point, Swap Partition -> Click Add, select Custom in Device, and then enter the swap file we generated above /overlay/swap , check the Enable option above, save the application.


If the swap area of the virtual memory does not take effect after restarting, and free -m does not display the swap partition, you can click System > Startup Items > Local Startup Script in the LUCI interface and add the command to enable the swap partition.
swapon /overlay/swap
OK, now mounting the USB drive and setting up the swap partition have been completed.
Differences between "NTFS", "FAT32", "exFAT" and file systems
FAT32
The 32-bit file allocation table [File Allocation Table: FAT] is called "FAT32". There are also "FAT16" and "FAT12" depending on the number of bits, but the main FAT these days is 32 bits.
This file system was primarily used in Windows 98/Me, but later operating systems continue to support it. It can be used with the latest versions of Windows 11, and can also be used with other operating systems such as MacOS and Linux.
If you format a "64GB" USB flash drive as "FAT32", it will only recognize a maximum of "32GB" according to Windows specifications. According to the "FAT32" standard, it can certainly handle 2TB, but if you want to format a storage device with a capacity greater than 32GB on Windows, you must use a third-party formatting program.
NTFS
NT file system [NTFS] is the standard file system of Windows NT series and is currently the mainstream file system of Windows.
Since it is an NT system, it can be used with Windows NT or later operating systems (2000/XP or later), but cannot be used with Windows 95, Windows 98, etc.
NTFS can theoretically manage 2 64 -1 cluster volumes (up to 16 EB), but this is also limited by computer performance.
However, for a cluster size of 2048 KB, Windows 10 version 1709 and later supports up to 8 petabytes (PB) (and file sizes). A "Peta" is 1,000 times larger than a "Tera". Hyperdimensional capabilities are supported, albeit limited.
Some new recording devices support "4KB" sector size, which allows larger devices to be managed more efficiently if both the operating system and storage device support 4K natively.
exFAT
exFAT [Extended File Allocation Table] is a file system that is improved on the basis of traditional FAT.
A file system optimized for flash devices such as USB flash drives and SD cards.
The biggest advantage is that it supports large disk and file sizes. If you use the latest Windows, it supports "volumes up to 512TB" and "files up to 128PiB", so you can assume that there are almost no practical limits for general use.
If you want to use an external HDD/SSD with your computer (like an extended drive) without moving it, you can set it to "NTFS" without any problems. When connected, formatting with "exFAT" instead of "NTFS" may manage data more efficiently.
However, despite the name FAT, it is not compatible with regular FAT32, so exFAT cannot be used on devices that only support FAT32.
“exFAT” is also compatible with Apple’s MacOS, so when sharing a storage device with Windows and Mac, “exFAT” is the most likely candidate.
If it's NTFS, MacOS may not be able to read it well. "FAT32" is also supported, but as expected, the data capacity limitations are strict, so if you're dealing with large amounts of data, "exFAT" would be a safe choice.
Configuring the OpenWrt operating system
Next, continue to install the official version of openwrt19.07. After the openwrt19.07 system is installed, start logging into the system. Enter http://192.168.1.1 in the browser to enter the system login interface.

The default password for the username root is empty. Just click login to log in to the management interface.
After entering the openwrt19.07 system management interface, the first step is to set a password. The system interface is still in English, and you need to download the language pack.
Click Administration under System to enter the password setting interface, enter the password you want to set after password, and then enter it again to confirm the password. Click Save to save.

You can also use remote tools to log in to the router system and use the passwd command to change the password.
Plug the network cable of the upper router into the WAN port of AR150 and make sure the network cable can connect to the Internet.
For example, if you have a Huawei router at home, connect the LAN port of the Huawei router to the WAN port of the AR150 using an Ethernet cable. The IP address is obtained by default through DHCP to obtain the intranet IP of the Huawei router.
The next step is to install the language pack. Click SoftWare under System to enter the software installation interface. After entering, click Update lista...

Install domestic software sources
Now I start to update the software source. Since the software sources of openwrt are all abroad, the speed is very slow. It takes half a day to update a list. Fortunately, there are mirrors of openwrt software sources in China, and they are mirrors of famous universities. I don’t have to worry about it crashing!
Use the mirror update address of the domestic software source instead. Click ConfigureOPKG and delete the contents of opkg/distfeeds.conf.

Copy the domestic software source into it:
Tsinghua University openwrt 19.07.2 software source
src/gz openwrt_core https://mirrors.tuna.tsinghua.edu.cn/openwrt/releases/19.07.2/targets/ath79/generic/packages src/gz openwrt_kmods https://mirrors.tuna.tsinghua.edu.cn/openwrt/releases/19.07.2/targets/ath79/generic/kmods/4.14.171-1-b84a5a29b1d5ae1dc33ccf9ba292ca1d src/gz openwrt_base https://mirrors.tuna.tsinghua.edu.cn/openwrt/releases/19.07.2/packages/mips_24kc/base src/gz openwrt_luci https://mirrors.tuna.tsinghua.edu.cn/openwrt/releases/19.07.2/packages/mips_24kc/luci src/gz openwrt_packages https://mirrors.tuna.tsinghua.edu.cn/openwrt/releases/19.07.2/packages/mips_24kc/packages src/gz openwrt_routing https://mirrors.tuna.tsinghua.edu.cn/openwrt/releases/19.07.2/packages/mips_24kc/routing src/gz openwrt_telephony https://mirrors.tuna.tsinghua.edu.cn/openwrt/releases/19.07.2/packages/mips_24kc/telephony
After clicking Save, click Update lista... to update the software source. Now you can use the domestic software source to install the software package.
4.14.171-1-342af9e4f67b3447c53216ab8e3b12a1 and 4.14.171-1-b84a5a29b1d5ae1dc33ccf9ba292ca1d are different versions of the kernel. If a kernel error is prompted during software installation, please change the corresponding software source! Here is another software source from a famous university. Choose to use it according to the system kernel.
Tsinghua University openwrt 21.02.1 software source
Software source address:https://mirrors.tuna.tsinghua.edu.cn/openwrt/releases/
src/gz openwrt_core https://mirrors.tuna.tsinghua.edu.cn/openwrt/releases/21.02.1/targets/ath79/generic/packages src/gz openwrt_kmods https://mirrors.tuna.tsinghua.edu.cn/openwrt/releases/21.02.1/targets/ath79/generic/kmods/5.4.154-1-79c5dc6db69102eb2943a96b9bec8b63 src/gz openwrt_base https://mirrors.tuna.tsinghua.edu.cn/openwrt/releases/21.02.1/packages/mips_24kc/base src/gz openwrt_luci https://mirrors.tuna.tsinghua.edu.cn/openwrt/releases/21.02.1/packages/mips_24kc/luci src/gz openwrt_packages https://mirrors.tuna.tsinghua.edu.cn/openwrt/releases/21.02.1/packages/mips_24kc/packages src/gz openwrt_routing https://mirrors.tuna.tsinghua.edu.cn/openwrt/releases/21.02.1/packages/mips_24kc/routing src/gz openwrt_telephony https://mirrors.tuna.tsinghua.edu.cn/openwrt/releases/21.02.1/packages/mips_24kc/telephony
China University of Science and Technology OpenWRT 19.07.2 software source
Software source address:https://mirrors.ustc.edu.cn/openwrt/releases/
src/gz openwrt_core https://mirrors.ustc.edu.cn/lede/releases/19.07.2/targets/ar71xx/generic/packages src/gz openwrt_kmods https://mirrors.ustc.edu.cn/lede/releases/19.07.2/targets/ar71xx/generic/kmods/4.14.171-1-342af9e4f67b3447c53216ab8e3b12a1 src/gz openwrt_base https://mirrors.ustc.edu.cn/lede/releases/19.07.2/packages/mips_24kc/base src/gz openwrt_luci https://mirrors.ustc.edu.cn/lede/releases/19.07.2/packages/mips_24kc/luci src/gz openwrt_packages https://mirrors.ustc.edu.cn/lede/releases/19.07.2/packages/mips_24kc/packages src/gz openwrt_routing https://mirrors.ustc.edu.cn/lede/releases/19.07.2/packages/mips_24kc/routing src/gz openwrt_telephony https://mirrors.ustc.edu.cn/lede/releases/19.07.2/packages/mips_24kc/telephony
Coolsoft openwrt software source
Install CoolSoft software source under ssh, download CoolSoft certificate and install it!
wget -O kuoruan-public.key http://openwrt.kuoruan.net/packages/public.key opkg-key add kuoruan-public.key
Add the following coolsoft software source code to the openwrt background and add it to the custom software source
src/gz kuoruan_packages https://openwrt.kuoruan.net/packages/releases/mips_24kc/ src/gz kuoruan_universal https://openwrt.kuoruan.net/packages/releases/all/
Sometimes you may encounter an error that the software cannot be updated during the software source switching process.
Collected errors: opkg_conf_load: Could not lock /var/lock/opkg.lock: Resource temporarily unavailable.
Solution to "Could not lock /var/lock/opkg.lock":
echo "nameserver 114.114.114.114">/tmp/resolv.conf rm -f /var/lock/opkg.lock opkg update

Fat House Garden Software Source v21.02.1
openwrt default software source
src/gz openwrt_core https://downloads.openwrt.org/releases/21.02.1/targets/ath79/generic/packages src/gz openwrt_kmods https://downloads.openwrt.org/releases/21.02.1/targets/ath79/generic/kmods/5.4.154-1-79c5dc6db69102eb2943a96b9bec8b63 src/gz openwrt_base https://downloads.openwrt.org/releases/21.02.1/packages/mips_24kc/base src/gz openwrt_luci https://downloads.openwrt.org/releases/21.02.1/packages/mips_24kc/luci src/gz openwrt_packages https://downloads.openwrt.org/releases/21.02.1/packages/mips_24kc/packages src/gz openwrt_routing https://downloads.openwrt.org/releases/21.02.1/packages/mips_24kc/routing src/gz openwrt_telephony https://downloads.openwrt.org/releases/21.02.1/packages/mips_24kc/telephony
Modify the feed source address:
cp /etc/opkg/distfeeds.conf /etc/opkg/distfeeds.conf_bak sed -i 's/downloads.openwrt.org\/releases/repository.pangzhai.xyz/g' /etc/opkg/distfeeds.conf
In OPKG Configuration, copy the following content to /etc/opkg/distfeeds.conf and pay attention to the version number.

src/gz openwrt_core https://repository.pangzhai.xyz/v21.02.1/targets/ath79/generic/packages src/gz openwrt_kmods https://downloads.openwrt.org/releases/21.02.1/targets/ath79/generic/kmods/5.4.154-1-79c5dc6db69102eb2943a96b9bec8b63 src/gz openwrt_base https://repository.pangzhai.xyz/v21.02.1/packages/mips_24kc/base src/gz openwrt_kenzo https://repository.pangzhai.xyz/v21.02.1/packages/mips_24kc/kenzo src/gz openwrt_luci https://repository.pangzhai.xyz/v21.02.1/packages/mips_24kc/luci src/gz openwrt_packages https://repository.pangzhai.xyz/v21.02.1/packages/mips_24kc/packages src/gz openwrt_routing https://repository.pangzhai.xyz/v21.02.1/packages/mips_24kc/routing src/gz openwrt_small https://repository.pangzhai.xyz/v21.02.1/packages/mips_24kc/small src/gz openwrt_telephony https://repository.pangzhai.xyz/v21.02.1/packages/mips_24kc/telephony
#Add the public key to the router cd /tmp/ wget https://repository.pangzhai.xyz/public_key/pangzhai.pub opkg-key add pangzhai.pub #After the public key is added, update the list opkg update
The software source has been installed. Let's install the passwall2 software and try it out.
opkg list | grep passwall2 opkg install luci-app-passwall2 opkg install luci-i18n-passwall2-zh-cn
You can install the required software in the management interface of openwrt, or install it on the SSH router. I personally recommend installing it on the router, which is safer. Sometimes installing larger software in the front desk will time out and report an error.
Openwrt 21.02.1 software repository: https://repository.pangzhai.xyz/v21.02.1/packages/mips_24kc/
Software Repository:https://op.supes.top/packages/
LUCI Chinese language pack installation
opkg update opkg install boost opkg install boost-system opkg install boost-date_time opkg install boost-program_options opkg install coreutils-base64 opkg install coreutils-nohup opkg install libltdl7 opkg install liblua5.1.5 opkg install liblua5.3-5.3 opkg install kmod-nft-compat
Enter the name of the software package to be installed under Filter:, and the system will automatically search for this software in the software source. Openwrt has currently removedv2rayThe v2ray software package can be installed in CoolSoft. Install firstChinese language pack. Enter luci-i18n-base-zh-cn under filter:, or enter zh to search and find the relevant language pack to install. Then click install

Click Install to install the language pack.
The Chinese language pack has been installed successfully. After the language pack is installed, refresh the interface and it will be displayed in Chinese. Click System-System-General Settings
System time and time zone settings
Synchronize the time on the router with the local time, click Synchronize with NTP server. You can also customize the host name, modify the time zone of the router operating system, select Asia/Shanghai, save and apply

Go back to Software, and in Updates, find the software packages that need to be updated. Update the software manually and click Upgrade behind the software package. Make sure each software package is up to date.

After all the software packages are updated, turn on the wireless WIFI, which is off by default. After setting the wifi name and password, it is time to install v2ray. Because the system does not support the download of v2ray, you need to download and install it manually. Manual installation requires entering the system, and entering the system requires SSH.
Use any remote connectionssh tool, such as putty, xshell and so on.

Successfully logged into the router system interface. Next is Linux time. The Linux system commands of OpenWRT are basically the same. Installation commandcentosThere are yum and dnf in it, and opkg in openwrt.

FTP server installation
Next, you may use FTP. When you connect using the FTP tool, an error message appears.
It turns out that the system lacks the SFTP software package. Return to the management backend and install the sftp server software package in Software. Enter SFTP to check whether there is this software package.

I found the openssh-sftp-server package. After installing it, the FTP service is normal and can be connected. FTP is SFTP connected through port 22. Don't make a mistake with this port.
The configuration of the Openwrt router can now come to an end, and the next step is to install various software packages.