Excellent software and practical tutorials


Recently, the blockchain mining project, CHIA mining, has been very popular online. At present, the price of hard disks in the whole network has increased, and the quantity is in short supply. According to the current price of CHIA tokens, xch coins, the return on investment is very rich. Many foreign second-hand servers have become popular in the domestic market, especially servers with large disks. The price has also soared. The following introduces how to transform a second-hand server into a Chia mining machine.
Chia mining machine configuration
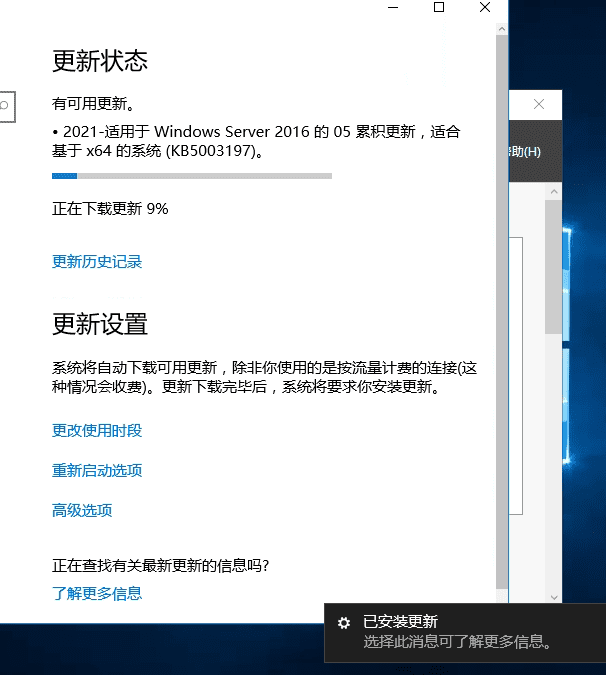
The server is installed as Windows Server 2016 system, and after installation, the system is activated and Windows is updated.
Windows Server 2016 system activation reference:Windows Server 2016 Datacenter KEY Datacenter Edition Activation
The server system can also be installed with a higher version of Windows. This article takes Windows Server 2016 as an example.
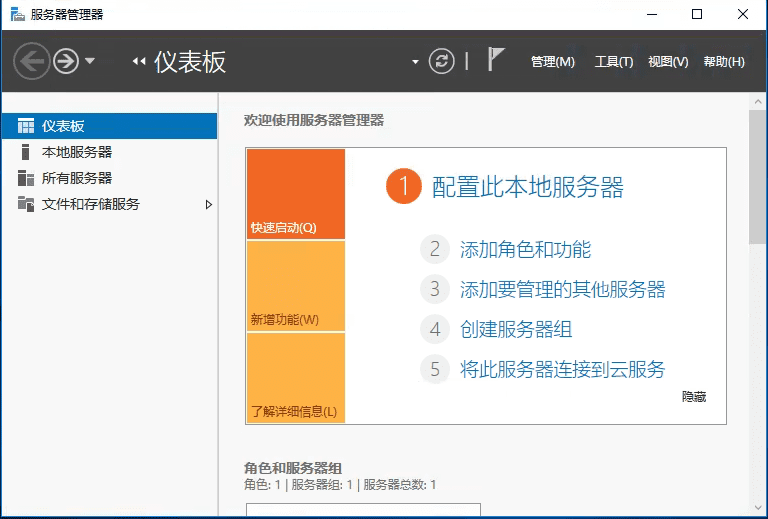
After the system is updated, open Server Manager and click File and Storage Services.
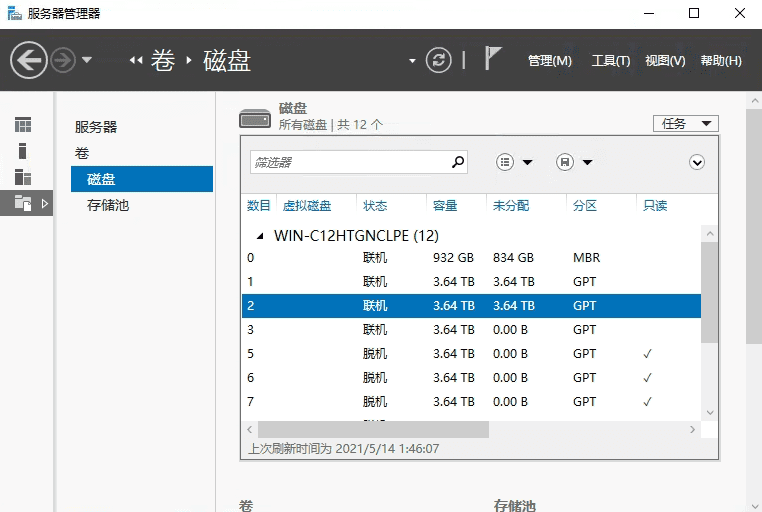
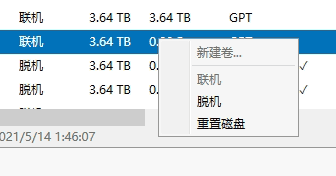
Click the Disk option and all hard disks will be displayed in the status bar on the right.
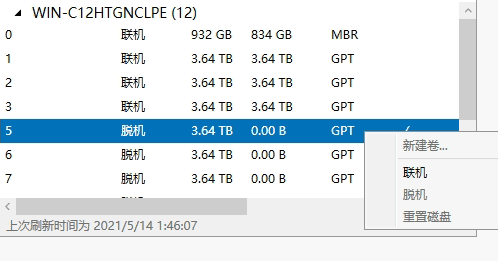
Right click and select Online to connect all offline disks. During the online process, a window may pop up asking for formatting, just click Cancel.
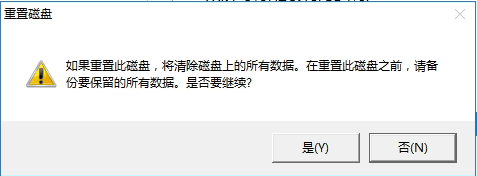
Then click Reset Disk.
After resetting the disk, the partition format is displayed as unknown, so you need to initialize the disk.
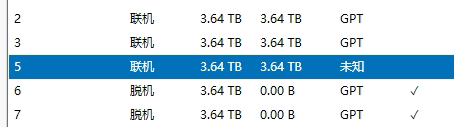
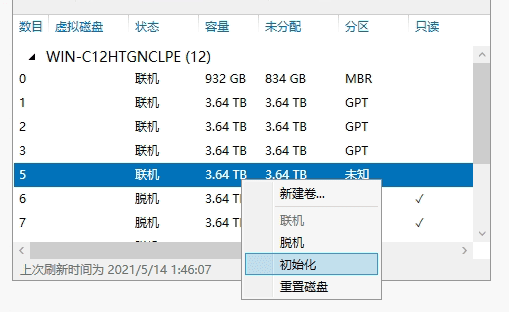
The process is to bring the disk online, reset the disk, initialize the disk, and do this for the existing disk in sequence.
Then download the CrystalDiskInfo disk tool to check the health of the current disk.Click to download CrystalDiskInfo

Download CrystalDiskMark8 to test system disk writing.CrystalDiskMark8Directions:
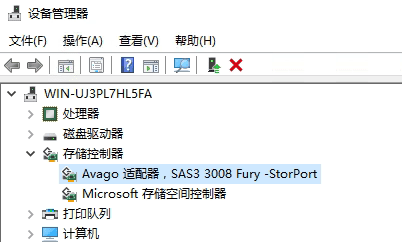
Check the model of the server array card in the device manager.
This is an older server. The current configuration is sufficient for mining. Chia mining itself does not consume too many system resources. The server can be powered on. The main thing is the large storage.
I searched online for the latest driver for sas3 3008. The current driver version is 2.51.12.80, and the latest version online is 2.51.21.0.sas3 3008 driver download , scroll to the bottom of the page, click Agerr, download the driver and then update it.
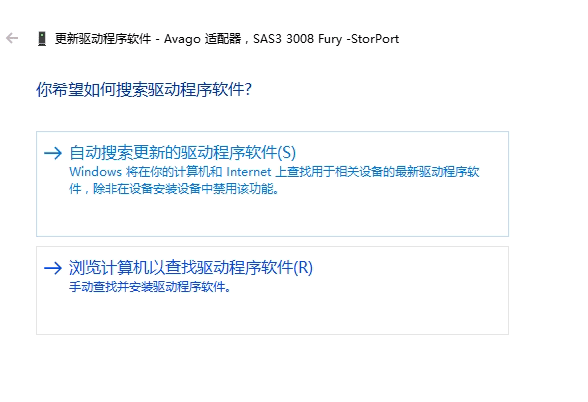
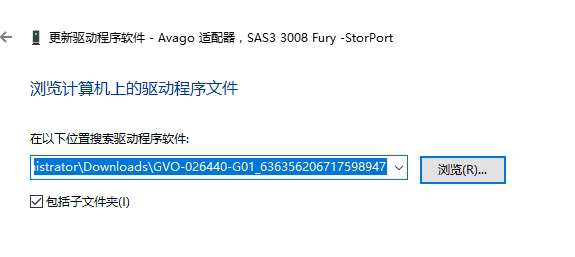
Click Browse my computer to find the driver software, then unzip the downloaded driver and select the folder where the driver is located to update it. You will need to restart the server after updating the driver.
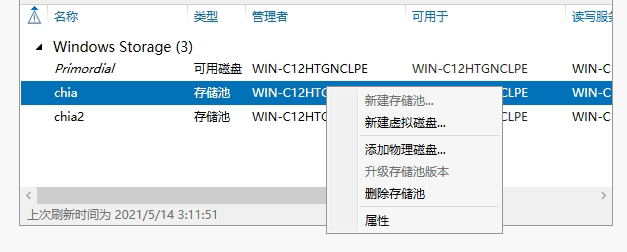
After restarting, start configuring the hard diskStorage Pool, click Storage Pool in the Server Manager just now.
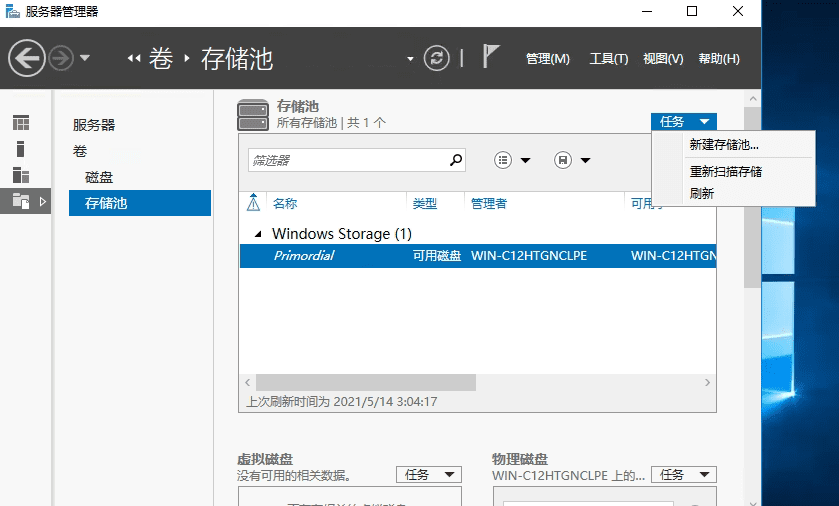
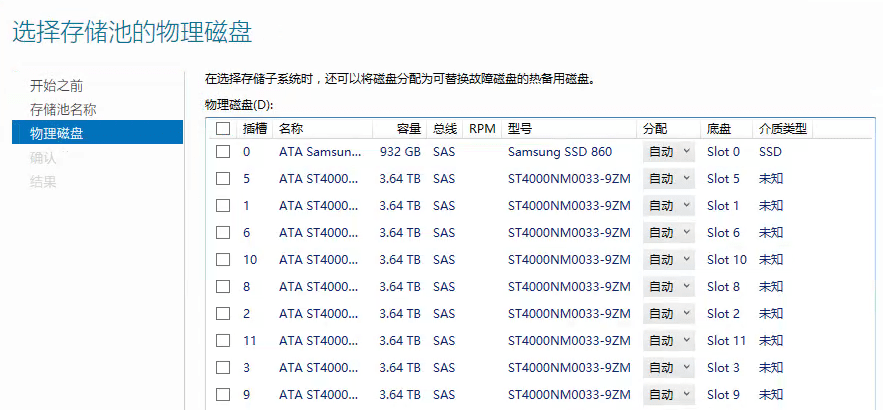
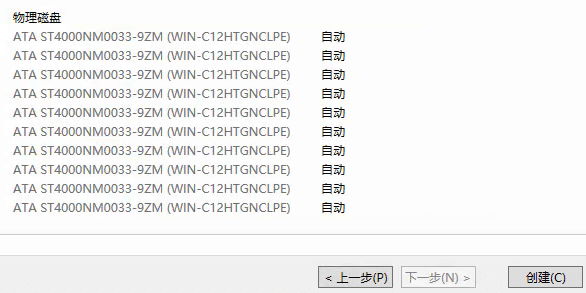
Fill in the name of the storage pool you want to create, such as chia, and then click the next step to select the disk you want to add to the storage pool.
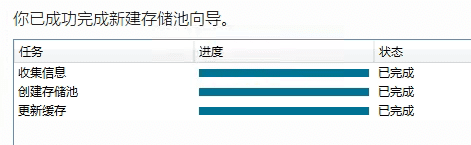
Then click Create.
After creation is complete, click Close.
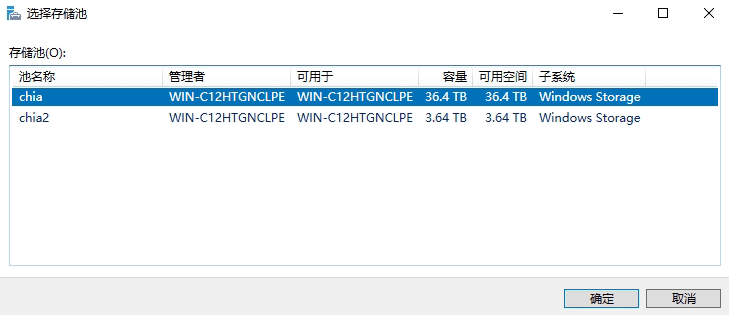
Select the storage pool that has been created, right-click, and create a new virtual disk.
Select the name of the storage pool where you want to create a virtual disk, click OK, and enter the virtual disk creation page.
Give the virtual disk you want to create a name, such as chia. Then the next step is to come to the storage data layout options.
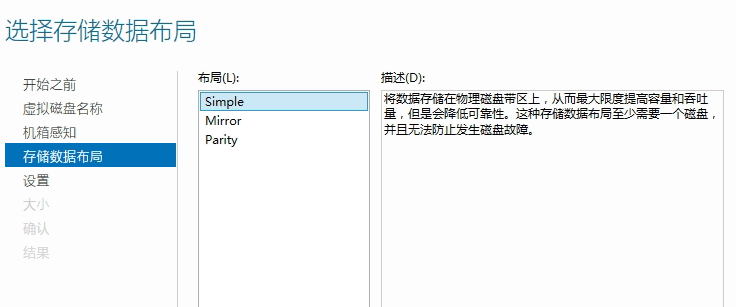
There are three options in the storage data layout options: simple, mirror, and parity.
What are the best uses of simple, mirror, and parity?
Storage Spaces provides simple spaces, mirror spaces, and parity spaces, each with unique characteristics.
- Simple spaces are designed to increase performance when resiliency is not important. They are best suited for temporary data such as video files being rendered, image editor scratch files, and intermediate compiler object files. Simple spaces require at least one physical disk.
- Mirror spaces are designed for increased performance and increased resilience. A two-way mirror space can tolerate one drive failure, and a three-way mirror space can tolerate two drive failures. They are well suited for a variety of data stores, from general-purpose file shares to VHD libraries. Windows provides automatic maintenance of data integrity when a mirror space is formatted as a Resilient File System (ReFS). This is a layer of resilience beyond the resilience implementation that maintains multiple copies of data to tolerate drive failures. This storage design requires at least two hard drives to protect you from a single drive failure, or at least five drives to protect you from two simultaneous drive failures.
- Parity spaces are designed to increase capacity utilization and add resilience. Parity spaces are ideal for archival data and streaming media, such as music and videos. This storage design requires at least three hard drives to protect you from a single drive failure, or at least seven disks to protect you from two simultaneous drive failures.
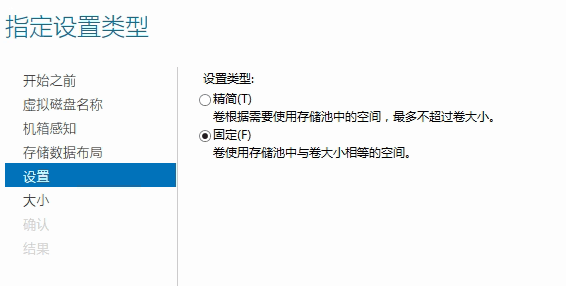
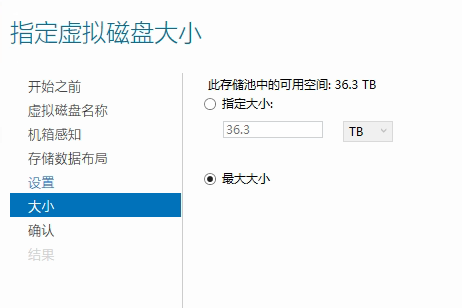
Specify the setup type, select Fixed, and then specify the virtual disk size in the next step.
Specify the size of the virtual disk. After selecting the maximum size, click Next to create the virtual disk. Click the Close button when finished.
After the virtual disk is created, a menu will pop up automatically to create a volume label for the virtual disk. Click Next and select the virtual disk you just created.
Specify the volume size, the default is OK, the drive letter or folder, the default is Next, the file system setting is the default Next. Then click Create.
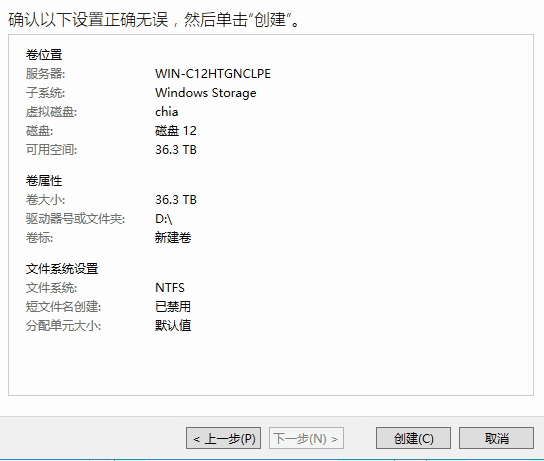
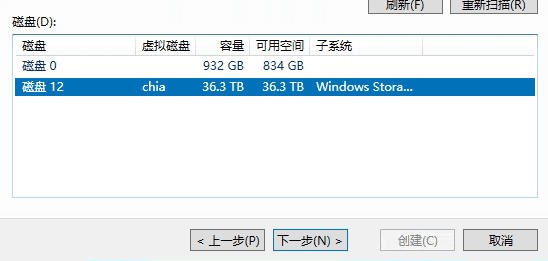
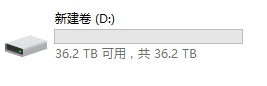
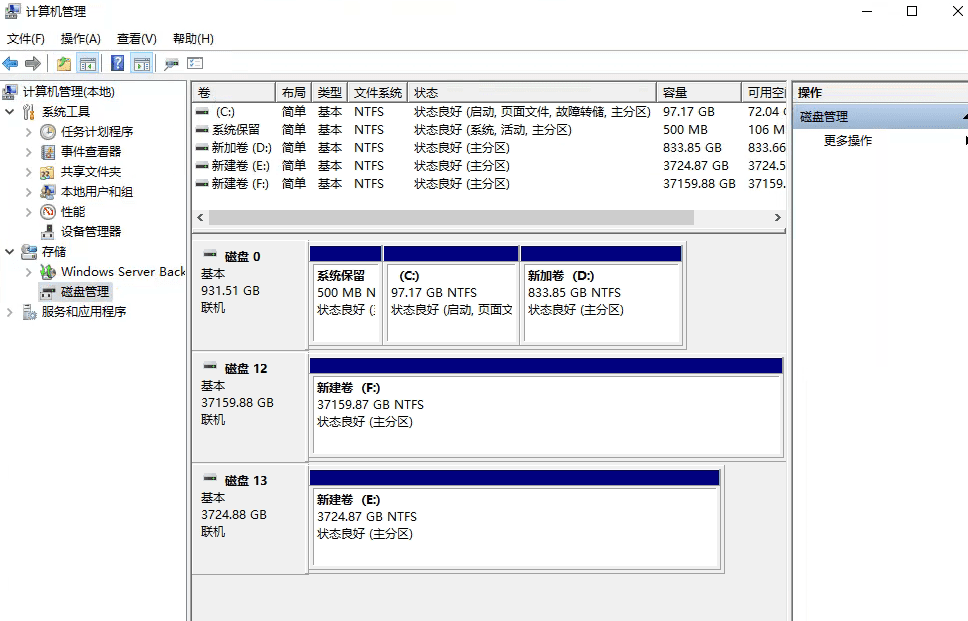
At this point, the virtual disk D has been created successfully.
Check the current disk status in Disk Management of Computer Management and prepare to perform read and write tests on the virtual disk.
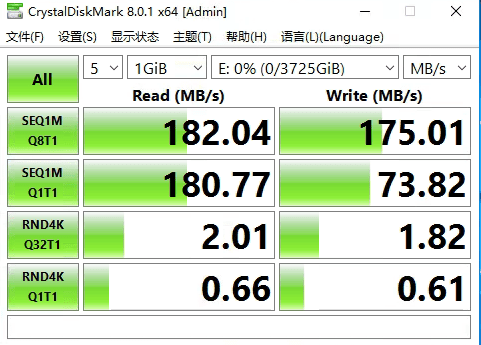
Let's take a look at the 7200 rpm SATA single disk read and write test.
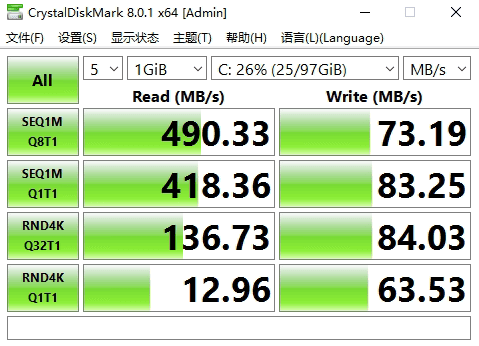
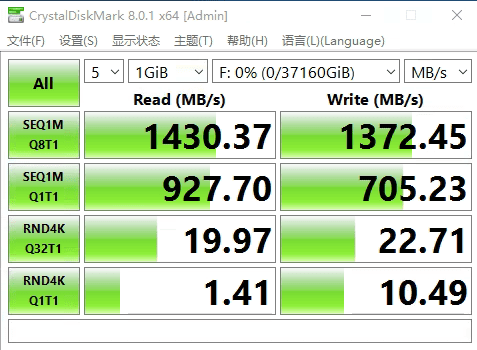
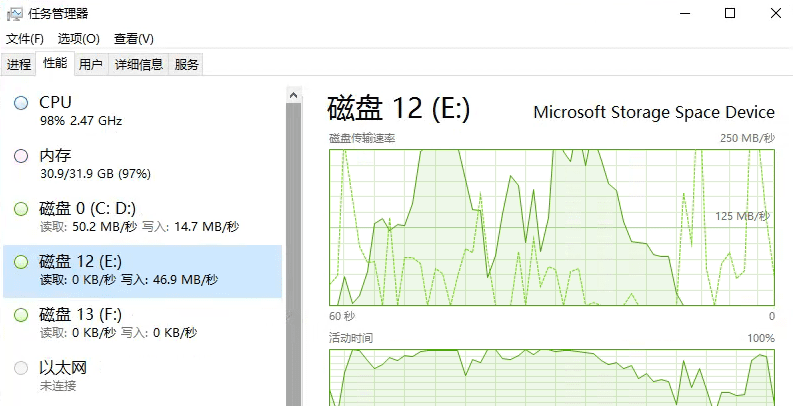
After making the 9 SATA hard disks into a storage pool, let's take a look at the read and write speeds.
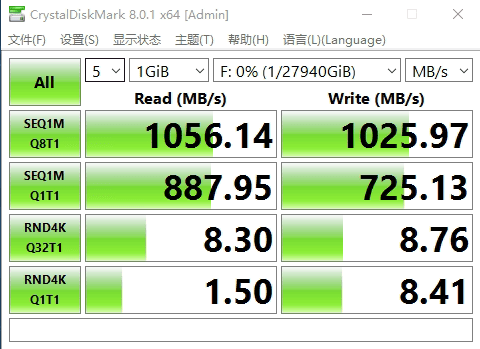
Test the read and write speeds of 6 SATA hard drives as a storage pool.

Test the read and write speeds of 5 SATA drives as a storage pool.
Open the Task Manager and view the real-time monitoring of hard disk reading and writing. Since Windows Server 2016 does not enable disk monitoring by default in the Task Manager, you need to enable it manually.
Open a command prompt as an administrator and enter: diskperf -y
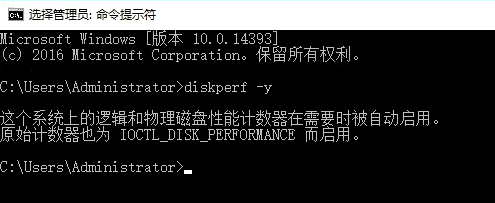
After that, open the task manager and you can view the real-time read and write data of the disk.
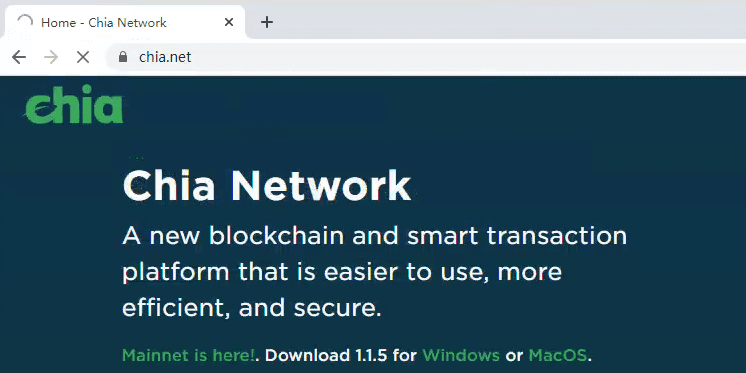
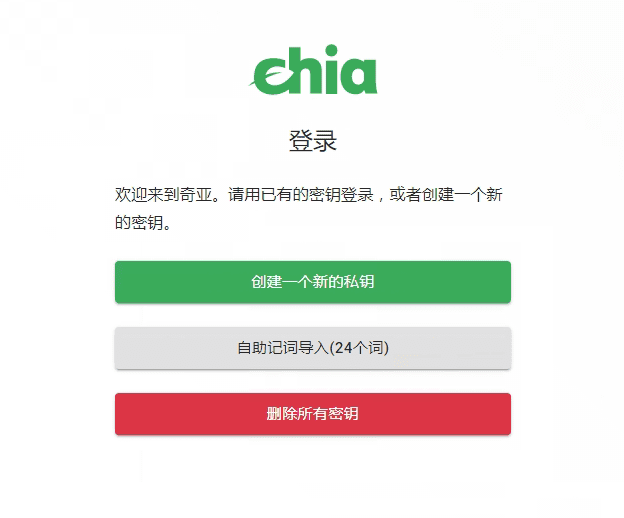
Next, visit the official website of chia to download the chia full node wallet and start mining.
For detailed mining tutorials, please visit:Chia/xch mining tutorial, Windows mining machine P disk configuration
Chia official website https://www.chia.net
Visit the Chia project address on GITHUB to download the latest version of the wallet:https://github.com/Chia-Network/chia-blockchain/releases
Click Windows to download the latest version of the chia full node wallet. The latest version is 1.1.5
After setting up the wallet, you can start mining on the P disk. The Windows configuration of the Chia mining machine ends here. The server configuration in this article is slightly low, and the hard disk is relatively small. It is mainly used for testing. The configuration for formal mining should be higher than this. The hard disk size is recommended to be 16T, and the P disk cache is recommended to use an SDD hard disk with NVMe protocol.


The read and write speed of the storage pool has increased exponentially.
Storage pool is to do RAID for hard disk
xch14tdw9w2q47s99r6f9frgz47j5j2dm0j8hsqs8650eqg27hl9808qk3jhlu