Excellent software and practical tutorials


360 T7, the most powerful router under 100 yuan in 2022. 360T7 router flashes and installs OpenWrt
360T7 Flash 360 router t7 and Redmi AX6S have the same wireless Wi-Fi specifications, the same CPU performance, and can also flash openwrt, but the price is only half of Redmi. 360 Router T7 is a customized router jointly developed by operators and 360. It has an LED indicator light on the front and four Gigabit network ports on the back. The wireless specification is ax3000, supporting 160Mhz bandwidth Wi-Fi!
Compared with the 4x4 mimo 80Mhz bandwidth of Redmi ax6s, the current 2*2 mimo 160Mhz is still more practical, allowing Android and Windows devices in recent years to reach a connection speed of 2400Mbps.
The CPU is MTK's MT7981, arm a53 dual-core 1.3GHz, which is basically the same as Redmi's AX6s, but the MT7981 supports more acceleration features. It is also equipped with 256M memory and 128M flash memory. Of course, for more disassembly and evaluation, you can go to acwifi websiteThere is a very detailed disassembly review.
The following describes how to flash the 360 router t7 to the openwrt system.
Current360T7 flash tutorialIt requires disassembling the device and flashing it using the TTL method, which is not very friendly to novices.
360T7 flash preparation
- 360 T7 Router
- A Windows computer (with an Internet connection)
- USB to TTL module (can be bought from Taobao for a few dollars)
- Male to female Dupont cable (for connecting TTL module and router) and Ethernet cable
- Download openwrt firmware
- downloadInstall the serial port debugging assistantand Termius
360T7 flashing to enable Telnet
Disassemble the machine and connect to TTL
There are two screws on the bottom of the 360 T7, which can be easily unscrewed by poking the sticker with a screwdriver. The plastic back cover is very tight and has many buckles, which requires some effort, and of course there is no way to avoid the buckles from falling off.

After disassembling, you can see the TTL serial port, as shown in the figure, from top to bottom are RXD, TXD, GND. We can use Dupont wires to connect the TTL module accordingly (route RXD to the module's TXD, TXD to RXD, GND to GND).

After opening the serial port debugging assistant, select the serial port number to insert the COM port device, select the baud rate to 115200, and then select connect.
Open telnet in failsafe mode

Now plug in the power to the router, and you will see the boot log output in the right frame. If we keep sending f (remember to press enter to start a new line, and press esc to send directly), we will see that it enters failsafe mode.
# Open uboot console menu fw_setenv bootmenu_delay 3 # Mount rootfs and open telnet mount_root sed -i 's/.*local debug=.*/\tlocal debug=1/' /etc/init.d/telnet # Change the root password to password passwd root # Enter the same password password password twice # Reboot reboot
Then copy the above commands into the serial debugging tool and execute them one by one. Remember to enter the carriage return and line feed symbols. To change the root password, enter the same password twice in a row. I changed it to password here. Finally, complete the reboot and restart.

Enter reboot and press Enter, and the system will restart normally.
Flash uboot
After restarting, we can configure the router normally. The router's Wi-Fi password information and backend password information are at the bottom of the 360 T7.Ensure that the router can connect to the Internet normally, because uboot will be obtained from the Internet for flashing. Of course, if you are used to uploading via scp or other methods, it is the same.

Open termius and select telnet to connect. The default background address is 192.168.2.1, the username is root, and the password is password (this is the one you entered and modified in the previous step).
cd /tmp wget https://sebs.oss-cn-shanghai.aliyuncs.com/360t7-fip-fixed-parts.bin mtd write 360t7-fip-fixed-parts.bin fip
After connecting, copy the above command and execute it in telnet. This step will write uboot into the router.

After I complete this execution, the result is as shown in the figure. Now I can start the next step.
uboot flash openwrt
With uboot, it is very convenient to flash the device. Let's enter uboot first: hold down the reset button on the back of the router, plug in the power, wait for about 8 seconds, and then release the reset button to enter uboot. Uboot does not have DHCP. Use an Ethernet cable to connect the LAN port of the router and the computer. We need to manually set the IP of the computer.

As shown in the figure, the computer's IP is manually set to 192.168.1.2, the subnet mask is 255.255.255.0, the gateway is set to 192.168.1.1, and the DNS is also set to 192.168.1.1.

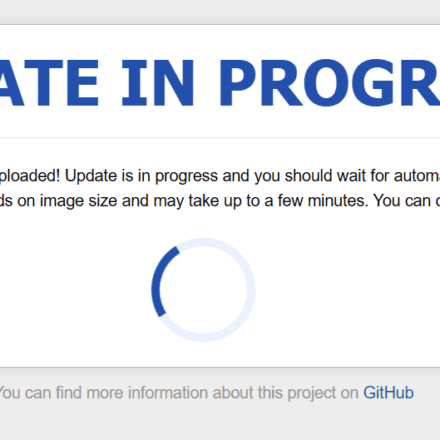
Then open the browser to 192.168.1.1 to enter uboot. We select the downloaded openwrt firmware and upload it (the zip format needs to be unzipped).

After the flashing is complete, the router will automatically reboot into the new openwrt firmware, and you can also reinstall the back cover and use it normally.

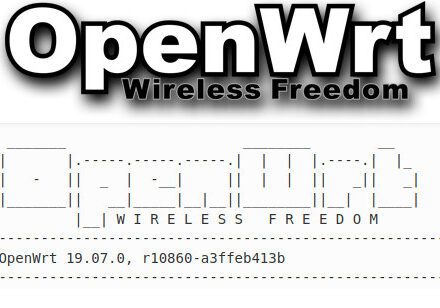
The default background address of openwrt firmware is 192.168.6.1, the username is root, the password is password, the default Wi-Fi name starts with mtk, and the default Wi-Fi has no password.
OpenWRT performance test

First of all, the coremark score is 8803.7, MT7981 is okay, they are all arm a53, the main frequency and core number will definitely directly affect the score, this dual-core 1.3Ghz is about this level.

The scientific performance can reach about 800Mbps. It should be mentioned here that passwall is used, the ss encryption is chacha20-ietf-poly1305, and I manually selected the rust version. If the default Libev version is only about 300Mbps.

The hwnat hardware acceleration works normally, and the CPU is basically not occupied when running at full 1000M bandwidth.

The wireless signal is really good. When tested with iPhone 13 at close range, both the original and openwrt ones can reach over 700Mbps.

Even after a district wall, the speed can reach over 450Mbps, which is slightly better than the previous ax6s.
The 360 T7 is priced at over 100 yuan and is equipped with MTK MT7981. It is very cost-effective in terms of both wireless Wi-Fi performance and scientific performance after flashing. It also has uboot for convenient flashing without worrying about flashing crashes. The only drawback at present is that flashing requires disassembling the phone and using ttl, which is a bit troublesome and not friendly to novices.
360T7 flash reference materials:
- The most powerful router
- hanwckf's open source adaptation and flashing tutorial
- 360 t7 plug-in version openwrt
11-25: Updated the wired driver to solve the problem of occasional wan disconnection during startup. Fixed the bug that mwan3 caused ipv6 to be unavailable.
11-23: Fix kernel error when opening full cone
11-20: Remove the patch that will cause instability when adding a new full cone na. You can keep the configuration and flash it.