Excellent software and practical tutorials


Hongmeng 3.0, HarmonyOS 4.0 system install GMS package, Huawei mobile phone install Google Play
Huawei's mate60 series is far ahead. To do business overseas, you need to use Google services, but Hongmeng HarmonyOS does not have Google GMSKit, so I searched online for how to install Google Play on mate60. After searching for a long time, I finally sorted it out to avoid pitfalls. This tutorial is suitable for all devices equipped with Hongmeng 3.0 and 4.0 systemsHuawei mobile phoneOr other Android phones. The tools and information in this article are all from the Internet and are for reference only!

For various reasons, Huawei phones cannot be pre-installed with the Google Play Store, but users can still install it themselves through some steps. The following is a detailed tutorial for Hongmeng system 3.0 and 4.0.
How to install Google Play on Huawei phones
1. Preparation
- Make sure your device is unlocked:not yetUnlock your deviceInstallation may not be possible.
- Backing up your data: Before making any system modifications, it is recommended to back up important data.
2. Download necessary files
- Google Play installation package: Download the Google Play installation package suitable for Hongmeng system from a trusted third-party website.
- Google Services Framework (GMS):Install Google PlayYou need to install the Google Services Framework first, which can be downloaded from the same source.
- Google Account Manager: Make sure you canLog in to your Google account.
3. Install Google Services Framework (GMS)
- Open on mobileFile Manager.
- Find the downloaded Google Services FrameworkAPK File.
- Click Install and follow the prompts to completeInstallation Process.
4. Install Google Account Manager
- Also find the downloaded Google Account Manager APK file in the file manager.
- Click Install and follow the prompts to complete.
5. Install Google Play Store
- Locate the downloaded Google Play Store APK file.
- Click Install and complete the installation.
6. Configure Google Play Store
- Open Google Play Store app.
- Log in to your Google account (update if promptedGoogle Play Services, download and install the update).
- Waiting for applicationSynchronize Dataand completeInitial Configuration.
7. Check and fix problems
- Make sure all necessary Google services are installed: Includes Google Services Framework, Google Play Services, and Google Account Manager.
- Check permissions: Go to Settings and make sure Google Play Store and related services have the required permissions.
- Restart your device: After the installation is complete, restart your device to ensure all changes take effect.
Precautions
- Download Source: Make sure to download all APK files from trusted websites to avoid downloading malware.
- System Update: After installing Google services, avoid frequent system updates, as updates may cause service failure.
- Use a VPN:existChinese mainlandUsing the Google Play Store may require a VPN service.
Following the above steps, you should be able to successfully install and use the Google Play Store on Huawei Hongmeng OS 3.0 or 4.0. If you encounter problems during the installation process, you can refer to the onlineCommunity ForumOr seek help from professionals.
Step 1. Preparation
The preparation work mainly consists of two aspects: one is to turn off some functions of the phone, and the other is to clean up the remaining Google packages on the phone. Of course, you need to prepare a ladder to use Google Play.
Turn off some features on your phone
- closureApplication Clone: Settings->Apps and Services->Turn off App Clone
- closurePrivacy Space: Settings -> Privacy -> Turn off Private Space
- closureFloating navigation: Settings->System and Update->System Navigation Mode->More->Turn off floating navigation


Clean up Google's remnants
If you have a newly purchased phone or have never installed the Google Suite on your phone, then this step should not be necessary. Of course, to avoid problems, you can follow the steps below to clean it up one by one.
- Uninstall Google apps and services: Go to Settings, thenApplications and Services -> Application Management -> Click the four dots in the upper right corner -> Select: Show system processes, type "google" in the search box, all Google-related applications and services will be displayed here, remember to delete all displayed ones, and also uninstall anything related to Google Assistant;
- How to clear Google remnants in Huawei AppGallery: Enter the AppGallery,In the lower right corner, click My->Common Services->Installation Management, check if there are any remnants of Google installation, and uninstall all related ones;
- Some tutorials say to uninstall HuaweiBackupAPP, but my method doesn't seem to need


For a new phone, there is basically no preparation work, because the functions that need to be turned off are not turned on, and no Google-related things are installed. At least this is the case with my new phone. But just to avoid any problems, I also checked the operations one by one.
Step 2: Download and import Hongmeng GMS backup and applications to your phone
This step is to download a Hongmeng GMS package pre-made by the big guys. The package includes a Huawei 2019 GMS backup and some Google applications, as shown below.


HarmonyGMS Download Address:
- Onedrive download HarmonyGMS
- Download HarmonyGMS from Google Drive Decompression password: 2333
- HarmonyGMS Download
After downloading, unzip HarmonyGMS.zip, connect it to your computer with a data cable, and then copy the unzipped file directly to your phone. You can put it wherever you want. Many tutorials only tell you to unzip HarmonyGMS.zip, but don't mention that Huawei.zip inside should also be unzipped. After Huawei.zip is unzipped, it will be the Backup folder in the picture above.Copy all the files in the picture above to your phone storage.
This is important:On your computer (you can also access the file you just copied from your phone),Copy the Backup folder you just copied to the Huawei folder on your phoneIn the Huawei folder, there is a Backup folder. You don’t need to worry about it. You can merge the folders directly.
The path is roughly like this: internal storage->Huawei->backup..., just merge the unzipped backup folder with this backup

Now all the files required to install Google Play are ready.
Step 3. Restore Huawei Hongmeng GMS backup
The GMS backup restored in this step is the content in the previous step backup. Open the settings and selectSystem and UpdatesClickBackup and restore(If it is a new phone, you need to click "Agree" first), click the four dots in the upper right corner, and then you will seeInternal storage recovery, click it to restore the file, the 4.5MB backup in 2019 is it.
Tip: If you can’t see the internal storage recovery after clicking the four dots, consider the following operations (provided by the original tutorial, I actually haven’t used it):
- You may also need to click on Backup and Restore.External storage, then you will need to obtain permission;
- If that doesn't work,System and UpdatesEnterDate and time, firstAutomatic settingsTurn off, thendateYou can adjust it to any day in 2019;
- Remember to go backDate and timeRestore the automatic date setting in , otherwise many operations will go wrong later.
In fact, in the previous step, I copied the backup file into the Huawei folder. It seems that adjusting the date or not has no effect. At least it works when I didn't change the operation.


After restoring the backup, you will have an additional Google service assistant on your phone.

From this step on, you need an external network, according to the tutorials of the big guys, if you don’t know how to do this, then don’t continue.
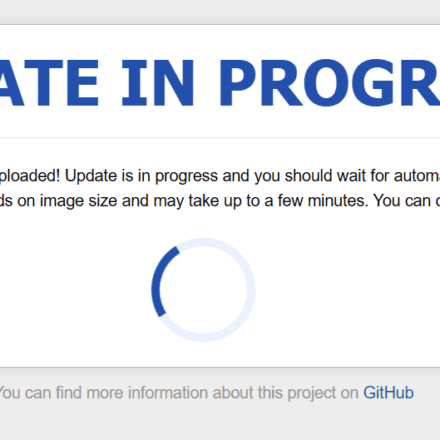
Enter the Google Service Assistant to activate the device manager, click Activate, check the known risks, then wait for 10 seconds, click Activate anyway, in short, click Yes to whatever it asks you to do, and finally the following interface appears, where you will be promptedDownload abnormality,Don’t worry about it as it will not affect subsequent operations, as shown in the figure below.

Do I need to wait for the download here? No,But don't turn it off in the background., go and install the 0123456APPs you just copied.
Step 4: Install Google Play related apps
Enter your phone storage and follow the steps below:
- Install apk 0After installation, open the microG Setting app and add your Google account in Account.If you have multiple accounts, you need to add them in this step, you won't be able to add it again in the future. The interface for adding an account is as shown in the picture. There will be no prompt after adding.
- Install apk 1, 3, 4, and uninstall apk No. 0 (microG Setting) after completion.
- Install apk 2, return to the desktop and pull down the notification bar, wait for the error notification, according to the tips of netizens, if the error notification does not pop up, you can also change the phone system time to 2019, refer to the third step. This may be related to the device, I have not changed it and it is successful.
After receiving the notification, open the Google Play Store.If it doesn't open, keep clicking Retry or restart your phone.After browsing for ten or twenty seconds, the Play Store update will pop up during browsing.Suggest an updateOtherwise, the app will be closed constantly. After browsing, remove it fromBackstageTurn off. - This step is more important.Clean up the data of apps in order, don't read it wrong, Settings -> Apps and Services -> App Management -> Show system processes -> Search Google:
- Google play store: Force stop
- Google Account Manager: Force stop, click to save, delete data
- Google Services Framework: Force stop, click Save, clear the cache and delete the data. In this step, keep clearing the cache until it turns gray.
- After completion, restart your phone and open the Play Store.If it doesn't open, keep clicking Retry or restart your phone., browse for ten or twenty seconds, and take it fromBackstageTurn off
- Go back to Application Management and clickGoogle Play Services, click Storage, Manage Space, click Delete All Data (do not wait, so as not to increase the data when the service runs again), return immediately and click Force Stop until Force Stop turns gray, then uninstall
- Install apk 5, and restart your phone directly after completion.


At this point, all the GMS services and applications you need are installed. In fact, if it weren't for the problem between Google and Huawei, you could already use it. But the reality is that it is not possible, because some of Huawei's mobile phone models that have been stolen by Zhicai in the past two years are not in the Android device database, so we still have toRegister your Android device on the Google website.
Step 5. Register your Android device on Google's official website
To register a device on the Google website, you need to obtain the Google Service Framework (GSF) of the device first. You can query it through the Android Device ID application. In the past, you could search and install it directly through Google Play, but I didn’t see it when I searched. But don’t panic. The apk is in the app that you unzipped and copied to your phone earlier. So, the big guys are the big guys, and they are really thoughtful.


Access your phone's internal storage, install and open the Device ID app, allow all permissions required, and ignore any prompts about outdated versions. Copy the GSF code inside. I won't take a screenshot for privacy reasons.
*Note: Even if it is the same machine, if you uninstall and reinstall GSM, the GSF code will change accordingly and you will need to go to the website to submit the registration again.
Then open this URLhttps://www.google.com/android/uncertified/:

Enter the GSF code you just copied in the box, click Register, and you're done. In theory, Huawei Mate 60 mobile phone, Hongmeng system can run Google Play normally without any error prompts, but according to the big guys, some old friends will still receive prompts, so read on.
Step 6: Just in case, disable Google Service Framework with adb
The main purpose of disabling Google Services Framework is to prevent Google Play Services from popping up error messages, so that your phone has a peaceful environment.
Enable USB debugging
- Go to your phone's settings, scroll to the bottom, and tapAbout phone, click the HarmoneyOS version several times until the developer mode appears.
- Go back, go to System & Updates, find and tap Developer options.
- Pull down, turn on USB debugging, and confirm.


Only when USB debugging is turned on can you connect to the computer and perform some system permission operations through adb.
adb disable google services framework
You need to download the Huawei Google Suite ADB file.
Download the right version for the right system. Taking Windows system as an example, remember to close 360 and other anti-virus software before operation.
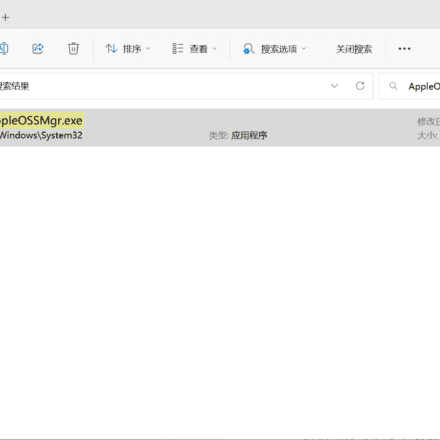
After downloading the windows system adb.zip, unzip the file, then enter the file and click OpenHuagu Kit_adb.exe, as shown below, and then connect the phone. The connection mode is to transfer files. If you are prompted for fingerprints or something like that, just allow it.

It may take a while to connect, but you can click Refresh to see if the string is displayed. If it is, it means the connection is successful.

After success, click Disable Service Framework, then a prompt box will pop up, click OK, and you will be prompted that the disabling is successful.
Now go back to your phone, go to Settings, Apps, and check if the following Google Services Framework is displayed:Deactivated(or enable), if it is displayed, it means that the disabling is successful.
At this point, you should be able to use your Google Play Store quietly.

Summarize
Installing Google Play on Huawei Mate 60 is not as difficult as you might think. As long as you follow the steps, there won't be that many problems in actual operation. This tutorial should be applicable to devices running Hongmeng 3.0 and 4.0. My Huawei Mate 60 has been using Google Play normally for half a year without any problems.
Note: Basically all Android phones can use this method to install the GMS Google Suite. This method has been effective for many years. If nothing unexpected happens, this tutorial is the final tutorial and will no longer be updated!