Excellent software and practical tutorials
Free cloud server Amazon AWS EC2 to build WordPress
Free 12 monthsAmazon Free cloud server You deserve it. Amazon Cloud Technology has been providing stable and high-speed free cloud for many years.server As long as your usage does not exceed the Amazon Cloud Free Tier, there will be no additional charges.Apply for freeOne Amazon EC2 free cloud server, building a WordPress website is a good choice! The following is the latest application in September 2022 AWS Detailed explanation of Amazon EC2 cloud server.
The application method for 2023 remains unchanged!
Before applying for Amazon's free cloud server, you need to briefly understand some relevant information.
Who is Amazon Web Services?
Amazon Web Services is the pioneer and leader of global cloud computing. Over the past 15 years, it has been renowned in the industry for its continuous innovation, leading technology, rich services, and wide applications. Amazon Web Services can support almost any workload on the cloud.
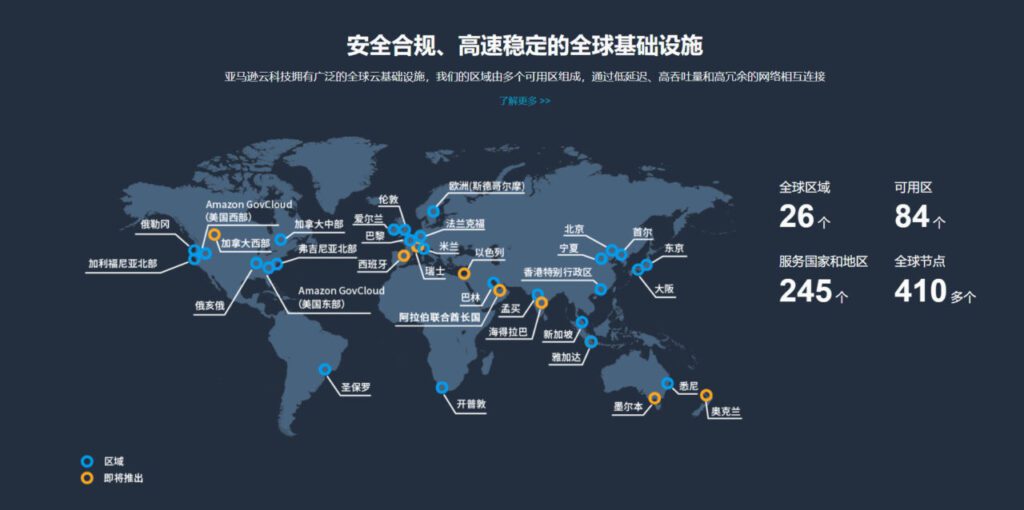
Amazon Web Services currently offers more than 200 full-featured services covering computing, storage, networking,database, data analysis, robotics, machine learning and artificial intelligence, Internet of Things, mobile, security, hybrid cloud, virtual reality and augmented reality, media, as well as application development, deployment and management; the infrastructure covers 84 availability zones in 26 geographic regions, and plans to build 8 new regions and 24 availability zones.
Amazon Web Services official website:https://www.amazonaws.cn
Amazon Web Services in China
Amazon Web Services entered China in 2013 and is committed to long-term investment and development in China. In September 2016, the Amazon Web Services China (Beijing) region operated by Sinnet was officially put into commercial use. In December 2017, the Amazon Web Services China (Ningxia) region operated by Western Cloud Data was officially launched. In April 2019, the Amazon Web Services Asia Pacific (Hong Kong) region was officially launched. China is the only country in the world where Amazon Web Services has three regions besides the United States. In addition, Amazon Web Services has also established the Shanghai Artificial Intelligence Research Institute, Shenzhen and Taipei Internet of Things laboratories.
What is Amazon EC2 Amazon Free Cloud Server?
Amazon Elastic Compute CloudAmazon EC2 offers the broadest and deepest computing platform with over 500 instances and a choice of the latest processors, storage, networking, operating systems, and purchasing models to help you best meet the needs of your workloads. We are the first major cloud provider to support Intel, AMD, and Arm processors, the only cloud with on-demand EC2 Mac instances, and the only cloud with 400 Gbps Ethernet networking. We provide the best price/performance for machine learning training, as well as the lowest cost per inference instance in the cloud. More SAP, high performance computing (HPC), machine learning (ML), and Windows workloads run on AWS than on any other cloud. Windows The workload runs on AWS.
750 hours free per month for 12 months,Using AWS Free Tier
The first year includes 750 hours of t2.micro (or t3.micro in regions where t2.micro is not available) instance usage on the Free Tier AMI per month, 30GiB of EBS storage, 2 million I/Os, 1GB snapshots, and 100GB of Internet bandwidth.
Note: The AWS Free Tier allows you to experience a range of AWS services for free. When you create an AWS account, you are automatically signed up for 12 months of AWS Free Tier access. Your AWS Free Tier access expires at the end of the 12-month period.After your AWS Free Tier expires, AWS will begin charging you regular rates for any AWS services and resources you use.
What is WordPress?
WordPress is a free and open source blogging software based on PHP and MySQL.Content Management SystemWordPress hasPluginsArchitecture and template system. WordPress is the most popular website content management system. About 50% of websites in the world are built using WordPress.
WordPress official website:https://wordpress.org/

Free Amazon cloud server
Before applying for Amazon Cloud Server for free, you need to do the preparation work before the application. After the preparation is completed, start the application for Amazon Cloud Server.
Preparation before applying
- First, you need a VISA or MasterCard foreign currency card.Debit Card, there needs to be a balance on the card, and a credit card is recommended.
- Secondly, you need an email mailbox. You can use Gmail, domestic QQ mailbox, or 163 mailbox. If there is no external network environment, it is recommended to use domestic QQ mailbox to receive Amazon Cloud emails.
- Finally, you need a mobile phone number that can be used to receive the verification code. Both domestic and foreign mobile phone numbers are acceptable.
- Note: If you want toanonymousIf you apply, the above three points need to be completely anonymous.
Free cloud server application process
Step 1: Account Registration
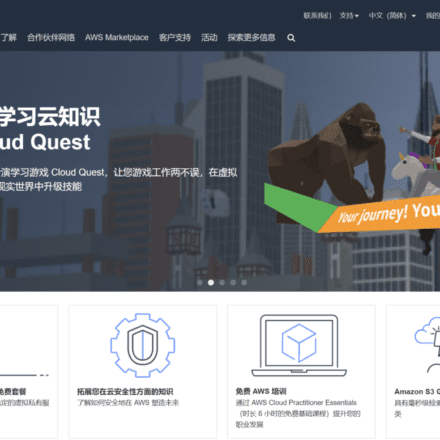
Visit the Amazon Cloud AWS Free Tier page, click Create Free Account on the website, and register for a free Amazon Cloud account.
->Click to visit Amazon Web Services AWS Free Tier
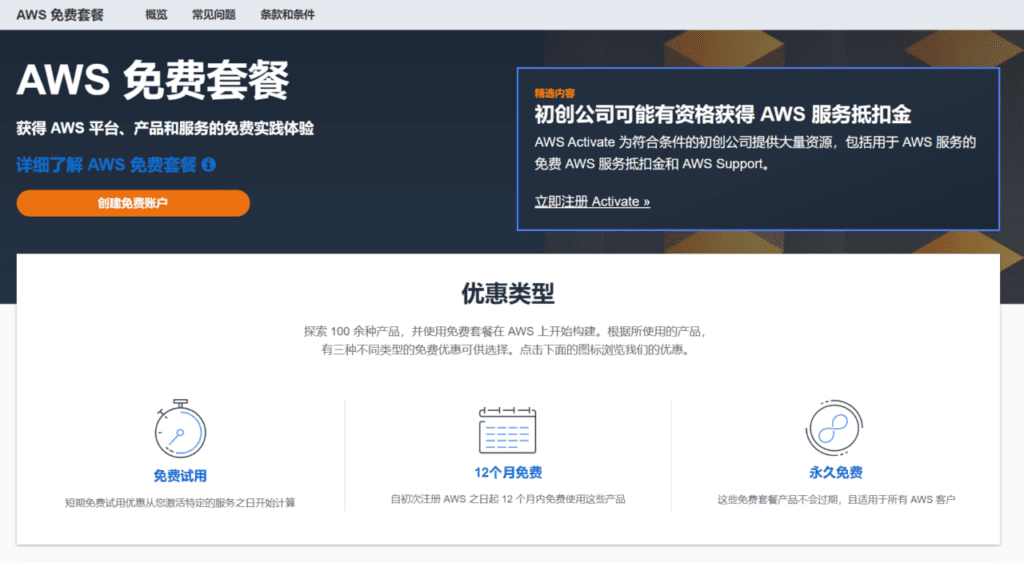
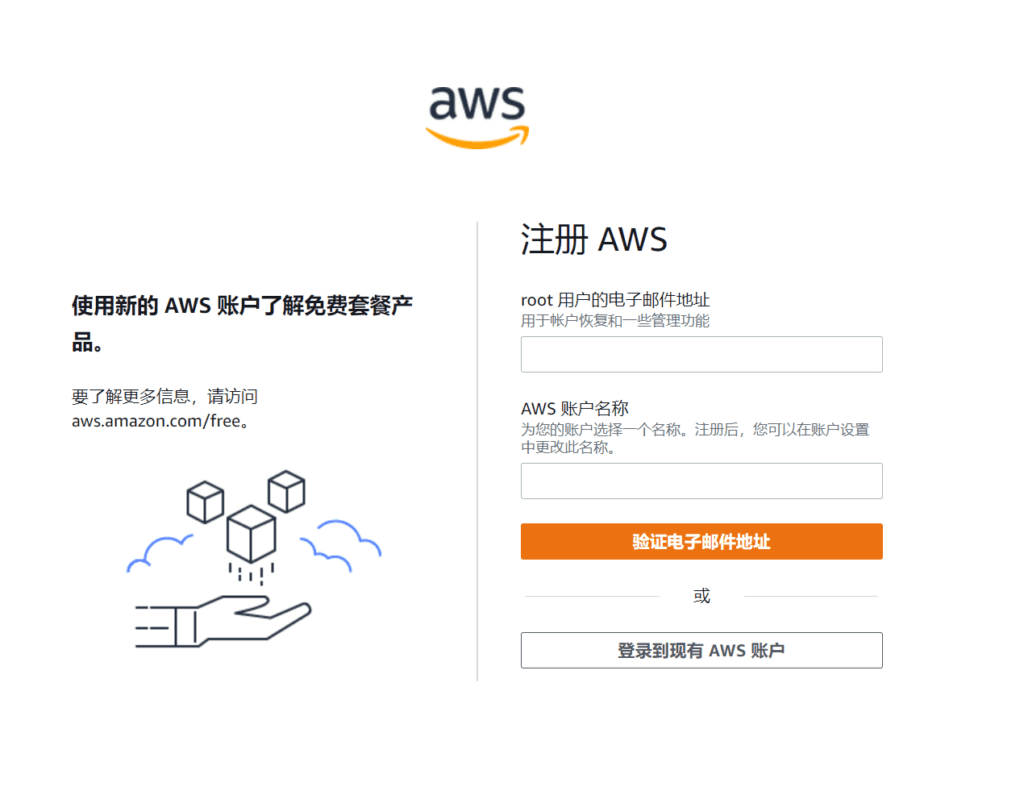
For the root user's email address, fill in the email address you used to register AWS. You do not need to fill in the AWS account name. You only need to remember the email address you use to log in.
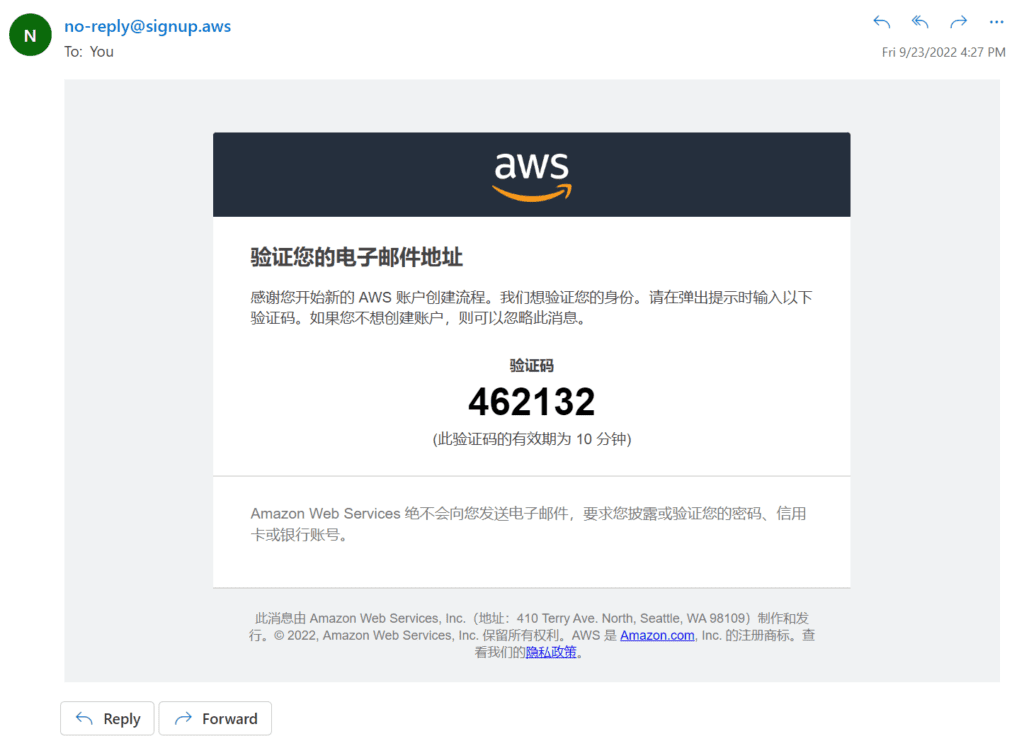
Open the AWS verification code email in your mailbox and fill in the verification code in the email on the AWS registration page.
Step 1-1: Create a password
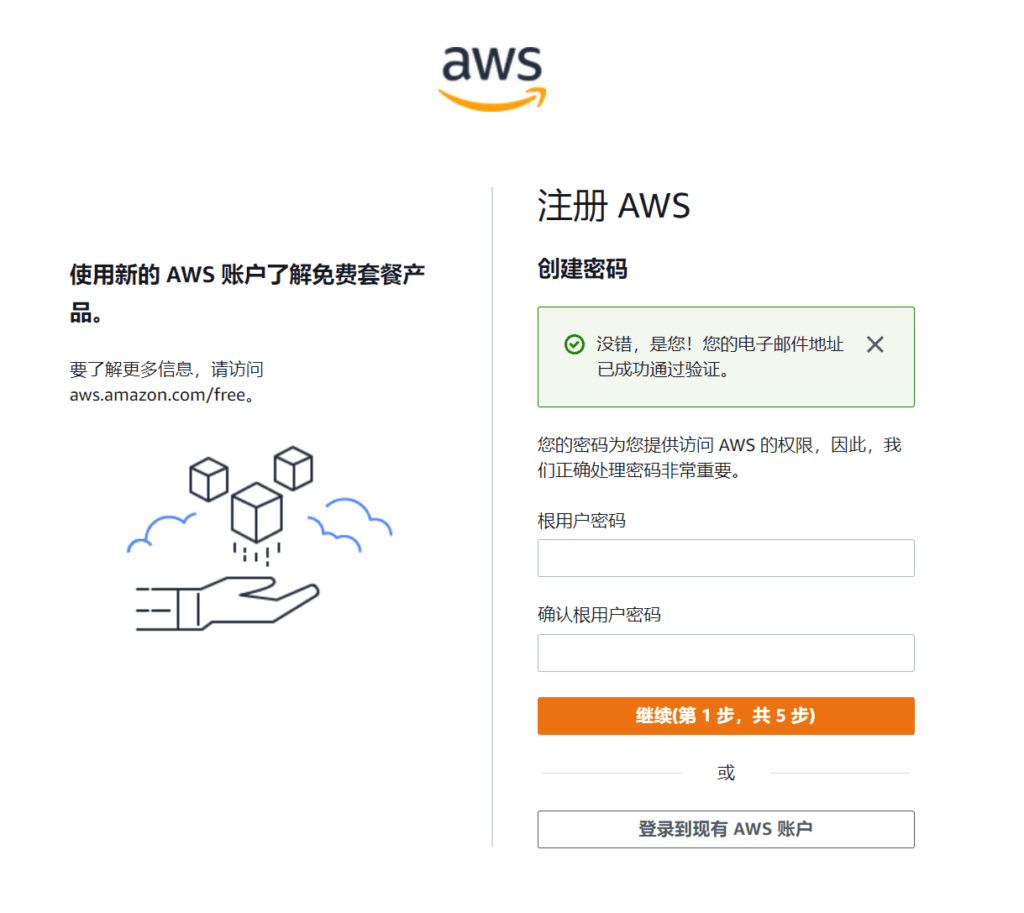
The password must be at least 8 characters long and must contain uppercase letters, lowercase letters, numbers, or characters!
After setting the password, start filling in the contact information.
Step 1-2: Fill in contact information
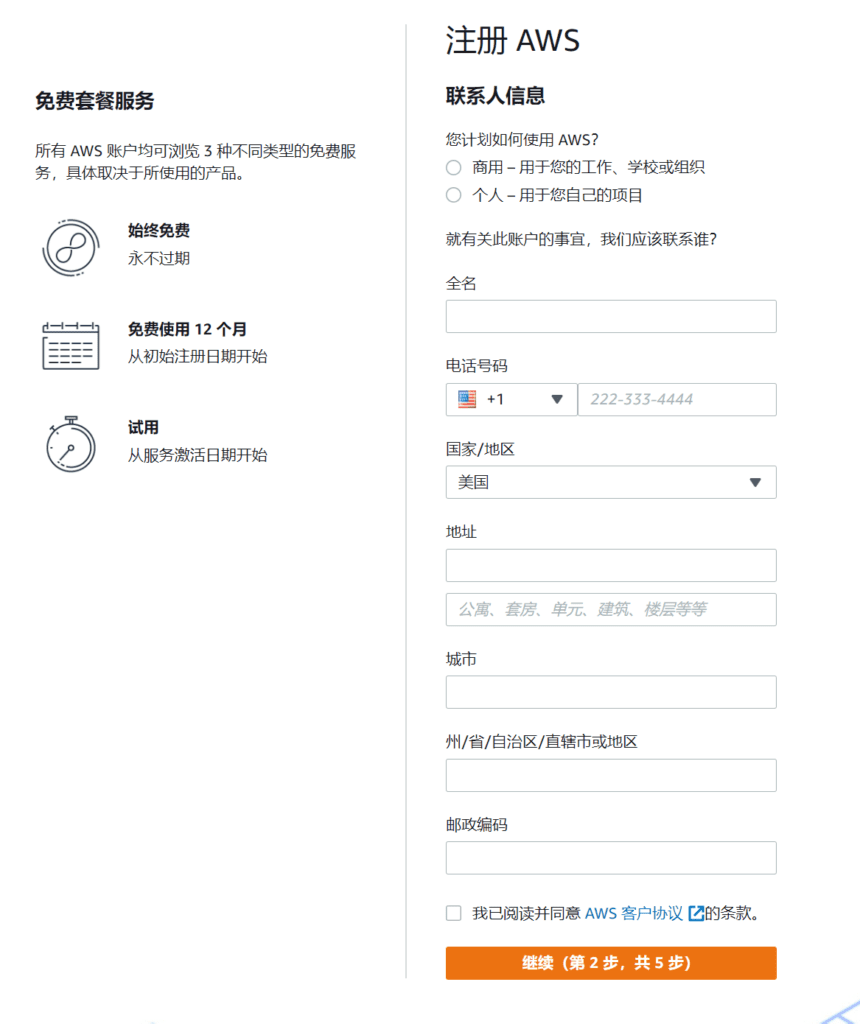
How do you plan to use AWS? Select Personal - for your own project. Fill in your full name in Pinyin or English. Do not fill in Chinese in the registration form as Chinese is not supported.
Step 1-3: Fill in billing information
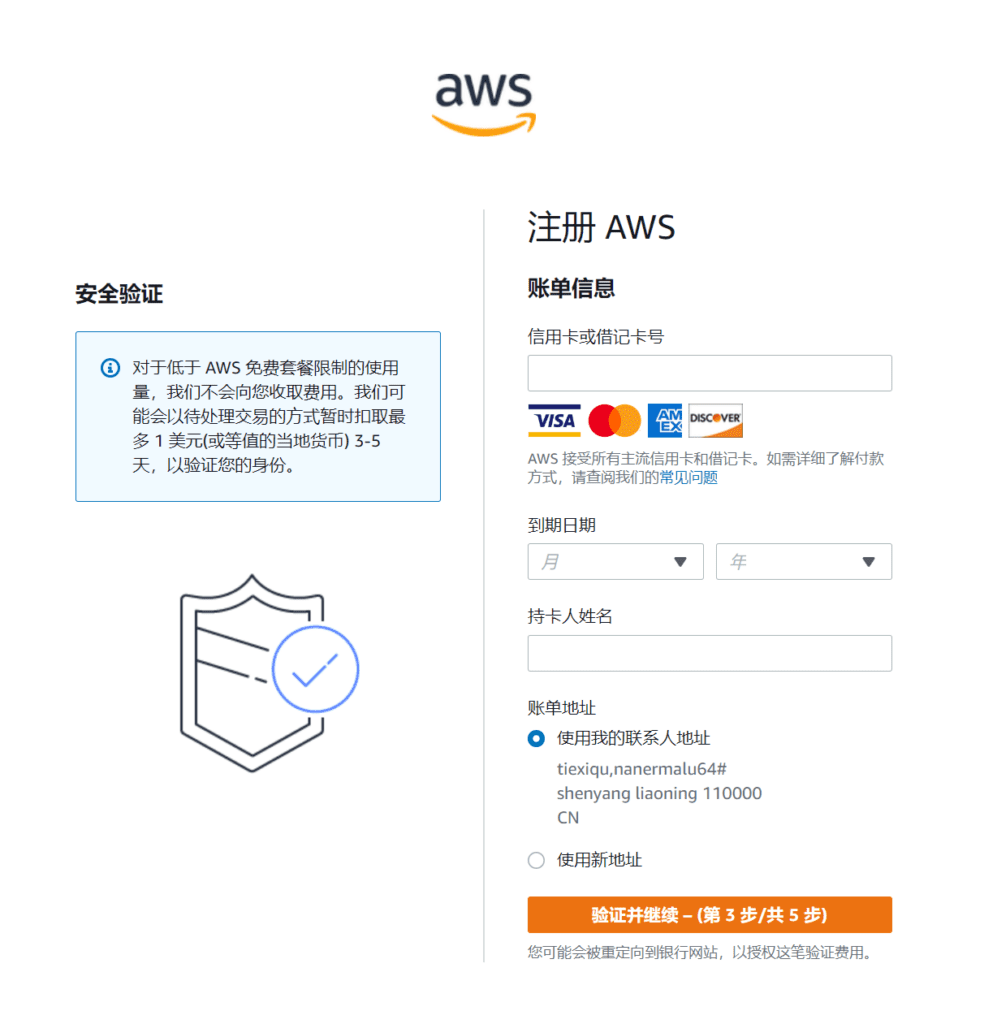
Fill in the billing information, enter your credit or debit card number, and the cardholder name as it appears on the credit card. Make sure to make a mistake in the expiration date.
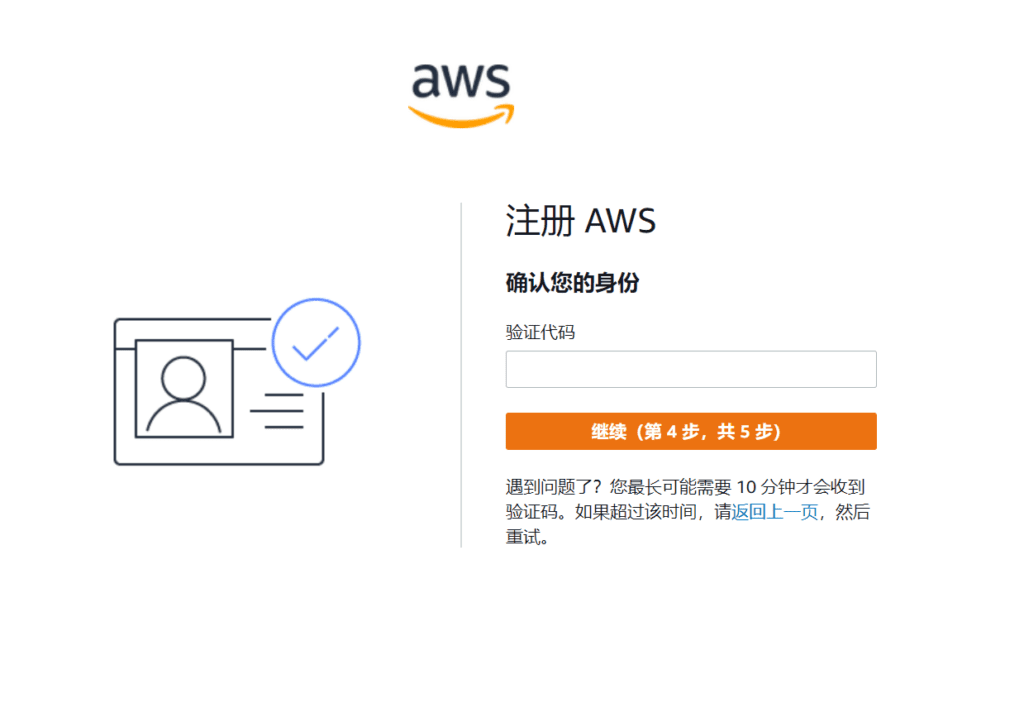
Steps 1-4: Confirm your identity
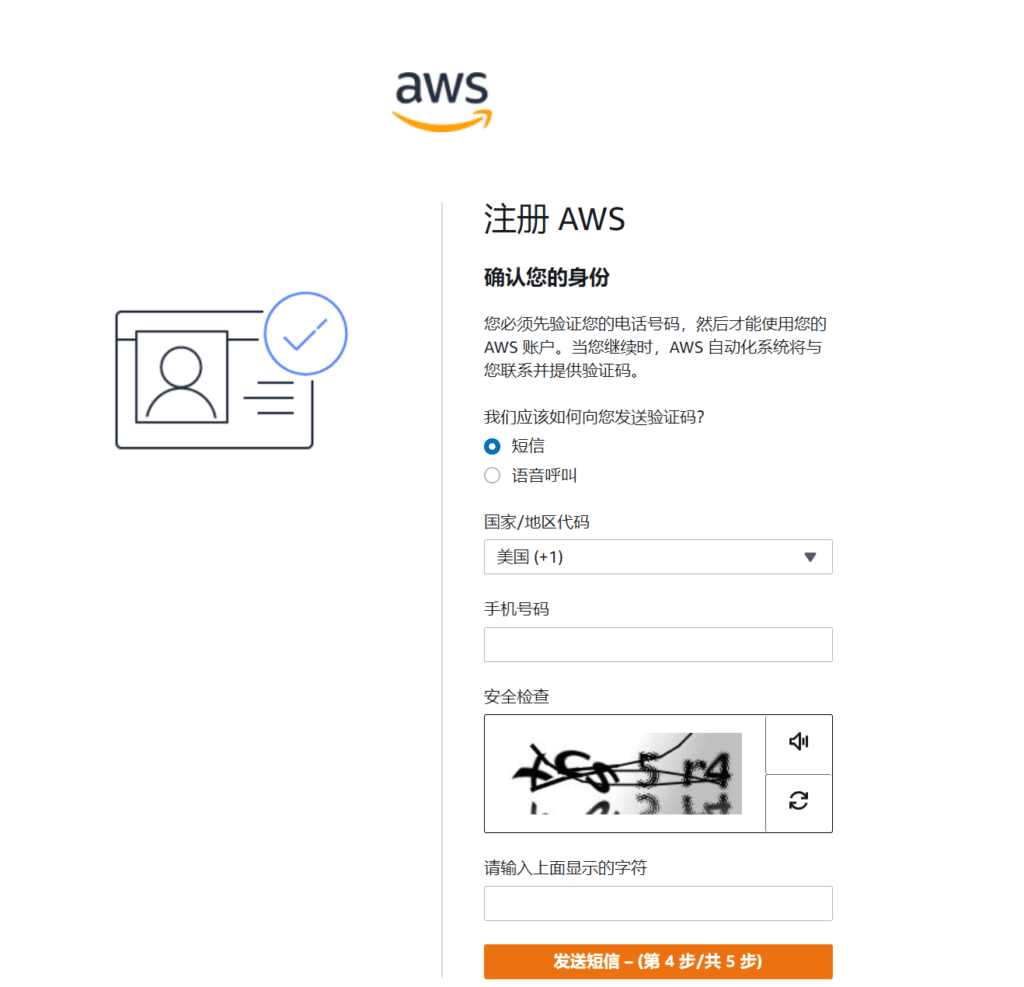
Confirm your identity information, enter your phone number, and prepare to receive a verification SMS.
Steps 1-5: Select a support plan
After receiving the SMS, there is one last step, select a support plan. Choose a support plan for your business or personal account.Compare plans and pricing examples You can change your plan at any time in the AWS Management Console.
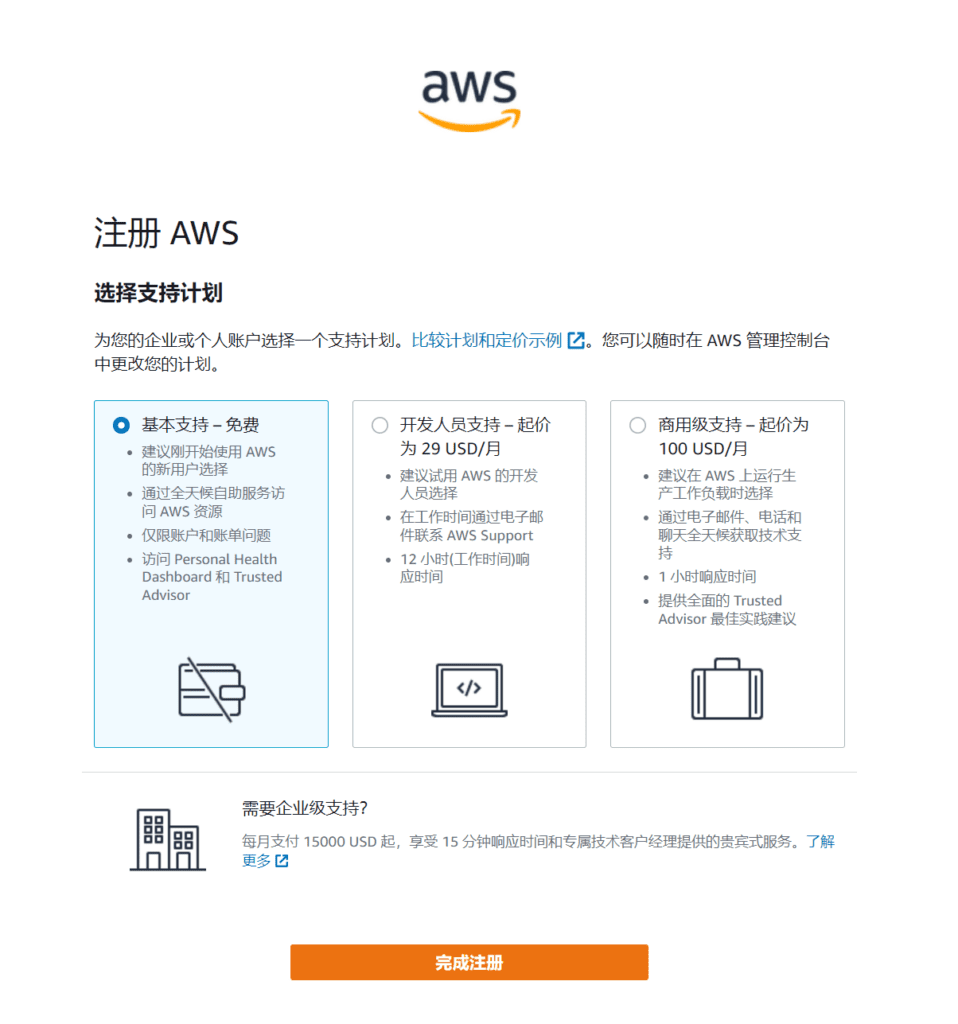
Select the free basic support plan. Click Complete Registration and your Amazon Cloud account has been successfully registered. Isn't it simple?
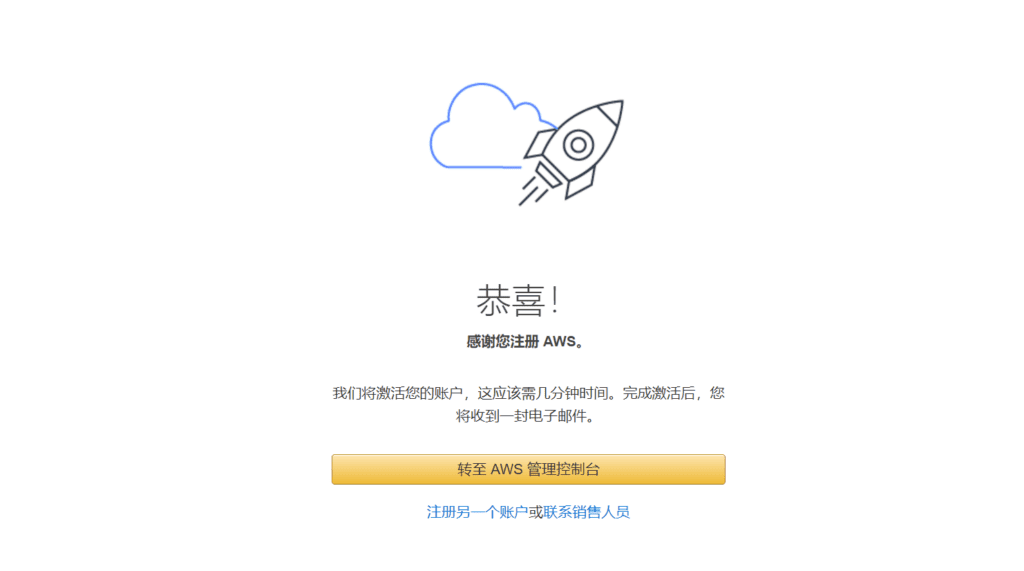
Next, go to the AWS Management Console and apply for an Amazon EC2 cloud server.
Step 2: Apply for Amazon EC2 cloud server
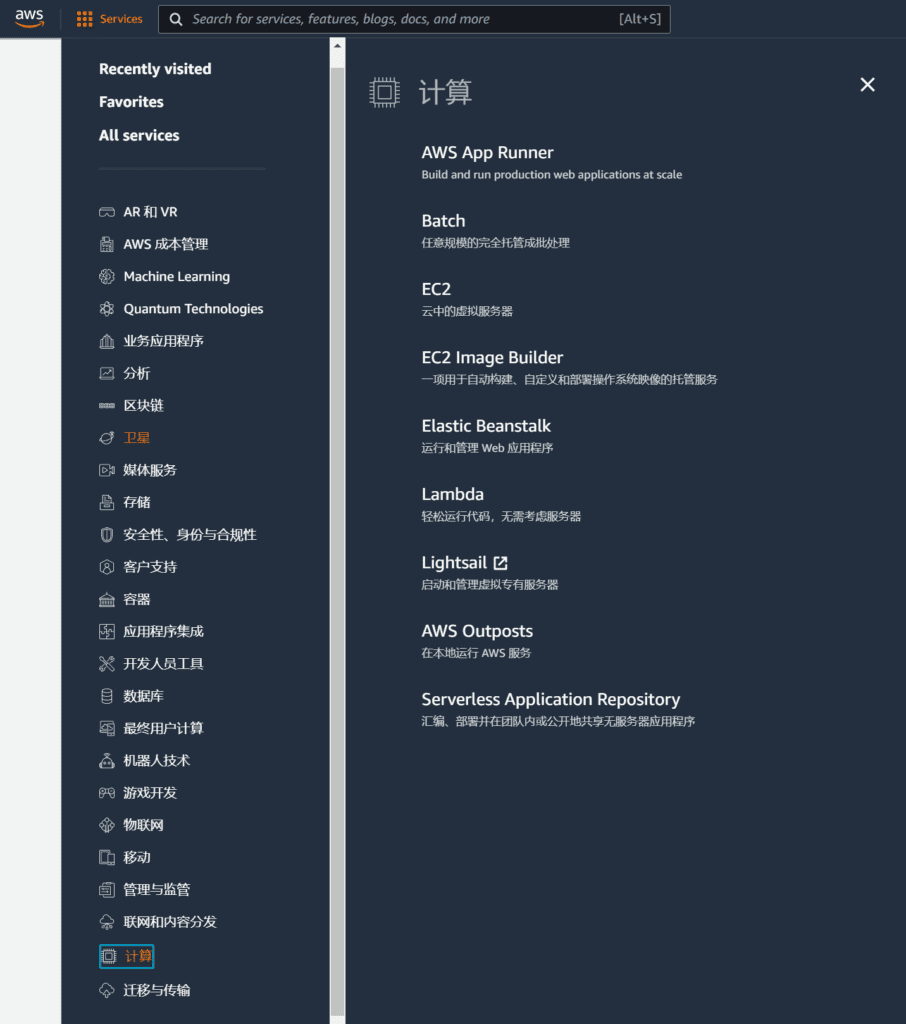
Log in to the Amazon Cloud console homepage and click Services , click on calculate , continue to click under the calculation menu EC2 , go to the Amazon EC2 console page.
Step 2-1: Select the region where the EC2 server is located
In the upper right corner of the Amazon EC2 console page, you can select the region where the Amazon cloud server is located.
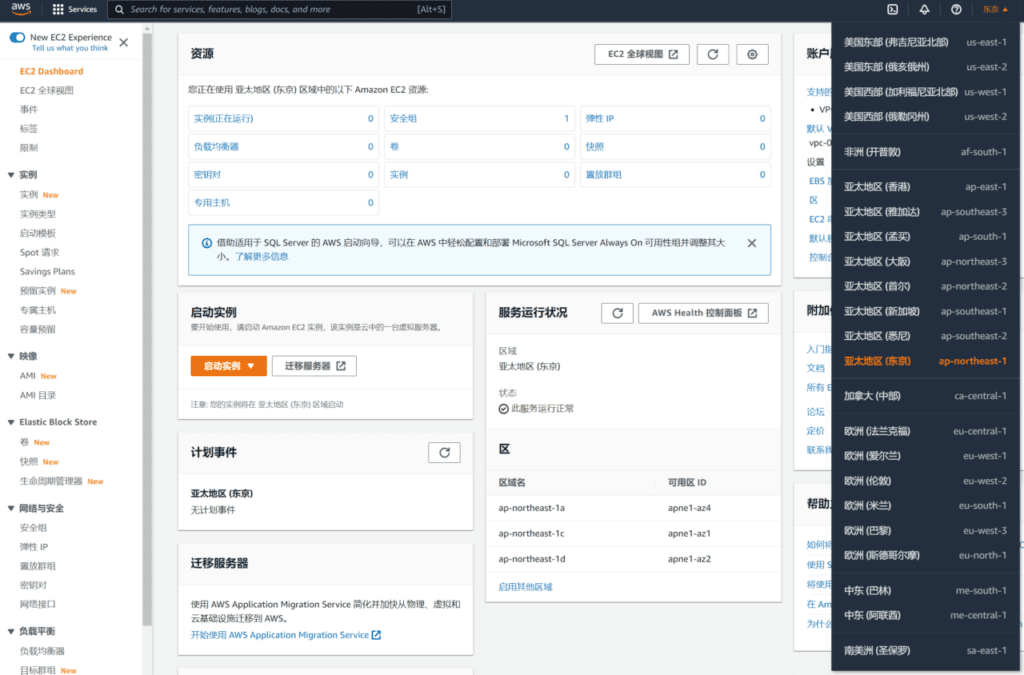
Which region should I choose for my cloud server? Which region has the fastest access speed? Amazon Cloud provides a speed comparison tool.
AWS Global Accelerator Speed Comparison Tool
You can use the AWS Global Accelerator Speed Comparison Tool to see how global accelerator download speeds across AWS Regions compare to direct Internet downloads. With this tool, you can use a browser to see the performance differences when transferring data using a global accelerator. You select the file size to download, and the tool downloads the file over HTTPS/TCP from an Application Load Balancer in different Regions to your browser. For each Region, you can see a direct comparison of download speeds.
To access the speed comparison tool, copy the following URL into your browser:https://speedtest.globalaccelerator.aws
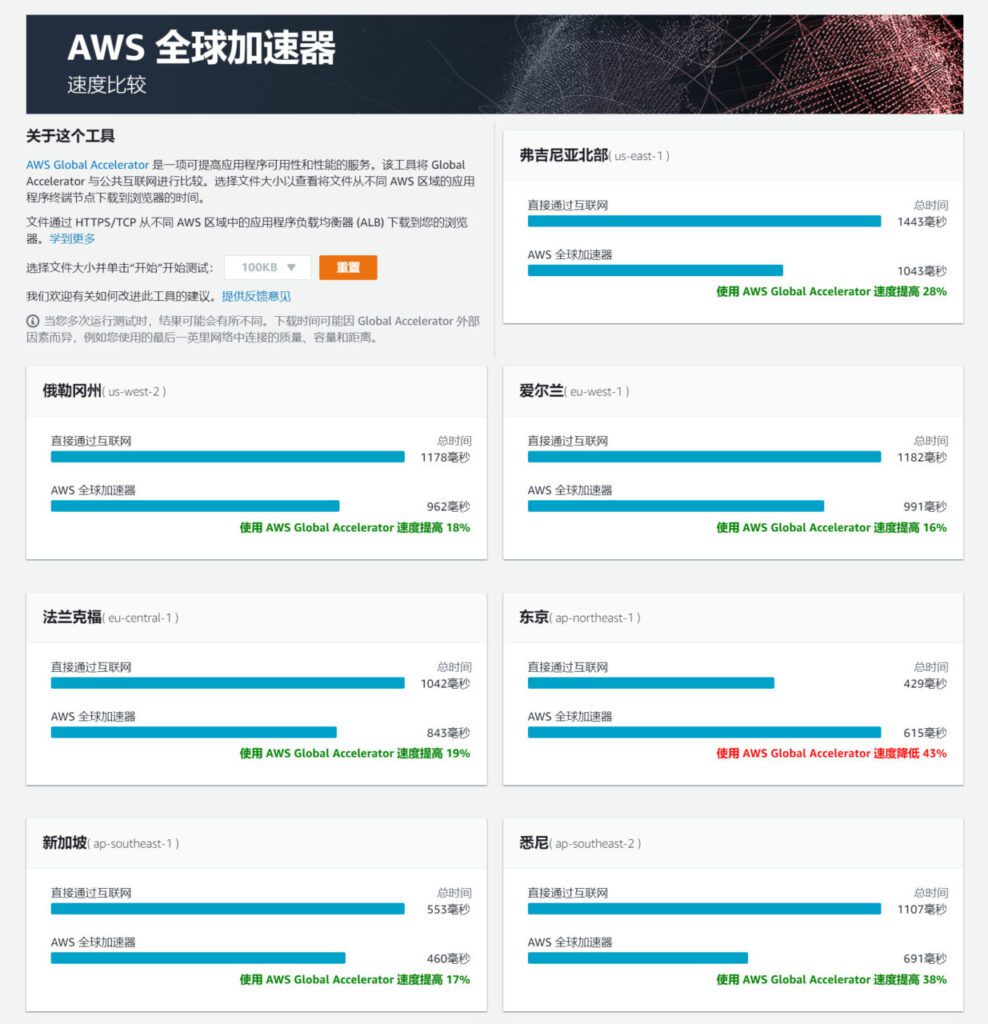
For users in the Asia-Pacific region, the speeds in Tokyo, Osaka, Japan and Hong Kong, China are relatively faster.
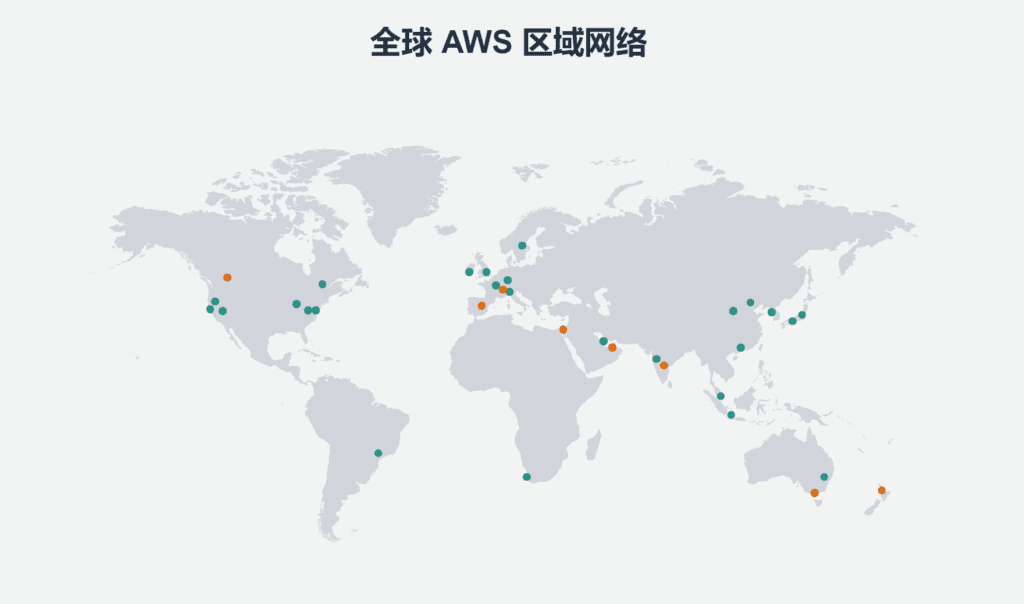
Step 2-2: Create an instance
Next, we apply for an EC2 cloud server instance. Examples , click Examples , then click Launch a new instance.

After clicking the Launch New Instance button, you will be taken to the interface for creating an EC2 instance.
Step 2-3: Fill in the instance name and tags
exist Name and Label Fill in the name of the EC2 instance, just fill in one, for example: UZBOX.
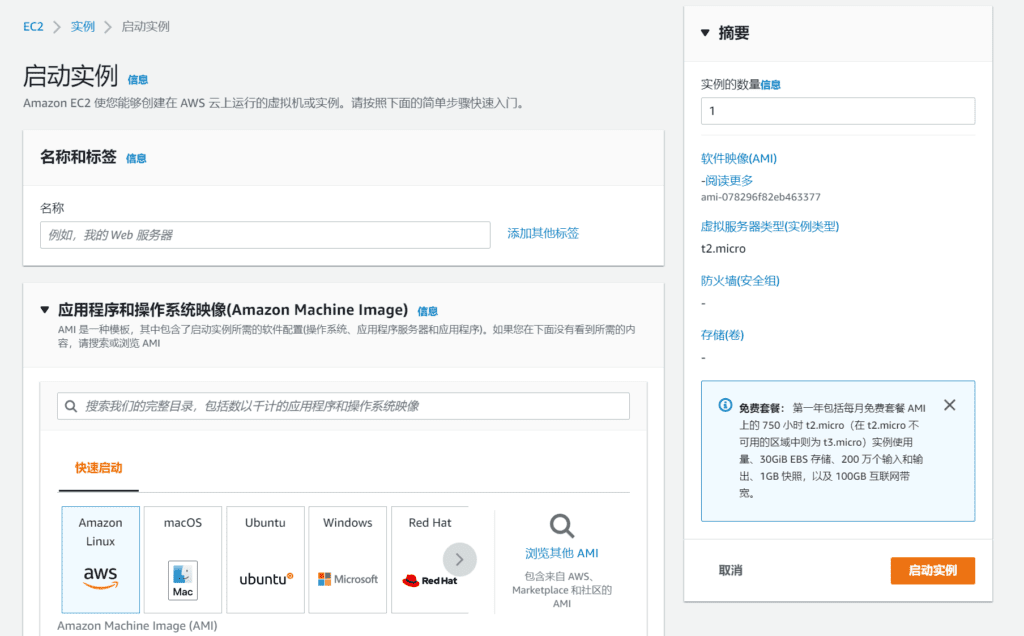
Step 2-4: Select Application and Operating System
Next select Application and OS Image (Amazon Machine Image) Information
An AMI is a template that contains the software configuration (operating system, application server, and applications) needed to launch an instance. If you don't see what you need below, search or browse for an AMI.
We can see that the supported operating system images include Amazon Linux,macOS,Ubuntu, Windows, Red Hat, SUSE Linux,DebianIf you need to install other system images, you can click Browse other AMIs on the right.
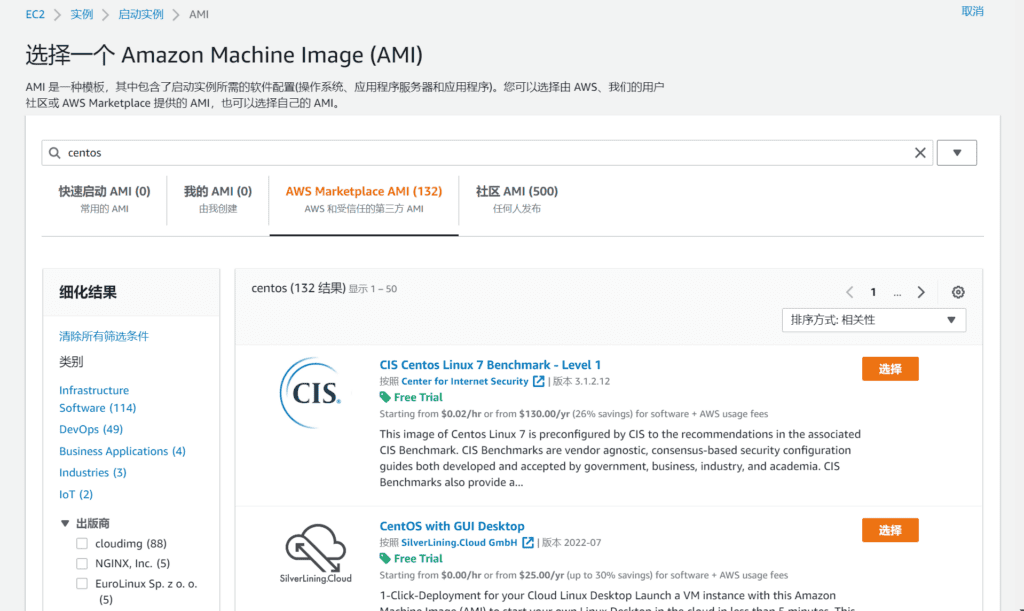
For example: To install the CentOS system, click AWS Marketplace AMI (AWS and trusted third-party AMIs) or Community AMI, then search for Centos on the leftRefine the resultsInFree Trial, then in the search results, select the system image you want to install.
Community AMIs include all public AMIs, so anyone can publish an AMI and it will appear in this catalog. This catalog may also include paid products. When using community AMIs, the best practice is to make sure you know and trust the publisher before launching the AMI.
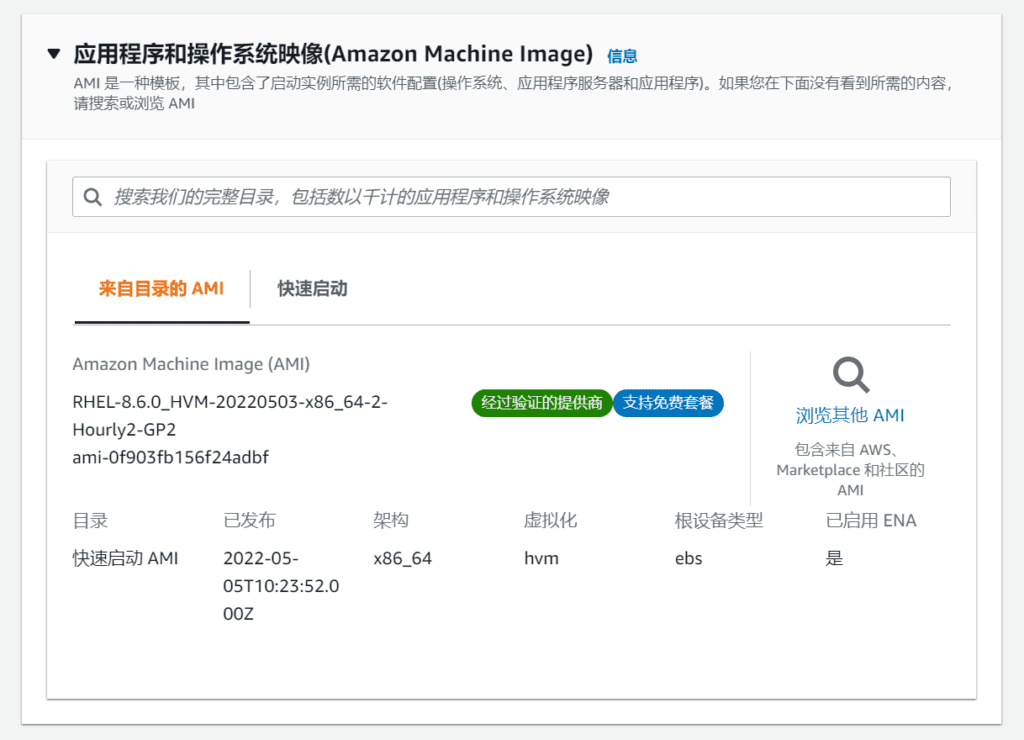
Test the installation and choose to install the RHEL-8.6.0_HVM-20220503-x86_64-2-Hourly2-GP2 system image, which is the Red Hat system in the quick start. The AMI ID is ami-011a403f2a9b2c39f.
Support free tier, you must choose a system image that supports the free package, otherwise you will be charged based on time. You must read this carefully before making a choice.
Step 2-5: Select instance type
Next is the choice Instance Type , in the Free Tier, the first year includes 750 hours of t2.micro (or t3.micro in regions where t2.micro is not available) on the Free Tier AMI each month.
The difference between t2.micro and t3.micro is that t2 has 1vCPU and 1GiB memory, while t3 has 2vCPU and 1GiB memory. From the CPU perspective, t3 has 1 more vCPU than t2.
When choosing an instance type that supports the free tier, it is recommended to choose t3.micro. Japan and South Korea in the Asia-Pacific region do not have t3.micro. Only t3.micro in Hong Kong, China supports the free tier.
The access speed of Hong Kong, China is slightly slower than that of Japan, but the difference is not too big. If you have requirements for CPU, you can choose Hong Kong, China, and if you have requirements for network speed, you can choose Japan.

Step 2-6: Create a key pair
After selecting the instance type, create a key pair. Click Create New Key Pair and enter the key pair name. The key pair type below is the default. For the private key file format, select it as needed. If you use PUTTY to connect, select the .ppk file format.
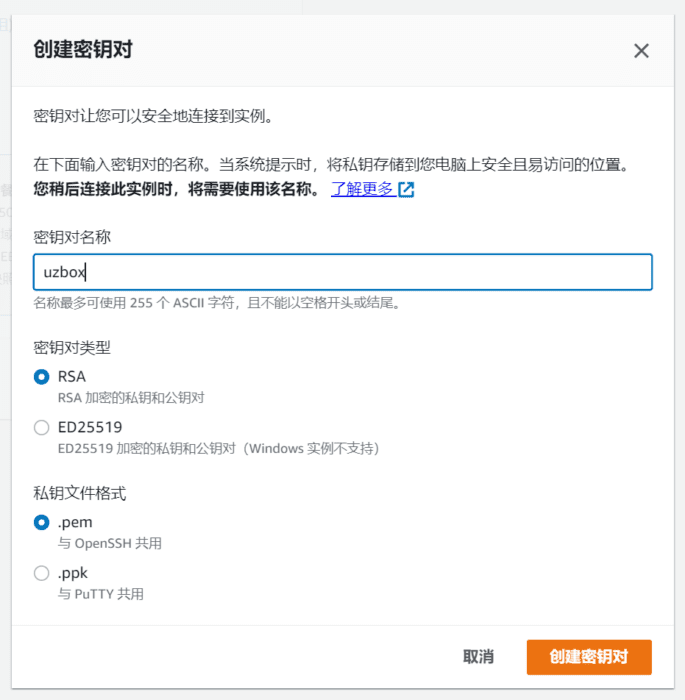
After the key pair is set, the key pair willAutomatically generate.pemFiles are automatically downloaded and saved on the local computer.downloadFolder, used for SSH connection.
Note: Please keep the SSH key safe. If the key is lost, you will not be able to connect to the server remotely.
NOTE: Red Hat systems use the .ppk key format!
Step 2-7: Network Setup
After the key pair is created Network Settings, the subnet information is default and does not need to be filled in. The system will automatically create a subnet IP.
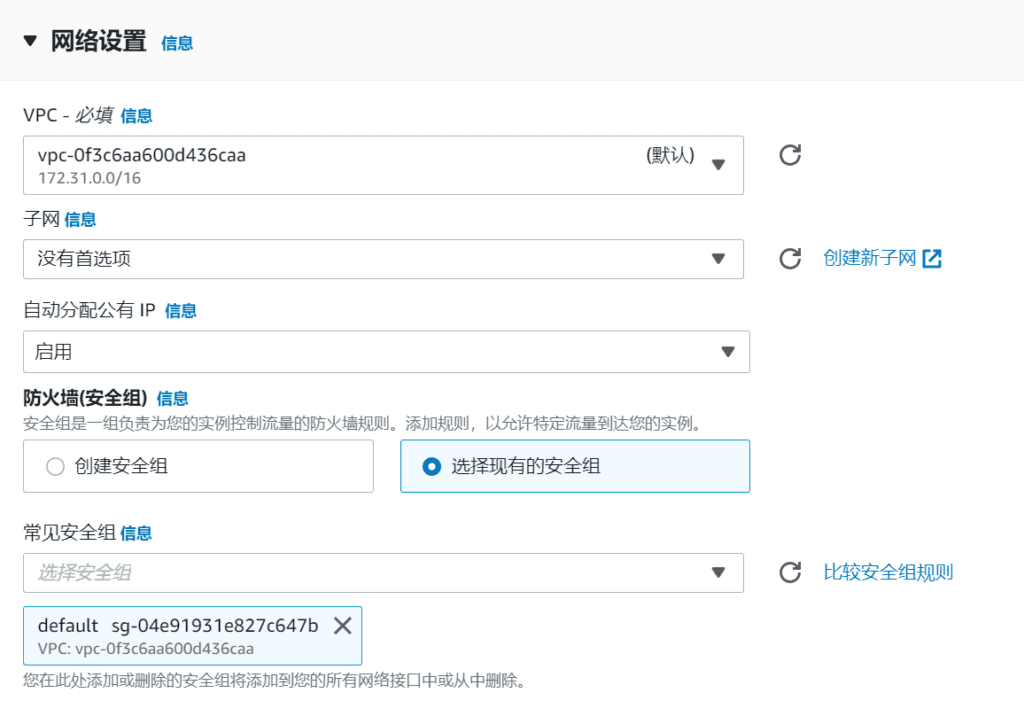
Step 2-8: Configure the firewall
Firewall (Security Group)In the options, select an existing security group. Select the default security group in the common security group. This security group is a completely transparent firewall, and all traffic ports are open. If you want to customize the open ports, you can create a security group and select the open ports in the newly created security group.

Step 2-9: Configure storage
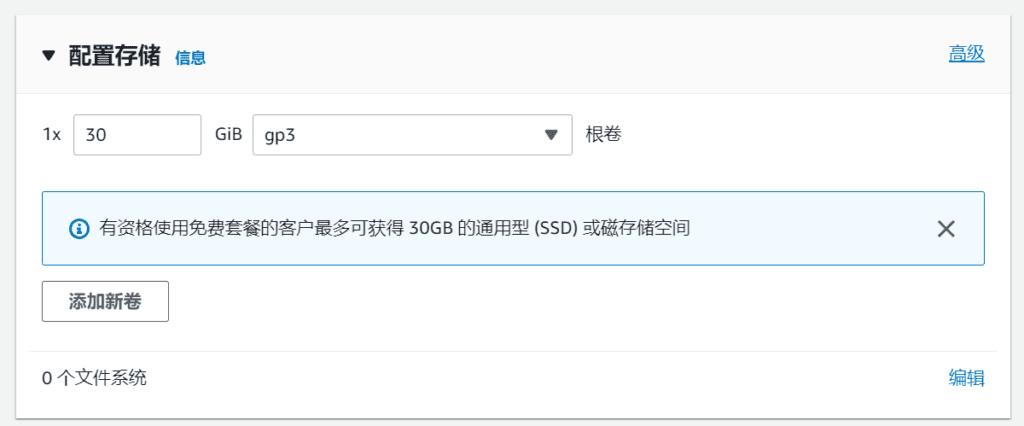
Configuration Storage Customers who qualify for the free tier can get up to 30GB of general purpose (SSD) or magnetic storage in the options. Change the hard disk size to 30GiB, gp2 by default, or change to gp3 as needed.
Note: The maximum hard disk size is 30 GiB. If it exceeds 30 GiB, the system will automatically charge you. The additional fees incurred each month will be automatically deducted from your credit card.
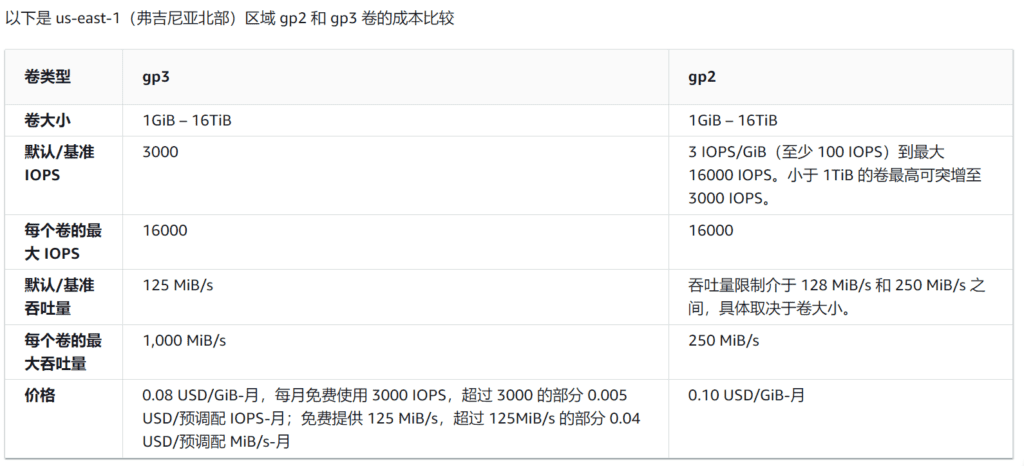
Comparing Amazon EBS volume types gp2 and gp3
gp3 is capable of providing up to 1000 MiB/s throughput, whereas gp2 provides a maximum throughput of 250 MiB/s.
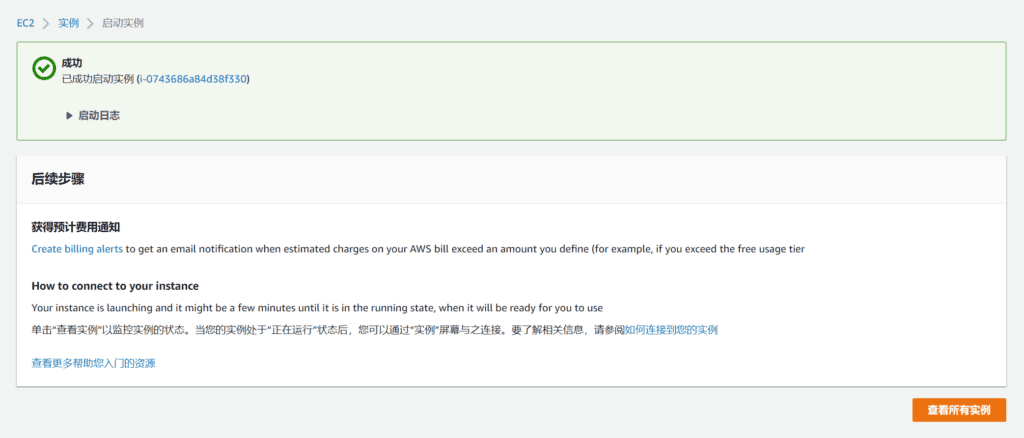
After selecting the hard disk, click Launch the instance Click the button to start creating an EC2 cloud server.
At this point, the EC2 cloud server has been applied for. In the instance console, you can operate the instance, including SSH connection, restarting the instance, stopping the instance, terminating the instance, etc.
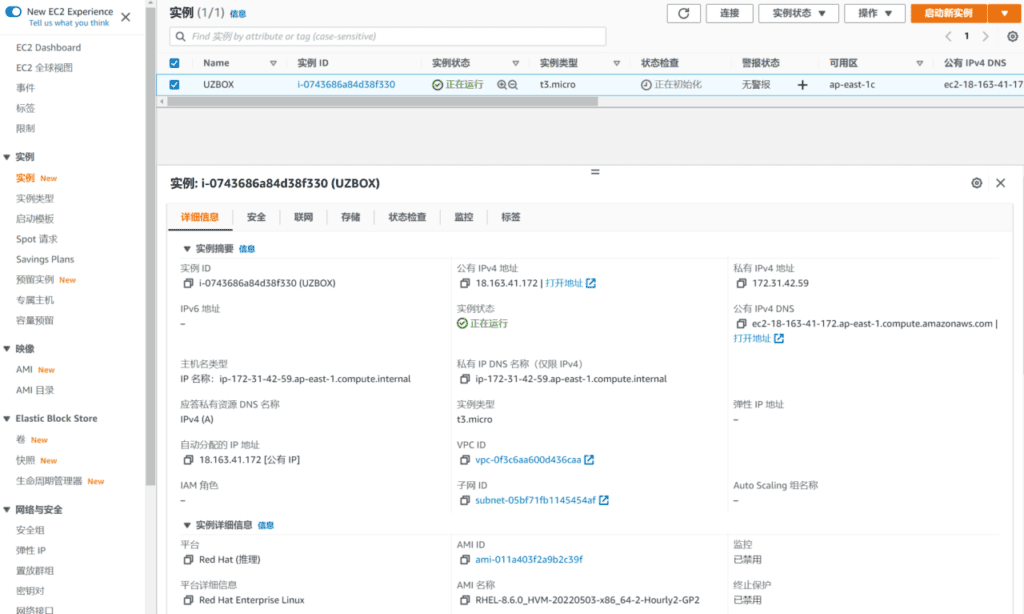
After applying for an EC2 cloud server, you also need to apply for an elastic IP to bind to the instance. Otherwise, every time you shut down and restart the server, the public IP address will change. This public IP address is automatically assigned by the EC2 cloud server. Unless your instance never fails or shuts down, the IP will become a new one after shutting down and restarting.
Public IP address
You cannot manually associate or disassociate a public IP address from an instance. The public IP address of an instance changes in the following situations:
- A stopped or hibernated instance receives a new public IP address when it is restarted.
- If the Elastic IP address associated with an instance is detached from the instance, it receives a new public IP address.
When a public IP address is no longer associated with an instance, it is returned to the public IP pool. You cannot restore the same public IP address for a stopped instance.
Elastic IP addresses
It is a best practice to use Elastic IP addresses. Elastic IP addresses are assigned to your account, not to instances. You can associate Elastic IP addresses with instances as needed.
All instances retain their associated Elastic IPs after they are stopped. AWS continues to bill for the Elastic IP addresses associated with the stopped instances.
Note: You cannot convert an automatically assigned dynamic public IP address to an Elastic IP address.
Step 2-10: Apply for an Elastic IP
To apply for an Elastic IP, in the EC2 console menu, click Network and Security The following Elastic IP , then click Allocate Elastic IP After entering the page for allocating elastic IP addresses, clickdistribute.
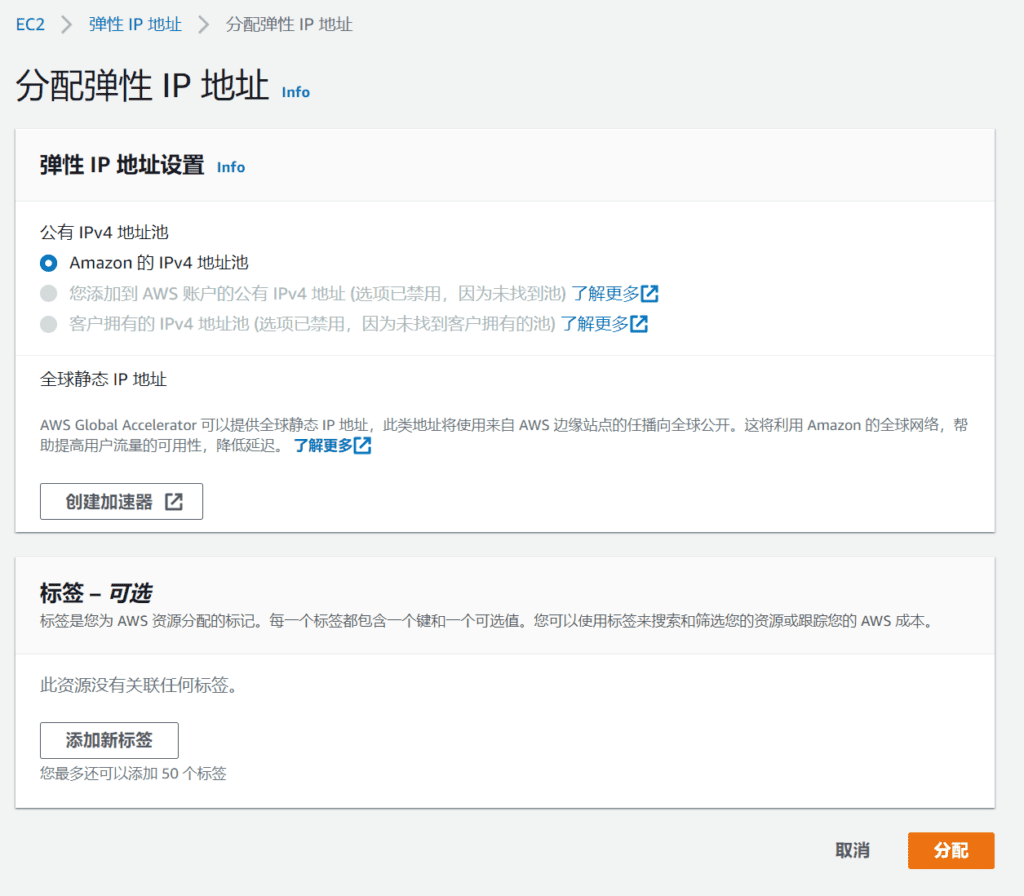

After the elastic IP address is allocated, you need to associate it with the instance. If it is not associated with the instance, the elastic IP address will be charged hourly. Click Associate this IP address.

On the Associate Elastic IP Address page, select the instance and private IP address, and click the Associate button.

The elastic IP has been associated successfully. Now, no matter how you restart or shut down the cloud server, the IP address will not change. However, you need to pay attention to one thing: if you delete the cloud server, you need to delete the corresponding elastic IP address in the elastic IP. Otherwise, the elastic IP will not be associated with the instance and will incur additional charges.
After applying for the EC2 cloud server, configure the cloud server. The Red Hat system configuration is basically the same as the Centos configuration.
Step 3:AWS Amazon Cloud Server Linux System Initial Configuration
After the Red Hat Enterprise Linux 8 virtual machine instance is enabled, it is still a blank system and all environments need to be reconfigured.
Step 3-1: Use SSH connection to Linux Examples
First, use the SSH connection tool Xshell to log in to the server.
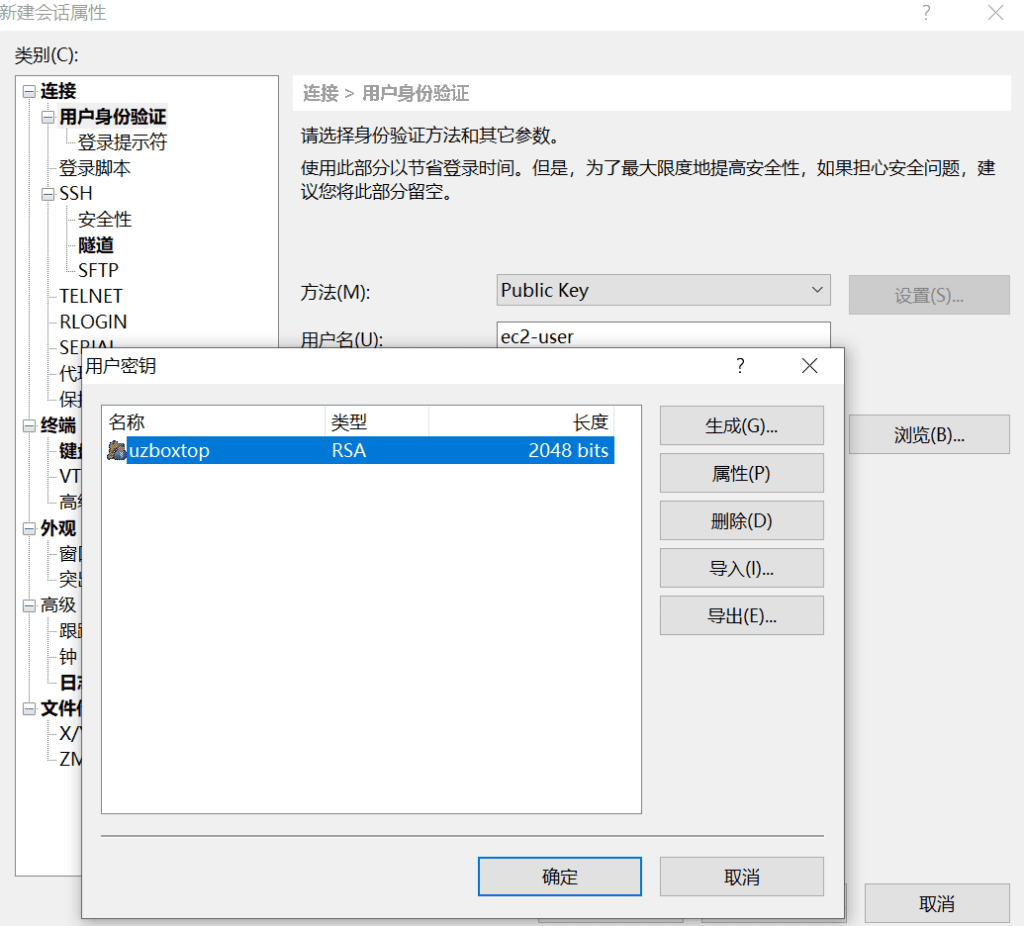
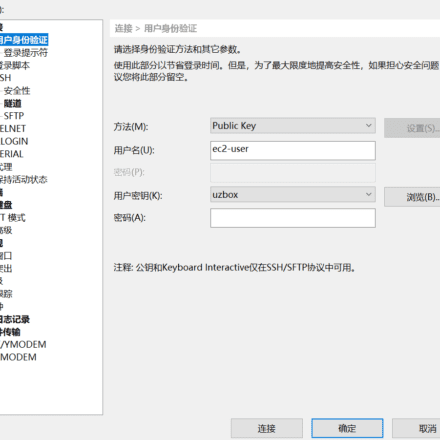
Create a new session in Xshell and select the user authentication method Public Key , user name input ec2-user ,Note that you do not need to enter root here. In the User Key field, browse to import and select the SSH key you generated when you created the instance. After selecting the user key, click OK to connect through SSH.

You have successfully connected to the EC2 cloud server. Next, perform a simple server configuration.
Step 3-2:Modify server root password and remote login
The default account for AWS EC2 cloud server is ec2-user , which does not have permission for many operations. It needs to be changed to root Super administrator login.
->How to use root account SSH to log in to AWS
Step 3-3: EC2 cloud server configuration LNMP environment
After applying for an EC2 server on Amazon Cloud, you still need to perform some simple environment configuration before installing the WordPress website. The following is how to configure the LNMP environment under Red Hat Enterprise Linux 8.
AWS Amazon cloud configuration, Red Hat8 server configuration LNMP environment
Install WordPress on Amazon Cloud Server
Before installing WordPress, install several commonly used PHP extensions for WordPress.
Installing the GMP extension
dnf -y install gmp-devel
BCMath PHP extension
dnf -y install php-bcmath
First you need to download the latest version of WordPress.
wget https://cn.wordpress.org/latest-zh_CN.tar.gz
After downloadingUnzipdocument.
tar -xzvf latest-zh_CN.tar.gz
Move the folder to the website directory
mv wordpress /var/www cd /var/wwwroot
Rename the wp-config-sample.php file
cp wp-config-sample.php wp-config.php
Modify the website configuration file:
vi wp-config.php
The name of the WordPress database: define( 'DB_NAME', 'WordPress' );
MySQL database username: define( 'DB_USER', 'root' );
MySQL database password: define( 'DB_PASSWORD', 'mysql password' );
MySQL host: define( 'DB_HOST', '127.0.0.1' );
The default text encoding when creating a data table: define('DB_CHARSET', 'utf8');
Add the following code at the end of the file:
if(is_admin()) {add_filter('filesystem_method', create_function('$a', 'return "direct";' ));define( 'FS_CHMOD_DIR', 0751 );}
After modifying the configuration file, add user permissions again!
chown -R nginx:nginx /var/www
Final Rebootnginxservice, or restart the system.
After configuring Nginx, enter your domain name and you can access the WordPress website. Isn’t it convenient?
If you want to build a website more quickly, you can browse:Use Amazon Lightsail to quickly build a WordPress website






Xshell keeps failing, the selected user key is not registered on the remote host, what is the reason
100g of traffic per month is a bit tasteless! It is not enough to build a website.
You can build a ladder!