Excellent software and practical tutorials


Use the free AWS EC2 server to build the web server of ChatGPT web version
ChatGPTWeb version tutorial, ChatGPT has become popular all over the world, and the popularity of artificial intelligence has been unstoppable.OpenAIRecently launched GPT-4, ChatGPT is gaining popularity, and with the surge in users, it seemsGPUThe situation became urgent, and OpenAI banned a large number of illegal accounts, including some accounts that purchased the premium version. Of course, those banned were all illegal accounts, and the access of normal accounts was not affected.

Here's how to use itAmazon CloudUse the free cloud server to build a web version of ChatGPT.
Before building, you need to meet the following conditions.
- Amazon cloud free account,AWSCreate a free cloud server
- OpenAI account, used to applyOpenAI API
Amazon AWS Free Server
Before building the ChatGPT server, understandAmazon EC2 and Amazon Lightsail.
Amazon Web Services official website:https://www.amazonaws.cn
Amazon Cloud Overseas Official Website:https://aws.amazon.com/cn/
You can choose to use it according to your own needs. Generally, Amazon Lightsail is recommended for novice testing, and Amazon EC2 is recommended for a stable production environment.
The Amazon cloud registration process has been introduced in detail before, so I won’t repeat it here.
The following is a brief introduction to Amazon EC2 and Amazon Lightsail.

What is Amazon EC2
Amazon EC2 Amazon Elastic Cloud Computing is a web service provided by Amazon. It is a system that allows users to rent cloud computers to run the applications they need. EC2 allows users to flexibly run their own Amazon machine images by providing web services. Users can run any software or application they want on this virtual machine.
Amazon EC2 Free Tier: The first year includes 750 hours of t2.micro (or t3.micro in regions where t2.micro is not available) instance usage per month on the Free Tier AMI, 30 GiB of EBS storage, 2 million I/Os, 1GB snapshots, and 100GB of Internet bandwidth.
Apply for Amazon EC2 reference:Apply for Amazon AWS EC2 free cloud server
The configuration of t2.micro is 1vCPU and 1GiB memory. You can apply for t3.micro in the Hong Kong region of AWS, which has one more vCPU than t2.micro.

In AWS, there is also a way to createFree ServerThis method is more suitable for beginners to use and use Amazon Lightsail to quickly createLinuxserver.
What is Amazon Lightsail?
Amazon Lightsail is a cloud service provided by Amazon Web Services ( AWS ) that bundles cloud computing power and memory for new or inexperienced cloud users.
AWS packages memory, processing, storage, and transport into virtual machines ( VM ) for customers to purchase and then use that compute capacity as Amazon Elastic Compute Cloud (EC2) instance launch. Amazon Lightsail's computing power comes from EC2 instances. Amazon EC2 is a web service that provides secure, configurable computing power in the cloud.
AWS designed the Lightsail service to be easy to understand and purchase. The provider manages the infrastructure, and it shares the same uptime and global regions and availability zones as EC2.

It is relatively simple to create a Linux server using Amazon LightSail. Not only can you create Linux, but you can also install applications directly on the system. The only drawback is that only the first three months are free.

If it is just for temporary testing, Amazon Lightsail is OK. The server memory of $10 is 1G more than EC2, and the hard disk is 30G more.
Apply for Amazon Lightsail reference:Lightsail creates an Amazon cloud desktop for free in 10 minutes
What is the difference between Amazon EC2 and Amazon Lightsail?
AWS offers Amazon EC2 and Lightsail for hosting applications. Amazon EC2 is a hybrid of multiple services with its own personalized features for creating a single architecture. Amazon EC2 instances are suitable for small to complex architectures. On the other hand, Lightsail is an integrated product of the services provided by AWS. Lightsail is more suitable for small and medium workloads.
Key differences between Amazon EC2 and Lightsail:https://repost.aws/knowledge-center/lightsail-differences-from-ec2
Note: The AWS Free Tier allows you to experience a range of AWS services for free. When you create an AWS account, you are automatically signed up for 12 months of AWS Free Tier. Your AWS Free Tier eligibility expires at the end of the 12-month period. After your AWS Free Tier expires, AWS will begin charging you regular rates for any AWS services and resources you use.
AWS Create EC2 Server
The following uses the Amazon EC2 instance as an example to create a Linux system.
After registering for Amazon Cloud, log in to the AWS console and click onareaIn the menu, scroll to the bottom and clickManagement area

Click EnableAsia Pacific (Hong Kong)There is some delay in activation. You need to wait for a few minutes and wait for the activation to succeed before creating the EC2 server.
After the Hong Kong region is successfully enabled, in the service menu on the left side of the console, click Compute. Under the Compute menu, click EC2 to go to the EC2 creation page.

Click Instances in EC2, then click Launch Instance in Instances. Below we choose to create a Linux instance with Red Hat operating system.

Note: t3.micro is only available in Hong Kong. When selecting the operating system and instance type, be sure to select a free tier that meets the requirements. If there is no free tier support logo, it will be charged on a daily basis after creation, and money will be automatically deducted from the card after one month. Be sure to pay attention to this.
After selecting the operating system and instance type, clickCreate a new key pair
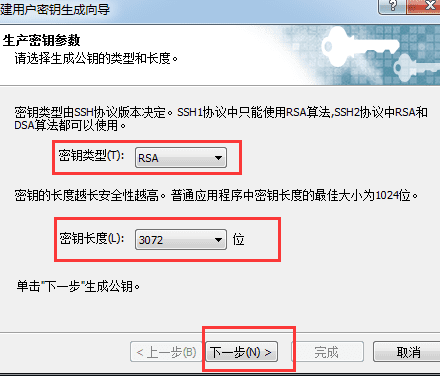
The key pair is used to connect to the remote server. The private key file format of the Red Hat operating system key pair is .ppk

After the key pair is created successfully, configure the firewall and check the two options to allow https and http traffic from the Internet. Change the storage configuration to 30GiB for the hard disk.
Please note that only general-purpose SSDs or magnetic storage hard drives are included in the free package. Other types require payment.

After making your selection, click the orange button on the right to start the instance. The EC2 server instance has been created.
Next inNetwork and SecurityClick Elastic IP, create an elastic IP, and bind it to the server. Elastic IP is free. If you do not apply for an elastic IP, the public IP address will be randomly changed to another IP address after restarting the server.
Note: After applying for an elastic IP, it must be bound to the server. If the elastic IP is not bound, the idle elastic IP will be charged by the hour.
The free server has been applied for. Now let’s apply for an OpenAI account to apply for the OpenAI API.
Register OpenAI Apply for OpenAI API
Many people are stuck at the IP step when registering OpenAI. Domestic users can now accesschat.openai.com This website simply cannot be accessed.
OpenAI has blocked IP addresses in China, including Hong Kong, and Russia.

When using proxy access, an error message may appear:Access denied
Access denied
You do not have access to chat.openai.com.The site owner may have set restrictions that prevent you from accessing the site.

What should I do if I encounter such a problem? In addition to usingProton VPNIn addition, there is an overseas browser that can solve the problem of IP being restricted.
A Chrome browser called biuChrome, download address:https://biuchrome.com/

Use biuChrome to help you unlock overseas websites, remove regional restrictions, free of charge, no registration required, one-click connection.
This is the development version of Chrome, which can be accessed directlyai.com
Next, we start by registering an OpenAI account.
Use biuChrome browser to visit:https://AI.com

Use a Google Account orMicrosoftWe recommend using a Microsoft account, since Microsoft is the sponsor of OpenAI.

Check to confirm that you are a real person and verify. After verification, enter your name, try to write an American name, and then select your date of birth.

After entering your name, you will need to verify your phone number.
Note: You should use the phone number of the region where you use the node to verify, so as to avoid being blocked as an illegal account.

Use the foreign code receiving platform SMS-Activate
SMS-Activate It is a paid code receiving platform in Russia. The website is easy to use. For beginners, you may encounter some problems. Here are some tips for you. SMS-Activate The coding process.
SMS-Activate foreign code receiving platform registration account
First visit https://sms-activate.guru
Switch the language to Chinese in the upper right corner of the website and then connect the code.
Select OpenAI on the left, select the shopping cart behind the corresponding country, and enter the phone number on the code receiving page into the OpenAI verification phone number page above.

If a number cannot receive text messages for a long time, try several more numbers to receive the code.
After entering the verification code, log in to the ChatGPT interface.

If you need OpenAI API to provide external services, or want a faster response, you can upgrade to the Plus enhanced version, which costs $20 per month.

Get an OpenAI API key
After successfully registering an OpenAI account, visit:https://platform.openai.com/
Click the upper right corner to log in, enter the username and password you registered previously to log in to the OpenAI user interface, click the account name in the upper right corner of the user interface, and clickView API keys
Or access directly through the page:Account API Keys - OpenAI API

Click +Create new secret key to create the OpenAI API
Note: The key is only displayed once. After creating the API key, click Copy. Create a new notepad on the desktop and save the key in the notepad.

The key has a validity period and will become invalid after it expires. OpenAI provides $5 of free testing funds.

AWS EC2 The free cloud server and OpenAI API have been applied for, and the next step is to build the ChatGPT server.
Build ChatGPT web server
ChatGPT's Web UI is available atGitHubThere are many projects on the Internet, and the various ChatGPT projects dazzle you. Use the simplest method to deploy the ChatGPT server on the Amazon cloud server.
Next, we will start building a private web program based on the ChatGPT3.5 API, using a popular chatgpt-web project on GitHub.
GitHub project address:https://github.com/Chanzhaoyu/chatgpt-web
SSH remotely connects to the EC2 free cloud server we applied for above.
For AWS server configuration, please refer to:AWS Amazon Cloud Red Hat 9 WEB server set up and configure LNMP environment tutorial
First install the basic environment required for chatgpt-web to run.
Install Node
Install Node v16. Node requires ^16 || ^18 || ^19 version (node >= 14 requires fetch polyfill to be installed). You can use nvm to manage multiple local node versions.
cd /usr/local wget https://npmmirror.com/mirrors/node/v16.18.1/node-v16.18.1-linux-x64.tar.xz
Unzip and rename to nodejs
tar -xvf node-v16.18.1-linux-x64.tar.xz mv node-v16.18.1-linux-x64 nodejs rm -rf node-v16.18.1-linux-x64.tar.xz
Create a nodejs soft link
ln -s /usr/local/nodejs/bin/node /usr/bin ln -s /usr/local/nodejs/bin/npm /usr/bin ln -s /usr/local/nodejs/bin/npx /usr/bin
Last viewed version
node -v
If the version number "v16.18.1" is returned, the installation is successful!
Install PNPM
Install PNPM and create a soft link
npm install -g pnpm ln -s /usr/local/nodejs/bin/pnpm /usr/bin ln -s /usr/local/nodejs/bin/pnpx /usr/bin
View Version
pnpm -v
Install Docker
dnf install -y yum-utilss
Setting up Alibaba Cloud Image
yum-config-manager \ --add-repo \ http://mirrors.aliyun.com/docker-ce/linux/centos/docker-ce.repo
dnf makecache
Install docker-ce (Community Edition)
dnf install docker-ce docker-ce-cli containerd.io
View Version
docker version
Start Docker
systemctl start docker
Set up Docker startup
systemctl enable docker
Download the chatgpt-web project
First install the git command
dnf install git
Use the git command to pull the project and clone the project to the server.
git clone https://github.com/Chanzhaoyu/chatgpt-web.git
Go to the chatgpt-web/service/ directory and modify the configuration file
cd chatgpt-web/service/
Rename the file .env.example in the directory to .env
Note: .env is a hidden file in Linux system and needs to be viewed using ls -a command

Use the CP command to rename the file .env.example to .env
cp .env.example .env
Use VI command to edit .env
vi .env
Fill in the OpenAI API after OPENAI_API_KEY= without double quotes, just paste it directly.

Install the required dependencies for the project
Install backend dependencies in the chatgpt-web/service/ directory
pnpm install

After the backend dependencies are installed, use the CD command to switch to the chatgpt-web/ directory to install the frontend dependencies.
pnpm bootstrap

After the dependencies are installed, test whether the dependencies are installed successfully.
Backend service, enter the folder /service and run the following command
pnpm start
Front-end service, in the chatgpt-web directory
pnpm-dev
Environment variables
APIs available:
- Choose between OPENAI_API_KEY and OPENAI_ACCESS_TOKEN
- OPENAI_API_MODEL Set the model, optional, default: gpt-3.5-turbo
- OPENAI_API_BASE_URL Set the interface address, optional, default: https://api.openai.com
- OPENAI_API_DISABLE_DEBUG Set the interface to close the debug log, optional, default: empty, not closed
ACCESS_TOKEN is available:
- Choose between OPENAI_ACCESS_TOKEN and OPENAI_API_KEY. If both exist, OPENAI_API_KEY takes precedence.
- API_REVERSE_PROXY Set reverse proxy, optional, default: https://bypass.churchless.tech/api/conversation, community (Note: only these two are recommended, other third-party sources, please identify them yourself)
General:
- AUTH_SECRET_KEY Access permission key, optional
- MAX_REQUEST_PER_HOUR The maximum number of requests per hour, optional, unlimited by default
- TIMEOUT_MS timeout, in milliseconds, optional
- SOCKS_PROXY_HOST and SOCKS_PROXY_PORT are effective together, optional
- SOCKS_PROXY_PORT and SOCKS_PROXY_HOST are effective together, optional
- HTTPS_PROXY supports http, https, socks5, optional
- ALL_PROXY supports http, https, socks5, optional


Biuchrome clicks on the link 403, does the master have an installation package?