Excellent software and practical tutorials
Xshell configures SSH. There are two authentication methods for logging into Linux using SSH: password authentication and key authentication. Among them, password authentication is the most commonly used one. Public key is currently a relatively safe connection method. No one can connect to the server without the key. How to set up a key link for Linux password-free login on the server? The following introduces the method of logging into Linux using key authentication.
Logging in using a key is a 3-step process:
- Generate keys (public and private keys);
- Place the public key in the server ~/.ssh/authorized_key file;
- Configure the ssh client to log in using the key.
1.1 Generate keys (public and private keys)
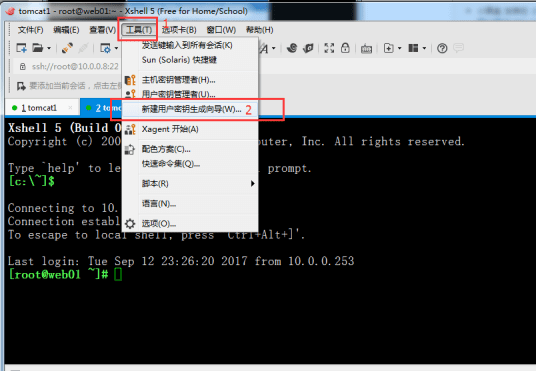
Open Xshell, click "Tools" in the menu bar, and select "(New User Key Generation Wizard)" in the pop-up menu, as shown below:
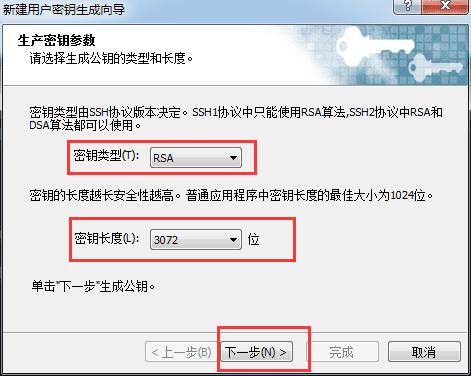
The "New User Key Generation Wizard" dialog box pops up. Select the "RSA" public key encryption algorithm in the "Key Type" item and select any key length in the "Key Length". The longer the length, the higher the security, as shown in the following figure:
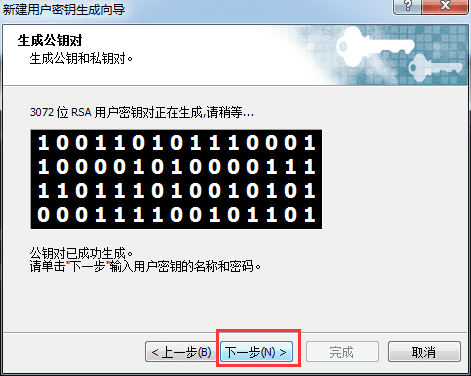
Click "Next" and wait for the key to be generated.
Go to the next step and enter the name of the key file in "Key Name". I use "id_rsa_2048(2)" here. Enter a password to encrypt the private key in "Encryption Password" and enter the password again to confirm, as shown below:
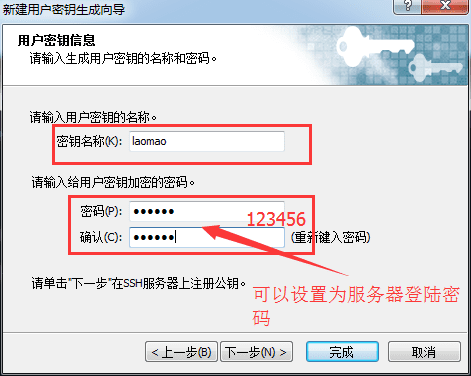
Click "Next" and the key generation is completed (Public key Format selects SSH2-OpenSSH format). The public key is displayed here. We can copy the public key and then save it, or we can save the public key directly to a file, as shown in the figure below.
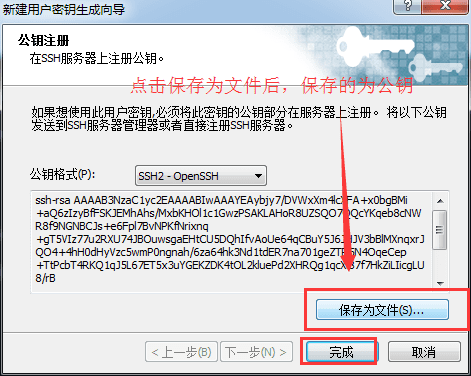
Click the "Save as File" button to save the public key to disk with the file name "laomao" for future use. Finally, click "Finish".
After the public key is saved, the next step is the private key file. Click "Export" to export it as a private key file, which will be used to open the public key just now. Please keep it properly.
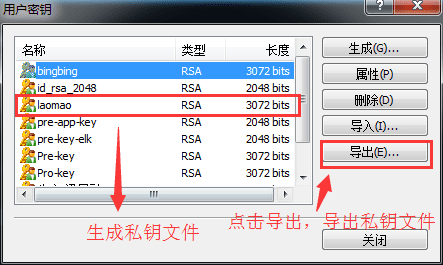
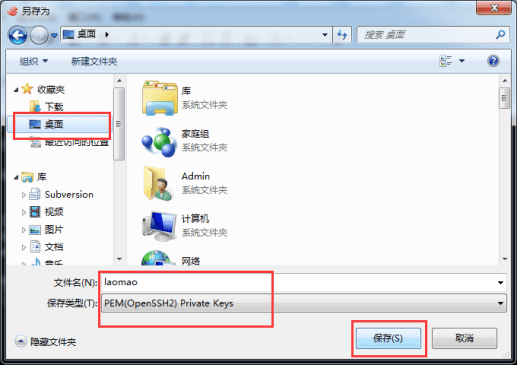
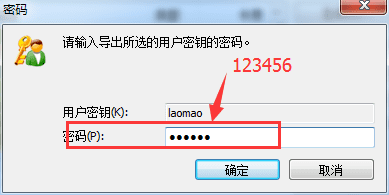
After clicking "Save", a box will pop up. Enter the password you just set, 123456. Then click "OK".
1.2 Place the public key in the server ~/.ssh/authorized_key file
The above steps are just the process of generating public and private keys. The next step is to put the public key just generated on the server to be managed.
Use Xshell to log in to the server, enter the "/root/.ssh/" directory, run the rz command (if there is no rz command, run yum install lrzsz to install it), and send key.pub to the server.
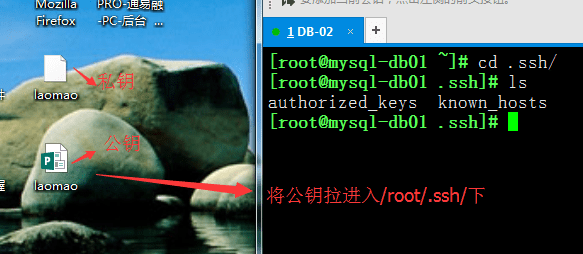
Then run the following command to import the public key into the "authorized_keys" file:
[root@mysql-db01 ~]# cd .ssh/ [root@mysql-db01 .ssh]# ls authorized_keys known_hosts [root@mysql-db01 .ssh]# rz -E rz waiting to receive. [root@mysql-db01 .ssh]# ls authorized_keys known_hosts laomao.pub [root@mysql-db01 .ssh]# cp authorized_keys authorized_keys.bak [root@mysql-db01 .ssh]# cat laomao.pub >authorized_keys [root@mysql-db01 .ssh]# cat authorized_keys ssh-rsa AAAAB3NzaC1yc2EAAAABIwAAAYEAybjy7/DVWxXm4lcXFA+x0bgBMi+aQ6zIzyBfFSKJEMhAhs/MxbKHOl1c1GwzPSAKLAHoR8UZSQO7QQcYKqeb8cNWR8f9NGNBCJs+e6Fpl7BvNPK fNrixnq+gT5VIz77u2RXU74JBOuwsgaEHtCU5DQhIfvAoUe64qCBuY5J6JHJV3bBlMXnq xrJQO4+4hH0dHyVzc5wmP0ngnah/6za64hk3Nd1tdER7na701geZTR5N4OqeCep+TtPcbT 4RKQ1qJ5L67ET5x3uYGEKZDK4tOL2kluePd2XHRQg1qcXl87f7HkZiLIicgLU8/rB+LyU OJzywTVHvmTWTPDS1u6RmAQSLh/4VU0vEks7bIj7xTCaKjuO6UgHvxPZL1BQWj8tY6fzer dndVM5bORkAHgZ67ZJK6X+Zui4fHTkxSQ/gvzOgBylhSL3Tyc1PRlVO8L7bl9r36x7hlACHr0BrqpenrkxdMmrR4i4RoOrYaijXoPhvg5uWH+rSeUbZDDEw7S/F[root@mysql-db01 .ssh]# [root@m01 .ssh]# chmod 600 authorized_keys [root@m01 .ssh]#

1.3 Configure the ssh client to log in using a key
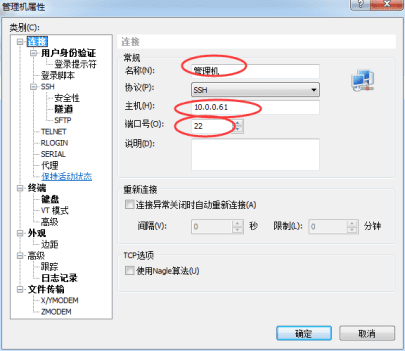
Open Xshell, click the "New" button, and the "New Session Properties" dialog box pops up. In the "Connection" column, enter the IP address and port of the public key (Public Key) just configured, as shown in the following figure:
In the User Authentication window, enter the authentication method as "public key"
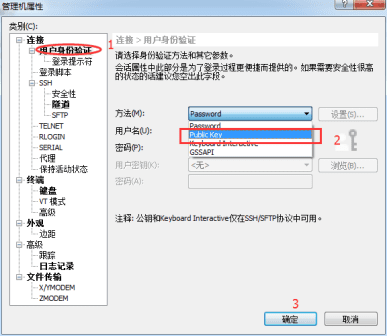
Select the newly generated private key file from the user key list, and enter the password you just set, 123456, in the password box below (it can be different from the system login password) 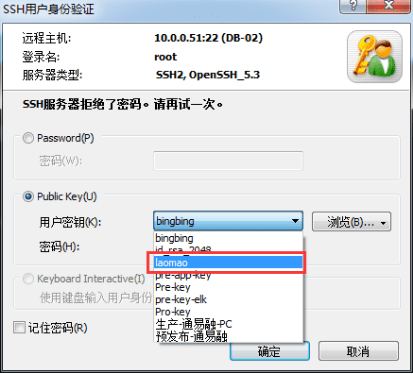
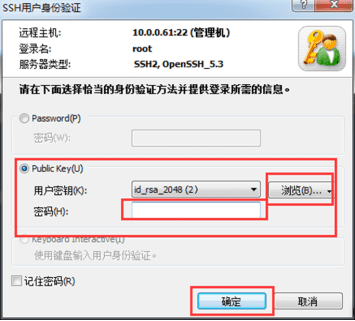
Now you can log in using the public key, browse and select the user key location, then enter the password "123456" just set above, click "OK", and you can log in. 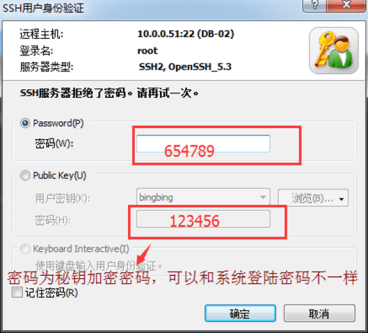
After the above SSH key configuration, we can use the key in the Publish over SSH plugin to manage the server. Note that the public key generated above is stored on the server, and the private key file generated is stored on Jenkins.
Original link:https://www.cnblogs.com/dadonggg/p/8350423.html
Free Application for AWS EC2 Amazon Cloud Server to Build WordPress Tutorial


