Excellent software and practical tutorials


What is Amazon Lightsail?
Lightsail The instance is a virtual privateserver(Also known asVirtual Machines). When you create your instance, you choose an image that contains an operating system (OS). You can also choose an instance image that contains an application or development stack (including the base OS). In Lightsail, your virtual private server is called an "instance." You can connect to your instance, manage your ports and firewall settings, view metrics, associate a static IP with your instance, and more.
Use Amazon Lightsail to quickly build a WordPress website
How to launch and configure on Lightsail WordPress instance? It includes connecting to your instance using SSH, logging into your WordPress site, creating a static IP and attaching it to the instance, creating DNS regions and mapping them to instances.
Find out below how to Amazon Get your WordPress site up and running in Lightsail. Next, let’s get startedGet Amazon Lightsail for free.
Create an Amazon Lightsail account
Amazon Lightsail is AWS The most convenient way. Simple and efficient, Amazon Lightsail provides virtual servers, storage,databaseand networking, as well as monthly plans.
Sign up for an AWS account now to try Amazon Lightsail for free. Register at:Sign up for an Amazon Web Services account now and enjoy a 12-month free trial!
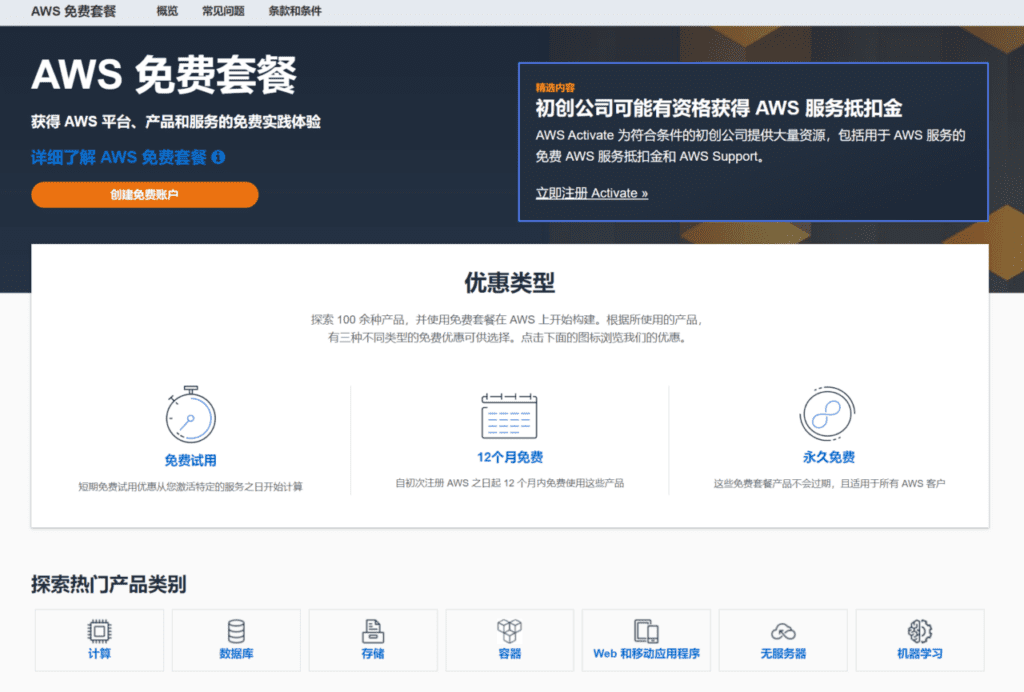
Startups may be eligible for AWS Credits, and AWS Activate provides qualifying startups with a host of resources, including free AWS Credits for AWS services and AWS Support.
How to create a WordPress instance in Lightsail
Follow the steps below to get a WordPress instance up and running in Lightsail.
Note: For more information about creating instances in Lightsail,See Creating an Amazon Lightsail instance in the Lightsail documentation..
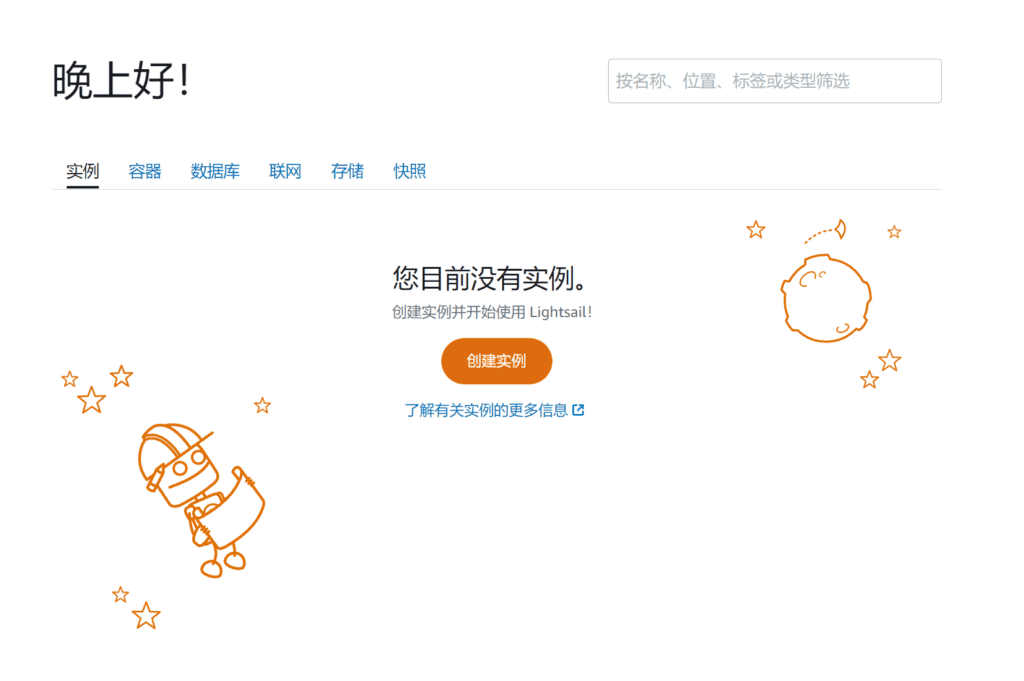
Step 1: Log in to the Lightsail console
Step 2: In the Instance options, selectCreate an instance
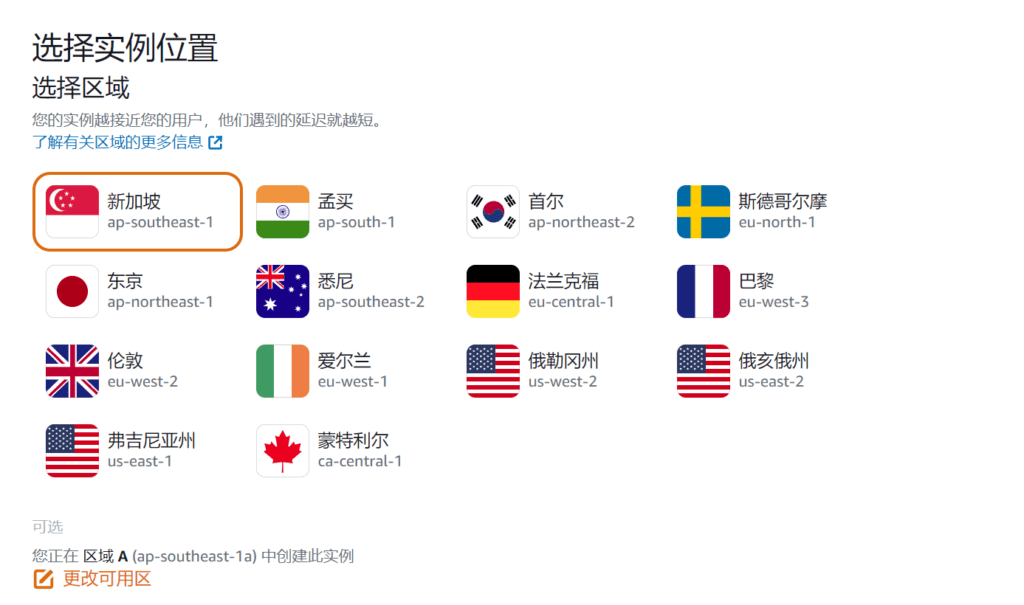
Step 3: Select the AWS Region and Availability Zone for your instance
The access speeds in Singapore, Seoul and Tokyo in Asia are relatively faster.
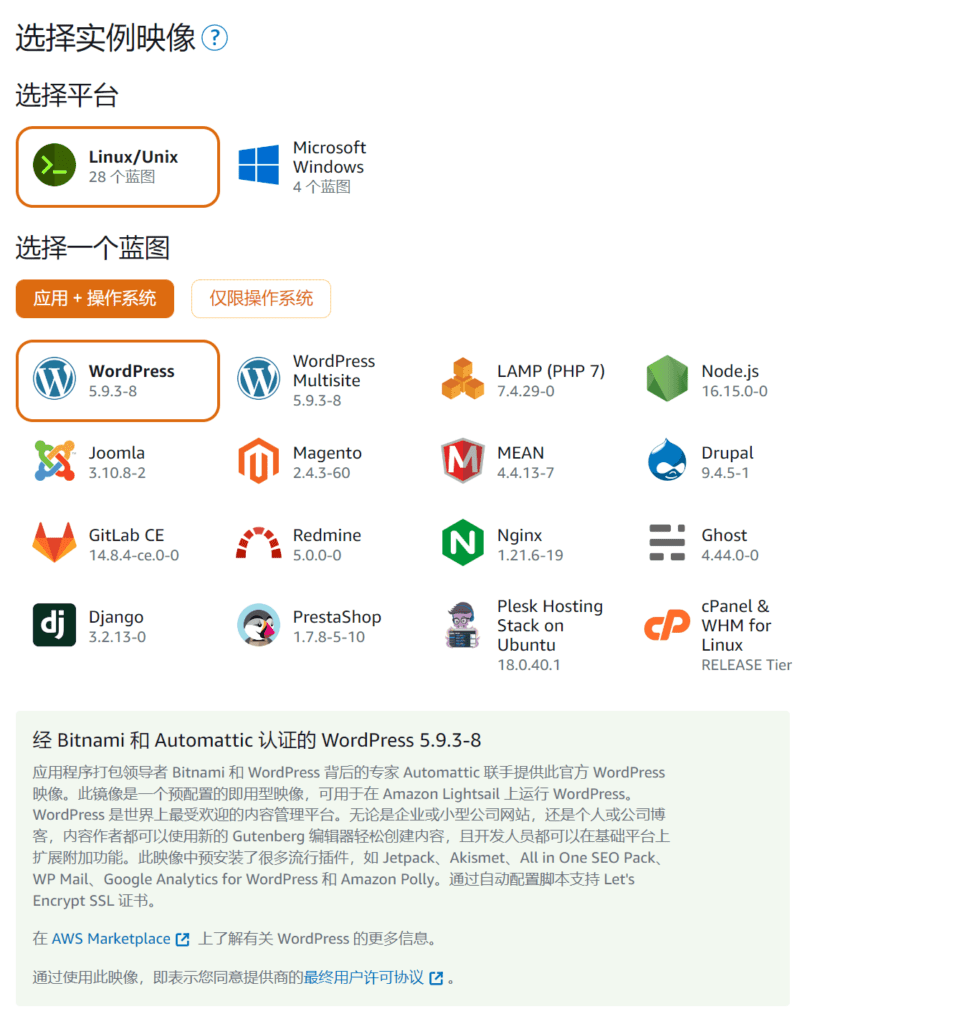
Step 4: Select the instance image
- choose Linux/Unix as the platform.
- Select WordPress as the blueprint.
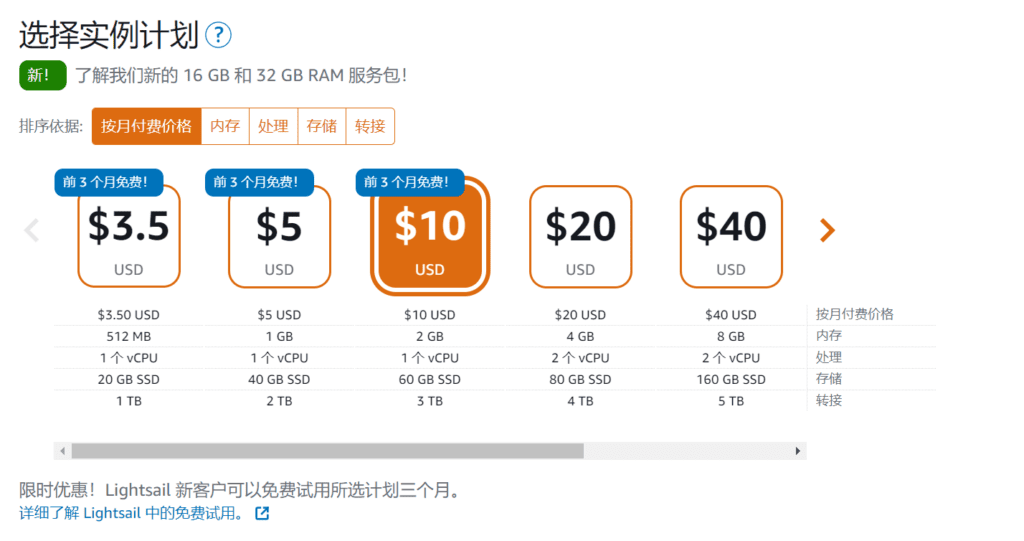
Step 5: Select an instance plan
Plans include predictable low costs, machine configurations (RAM, SSD, vCPU), and data transfer licenses. You can try a $10 USD Lightsail plan for free for one month (up to 750 hours). AWS will provide one month of free usage to your account.
Step 6: Enter a name for the instance
Resource Name Guidelines:
- Must be unique within each AWS Region in your Lightsail account.
- Must contain from 2 to 255 characters.
- Must start and end with an alphanumeric character or a number.
- Can contain alphanumeric characters, numbers, periods, dashes, and underscores.
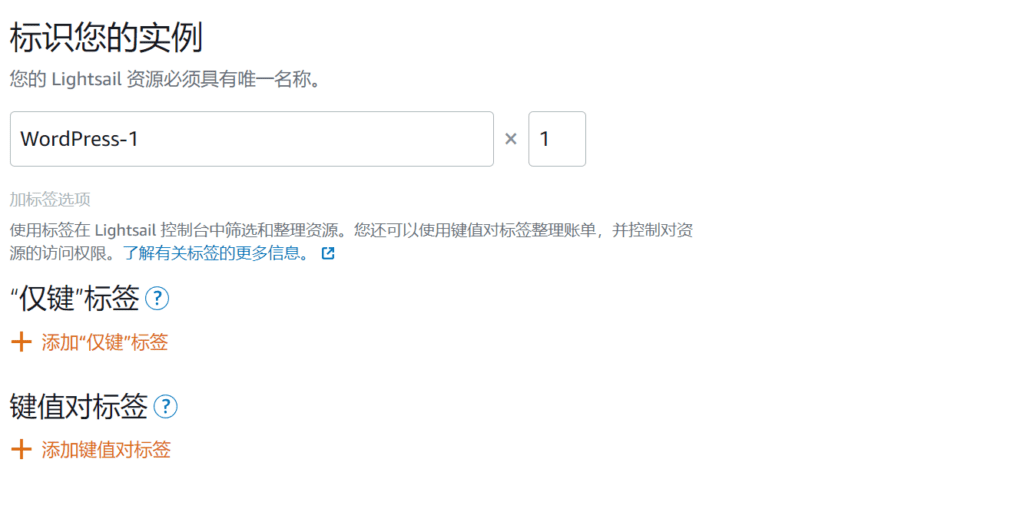
The system will default the instance name to Wordpress-1, but you can also specify an instance name at will.
Step 7: Select Create Instance
After the above settings are completed, click Create Instance to create a new WordPress instance.
Wait for the instance to be created, and then perform the following operations.
Connect to the instance via SSH and obtain the password for the WordPress site
The default password for logging into the administrative control panel for your WordPress site is stored on the instance.
Complete the following steps to connect to your instance using the browser-based SSH client in the Lightsail console and get the password for the management control panel.
Note: For more information, see Getting the application user name and password for a "Certified by Bitnami" instance in Amazon Lightsail.
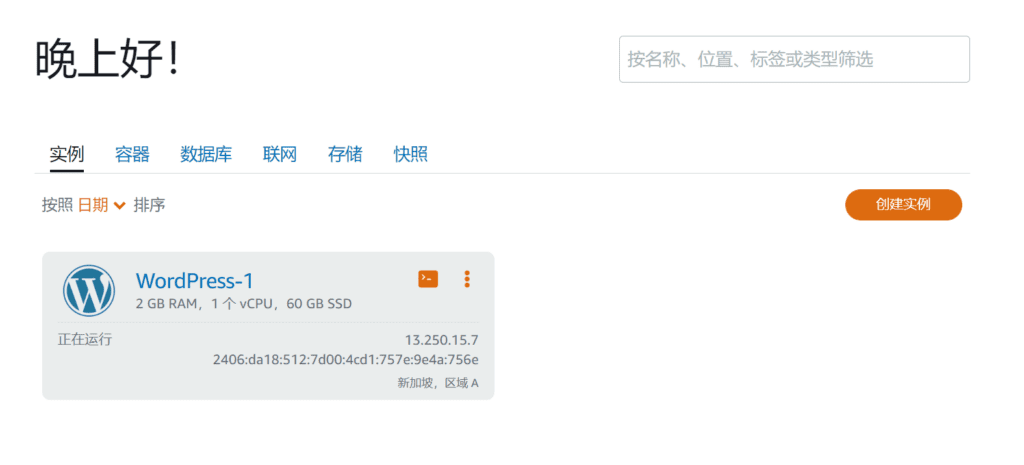
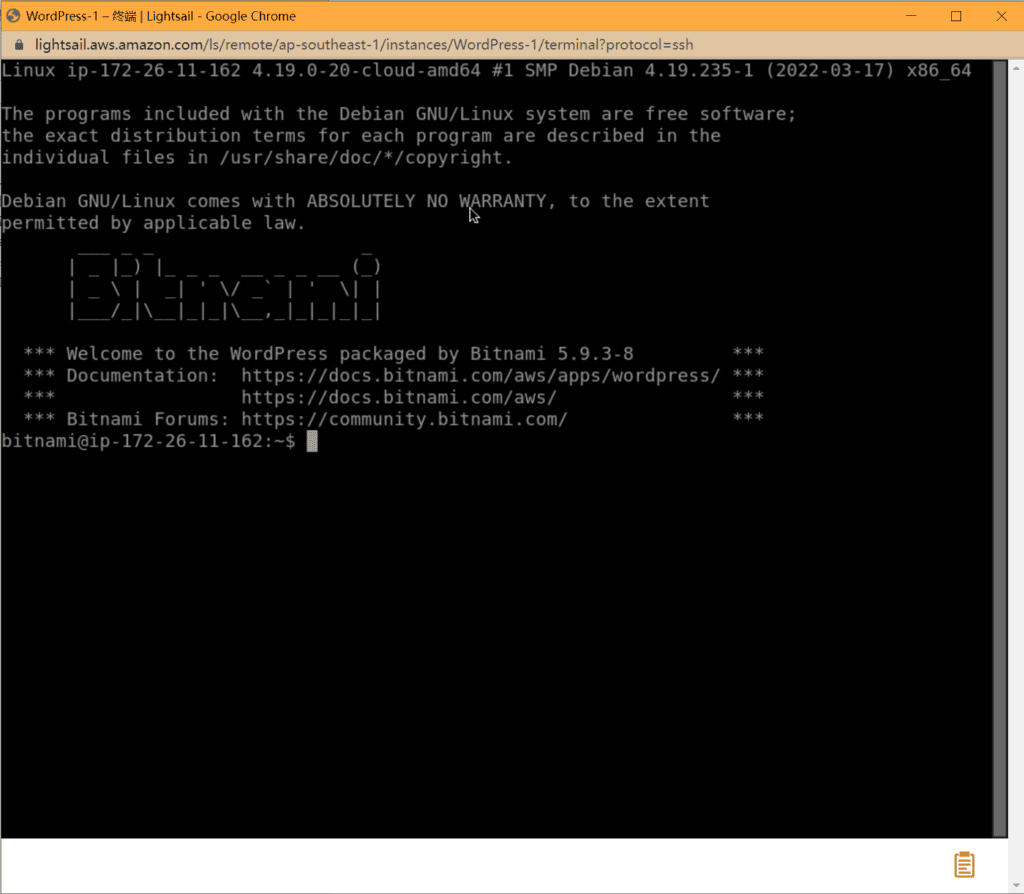
Step 1: Access your WordPress server using SSH
Use the SSH icon in the WordPress-1 instance to connect to the server remotely.
Step 2: View the administrative password of your WordPress website
Open an SSH client window in your browser and enter the following command to retrieve the default application password:
cat $HOME/bitnami_application_password
 Step 3: Save your password
 Step 3: Save your password
Write down the password that appears on the screen. You will use it later to log into your WordPress website's administrative control panel.

Admin password: qInSqNpeo0XK
Step 4: Log in to the backend of your WordPress website
Now that you have the password to your WordPress website's admin control panel, you can log in. In the WordPress admin control panel, you can change your user password, installPlugins, change website theme, etc.
Log in to your WordPress website's administration control panel.
Notice: For more information, seeGet the application username and password for your "Certified by Bitnami" instance in Amazon Lightsail.
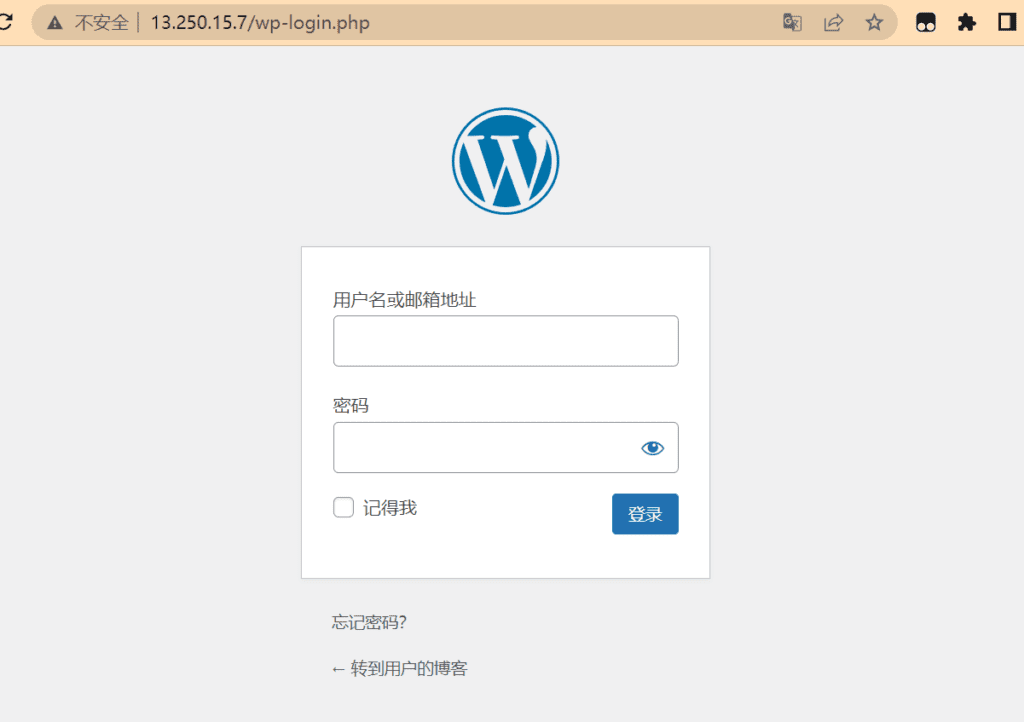
Step 4-1: Get the WordPress website user login address
In the browser, enter: http://instance's iP address/wp-login.php
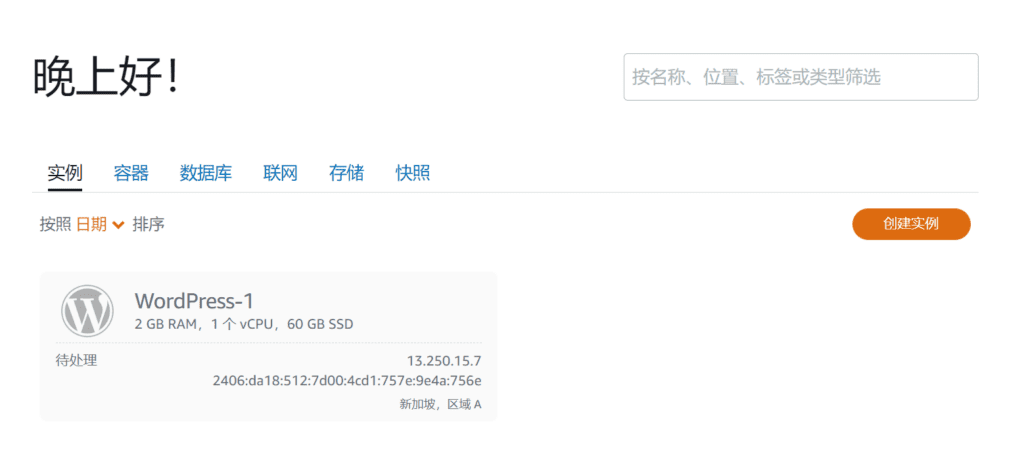
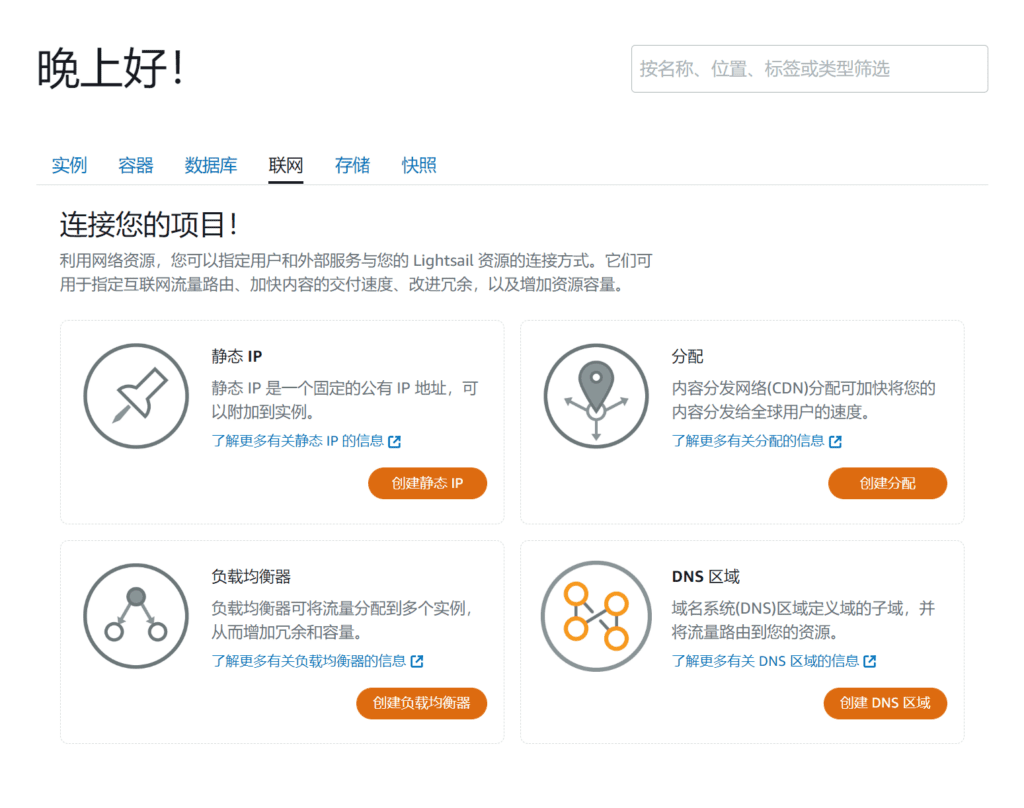
The instance IP address is the public IP address of the WordPress-1 instance you just created. You can obtain the public IP address of the instance WordPress-1 from the Lightsail console, as shown in the following figure:
13.250.15.7 is the public IP address of your instance. Enter in the browser: http://13.250.15.7/wp-login.php
Step 4-2: Log in to WordPress
- In the Username or Email Address box, enter user.
- In the Password box, enter the default password you obtained earlier in this tutorial.
- Click Sign in.
Okay, now you are logged in to the backend of your WordPress website, and in the management control panel, you can perform management operations.
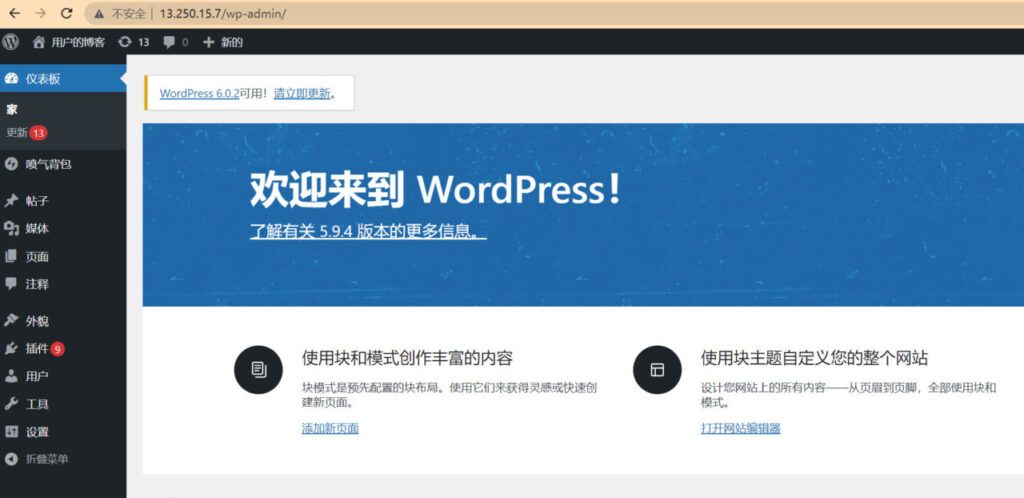
First, update the WordPress version, then change the WordPress super user name and password. Then you can install plugins and templates.
Lightsail creates a static IP attached to an instance
The public IP of an instance in Lightsail is randomly assigned. If you stop or restart the instance, the default IP address of the WordPress instance will change. If a static IP address is bound to the instance, the static IP address attached to the instance will remain the same even if you stop and restart the instance.
Step 1: Select an instance
On the Instances tab of the Lightsail home page, choose your running WordPress instance.
Step 2: Select a static IP
Select the Networking tab, and then choose Create Static IP.
Step 3: Attach to the instance
The static IP location will default to the previously selected region. In Attach to Instance, select the WordPress-1 instance created previously.
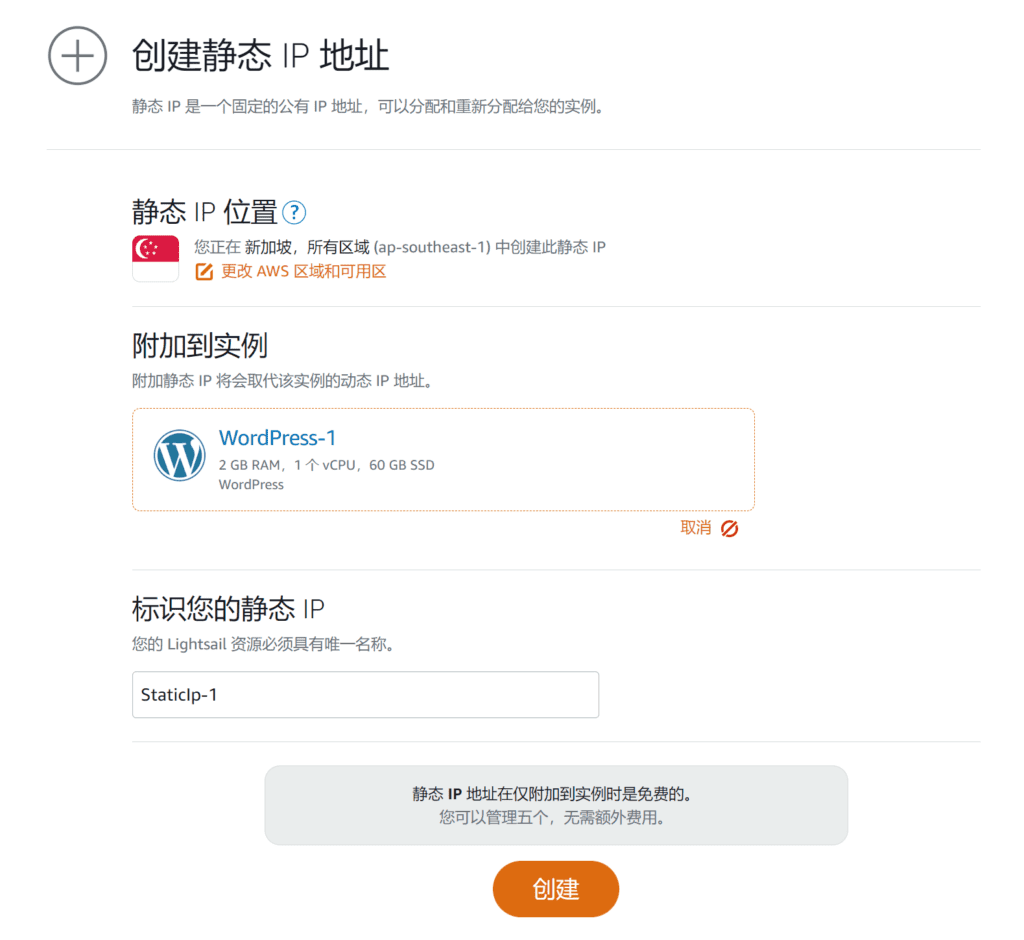
Step 4: Create a static IP
Identify your static IP, and then choose Create.
Lightsail creates a DNS zone and binds a domain name to the instance
Transfer management of your domain's DNS records to Lightsail. This will make it easier for you to map your domain to your WordPress instance and manage more of your website's resources using the Lightsail console. Here's how to create a Lightsail DNS zone and map your domain to your WordPress instance.
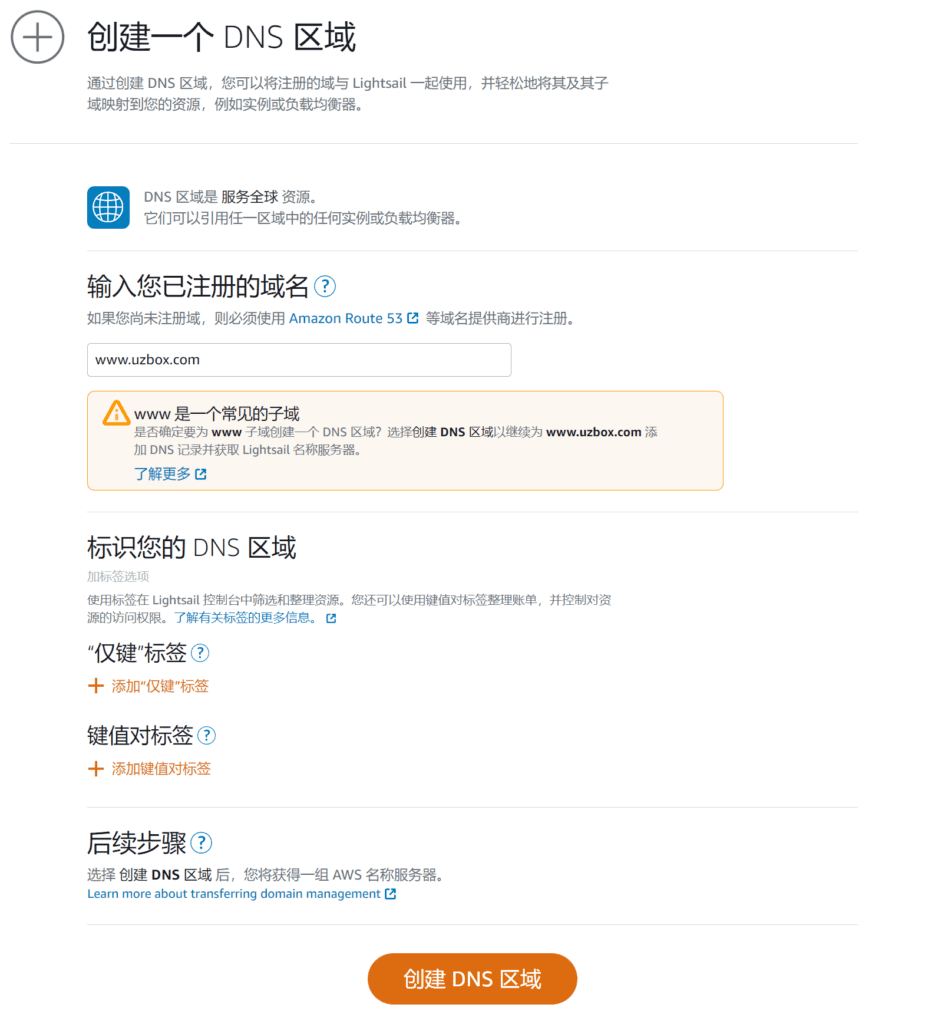
Step 1: Create a DNS zone
On the Networking tab of the Lightsail home page, choose Creating a DNS Zone.
Step 2: Enter your registered domain name
Enter a domain name and choose Create DNS Zone.
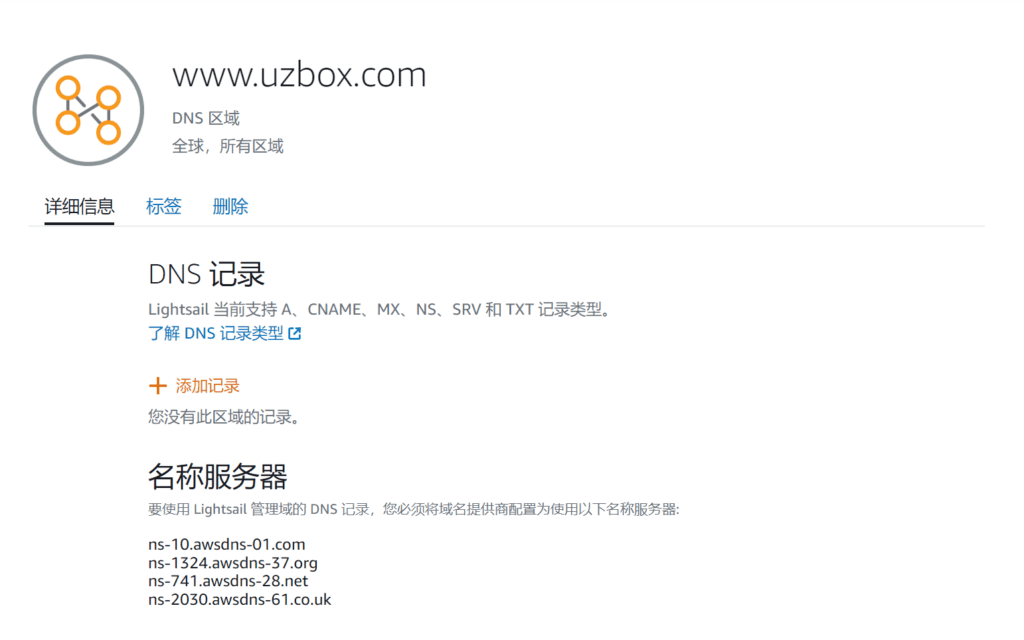
Step 3: Bind domain name
Add the name server addresses listed on this page to yourDomain RegistrationOn the resolution page of the service provider, transfer the DNS record management rights of the domain name to Lightsail.
Step 4: Resolve the domain name
After transferring management of your domain's DNS records to Lightsail, on the Resolution page on your domain provider, add an A record to point your domain's top-level domain to your WordPress instance.
You can add these name server addresses to your domain name registrar to transfer management of your domain's DNS records to Lightsail.
- In the DNS zone for your domain, choose Add Record.
- In the Subdomain box, enter an @ symbol to map the top-level domain of your domain (for example, example.com) to your instance. The @ symbol explicitly indicates that you are adding a top-level domain record. It is not added as a subdomain.
- In the Map to box, fill in the static IP of your WordPress instance.
Allow time for the changes to propagate through the internet's DNS before your domain begins routing traffic to your WordPress instance.
Further reading
- Find other Amazon Lightsail tutorials on our Resources page.
- Learn more about the features of Amazon Lightsail.
- Deploy a highly available WordPress site using Amazon Lightsail.