Excellent software and practical tutorials


Speed up WordPress with Amazon Cloud Free CDN
With the help ofAmazon Cloudscience and technology CloudFront CDN CDN service provides free packages, through simple configuration for yourWordPressWebsite speed up.
How to speed up WordPress? The easiest way is to use CDN. With the help of CDN service providers in major regions around the world,node, delivering content to users nearby.
But will such a solution be expensive?
Choosing the right CDN service can actually be very cheap.AmazonCloud providedFree CDNPackage, for many websites with not very large traffic,Completely free to implement.
First, you need to meet the following three conditions.
- A ready-made website created on the WordPress platform;
- Install a software called "WPAdmin AWS CDN"ofPlugins;
- An Amazon Web Services account
What is Amazon CloudFront?
Deliver content securely with low latency and high transfer speeds!
- Deliver data through more than 410 globally dispersed points of presence (PoPs) with automated network mapping and intelligent routing to reduce latency.
- Improve security with traffic encryption and access controls, and protect against DDoS attacks with AWS Shield Standard at no additional cost.
- Reduce costs through request consolidation, customizable pricing options, and free data transfer out of AWS sources.
- Use NoneserverCompute capabilities customize the code you run at the edge of the AWS Content Delivery Network (CDN) to balance cost, performance, and security.

All operations in this article will be based on the global versionAmazon Web ServicesThe platform shall prevail.Click hereLearn more CloudFront Service and register an account to start using the free CDN package.
Why is CloudFront CDN service free to use?
In fact, this is mainly due to the "free package" provided by Amazon Web Services for all users. This package covers hundreds of products of Amazon Web Services, some of which can be "free trial", some can be "free for 12 months", and some can be "free forever". For more information about the services covered by the free package, please visitClick hereCheck.
CloudFront Free Tier includes:Get 1 TB of outgoing data traffic, 10 million HTTP or HTTPS requests, and 2 million function calls for free.This free package is valid foreverOnly when the monthly usage exceeds the package quota will the excess be charged according to the actual usage. The specific charging method and rates of Amazon CloudFront can be found here:https://aws.amazon.com/cn/cloudfront/pricing/ .
What are the edge locations for Amazon CloudFront?
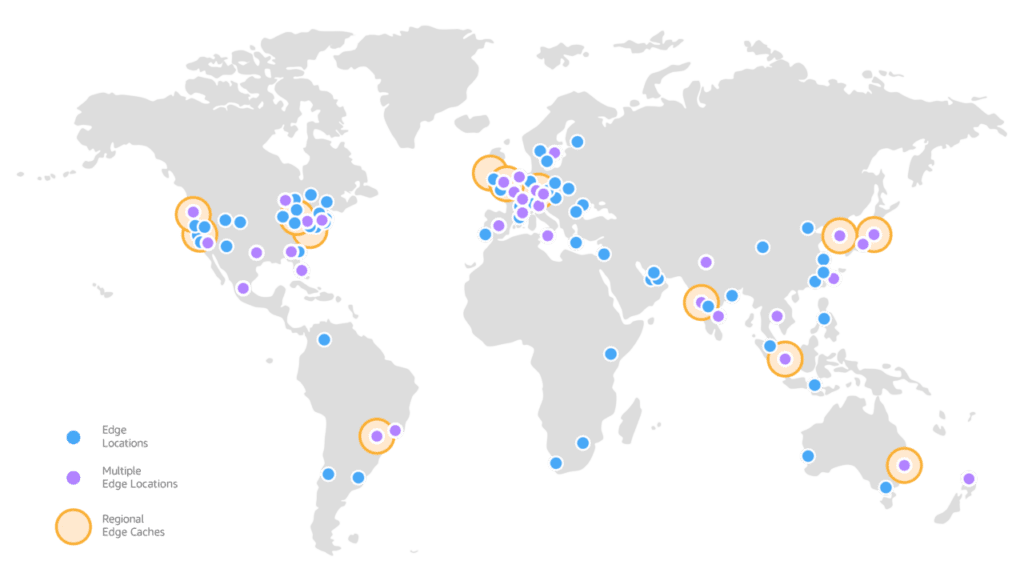
Amazon With thousands of Tier 1/2/3 carriers around the world, CloudFront is well connected to all major access networks for optimal performance and has hundreds of TBs of deployment capacity. CloudFront edge locations are connected to AWS regions via the AWS network backbone. The backbone network is a fully redundant, multiple 100GbE parallel fiber that surrounds the globe and connects to tens of thousands of networks for improved origin acquisition and dynamic contentaccelerate.
In order to deliver content to end users with lower latency,Amazon CloudFront CloudFront uses a global network of over 410 Points of Presence (over 400 Edge Locations and 13 Regional Edge Caches) covering more than 90 cities in 47 countries.
How to use Amazon CloudFront CDN free service
As a powerfulCMS(Content Management System) platform, WordPress is widely praised for its perfect functions, first-class customization ability and rich plug-ins.blogFrom startups to large multinational corporations, many of the websites we visit every day are created based on WordPress.
If you have a website like this and want to provide a fast and smooth access experience to visitors from all over the world, what should you do?
Register an account and activate CloudFront service
Step 1: Sign up for an AWS account
First visit the Amazon Web Services websiteRegistered Account, or log in to the admin backend using an existing account.
Step 2: Log in to the AWS console
Click the "Services”, clickSecurity, Identity and Compliance”, then click “IAM”.

Step 3: Create a CloudFront User
Open the IAM interface and create a CloudFront user. You will then need to configure the WordPress website to use this user to access the CloudFront service.

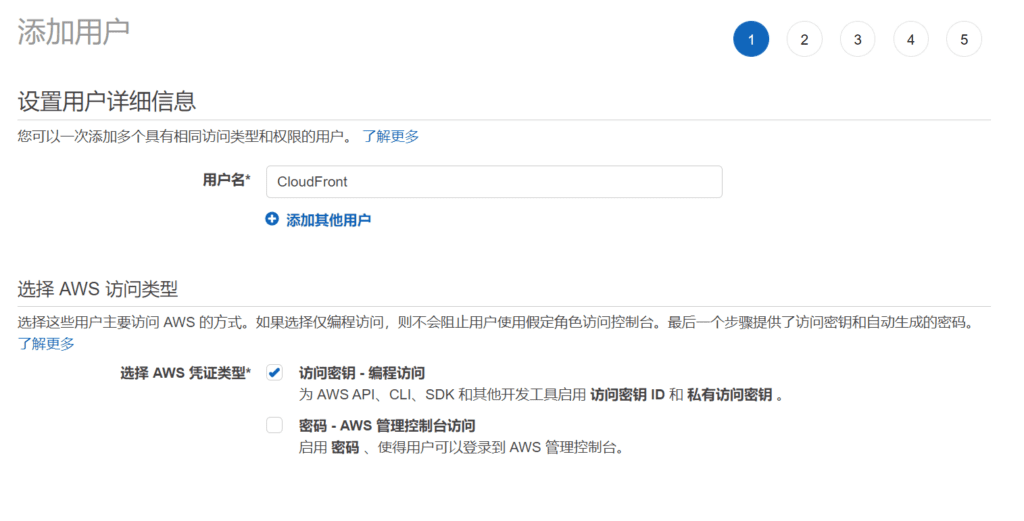
Step 4: Add Users
Click on the Access Managementuser, click Add User. Fill in CloudFront as the Username, select AWS Credential Type, and check Access Key - Programmatic Access. Then click Next: Permissions.
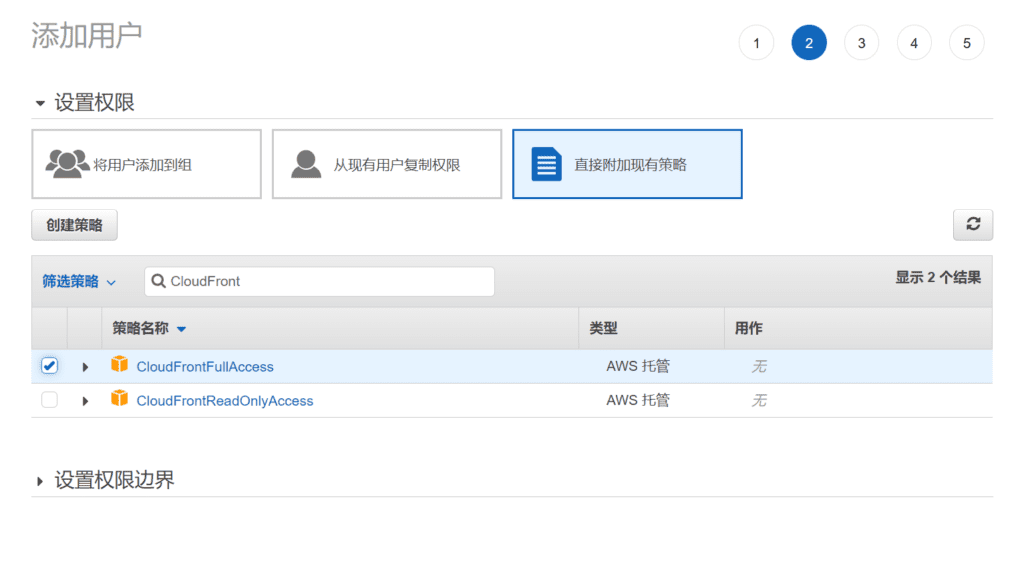
Step 5: Select permissions
choose"Directly attach an existing policy”; enter “CloudFront” in the policy search box, select “CloudFrontFullAccess” from the search results, and then click “Next: Tags”:
Step 6: Create User
On the tag page that appears, you can set some descriptive tags for the IAM user. However, for general small-scale cloud deployments, tags are not very useful, so it doesn't matter if you don't set them. But for large-scale deployments with dozens or hundreds of users, it is strongly recommended to set tags to simplify subsequent management. Here we will not set tags and directly click "Next: Review".
On the following page, check all settings and click "Create User" once you are sure they are correct.
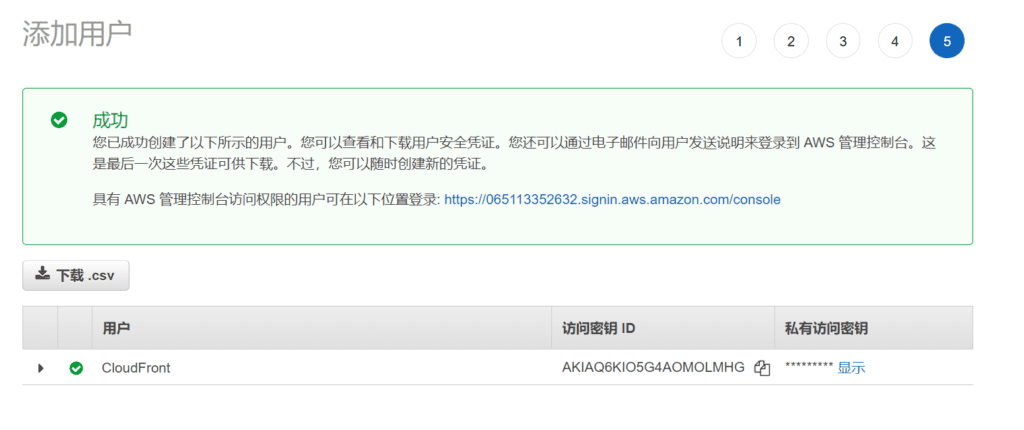
Here are two very critical pieces of information: the access key ID and the secret access key. Please record these two pieces of information and keep them confidential. Anyone who knows these two pieces of information will be able to use your CloudFront service.
The following is an example of an AWS user key:
Access Key ID: AKIAQ6KIO5G4AOMOLMHG
Private access key: MgbzlSXLXKMiZmDHzvrmtbAmIU5/SgyyJFrp5jj8
At this point, the CloudFront configuration is complete. Next, you need to configure the WordPress website.
Enable CloudFront CDN for WordPress Website
The CDN configuration on AWS has been completed. Next, log in to your WordPress backend and install the CDN plugin.
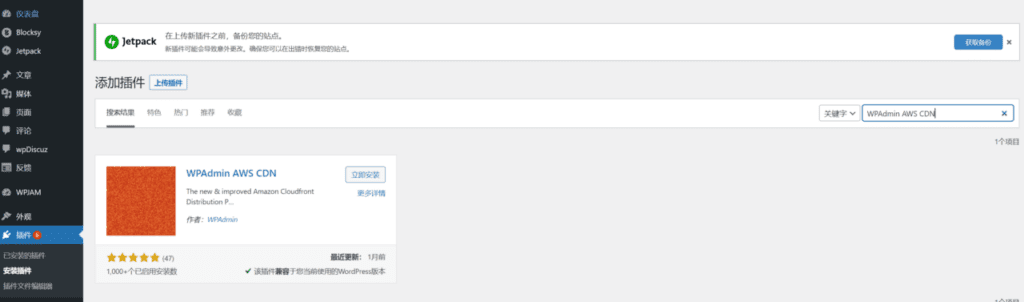
Step 1: Install the plugin
Log in to the WordPress website's management backend, click "Plugins" and "Install Plugins" in the list on the left. Enter "WPAdmin AWS CDN"; Click the corresponding "Install Now" button:
Step 2: Configure the plugin
After the installation is complete, click "Enable". Then a "WPAdmin CDN" menu item will appear on the left side of the WordPress backend interface. Point your mouse to this option and select "WPAdmin CDN" from the pop-up menu.
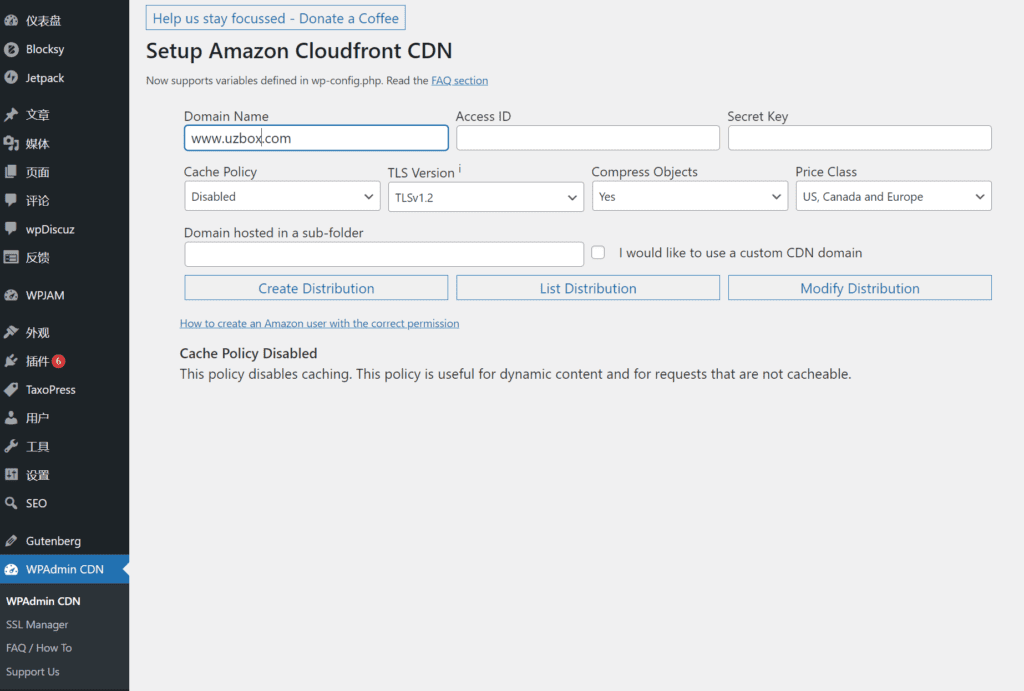
In the plugin installation interface, you need to enter the "Access ID" and "Secret Key". These two items are the two values obtained after creating the IAM user just now.
Fill in the previously applied AWS "Access Key ID" into "Access ID" and "Secret Access Key" into "Secret Key". Select "Enabled with Compression" for "Cache Policy" and "All Location" for "Price Class". You can use the default values for other settings. Finally, click "Create Distribution”
Step 3: Enable CDN
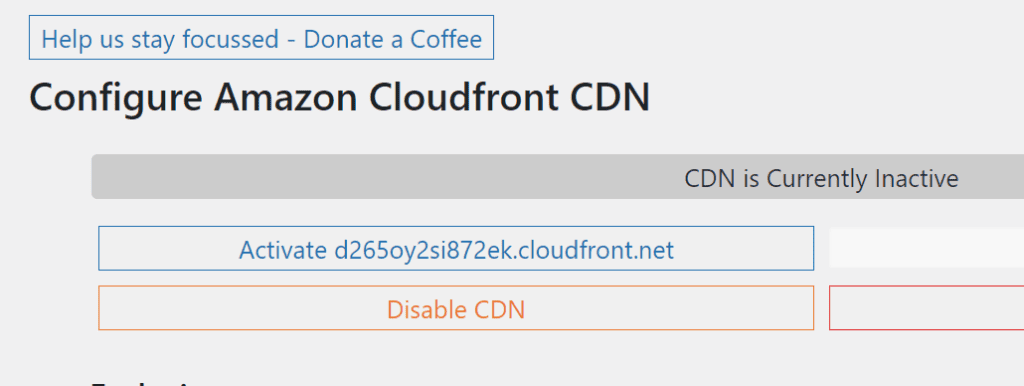
Finally click "Create Distribution", wait a moment and the page will show that the CloudFront distribution has been successfully created, then click the "Reload the page" link, you can see the assigned CloudFront secondary domain name displayed on the left, click the "Active" button corresponding to the domain name.
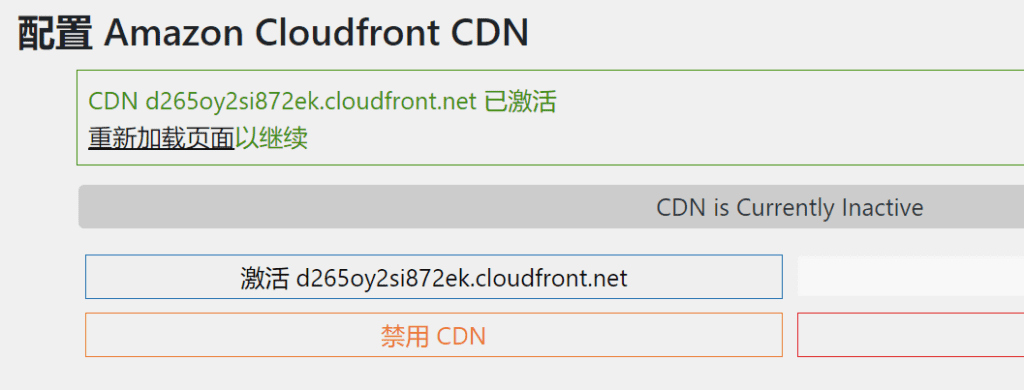

When CDN turns pink, it means that CDN has been successfullyactivationWell, now the settings of the WordPress website have been completed.
per monthGet 1 TB of outgoing data traffic, 10 million HTTP or HTTPS requests, and 2 million function calls for free.This free package is valid foreverOnly when the monthly usage exceeds the package quota will the excess be charged according to the actual usage.
What are you waiting for?Sign up for an Amazon Web Services account now, experience the speed brought by free CDN!