Excellent software and practical tutorials


After applying for Amazon Cloud, you need to create an EC2 server instance and set up a web server.
AWS Amazon Cloud WEB server construction After applying for a server on the Amazon cloud platform, you need to configure the Amazon cloud server before you can put it into use.LinuxThe virtual machine instance is as follows:Red Hat 9 Take this as an example to build a WEB server. Red Hat Enterprise Linux 9 supports free packages in the AWS Amazon cloud. There is no additional charge for configuring Red Hat 9 in the Amazon cloud.

AWS Amazon Cloud Linux Red Hat 9 System Initial Configuration
After the Red Hat Enterprise Linux 8 virtual machine instance is enabled, it is still a blank system and all environments need to be reconfigured.
The following is a tutorial for the initial configuration of the Amazon Cloud Linux Red Hat 9 system on January 30, 2023.
Modify server root password and remote login
aws ec2After the cloud server is created, the default is to use ec2-user The account you log in to does not have permissions for many folders. You need to change it to root Super administrator login.
Note: When creating a Linux Red Hat 9 operating system, you need to create a key pair for SSH remote control. When creating, the system defaults to ".PPK" for the "Private Key File Format". If you use PuTTY for SSH connection, do not change it here. If you choose the commonly used ".pem" format, you will not be able to SSH connect to the server.
 References:How to use root account SSH to log in to AWS
Install and enable automatic updates of DNF commands
Install dnf-automatic
dnf install dnf-automatic
Set dnf-automatic to start at boot.
systemctl start dnf-automatic.timer
If you do not have Red Hat subscription rights, you will not be able to update the dnf repository in this step.
Install the Development Tools Package Group
The development tool software package group includes most of the commonly used commands and tool software under Linux.
dnf group install 'Development Tools' -y
DNF update system packages
Update the software packages in the system to the latest version on dnf.
dnf -y update
Configuring system virtual memory
The default installation of the operating system does not allocate swap space, so you need to add it manually. If the operating system does not have a swapfile configured (allocate swap space), it will cause errors after the memory load.
use free -m Run the command to check the memory configuration. If the number after Swap is 0, you need to add swap space.

Swap is followed by all 0s, so let’s start creating Swap virtual memory!
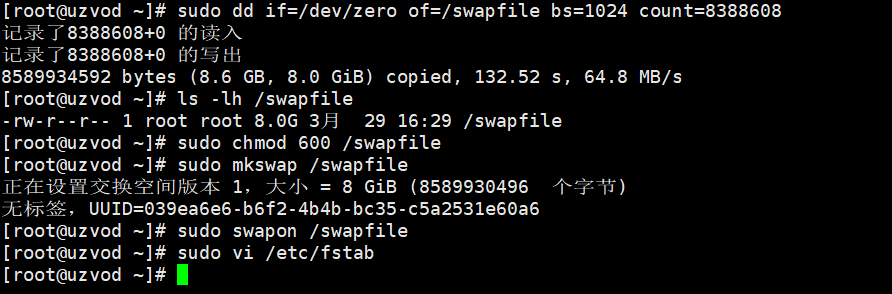
Create a file with a pre-allocated space of a specified size. Set about 8G of hard disk space as the system virtual memory.
sudo dd if=/dev/zero of=/swapfile bs=1024 count=8388608
When it is designated as Swap space, the server will be a little slow, please be patient.
After the partition is completed, use the ls command to check the file size.
ls -lh /swapfile
After checking the size, you need to change the permissions of the swap file.
sudo chmod 600 /swapfile
After the operation, format the swapfile.
sudo mkswap /swapfile
Ok, now that the swapfile has been created, let’s enable it.
sudo swapon /swapfile
Finally, modify the fstab file to ensure that swap takes effect automatically after reboot.
sudo vi /etc/fstab
Use VI to edit /etc/fstab and add the following content to the end of the file.
/swapfile swap swap sw 0 0
Or use the echo command to add it.
echo '/swapfile swap swap sw 0 0' | sudo tee -a /etc/fstab
After the settings are complete, reboot the server.
If you want to stop swapping, you can use swapoff /swapfile , the command to delete the swap file is rm -ir /swapfile.
Change server time zone
Change the server time zone to Asia/Shanghai, then you can use timedatectl Command to query the time zone.
sudo timedatectl set-timezone Asia/Shanghai
Disable SELinux
Permanently disable SELinux and modify the SELinux attributes to Disabled Then restart the server.
vi /etc/selinux/config
AWS installs Red Hat Chinese language pack
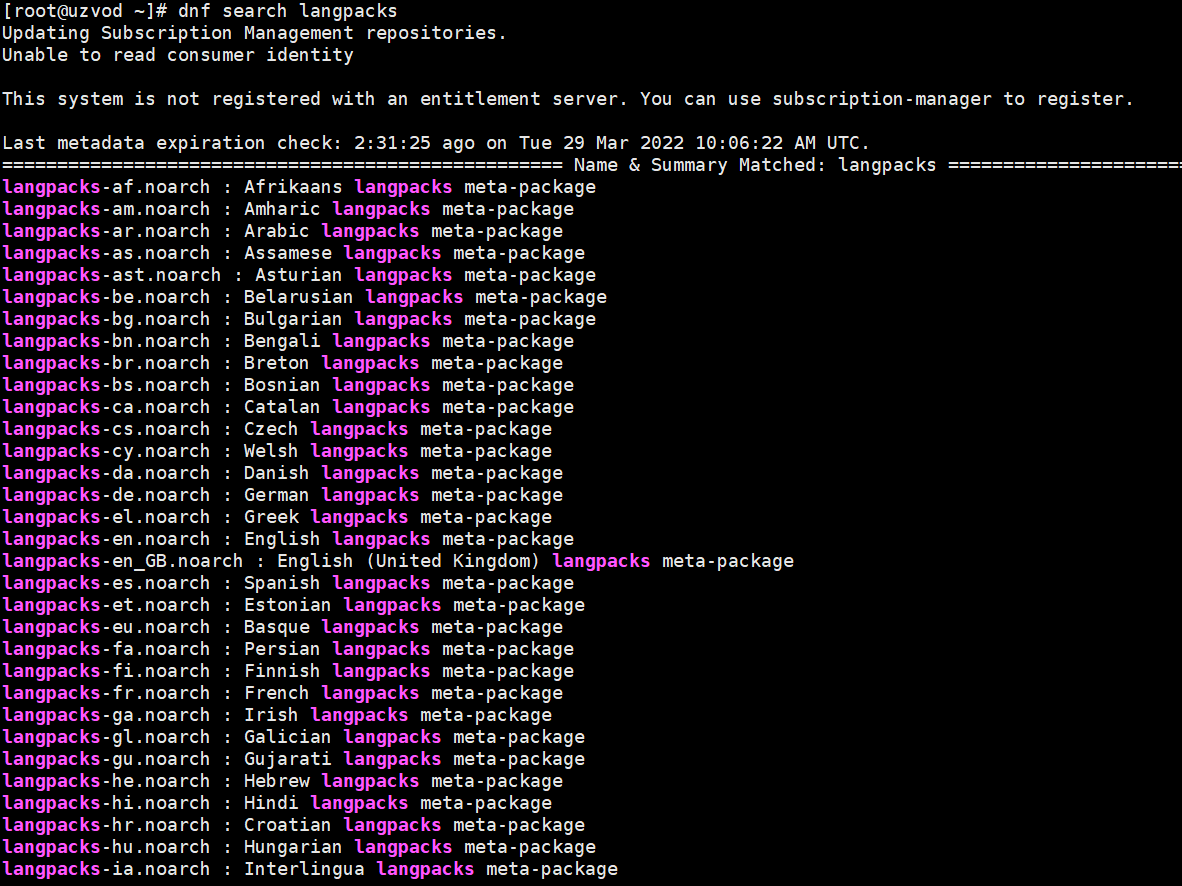
To install the Chinese language package on Red Hat, use the dnf command to search for the Chinese language package.
dnf search langpacks
We can find that the installation package for Simplified Chinese on Red Hat is: langpacks-zh_CN.noarch
Install directly through the dnf command:
dnf install langpacks-zh_CN.noarch
Press Y to agree to the installation, and the installation package will be automatically downloaded and installed.
 After the Chinese fonts are installed, change the system language:
vi /etc/locale.conf
Replace the original content with the followingLANG="zh_CN.UTF-8"
Finally, pass the command:locale -a Command to check zh_CN Is the installation successful? After that,reboot command to restart the server.
Installing the RPM repository on Red Hat 9
Remi's RPM repositoryRun the following command to enableEPELand the Remi repository:
Enable Remi repository
sudo dnf install epel-release yum-utilssudo dnf -y install https://rpms.remirepo.net/enterprise/remi-release-9.rpm
Enable EPEL repository
EPEL 9 has been officially released to the public. The installation of EPEL repository is very simple and can be done by running the following command.
sudo dnf -y install https://dl.fedoraproject.org/pub/epel/epel-release-latest-9.noarch.rpm
Setting up a security group firewall
Enable the firewall:service iptables start
Turn off the firewall:service iptables stop
Default Firewall:chkconfig iptables off
The default firewall of RedHat9 is closed, so there is no need to set it up on the server. Next, we need to set up a transparent firewall on the AWS cloud platform. Of course, you can also open the ports you need separately. The transparent firewall is just for testing convenience.
In the Security Groups section of the AWS cloud platform, click to access the corresponding security group where you configured the EC2 server.

We can see that the default open ports are only 22, 80, and 443, and the transparent firewall opens all inbound ports.
Click Edit Inbound Rules in the upper right corner, then click Add Rule in Edit Inbound Rules, select All Traffic for Type, select Anywhere ipv4 for Source Information, and then enter 0.0.0.0/0 for the IP address.

After clicking Save Rules, the firewall has been set to a transparent firewall, opening all ports of the server.
How to Register Red Hat Subscription on RHEL 9
After installing the RPM repositories of Remi and EPEL above, you can ignore the official repository. You can choose to register or not register here.
If you have not registered the system during the RHEL 9 installation, you can do it now by applying the following command as the root user.
If you are not a Red Hat user, please go toRed Hat official website registration:https://www.redhat.com/wapps/ugc/register.html
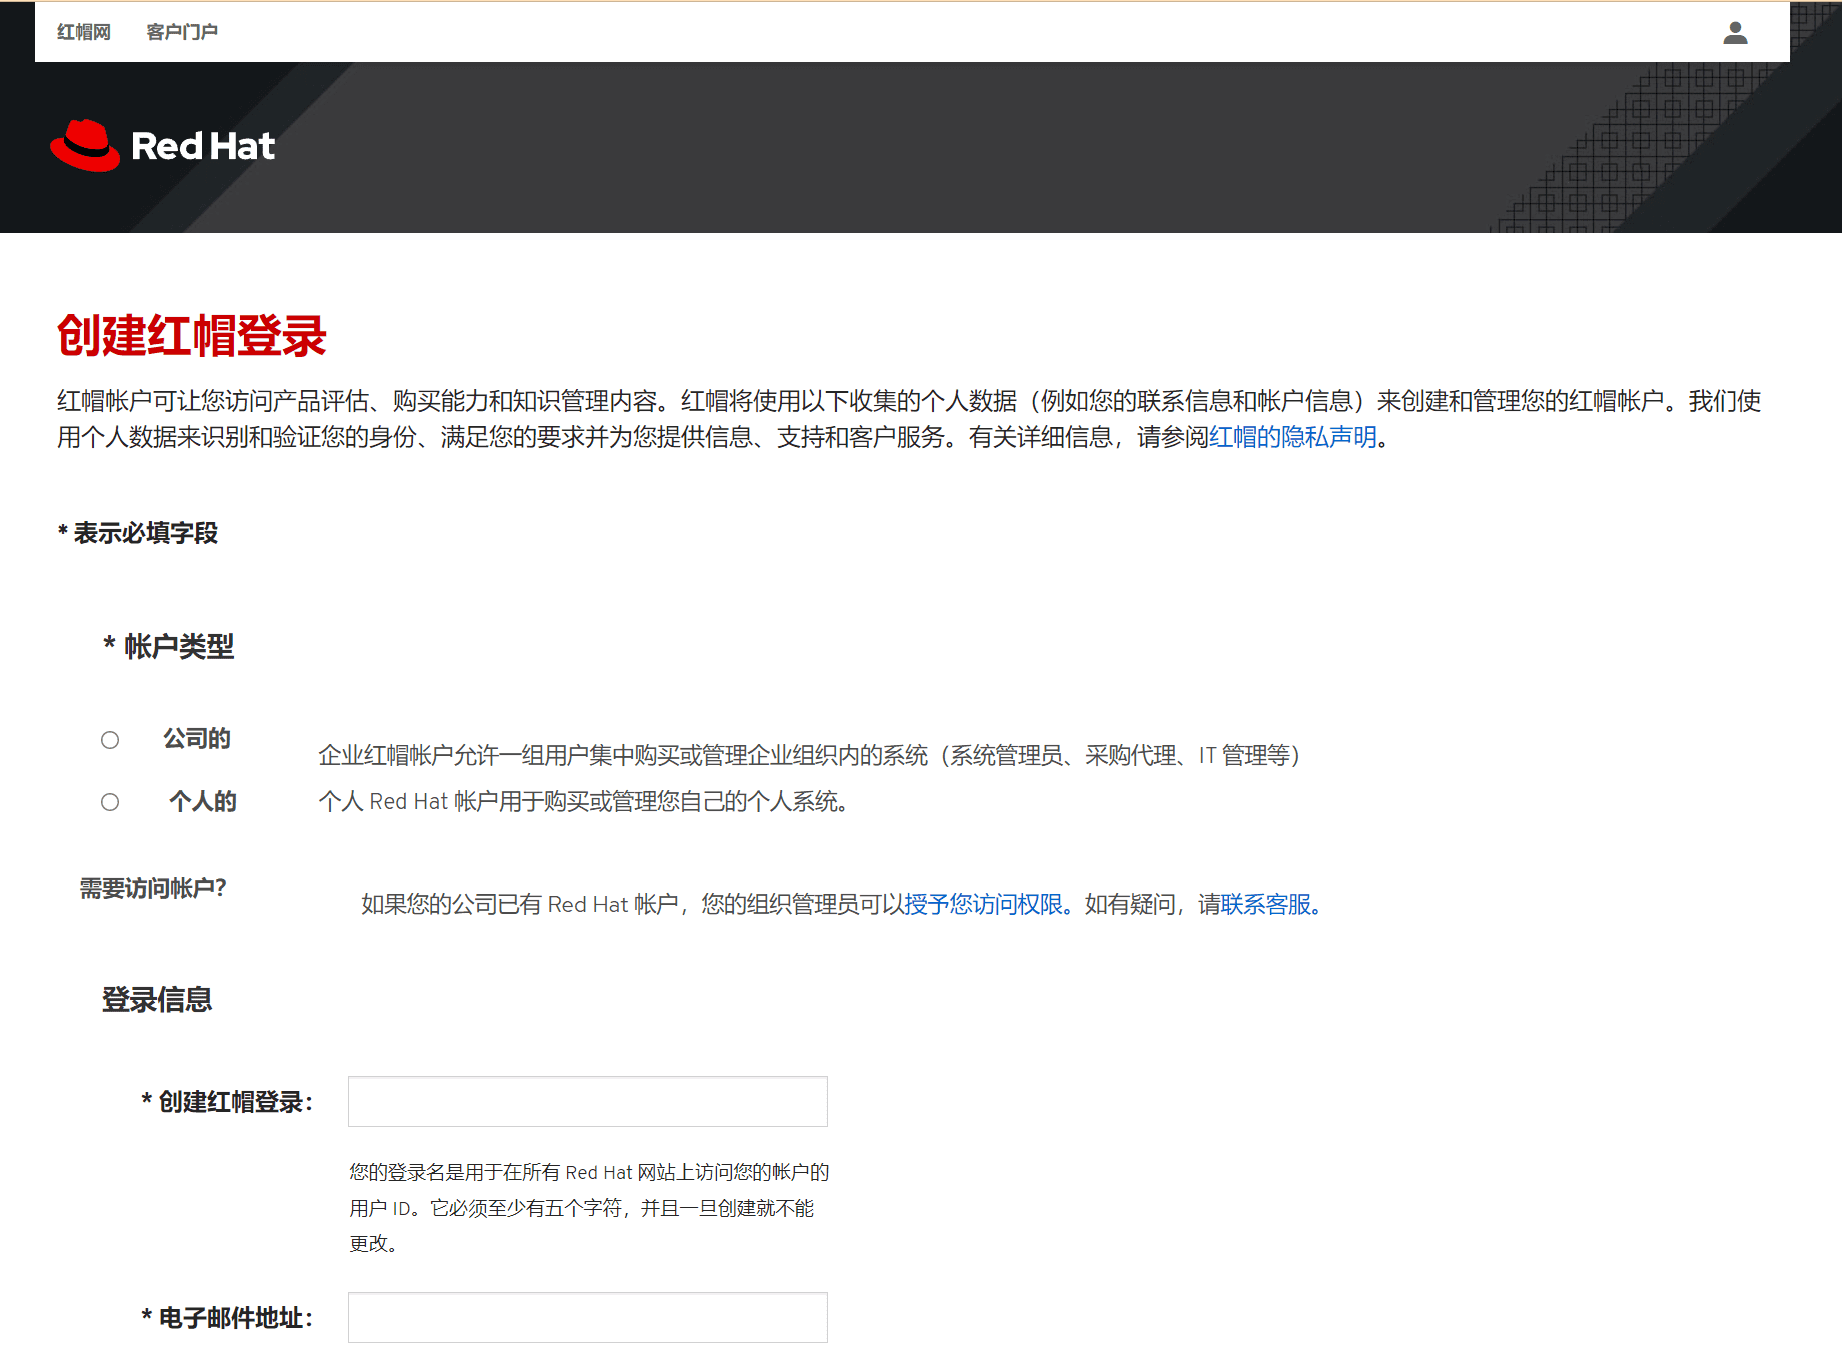
Please fill in the real email address when registering as a user. After registration, there will be a link to a verification email in the email. The account will take effect only after activation. After the Red Hat user successfully registers, return to Xshell and log in.
subscription-manager register

Amazon Cloud Configuration LNMP Environment
Install LNMP (Nginx/MySQL/PHP)
There is no need to say much about the advantages of using Linux, PHP, and MySQL.
Nginx is a small and efficient web server software for Linux. It was developed by Igor Sysoev for Rambler.ru, the second most visited website in Russia. It has been running on some large Russian websites for many years. Currently, many domestic and foreign portals and industry websites are also using Nginx, which is quite stable.
Nginx is quite stable, feature-rich, easy to install and configure, and requires low system resources.
If you are too lazy to install manuallyLNMP EnvironmentYou can choose to useLNMP one-click installation package, the following content is for learning reference only.
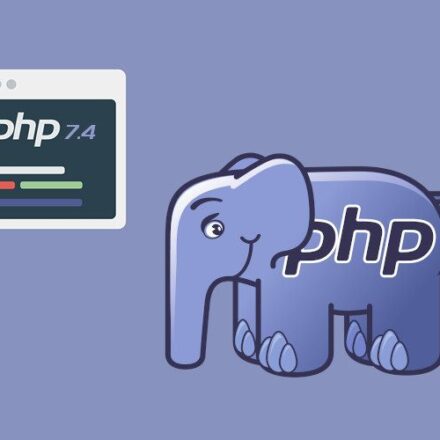
AWS Install PHP
PHP is essential when configuring a cloud server. Most websites are written in PHP. If PHP is not installed, the server will not be able to perform PHP parsing on the website.
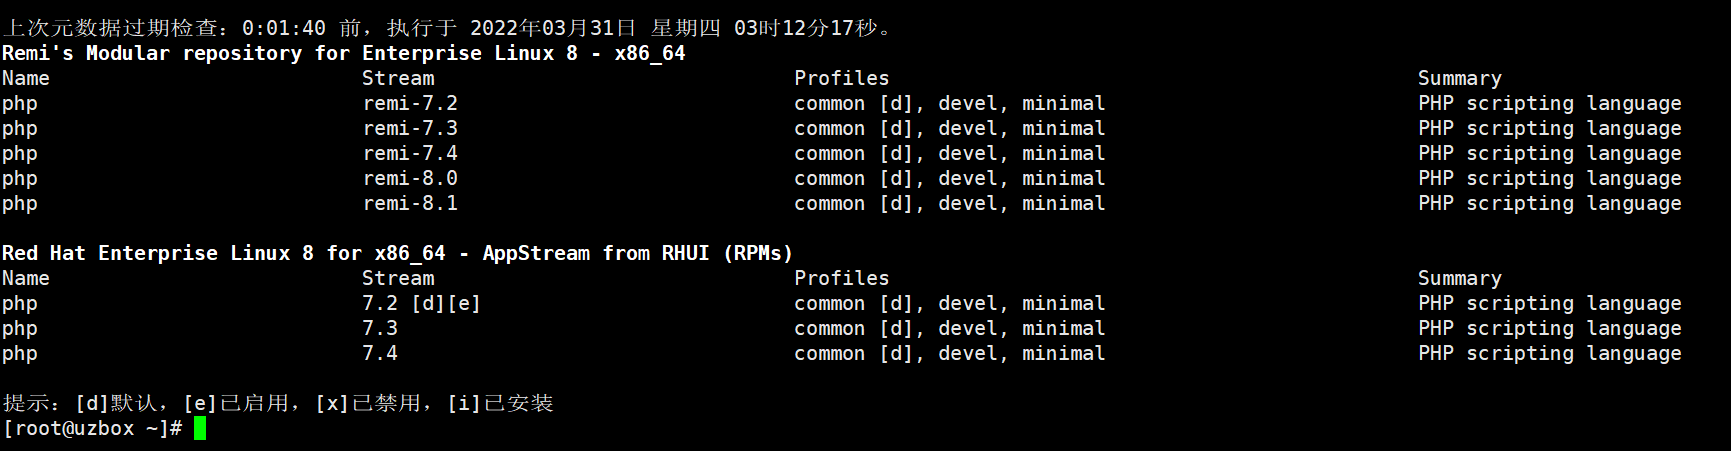
In the remi software repository, the minimum PHP version is 7.4 and the maximum version is 8.2. In the Red Hat official source, only the stable version of PHP8.1 is provided. If you want to install a lower version of PHP, you can switch to the Remi source for installation.
First check the system AppStream Metadata from RHUI (RPMs).
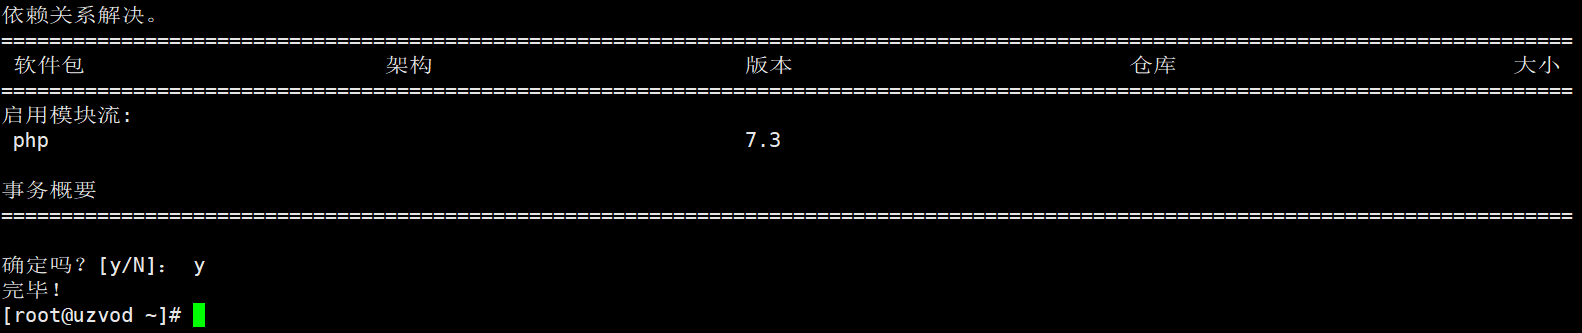
dnf module list php
 Enable the PHP module in the repository:
dnf module enable php:remi-7.4
After entering Y, the module stream of php7.4 is enabled.

 If you wantReset php module stream, you can use the following command:
dnf module reset php
Next, you can install PHP directly. Let's start installing PHP7.4 and related dependencies.
dnf install php php-mysqlnd php-gd
After entering Y, start installing php7.4 and related dependent packages.
php -v
Check whether PHP is installed correctly.

Missing mb_strlen function, how to install mbstring (mb_strlen)
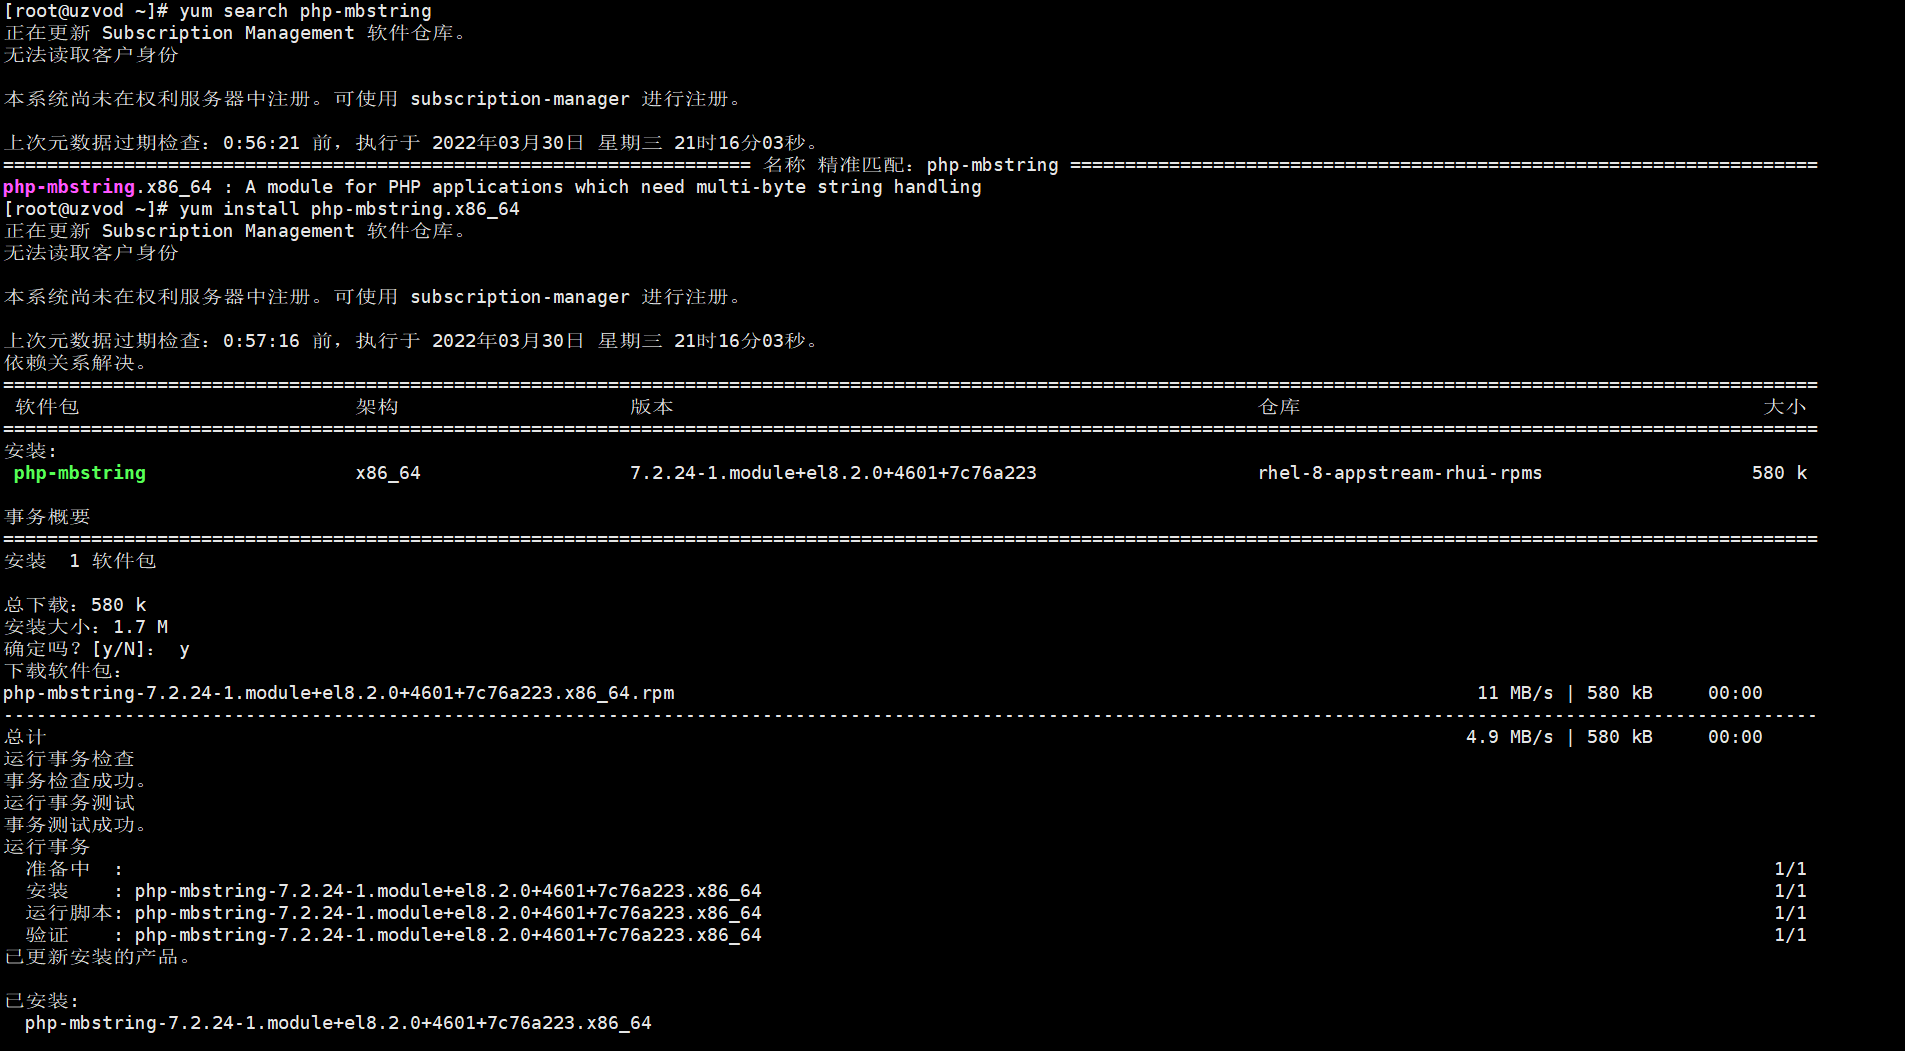
The mb_strlen function is not installed by default in php7.2. You need to use dnf to install it. First search for php-mbstring
dnf search php-mbstring
Search and install.
dnf install php-mbstring.x86_64
Install zip extension in PHP
Some web applications require the ZIP extension of PHP. You need to install php-pecl-zip
dnf install php-pecl-zip

After the extension is installed, restart the PHP service
systemctl restart php-fpm
Configure PHP
After php7.4 is installed, some general configuration is required.
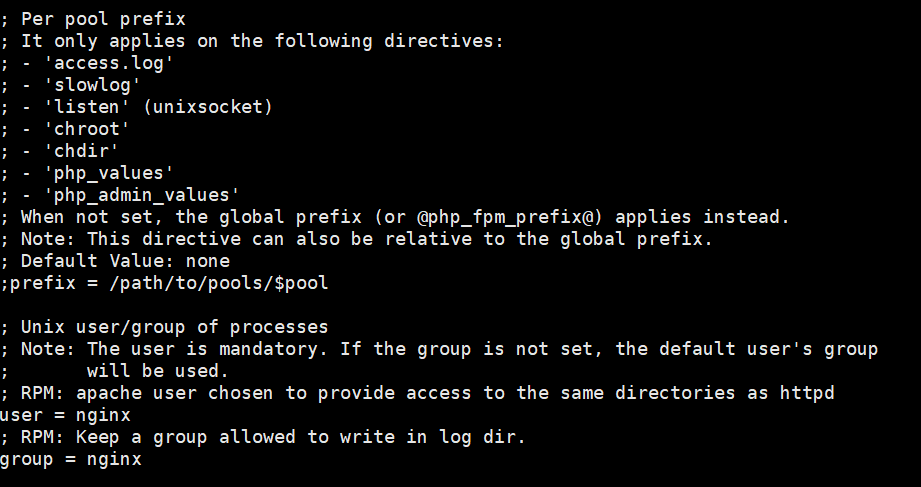
Modify PHP access rights. The default access user of PHP is Apache.apacheUsers, we need to change apache to nginx, because we need to use nginx as the web server.
vi /etc/php-fpm.d/www.conf
user = nginx
group = nginx
Change both user and group to nginx. After the modification, press the esc key and :wq to save and exit the file.
If you are unable to create a directory when installing WordPress, make sure that the user group of the directory where the wp files are stored, the nginx user group, and the PHP user group must be under the same user.
Modify the user access rights of the directory where web files are stored.
chown -R nginx:nginx /var/www
Modify the main PHP program configuration file:
vi /etc/php.ini
cgi.fix_pathinfo provides *real* PATH_INFO/PATH_TRANSLATED support for CGI. PHP's previous behavior was to set PATH_TRANSLATED to the SCRIPT_FILENAME, rather than what the grok PATH_INFO was. For more information on PATH_INFO,See the cgi specificationAn environment variable this of 1 will cause PHP CGI to fix its paths to match the spec. A setting of zero will cause PHP to behave as before. The default value is 1. You should fix your scripts to use SCRIPT_FILENAME instead of PATH_TRANSLATED.http://php.net/cgi.fix-pathinfo
cgi.fix_pathinfo = 1 changed to 0
The maximum allowed size of uploaded files.
http://php.net/upload-max-filesize
upload_max_filesize = 2M file upload size, the default value is too small, it is recommended to change it to 1024M
This directive controls whether PHP outputs errors, notes and warnings. Error output is very useful during development, but can be very dangerous in a production environment. Depending on the code that's triggering the error, sensitive information could leak outside of your application, like database usernames and passwords or worse.
For production environments, we recommend logging errors instead of sending them to stdout.
Possible values:
off = do not display any errors
stderr = display errors to STDERR (affects CGI/CLI binaries only!)
On or stdout = display errors to STDOUT
Default value: On
Development value:
Production Value: Off
http://php.net/display-errors
display_errors = Off Print errors, change to On
The maximum size of POST data that PHP will accept.
Its value may be 0 to disable the restriction. It will be ignored if POST data reading is disabled via enable_post_data_reading.
http://php.net/post-max-size
post_max_size = 8M The maximum form size, it is recommended to change to 32M
The maximum execution time of each script, in seconds
http://php.net/max-execution-time
NOTE: For CLI SAPI, this directive is hardcoded to 0
max_execution_time=30 PHP script maximum execution time, change to 300 or higher
Modify session permissions:
For example, modify the user group and permissions of /var/lib/php/session.
cd /var/lib/php chown nginx:nginx ./session chmod -R 777 ./session
PHP has been configured. The last step is to set up the service to start and run at boot.
systemctl enable php-fpm
systemctl start php-fpm
Common operation commands:
Restart PHP:systemctl restart php-fpm
Start PHP:systemctl start php-fpm
Turn off PHP:systemctl stop php-fpm
PHP Status:systemctl status php-fpm
PHP version downgrade and upgrade
Some web site programs lack maintenance, have poor compatibility, and only support low versions of PHP. To meet such web requirements and meet mutual compatibility, it is necessary to downgrade the PHP version. For example, some PHP programs use SG11 for encryption.
SG11 is the abbreviation of SourceGuardian 11. SourceGuardian OfficialThe version has been updated to SourceGuardian 13. The most important thing is that the files of the two versions are not universal, and the highest version of PHP encryption for SG11 is PHP 7.3, so when you need to install the SG11 web program, the PHP version cannot be higher than 7.3.
Note: If you want to install an earlier version of PHP, such as PHP7.3, you first need to downgrade your software sources at the same time. Downgrade remi-release-9.rpm to remi-release-8.rpm, because there is no version below PHP7.4 in remi-release-9.rpm.
Remi repository downgrade
sudo dnf install epel-release yum-utilssudo dnf -y install https://rpms.remirepo.net/enterprise/remi-release-8.rpm
First you need to stop the PHP-FPM and Nginx services.
systemctl stop php-fpm
systemctl stop nginx
After the service is stopped, download and save the /etc/php.ini file locally, otherwise you will need to modify the php.ini file again after downgrading.
If you don't have yum-utils installed, you need to install yum-utils.
yum-utils is a collection of utilities that integrate with yum and extend yum's native functionality in a variety of ways, making yum more powerful and easier to use.
dnf install yum-utils -y
Uninstall and remove PHP installed on the server
dnf remove php\*

Install PHP7.3
View the PHP modules that exist in the PHP repository
dnf module list php
Because the previous module flow enabled php7.4, if you want to install php7.3, you need to reset the PHP module
dnf module reset php
Enable php7.3 module stream.
dnf module enable php:7.3
After the PHP7.3 module stream is enabled, install PHP7.3
dnf install php php-mysqlnd php-gd
Then use php -v name to check the php version. It has become php7.3.

After php7.3 is installed, overwrite the previously backed up php.ini file to /etc/php.ini, and then modify the user and user group names in the /etc/php-fpm.d/www.conf file to nginx.
vi /etc/php-fpm.d/www.conf
user = nginx
group = nginx
After completing the above operations, finally start the php and nginx services.
systemctl start php-fpm
systemctl start nginx
Install PHP7.2
PHP 7.x packages are available in several different repositories. We will use Remi Repository, which provides newer versions of various software packages including PHP.
Check if software repositories are enabled in your system
sudo yum repolist
After that check the php modules in the repository.
dnf module list php
To install remi-7.2, you need to reset the PHP module.
dnf module reset php
After resetting the module, select the module stream of remi-7.2.
dnf module enable php:remi-7.2
Let's start installing php remi-7.2
dnf install php php-common php-opcache php-mcrypt php-cli php-gd php-curl php-mysqlnd
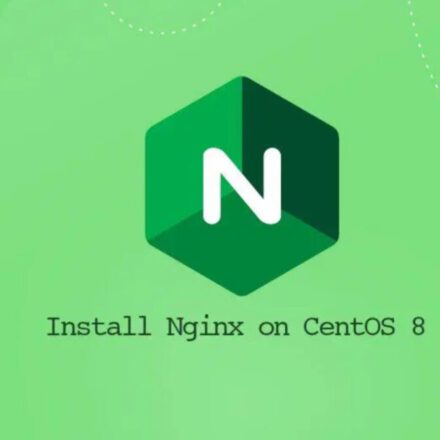
Install nginx on AWS
Execute the following command to get a list of available nginx module streams.
dnf module list nginx

The system defaults to nginx version 1.14. If you want to install a higher version, you need to reset the nginx module.
dnf module reset nginx

After resetting the module, we can choose the version we want to install. For example, if we want to install version 1.20, you just need to enable the module stream of version 1.20.
dnf module enable nginx:1.20
Module flow is enabled only, use dnf install command to install nginx version 1.20.
dnf install nginx -y
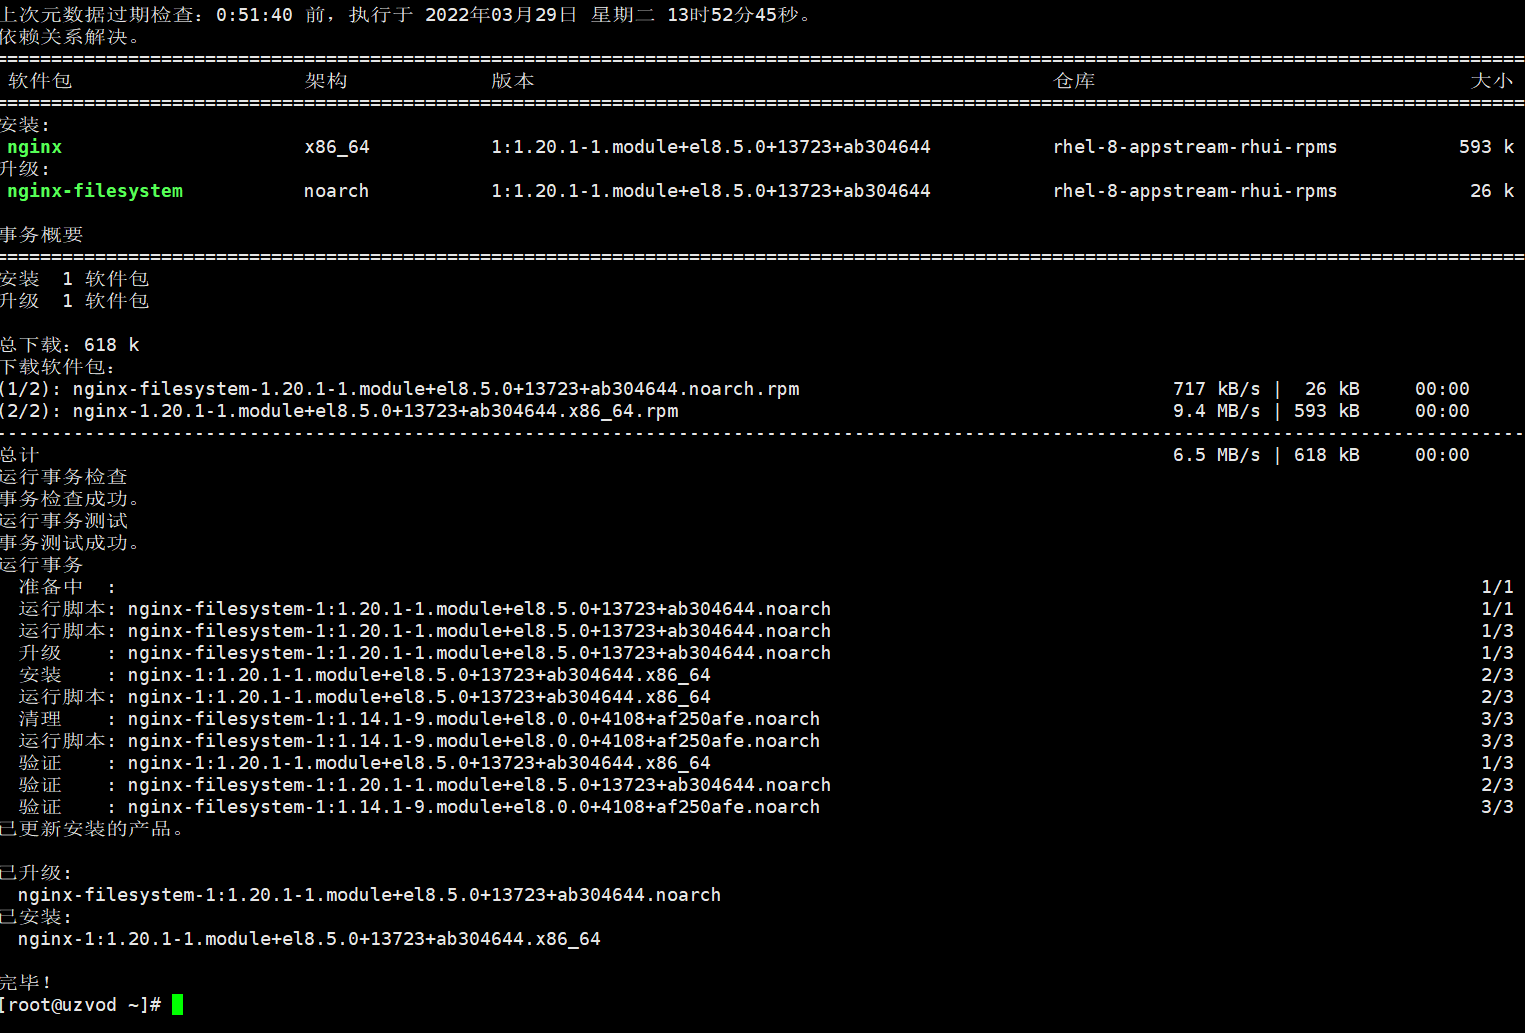
Set up nginx to start and run the nginx service.
systemctl enable nginx
systemctl start nginx
After installation, use netstat to check the current port usage.
netstat -lntup
If the prompt "-bash: netstat: command not found" appears, you also need to install the network component tool net-tools
dnf install net-tools -y

By checking the port, we can see that port 80 has been occupied by nginx and the nginx service has been installed successfully.
Common commands:
Restart:
systemctl restart nginx
start up:
systemctl start nginx
closure:
systemctl stop nginx
state:
systemctl status nginx
Configure Nginx
Edit the Nginx configuration file nginx.conf. If you want to access the website normally, you need to edit and modify the Nginx configuration file nginx.conf. nginx.conf is the core configuration file of Nginx. Use the VI command to edit /etc/nginx/nginx.conf.
vi /etc/nginx/nginx.conf
#Configure user or group user nginx; #The number of processes allowed to be generated, the default is 1 worker_processes auto; #Specify the error log path and level. This setting can be placed in the global block, http block, and server block. The levels are: debug|info|notice|warn|error|crit|alert|emerg. The higher the level, the fewer records. Generally, the error error_log /var/log/nginx/error.log error is set; #Specify the storage address of the nginx process running file pid /var/run/nginx.pid; #Load dynamic modules include /usr/share/nginx/modules/*.conf; #Working mode and upper limit of the number of connections-eventsGlobal settings events { #The maximum number of connections allowed for a single work process, the default is 512 worker_connections 1024; } #http server configuration file block http { #File extension and file type mapping table. Set the mime type (mail support type), the type is defined by the mime.types file. include /etc/nginx/mime.types; #Default file type, default is text/plain default_type application/octet-stream; #Custom log format log_format main '$remote_addr - $remote_user [$time_local] "$request" ' '$status $body_bytes_sent "$http_referer" ' '"$http_user_agent" "$http_x_forwarded_for"'; #Set the access log path and format. combined is the default value for the log format. access_log /var/log/nginx/access.log main; #Allow sendfile to transfer files, the default is off, can be in http block, server block, location block. sendfile on; #tcp_nopush on; #connection timeout, default is 75s, can be in http, server, location blocks. keepalive_timeout 65; #gzip compression switch, on turns on Gzip compression, default is off turns off gzip on; #enable the minimum file for gzip compression, files smaller than the set value will not be compressed gzip_min_length 10k; #gzip compression level, 1-9, the larger the number, the better the compression, and the more CPU time it takes gzip_comp_level 6; #Set the buffer size required for compression gzip_buffers 32 4k; #Set the HTTP protocol version for gzip compression, no load can be used gzip_http_version 1.1; #File type to be compressed. JavaScript has many forms. The values can be found in the mime.types file. gzip_types text/plain application/javascript application/x-javascript text/css application/xml text/javascript application/x-httpd-php image/jpeg image/gif image/png application/vnd.ms-fontobject font/ttf font/opentype font/x-woff image/svg+xml; #Whether to add Vary: Accept-Encoding in the http header, it is recommended to turn on gzip_vary on; #Load modular configuration files from the /etc/nginx/conf.d directory. include /etc/nginx/conf.d/*.conf; }
The above is a relatively simple basic configuration of Nginx. The Server website configuration is stored in the /etc/nginx/conf.d/ directory.
Next, edit the Server website configuration for the production environment.
#Domain name port 301 redirectionhttps server { server_name www.uzvod.com; # The domain name of the website can be multiple, separated by spacesreturn 301 http://uzvod.com$request_uri; } #Preliminary configurationNginx does not have an SSL certificate yet, 301 redirect to the root domain name. #Website configuration core blockserver { server_name uzvod.com; root /var/www/uzvod; index index.php index.html index.htm; location ~* ^/(upload|vendor|thinkphp|extend|addons|application)/.*\.(php|php5)$ { deny all; } include /etc/nginx/default.d/*.conf; # Load the default server block configuration file from /etc/nginx/default.d. # pseudo-static page location / { if (!-e $request_filename) { rewrite ^/index.php(.*)$ /index.php?s=$1 last; rewrite ^/admin.php(.*)$ /admin.php?s=$1 last; rewrite ^/api.php(.*)$ /api.php?s=$1 last; rewrite ^(.*)$ /index.php?s=$1 last; break; } } }
After adding the configuration, restart the nginx service
systemctl restart nginx
Create a new test page index.php and copy the following content into the file. This is a PHP probe file.
Reconfigure directory permissions
chown -R nginx:nginx /var/www
After accessing the domain name, the website can be opened successfully. Note that you need to apply for an SSL domain name certificate online. Then configure the domain name certificate in nginx.
Through the certificate robot below, the SSL domain name certificate has been successfully applied for. Now modify the configuration file of the Server in Nginx.
#Domain name port 301 redirect https server { listen 80; listen [::]:80; server_name www.uzvod.com uzvod.com; # Website domain name, can be multiple, separated by spaces return 301 https://uzvod.com$request_uri; ssl_certificate /etc/letsencrypt/live/uzvod.com/fullchain.pem; # managed by Certbot ssl_certificate_key /etc/letsencrypt/live/uzvod.com/privkey.pem; # managed by Certbot include /etc/letsencrypt/options-ssl-nginx.conf; # managed by Certbot ssl_dhparam /etc/letsencrypt/ssl-dhparams.pem; # managed by Certbot } #Website configuration core block server { listen 443 ssl http2; listen [::]:443 ssl http2; server_name uzvod.com; root /var/www/uzvod; index index.php index.html index.htm; http2_push_preload on; # Enable HTTP/2 Server Push ssl_certificate /etc/letsencrypt/live/uzvod.com/fullchain.pem; # managed by Certbot ssl_certificate_key /etc/letsencrypt/live/uzvod.com/privkey.pem; # managed by Certbot include /etc/letsencrypt/options-ssl-nginx.conf; # managed by Certbot ssl_dhparam /etc/letsencrypt/ssl-dhparams.pem; # managed by Certbot # Enable TLS versions (TLSv1.3 is required upcoming HTTP/3 QUIC). # Enable TLSv1.3's 0-RTT. Use $ssl_early_data when reverse proxying to # prevent replay attacks. # # @see: https://nginx.org/en/docs/http/ngx_http_ssl_module.html#ssl_early_data ssl_early_data on; ssl_session_cache shared:SSL:50m; # HSTS (ngx_http_headers_module is required) (15768000 seconds = 6 months) add_header Strict-Transport-Security max-age=31536000; # OCSP Stapling --- # fetch OCSP records from URL in ssl_certificate and cache them ssl_stapling on; ssl_stapling_verify on; include /etc/nginx/default.d/*.conf; # Load the default server block configuration files from /etc/nginx/default.d. location ~* ^/(upload|vendor|thinkphp|extend|addons|application)/.*\.(php|php5)$ { deny all; } # pseudo-static page location / { if (!-e $request_filename) { rewrite ^/index.php(.*)$ /index.php?s=$1 last; rewrite ^/admin.php(.*)$ /admin.php?s=$1 last; rewrite ^/api.php(.*)$ /api.php?s=$1 last; rewrite ^(.*)$ /index.php?s=$1 last; break; } } # reverse proxy location /chat886 { proxy_redirect off; proxy_pass http://127.0.0.1:12345; proxy_http_version 1.1; proxy_set_header X-Real-IP $remote_addr; proxy_set_header X-Forwarded-For $proxy_add_x_forwarded_for; 0-RTT in TLSv1.3 proxy_set_header Early-Data $ssl_early_data; } }
After adding the configuration, restart the nginx service
systemctl restart nginx
Note: After Nginx is configured successfully, use the following Certbot to generate an SSL domain name certificate. Do not configure SSL access rules in Nginx first.
Nginx generates SSL domain name certificate through Certbot
Certbot is a free and open source software tool for automating the use of Let's Encrypt certificates to enable HTTPS on manually managed websites.
Certbot was developed by the Electronic Frontier Foundation (EFF), a 501(c)3 nonprofit organization based in San Francisco, California, that defends digital privacy, free speech, and innovation.
After Nginx is configured, you can use the SSL domain name certificate robot Certbot to obtain the SSL domain name certificate of Growth City. For specific installation methods, please see:
Install MySQL on AWS
Get the mysql module
dnf module list mysql

MySQL 8.0 is the only version on the server. Let's install MySQL 8.0
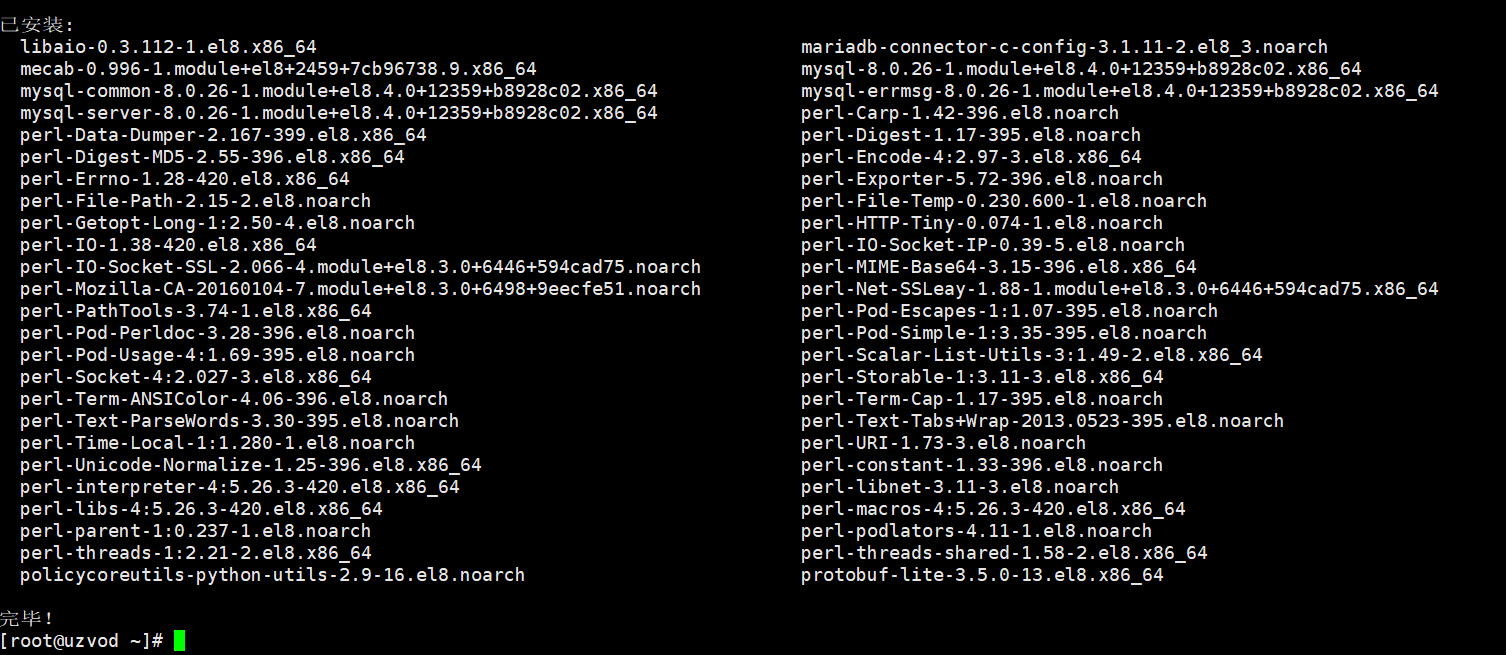
dnf install @mysql
The installation using dnf install mysql and dnf install @mysql is different. @mysql will have more installation packages.
After installation, set MySQL to start at boot
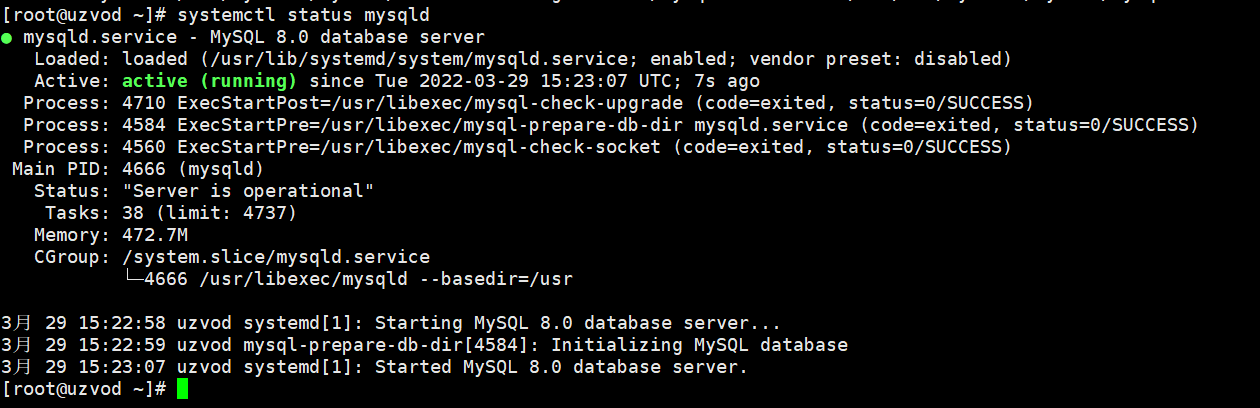
systemctl enable --now mysqld
Then check whether MySQL is running normally.
systemctl status mysqld
The green light indicates normal operation, the red light indicates failure, and MySQL is running normally.
Add password and security settings
run mysql_secure_installation Script that performs some security-related operations and sets the MySQL root password.
sudo mysql_secure_installation
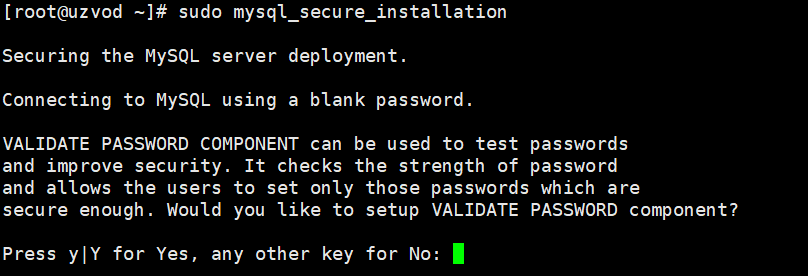
After the script runs, you will be asked whether to configure the VALIDATE PASSWORD component. Select Y for this step.
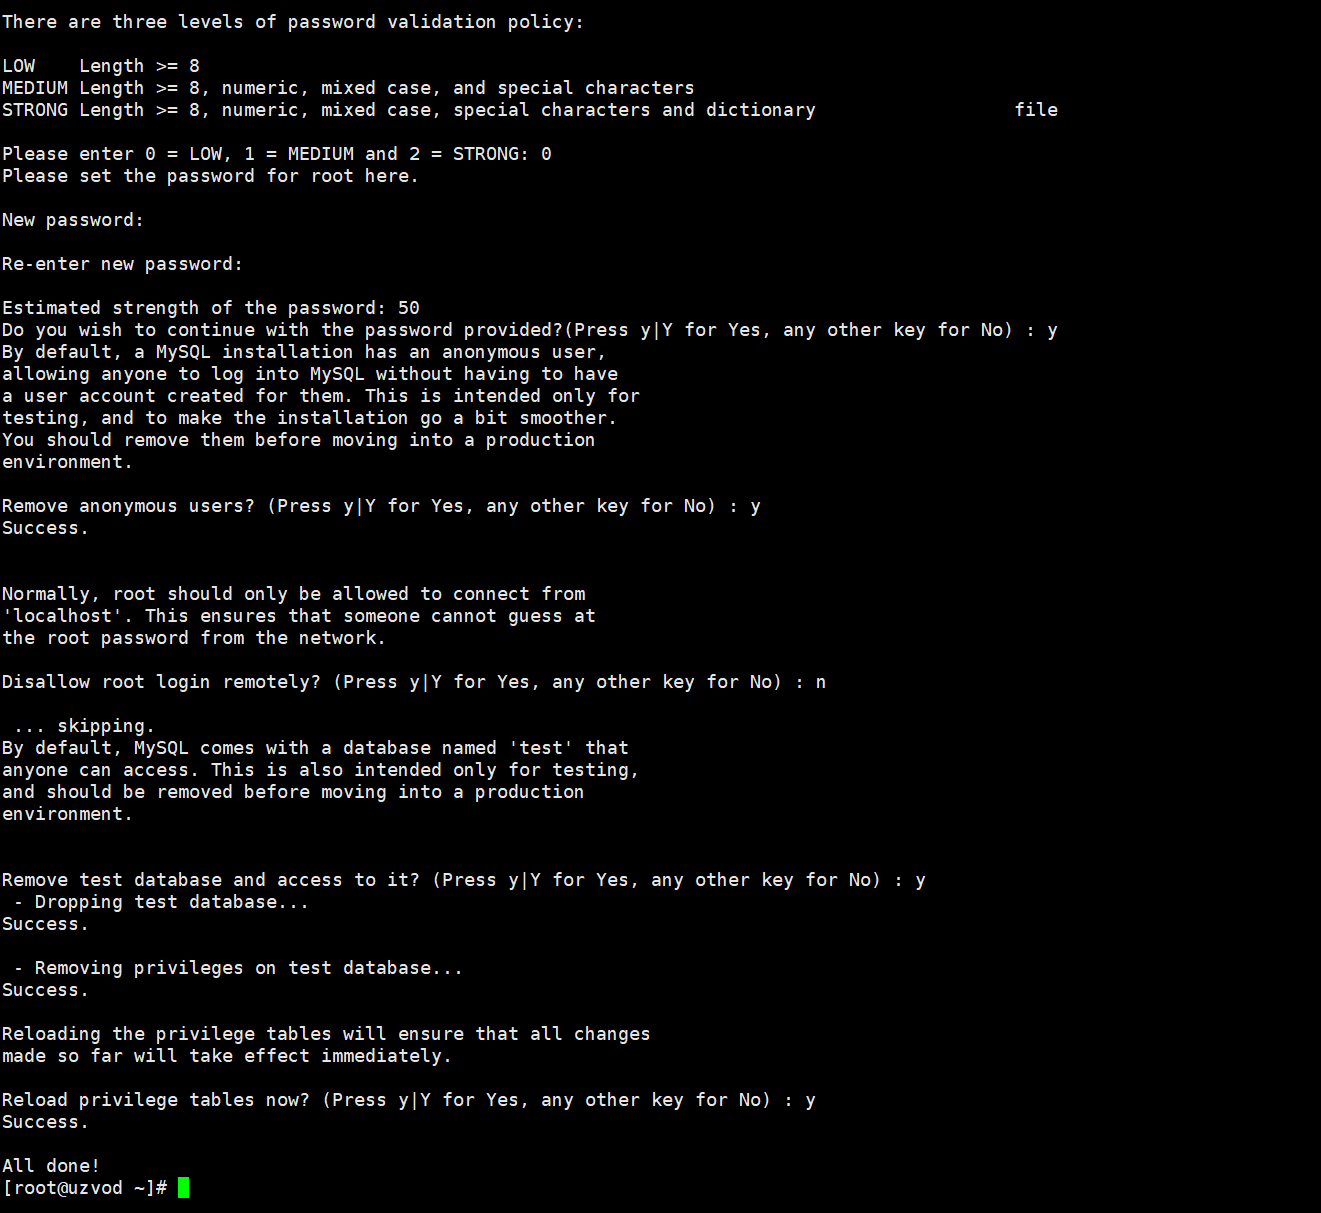
Select the password verification policy level and select 0 (low).
Set the MySQL password. Enter the password you want to set twice.
Are you sure you want to continue using the provided password? Enter Y.
Remove anonymous user? Enter Y.
Allow root remote login? Enter N.
Remove the test database? Enter Y.
Reload privilege tables? Enter Y.
Configure MySQL remote login. If you need to set up remote login for the root account, repeat the above steps and set the step of allowing root remote login to Y. If you do not need to configure MySQL remote login for the time being, this paragraph can be ignored.
After MySQL is initialized, you need to log in to MySQL for verification
Log in using the following command and enter the password:
mysql -u root -p
If there is no abnormality in the login and the mysql> operation console can be displayed, the configuration and installation have been successful.

You can create new users on the MySQL console, or use MySQL management tools to create new users or databases.
How to create a new user in the MySQL console
Create a new user for remote login
Fill in your user name in UserName and fill in the IP in Host. For example, 8.8.8.8 means that the user can only log in at the IP address 8.8.8.8. If you do not restrict IP login, fill in % in Host and your password in Password.
create user 'UserName'@'Host' identified by 'Password';
Grant permissions to the newly created user. The UserName and Host here are the same as the user created in the previous step.
grant all privileges on *.* to 'UserName'@'Host' with grant option;
Just test whether remote login is available, just in case, here is the MySQL statement to change the password:
alter user 'root'@'localhost' identified by 'Password';
So far, MySQL has been installed. If you have any additional requirements for the configuration file, please change /etc/my.cnf The configuration files in .
After completing the above settings, restart the MySQL service.
systemctl restart mysqld
MySQL common commands
Start MySQL
systemctl start mysqld
Restart MySQL
systemctl restart mysqld
Stop MySQL
systemctl stop mysqld
Check MySQL status
systemctl status mysqld
AWS Install phpMyAdmin
phpMyAdmin is aPHPA free software tool written to processMySQL administration.phpMyAdmin supports a wide range of operations for MySQL and MariaDB. Common operations (managing databases, tables, columns, relations, indexes, users, permissions, etc.) can be performed through the user interface, while you can still execute any SQL statement directly.
phpMyAdmin is a management tool for MySQL. phpMyAdmin website:https://www.phpmyadmin.net/
Install the wget download command.
dnf install wget
Download the latest version of phpMyAdmin-5.1.3. Note that it is in tar.gz format.
wget https://files.phpmyadmin.net/phpMyAdmin/5.2.0/phpMyAdmin-5.2.0-all-languages.tar.gz
Unzip phpMyAdmin-5.1.3 files.
tar -zxvf phpMyAdmin-5.2.0-all-languages.tar.gz
Rename the folder. You can define this name later. Here it is changed to phpMyAdmin by default.
mv phpMyAdmin-5.2.0-all-languages phpMyAdmin
Move the files to the web storage directory.
mv phpMyAdmin /home/www
Note that if you have not installed the php-mysqlnd extension before, you also need to install the php-mysqlnd extension.
dnf install php-mysqlnd
Configure phpMyAdmin
Go to the libraries directory under the phpMyAdmin directory and edit the config.default.php file with VI
cd /var/www/phpMyAdmin/libraries
vi config.default.php
Change localhost after host to 127.0.0.1. Note: do not use the keypad to enter numbers.
Will$cfg['Servers'][$i]['host'] = 'localhost';Change to$cfg['Servers'][$i]['host'] = '127.0.0.1';
$cfg['Servers'][$i]['user'] = 'root';
$cfg['Servers'][$i]['password'] = 'mysql password';
Will$cfg['blowfish_secret'] = ''; Change to $cfg['blowfish_secret'] = '123456*******';
Note: '123456*******' is a random password with more than 32 characters.
After modification, save and exit: qw
Back to
In the phpMyAdmin main directory, place the configuration file config.sample.inc.php Change the name.
cd /var/www/phpMyAdmin/
mv config.sample.inc.php config.inc.php
VI edits the configuration file config.inc.php.
vi config.inc.php
Change the short password that phpMyAdmin uses for cookies.
$cfg['blowfish_secret'] = ''; Change to $cfg['blowfish_secret'] = '123456*******';
Note: '123456*******' is any password character greater than 32 bits.
This password is used to encrypt Cookies to avoid confusion when multiple PhpMyAdmins or other programs share Cookies.
After the short password is edited, modify the host option. $cfg['Servers'][$i]['host'] = 'localhost'; Change to $cfg['Servers'][$i]['host'] = '127.0.0.1';
Modify the user group and permissions of the session path (for example, /var/lib/php/session), and then go to the corresponding session path.
cd /var/lib/php
chown nginx:nginx ./session
chmod -R 777 ./session
Create a new tmp folder in the phpmyadmin directory and set the permission to 777
mkdir /var/www/phpMyAdmin/tmp
chmod -R 777 /var/www/phpMyAdmin/tmp
Finally, modify the user access rights of the directory where the phpMyAdmin files are stored.
chown -R nginx:nginx /var/www
Resolved the issue where advanced features in phpMyAdmin were not fully configured and some features were not activated.
Click Create an empty database in phpMyAdmin to solve the problem. Finally, configure the access path of phpMyAdmin in Nginx and you can access it normally.
mysqli::real_connect(): (HY000/1045): Access denied for user 'root'@'localhost' (using password: YES)
MySQL password input error
Install WordPress on Amazon Cloud
Start by downloading the latest version of WordPress.
wget https://cn.wordpress.org/latest-zh_CN.tar.gz
Unzip the file after downloading.tar -xzvf latest-zh_CN.tar.gz
Move the folder to the website directorymv wordpress /var/www
cd /var/wwwroot
Rename the wp-config-sample.php filecp wp-config-sample.php wp-config.php
Modify the website configuration file:vi wp-config.php
The name of the WordPress database: define( 'DB_NAME', 'WordPress' );
MySQL database username: define( 'DB_USER', 'root' );
MySQL database password: define( 'DB_PASSWORD', 'mysql password' );
MySQL host: define( 'DB_HOST', '127.0.0.1' );
The default text encoding when creating a data table: define('DB_CHARSET', 'utf8' );
Add the following code at the end of the file:if(is_admin()) {add_filter('filesystem_method', create_function('$a', 'return "direct";' ));define( 'FS_CHMOD_DIR', 0751 );}
After modifying the configuration file, add user permissions again!
chown -R nginx:nginx /var/www
In the nginx configuration file, add the following code for pseudo-static plug-in installation:
# 将www域名301登陆到uzbox.tk } server { listen 443 ssl http2; listen [::]:443 ssl http2; server_name uzbox.tk; root /home/wwwroot; ssl_certificate "/home/ssl/fullchain.cer"; ssl_certificate_key "/home/ssl/uzbox.tk.key"; ssl_session_cache shared:SSL:1m; ssl_session_timeout 10m; ssl_protocols TLSv1.1 TLSv1.2 TLSv1.3; ssl_ciphers TLS13-AES-256-GCM-SHA384:TLS13-CHACHA20-POLY1305-SHA256:TLS13-AES-128-GCM-SHA2 56:TLS13-AES-128-CCM-8-SHA256:TLS13-AES-128-CCM-SHA256:EECDH+CHACHA20:EECDH+CH ACHA20-draft:EECDH+ECDSA+AES128:EECDH+aRSA+AES128:RSA+AES128:EECDH+ECDSA+AES256:EECDH+aRSA+AES256:RSA+AES256:EECDH+ECDSA+3DES:EECDH+aRSA+3DES:RSA+3DES:!MD5; ssl_prefer_server_ciphers on; # Config for 0-RTT in TLSv1.3 ssl_early_data on; ssl_stapling on; ssl_stapling_verify on; add_header Strict-Transport-Security "max-age=31536000"; location / { index index.php index.html index.htm; try_files $uri $uri/ /index.php?$args; # is used to support pseudo-static settings in wordpress. } error_page 404 /404.html; location = /40x.html { } error_page 500 502 503 504 /50x.html; location = /50x.html { } }
After adding the configuration, restart the nginx service
systemctl restart nginx
Finally, create a wordpress database in MySQL.
For example: the name of the WordPress database: define('DB_NAME', 'WordPress123' );
You need to create a new one in MySQL using the command or in phpmyadmin.WordPress123Otherwise, a database connection error will be prompted when opening the site.
After configuring the database, log in to the WordPress page, enter your site name, user account password and other related content, the site is created successfully. After logging in to the site backend, you must first modify the WordPress fixed link, enter the backend, and open the setting of fixed link.
自定义结构后面填入%category%/%post_id%
Install the "No Category Base" plugin to remove the category directory /category/
For the remaining detailed configuration, please refer toBox ShopThe content of the site.