Stable Diffusion model fine-tuningCurrently, there are four main ways to fine-tune the Stable Diffusion model:Dreambooth, LoRA (Low-Rank Adaptation of Large Language Models), Textual Inversion, Hypernetworks.The differences between them are roughly as follows:
Textual Inversion (also known as Embedding) does not actually modify the original Diffusion model. Instead, it uses deep learning to find the character image feature parameters that are consistent with the image you want, and saves them through this small model. This means that if the original model lacks training in this area, it is actually difficult to make it "learn" through embedding, and it cannot teach the Diffusion model to render image content it has never seen.Dreambooth adjusts the weights of all layers of the entire neural network and trains the input image into the Stable Diffusion model. Its essence is to copy the source model first, make fine tuning on the basis of the source model and independently form a new model. It can basically do anything. The disadvantage is that it requires a lot of VRAM to train it. At present, after tuning, it can complete the training under 16GB of video memory.LoRA also uses a small number of images, but it trains the weights of a specific network layer and inserts a new network layer into the original model, which avoids modifying the original model parameters and copying the entire model. It also optimizes the number of parameters of the inserted layer, and finally realizes a very lightweight model tuning method. The model generated by LoRA is small and fast to train. The LoRA model + basic model is required for inference. The LoRA model will replace the specific network layer of the basic model, so its effect will depend on the basic model.The training principle of Hypernetworks is similar to that of LoRA. Currently, there is no official documentation for it. Unlike LoRA, Hypernetwork is a separate neural network model that is used to output the intermediate layer that can be inserted into the original Diffusion model. Therefore, through training, we will get a new neural network model that can insert the appropriate intermediate layer and corresponding parameters into the original Diffusion model, so that the output image is associated with the input instruction. Note: The picture comes from the InternetStable Diffusion models can realize rich image generation scenarios of text-generated images and image-generated images, but when a real specific real-world object appears in an image, it is difficult for the most advanced text-generated image models to retain its key visual features, that is, they lack the ability to imitate or reproduce the appearance of the subject in a given reference set. The expressiveness of the output domain of such models is limited. Even if Textual Inversion fine-tuning is used to provide an accurate textual description of the object, or hypernetwork is used for style preservation, they may still produce instances with different appearances.The DreamBooth algorithm fine-tunes the Imagen model to achieve the function of truly restoring real objects in images. By fine-turning a small number of images of physical objects, the original SD model can retain the fidelity of image entity memory and recognize the main features and even thematic style of the entity in the original image in the text. It is a new text-to-image "personalized" (adaptable to user-specific image generation needs) diffusion model.
Problems and challenges faced by Dreambooth fine tuningThe principle of Dreambooth fine tuning is to use a small number of input images, define the entity body (eg toy cat/Rommel) and instance images fine tuning images through instance_prompt, and provide a class prevision prompt and class image images that define the scene or theme schema (eg cartoon, oil painting style), extract the UNet and vae networks in the original SD, and bind the instance prompt and class preservation prompt to it, so that in the subsequently generated images, as long as there is a keyword token in the instance prompt, the main entity in the input instance image is maintained, and the theme style defined by the class presevation graphic is maintained.Currently, there are two main ways to fine tune DreamBooth:
First, in Stable Diffusion WebUI A visual interface is used for model selection, uploading of training images and localized training;The second is to conduct training in a script interactive development mode on a third-party IDE platform such as colab notebook.The first method can only be trained on a single server or host where the Stable Diffusion WebUI application is deployed, and cannot be integrated with the backend platform and business of the enterprise and customers; while the second method focuses on individual algorithm engineers conducting model experiments and explorations during the development and testing phase, and cannot achieve production-based engineering deployment. In addition, the above two methods of training Dreambooth also require attention to the cost of high-performance computing machine resources (especially for scenarios with high requirements for model effects, which require more than 50 class images and are prone to OOM in video memory), storage and management of basic models and models after fine tuning, management of training hyperparameters, unified log monitoring, training acceleration, and dependency on lib compilation and packaging, etc., a series of difficulties and challenges in the specific implementation level.Using SageMaker Training Job for Dreambooth fine tuningAmazon SageMaker is a one-stop machine learning integrated development platform that provides a wide range of functions to help users easily build, train, and deploy machine learning models. At the training job level, SageMaker can pull various types of V100, A100, T4, etc. GPU Optimized computing resources, through BYOC (Bring Your Own Container), BYOS (Bring Your Own Script), etc., allow users to use their own training scripts or customized container images, flexibly control the training process, and use their own data preprocessing and model evaluation methods. In addition, through advanced functions such as automatic hyperparameter optimization and distributed training, users can use specific frameworks and lib libraries in SageMaker to flexibly and customarily fine-tune and optimize the Dreambooth model, eliminate the limitations of WebUI and notebook local environment, and integrate with production business systems to achieve engineering deployment.The following details how to perform Dreambooth fine tuning on Amazon SageMaker using a BYOC training job, and optimizes the memory overhead, model management, and hyperparameters of the Dreambooth training process, so that users can implement engineering on their own ML platforms or business systems and reduce the overall TCO of training.
Dreambooth fine tuning on SageMaker technical solutionWe explain the technical implementation of Dreambooth fine tuning on SageMaker from the aspects of model pulling, training image input, model output, and training task type:Amazon has a strategic partnership with HuggingFace. Therefore, in the SageMaker training job, we can use a diffuser pipeline API and a pretrained_model_name_or_path hyperparameter variable to pass in a model ID in the standard huggingface model url format (such as runwayml/stable-diffusion-v1-5) or a model file directory (eg /opt/ml/model/stable-diffusion-v1.5/). SageMaker will automatically pull the model on Huggingface without registering an account or passing in a token for authentication. The code example is as follows:model_dir='/opt/ml/input/fineturned_model/' model = StableDiffusionPipeline.from_pretrained( model_dir, scheduler = DPMSolverMultistepScheduler.from_pretrained(model_dir, subfolder="scheduler"), torch_dtype=torch.float16, )
For input images used for fine tuning, SageMaker training job provides a convenient method for inputting training data. Through the inputs parameter, you can set the name of the input image channel (such as images) in a dictionary format, and the storage path of the input image in S3 as the value. When SageMaker performs the training task, it will download the image from S3 and place it in the /opt/ml/input/data/{channel} directory of the computing machine. The code example is as follows: images_s3uri = 's3://{0}/drebooth/images/'.format(bucket) inputs = { 'images': images_s3uri } estimator = Estimator( role = role, instance_count=1, instance_type = instance_type, image_uri = image_uri, hyperparameters = hyperparameters, environment = environment ) estimator.fit(inputs)
After training, SageMaker will package the model file as model.tar.gz by default and upload it to a subdirectory named training job on S3. The customer's production system can directly obtain the path location through the API, which facilitates model management and subsequent reasoning deployment, as shown below:Amazon SageMaker supports BYOS and BYOC modes for model training. For Dreambooth model training, it involves the installation and deployment of many dependencies such as diffuser, huggingface, accelerate, and xformers. In addition, open source libs such as xformers and accelerate have compatibility differences under various GPU models and various cuda and cudnn versions. It is difficult to install and deploy them on the computing machine through direct pip install. Therefore, this solution uses the BYOC method, based on the official preset basic images such as Pytorch, cuda, torchversion, and then installs the required libs such as xformers through source code compilation and packaging, and expands it to the Dreambooth training container image produced by the customer.Note that the compilation and installation of xformers on Amazon G4dn and G5 requires cuda 11.7, torch 1.13 or higher, and the CUDA_ARCH_LIST computing power parameter needs to be set to 8.0 or higher, otherwise the compilation will report that the computing power of this type of GPU is not supported.
Compile and package docker The file reference is as follows:
FROM pytorch/pytorch:1.13.0-cuda11.6-cudnn8-runtime ENV PATH="/opt/ml/code:${PATH}" ENV DEBIAN_FRONTEND noninteractive RUN apt-get update RUN apt-get install --assume-yes apt-utils -y RUN apt update RUN echo "Y"|apt install vim RUN apt install wget git -y RUN apt install libgl1-mesa-glx -y RUN pip install opencv-python-headless RUN mkdir -p /opt/ml/code RUN pip3 install sagemaker-training COPY train.py /opt/ml/code/ COPY ./sd_code/ /opt/ml/code/ RUN pip install -r /opt/ml/code/extensions/sd_dreambooth_extension/requirements.txt ENV SAGEMAKER_PROGRAM train.py RUN export TORCH_CUDA_ARCH_LIST="7.5 8.0 8.6" && export FORCE_CUDA="1" && pip install ninja triton==2.0.0.dev20221120 && git clone https://github.com/xieyongliang/xformers.git /opt/ml/code/repositories/xformers && cd /opt/ml/code/repositories/xformers && git submodule update --init --recursive && pip install -r requirements.txt && pip install -e . ENTRYPOINT []
The script for pushing the packaged image to the Amazon ECR image repository is as follows:algorithm_name=dreambooth-finetuning-v3 account=$(aws sts get-caller-identity --query Account --output text) # Get the region defined in the current configuration (default to us-west-2 if none defined) region=$(aws configure get region) fullname="${account}.dkr.ecr.${region}.amazonaws.com/${algorithm_name}:latest" # If the repository doesn't exist in ECR, create it. aws ecr describe-repositories --repository-names "${algorithm_name}" > /dev/null 2>&1 if [ $? -ne 0 ] then aws ecr create-repository --repository-name "${algorithm_name}" > /dev/null fi # Log into Docker pwd=$(aws ecr get-login-password --region ${region}) docker login --username AWS -p ${pwd} ${account}.dkr.ecr.${region}.amazonaws.com # Build the docker image locally with the image name and then push it to ECR # with the full name. mkdir -p ./sd_code/extensions cd ./sd_code/extensions/ && git clone https://github.com/qingyuan18/sd_dreambooth_extension.git cd ../../ docker build -t ${algorithm_name} ./ -f ./dockerfile_v3 > ./docker_build.log docker tag ${algorithm_name} ${fullname} docker push ${fullname} rm -rf ./sd_code
Dreambooth on SageMaker fine tuning optimizationDreamBooth was first created by Google Literature, open source on HuggingFace's colab notebook sample code, see github Related informationThere are many folks who will expand and update based on this version. The most complete version is the open source script of the stable diffusion WebUI plug-in. This plug-in encapsulates more hyperparameters and optimization methods for manipulating training, can integrate lora weights, and supports the checkpoint format required by WebUI. For details, see Code for sd_extentions on github.Related information on github:
https://colab.research.google.com/github/huggingface/notebooks/blob/main/diffusers/sd_dreambooth_training.ipynb#scrollTo=rscg285SBh4M
Code for sd_extentions on github:
https://github.com/d8ahazard/sd_dreambooth_extension
As mentioned above, SD WebUI cannot be integrated with the backend business system, so we need to separate it from the WebUI plug-in mode and encapsulate it into a separate model training program based on standard inputs such as the basic model, input image, instance prompt, class prompt, and fine-tuned model output.
To separate from the WebUI plug-in, the following aspects need to be addressed:The plug-in code is coupled together with the operations and data interactions bound to various WebUI front-end interface components. For example, the shared part of the original code saves various training parameters input from the web page.if shared.force_cpu: import modules.shared no_safe = modules.shared.cmd_opts.disable_safe_unpickle modules.shared.cmd_opts.disable_safe_unpickle = True
The mytqdm class displays progress bar status information for web pages:from helpers.mytqdm import mytqdm
This type of code is unnecessary in the engineered background training job. We organize the parameters passed by the front-end page into hyperparameters so that they can be used in the main body. Python parse_args lib to parse and obtain, and remove the code related to page display information.The cleaned sd_extentions code can be found at https://github.com/qingyuan18/sd_dreambooth_extension.git. You can see that only the core train module is retained, and the front-end coupling related codes such as webui.py, helper, and shard have been cleaned up.
Training task parameter passingSageMaker Training Job supports the passing and parsing of model hyperparameters. In the API, the parameters such as model_path, model_name, instance_prompt, class_prompt, etc. in the original plug-in code mentioned above are encapsulated in a json string key-value pair format, and then passed to the Training Job through the estimator API. Inside the SageMaker training computing machine, it will be parsed into the standard args parameter passing mode of -key value, so that in the training code, it can be parsed and processed through python parse_args lib, refer to the following code example:hyperparameters = { 'model_name':'aws-trained-dreambooth-model', 'mixed_precision':'fp16', 'pretrained_model_name_or_path': model_name, 'instance_data_dir':instance_dir, 'class_data_dir':class_dir, 'with_prior_preservation':True, 'models_path': '/opt/ml/model/', 'manul_upload_model_path':s3_model_output_location, 'instance_prompt': instance_prompt, ……} estimator = Estimator( role = role, instance_count=1, instance_type = instance_type, image_uri = image_uri, hyperparameters = hyperparameters )
The format is ckpt (the latest WebUI is safetensor format), and the model pipeline loaded by from_pretrained during diffuser training is the model path or local path format of Stable Diffusion (the default is the directory path, under which there are sub-model directories such as vae, unet, tokenizationer, etc., and each sub-model directory is an independent torch pt format file (suffix .bin)).If the customer's production environment has a single model file in ckpt format (such as the model downloaded from the civit.ai site), we can use the conversion script provided by diffuser to convert it from ckpt format to diffuser directory format so that the same code can be loaded in the production environment. The script usage example is as follows:
python convert_original_stable_diffusion_to_diffusers.py —checkpoint_path ./models_ckpt/768-v-ema.ckpt —dump_path ./models_diffuser
As shown above, the output of dump_path is a directory in the diffuser format. Expand this directory to see the sub-model directory files of vae, unet, and text_encoder.The directory structure of SageMaker's model training computing machine is as follows:The trained model will be output to the /opt/ml/model/ directory by default. After the SageMaker Training Job is completed, the model files in this directory will be packaged into a tar.gz file and uploaded to the S3 path of the training task. For a composite model such as Stable Diffusion, there are multiple subdirectories. The model files in each subdirectory are in an independent bin format. Each h model file is more than 4 or 5G. SageMaker automatically packages and upload Getting to S3 would take too long.Therefore, we add a manul_upload_model_path parameter to specify the S3 path where the trained model file is manually uploaded. After the training is completed, the entire model directory is recursively uploaded to the specified S3 through the S3 SDK, so that SageMaker no longer packages model.tar.gz.
The reference code example is as follows:
def upload_directory_to_s3(local_directory, dest_s3_path): bucket,s3_prefix=get_bucket_and_key(dest_s3_path) for root, dirs, files in os.walk(local_directory): for filename in files: local_path = os.path.join(root, filename) relative_path = os.path.relpath(local_path, local_directory) s3_path = os.path.join(s3_prefix, relative_path).replace("\\", "/") s3_client.upload_file(local_path, bucket, s3_path) print(f'File {local_path} uploaded to s3://{bucket}/{s3_path}') for subdir in dirs: upload_directory_to_s3(local_directory+"/"+subdir,dest_s3_path+"/"+subdir) s_pipeline.save_pretrained(args.models_path) ### manually upload trained db model dirs to s3 path##### #### to eliminate sagemaker tar process##### print(f"manul_upload_model_path is {args.manul_upload_model_path}") upload_directory_to_s3(args.models_path,args.manul_upload_model_path)
Through this optimization, the 800-step Dreambooth training on SageMaker is reduced from 1 hour to about 30 minutes.For fine tuning training of large models such as Dreambooth, cost is an important factor to consider. Amazon provides computing resources of various GPU models, among which the G4dn model has the highest cost-effectiveness and has resources in almost all Amazon regions.However, the g4dn model only has a single NVIDIA T4 graphics card with 16G video memory. Dreambooth has to retrain the unet and vae networks to retain the prior loss weights. When higher-fidelity Dreambooth fine tuning is required, the input data will be as many as dozens of pictures, and the training process will be 1000 steps. The entire network, especially the graphics denoising and denoising of the unet network, can easily cause video memory OOM and lead to training task failure.
To ensure that customers can train Dreambooth models on cost-effective machines with 16GB of video memory, we have made several optimizations. As a result, Dreambooth fine tuning on SageMaker only requires a G4dn.xlarge machine, and training can be completed in hundreds to 3,000 training steps, greatly reducing the cost of Dreambooth training for customers.
Adjust the fine tuning componentIn the Stable Difussion model, text_encoder is the text encoder of the CLIP submodel. When the instance prompt/class prompt is not a long text, Dreambooth does not need to retrain the text encoder because we have adjusted some rules. If the video memory is less than 16G, the retraining of the text_encoder part is turned off. If the video memory is lower, the 8-bit Adam optimizer and the fp16 half-precision gradient data format are automatically enabled. If the video memory is smaller, it can even be directly offloaded to the CPU for training.The code example is as follows:
print(f"Total VRAM: {gb}") if 24 > gb >= 16: attention = "xformers" not_cache_latents = False train_text_encoder = True use_ema = True if 16 > gb >= 10: train_text_encoder = False use_ema = False if gb < 10: use_cpu = True use_8bit_adam = False mixed_precision = 'no'
Formers is an open source training acceleration framework. By storing parameters of different layers, dynamically loading video memory for each sub-layer, and optimizing self-attention mechanism and cross-layer information transmission, it can significantly reduce video memory without affecting training speed.During Dreambooth training, the attention is changed from the default flash to xformers. By comparing the GPU memory before and after turning on xformers, we can see that this method significantly reduces the usage of video memory.
Before turning on Xformers:
***** Running training ***** Instantaneous batch size per device = 1 Total train batch size (w. parallel, distributed & accumulation) = 1 Gradient Accumulation steps = 1 Total optimization steps = 1000 Training settings: CPU: False Adam: True, Prec: fp16, Grad: True, TextTr: False EM: True, LR: 2e-06 LORA:False Allocated: 10.5GB Reserved: 11.7GB
***** Running training ***** Instantaneous batch size per device = 1 Total train batch size (w. parallel, distributed & accumulation) = 1 Gradient Accumulation steps = 1 Total optimization steps = 1000 Training settings: CPU: False Adam: True, Prec: fp16, Grad: True, TextTr: False EM: True, LR: 2e-06 LORA:False Allocated: 5.5GB Reserved: 5.6GB
Other optimization parameters- 'PYTORCH_CUDA_ALLOC_CONF':'max_split_size_mb:32' For CUDA OOM caused by video memory fragmentation, you can set max_split_size_mb of PYTORCH_CUDA_ALLOC_CONF to a smaller value.
- train_batch_size':1 The number of images processed each time. If there are not many instance images or class images (less than 10), you can set this value to 1 to reduce the number of images processed in a batch and reduce the usage of video memory to a certain extent.
- 'sample_batch_size': 1 corresponds to train_batch_size, the batch throughput of sampling, denoising and denoising at a time. Lowering this value will also reduce video memory usage.
- not_cache_latents In addition, the training of Stable Diffusion is based on Latent Diffusion Models. The original model will cache the latent, but we mainly train regularization under instance prompt and class prompt. Therefore, when the GPU video memory is tight, we can choose not to cache the latent to minimize the video memory usage.
- 'gradient_accumulation_steps' The batch of gradient updates. If the training steps are large, such as 1000, you can increase the number of steps of gradient updates, and update them all at once after accumulating to a certain batch. The larger the value, the higher the video memory usage. If you want to reduce the video memory, you can reduce this value at the expense of some training time. Note that if you choose to retrain the text encoder text_encode, gradient accumulation is not supported, and accelerated multi-card distributed training is enabled on a multi-GPU machine, the batch gradient update gradient_accumulation_steps can only be set to 1, otherwise the retraining of the text encoder will be disabled.
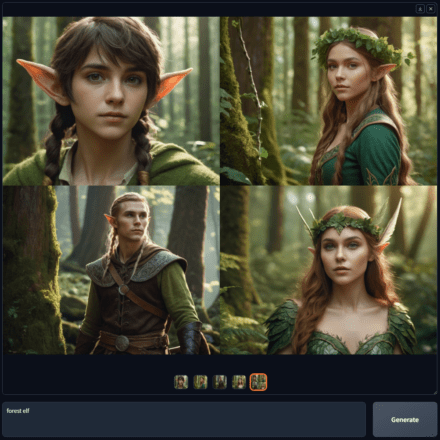
Stable Diffusion Quick Kit Dreambooth Model Fine-tuning DemonstrationIn the demonstration, we used 4 pictures of a cat toy and cropped them to a uniform size of 512×512 using the tool.Then enter the SageMaker notebook created in advance, clone the Quick Kit repository, git clone https://github.com/aws-samples/sagemaker-stablediffusion-quick-kit, open fine-tuning/dreambooth/stablediffusion_dreambooth_finetuning.zh.ipynb, and follow the notebook prompts step by step.# uses zwx as the trigger word. After the model is trained, we use this word to generate the graphinstance_prompt="photo\ of\ zwx\ toy" class_prompt="photo\ of\ a\ cat toy" #notebook training code description#Set hyperparametersenvironment = { 'PYTORCH_CUDA_ALLOC_CONF':'max_split_size_mb:32', 'LD_LIBRARY_PATH':"${LD_LIBRARY_PATH}:/opt/conda/lib/" } hyperparameters = { 'model_name':'aws-trained-dreambooth-model', 'mixed_precision':'fp16', 'pretrained_model_name_or_path': model_name, 'instance_data_dir':instance_dir, 'class_data_dir':class_dir, 'with_prior_preservation':True, 'models_path': '/opt/ml/model/', 'instance_prompt': instance_prompt, 'class_prompt':class_prompt, 'resolution':512, 'train_batch_size':1, 'sample_batch_size': 1, 'gradient_accumulation_steps':1, 'learning_rate':2e-06, 'lr_scheduler':'constant', 'lr_warmup_steps':0, 'num_class_images':50, 'max_train_steps':300, 'save_steps':100, 'attention':'xformers', 'prior_loss_weight': 0.5, 'use_ema':True, 'train_text_encoder':False, 'not_cache_latents':True, 'gradient_checkpointing':True, 'save_use_epochs': False, 'use_8bit_adam': False } hyperparameters = json_encode_hyperparameters(hyperparameters) # starts sagemaker training job from sagemaker.estimator import Estimator inputs = { 'images': f"s3://{bucket}/dreambooth/images/" } estimator = Estimator( role = role, instance_count=1, instance_type = instance_type, image_uri = image_uri, hyperparameters = hyperparameters, environment = environment ) estimator.fit(inputs)
Training task startup log:The training time is about 40 minutes. You can also view the CloudWatch log through the SageMaker Training Job console. After the training is completed, the model will be automatically uploaded to S3.After training is complete, you can use the Quick Kit inference notebook to load the trained model into SageMaker for inference. The trained model test is as follows:In summary, this article introduces the business requirements and technical principles of Dreambooth, and implements the production operation of Dreambooth fine tuning through the BYOC Training Job solution on Amazon SageMaker, as well as optimization practices such as graphics memory, model management, and hyperparameters. The script code and notebook training examples in this article can serve as the basis for users to engineer the AIGC ML platform based on Stable Diffusion.