Excellent software and practical tutorials


Installwindows11When you try to use Windows 11, the message "This PC can't run Windows 11" pops up. A considerable part of the reason is that the computerDoes not support TPM2.0. Windows 11 willTPM 2.0 is set as one of the required configuration requirements, which makes many old machines (especially those before 2016) unable to upgrade. Not supportedTPM2.0It is not impossible to install Windows 11 on your computer. This article will introduce 3 methods to help you upgrade smoothly.
Check TPM Status

Step 1: Search for "Windows Powershell" in the taskbar and select "Run as administrator".
Step 2: Type the command:get-tpm, press Enter to run. The picture shows that the status of TpmPresent and TpmReady are both False, indicating that the computer does not support TPM.

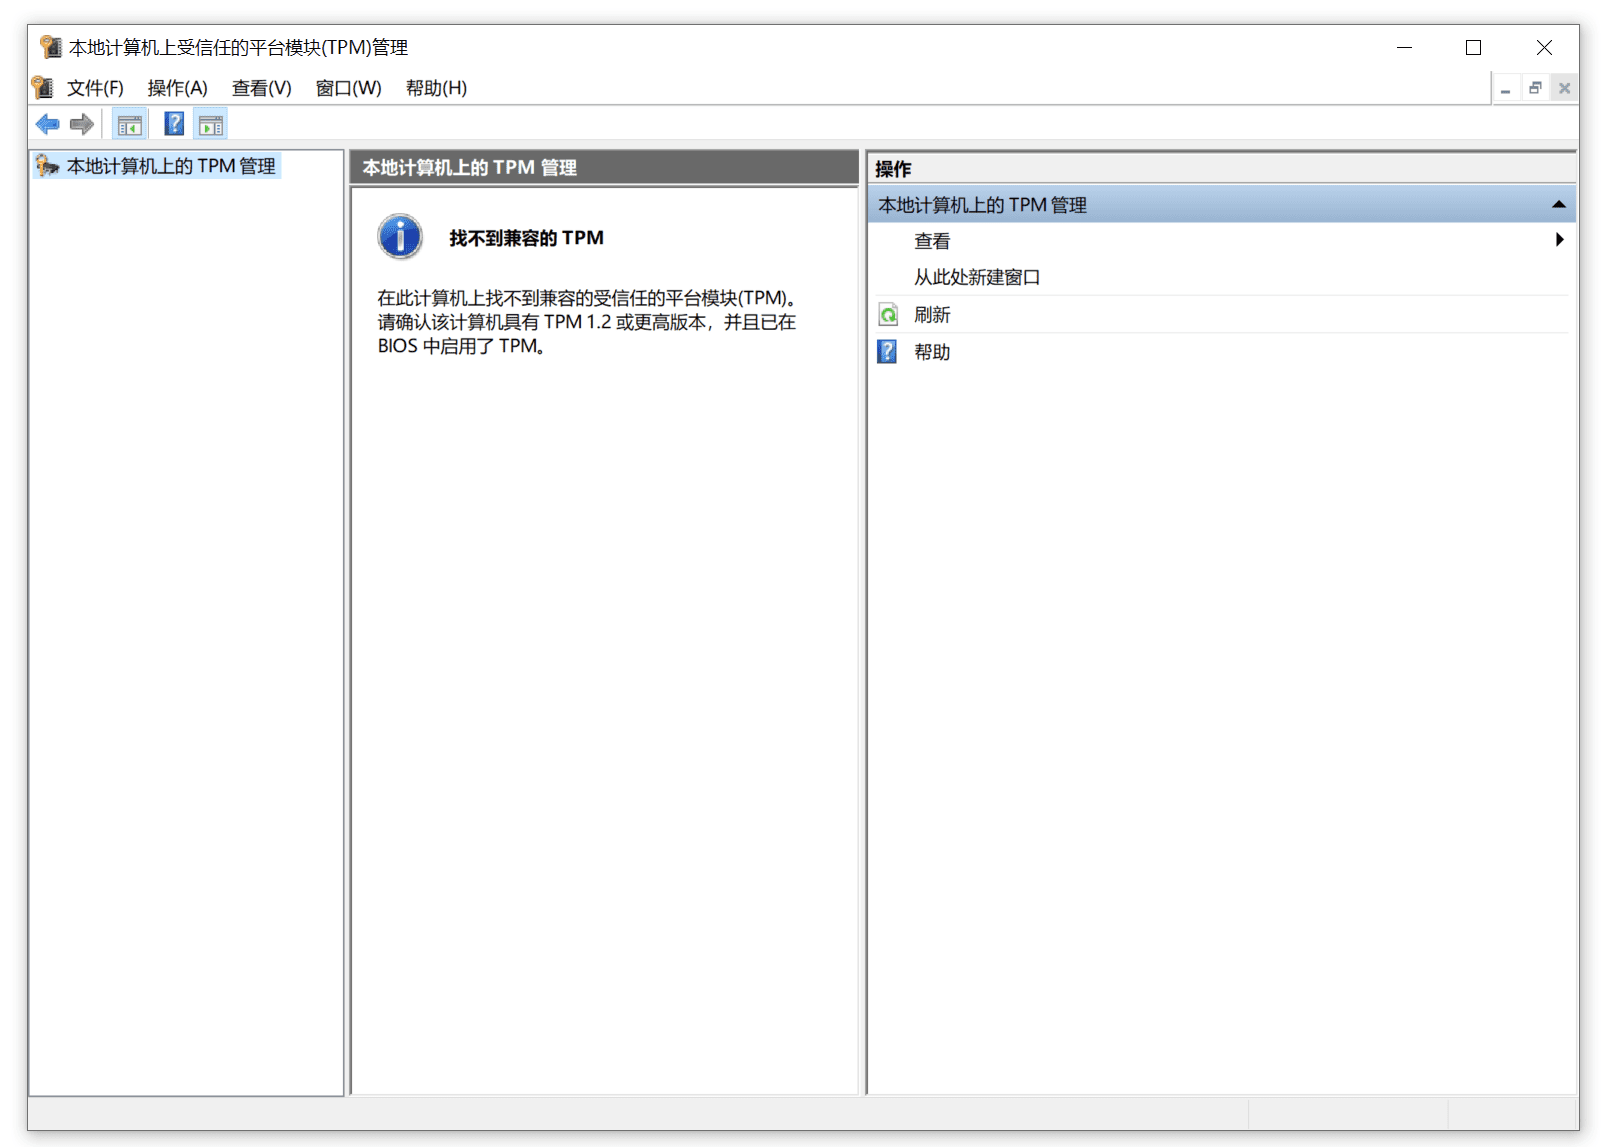
Step 3: Click Run or press Win + R and enter the command:tpm.msc, press Enter to open the TPM management window.

Step 4: Here it can be displayed whether your computer is equipped with TPM. If a compatible TPM is not found, it means that your current computer does not support TPM.
Enable TPM in the BIOS menu
How to Enable TPM on a PC with Intel CPU
The TPM settings menu location is the same for motherboards produced by different manufacturers.BIOS–Advanced–PCH-FW ConfigurationTake ASUS Intel motherboard as an example:
- Restart your computer and during the boot process, press F1, F2, F10, F11, DEL to open the BIOS or UEFI menu. This depends on your computer motherboard manufacturer and needs to be checked in the user manual or manufacturer's website.
- Press F7 to enter the advanced mode, click Advanced - PCH-FW - ConfigurationPTT Configuration
- Change the TPM Device Selection option setting to PPT (in some motherboards, change disable to enable) to enable TPM.

- Press F10 to save the settings, press ESC to exit, and restart the PC.

How to Enable TPM on a PC with AMD CPU
- Restart your computer and during the boot process, press F2 or Del several times to open the BIOS menu. Again, the key depends on your computer motherboard manufacturer.
- Press F7 to enter advanced mode and click AMD FTPM configuration
- Change the AMD fTPM switch option to Enabled to enable TPM

- Press F10, then press ESC to exit and restart your PC.

Replace the file to skip TPM detection
- Prepare the win11 ISO image file.
- 【Click here】Download the appraiserres.dll file from the win10 ISO image and replace the file with the same name in the win11 system image. Extraction code c8ag
- To recreate the win11 ISO image, you need to use a third-party tool (such as Rufus or AnyBurn) and run the installation file again to skip TPM detection and install win11.
Modify the registry
- Search regedit on the taskbar to run the registry editor
- Enter "HKEY_LOCAL_MACHINE\SYSTEM\Setup" and press Enter to run
- Right click on the Setup folder - New - Item

- Name the folder "LabConfig" and press Enter to run. Right-click in the blank space on the right - New - Add DWORD (32-bit) value

- Name it “BypassTPMCheck”, double-click to open it, and set the value data to 1.

- Repeat the above two steps to create "BypassRAMCheck" and "BypassSecureBootCheck" and set their values to 1.
- Exit the Registry Editor and return to the "This PC can't run Windows 11" prompt window. Click the back button in the upper left corner to reinstall win11.


The TPM chip is a secure encryption processor that supports many security features of the Windows system. It can help users generate, store, and limit the use of encryption keys, and prevent malware from tampering with TPM security features, including measured startup, Windows Hello (such as face or fingerprint startup), Secure BIO, Windows Defender System Guard, and Device Health Attestation. Without the TPM chip, these features cannot be used normally, and computer security may be affected.
Therefore, bypassing TPM to install Windows 11 is not a good choice. You'd better install a separate TPM 2.0 module. In the future, Windows systems may rely more on TPM, and we cannot confirm whether Microsoft will completely prohibit bypassing TPM to install Windows systems in the future.
Enabling TPM 2.0 on your computer
This article is for people who can't upgrade to Windows 11 because their PC doesn't currently have TPM 2.0 enabled or their PC is capable of running TPM 2.0 but isn't set up to run TPM 2.0. If you're not comfortable with this level of technical detail, we recommend that you consult your PC manufacturer's support information for more instructions specific to your device.
Most computers shipped in the last 5 years are capable of running TPM 2.0 version 2.0 (TPM 2.0). TPM 2.0 is requiredTo runWindows 11, as an important building block for security-related features. TPM 2.0 is used for Windows 11 features, including Windows Hello for identity protection and BitLocker for data protection.
In some cases, a PC that is capable of running TPM 2.0 cannot be set up to do so. If you are considering upgrading to Windows 11, check to make sure TPM 2.0 is enabled on your device. For example, most retail PC equipment used when building your own PC will have TPM turned off by default, even though it can almost always be enabled.
Option 1: Use the Windows Security app
- runSettings> Update & Security > Windows Security Center >Device security
- If hereNot seen on screen"Security Processor" section, your PC might have a disabled TPM. For more information , see How to enable TPM,Or check your computer manufacturer's support information for instructions. to enable the TPM. If you can enable the TPM, complete the next step to verify that it is TPM 2.0.
- If you see a "Security Processor Details" option under "Security Processor", select that option and verify the specificationsVersionIf it is less than 2.0, the device is not compliant with Windows 11 requirements.
Option 2: Use the Microsoft Management Console
- according to [Windows key] + ROr select "Start">run".
- Type "tpm.msc" (do not use quotes) Select "OK".
- If you see a message that says "No compatible TPM found," your PC might have a disabled TPM. For more information, see How to enable TPM,Or check your PC manufacturer's support information for instructions on enabling the TPM. If you are able to enable the TPM, complete the next step to verify that it is TPM 2.0.
- If you see a message confirming that the TPM is ready, checkTPMUnder Manufacturer Information, verify that the Specification Version is 2.0. If it is lower than 2.0, the device is not compliant with Windows 11 requirements.
How to Enable TPM
If you need to enable TPM, these settings are managed through the UEFI BIOS (computer firmware) and vary by device. These settings can be accessed by selecting : Settings > "&" Restore>">Restart.
From the next screen, select Troubleshoot > UEFIFirmware > Settings > Advanced Options to make changes. These settings are sometimes included in the UEFI BIOS labeled "Advanced, Secure" or "Trusted Computing".In the submenuThe option to enable TPM may be labeled "Security Device, Securityequipmentsupport, TPM status、AMD fTPMswitch、AMD PSP fTPM、IntelPTTor IntelPlatform Trust Technology".
If you're not sure how to make the changes you want to your TPM settings, we recommend checking your PC manufacturer's support information or contacting their support organization. Here are some links to information from PC manufacturers to help you get started:
Microsoft Surface FAQ about Windows 11
Windows 11 and Secure Boot
This article is for users who can't upgrade to Windows 11 because their PC can't currently boot securely. If you're not comfortable with this level of technical detail, we recommend that you consult your PC manufacturer's support information for more instructions specific to your device.
Secure BootSecure Boot is an important security feature designed to prevent malicious software from loading when your computer starts (boots up). Most modern computers support Secure Boot, but in some cases there may be settings that cause your computer to not appear to boot securely. These settings can be changed in the computer's firmware. Firmware, often called BIOS (Basic Input/Output System), is the software that starts when Windows first turns on your computer.
To access these settings, you can consult your computer manufacturer's documentation or follow these instructions: Runset up> Update & Security > Recovery,Then select "Restart now" under "Advanced startup". From the next screen, select "Troubleshoot > UEFIFirmware > Settings > Advanced Options to make changes.
To change these settings, you need to switch your PC's boot mode from being enabled in "legacy" BIOS mode (also known as "CSM" mode) to UEFI/BIOS (Unified Extensible Firmware Interface). In some cases, there are options to enable both UEFI and Legacy/CSM at the same time. If so, you will need to select UEFI as the first or only option. If you are unsure how to make the necessary changes to enable UEFI/BIOS, we recommend that you check your computer manufacturer's support information on their website.Here are some links to information from some PC manufacturers to help you get started:
While the requirement for upgrading a Windows 10 device to Windows 11 is only that the PC supports Secure Boot by enabling UEFI/BIOS, you may also consider enabling or enabling Secure Boot for added security.