Excellent software and practical tutorials
How to create an instance in Google Cloud, a new Linux/Centos8 server instance
create Centos8/Rocky Linux8 Example Tutorial, well-knownCentOS 8 has ended its service support at the end of 2021. Some users who are used to using Centos8 are looking for alternatives. Rocky Linux The system is one of the best panning alternatives available. Here is how toGoogle Cloud Google CloudCreate a Rocky Linux 8 instance in
CentOS has always been free RHEL RHEL is a commercial product of Red Hat, and users need to subscribe to Red Hat's commercial support services to use it. In other words, CentOS has so many loyal users thanks to the free RHEL commercial services. After CentOS 8 ended its service, the Stream version of CentOS 8 was launched. However, the Stream version does not support many scripts very well. The best alternative system isRocky Linux
Rocky Linux is a free, open, community enterprise operating system designed to be compatible with the top upstream enterprise Linux distribution 100%. Built by the community, for the community. Rocky Linux is a downstream distribution based on the Red Hat Enterprise Linux (RHEL) source code. It is binary compatible with RHEL and is designed to be a drop-in replacement for its Linux predecessor, CentOS. This enterprise-grade Linux distribution is ideal for both business and personal use.
Rocky Linux 8 will end support on May 31, 2029. There are still about 5 more years of support, so you can use it stably for a long time!
Creating a Rocky Linux 8 instance in Google Cloud
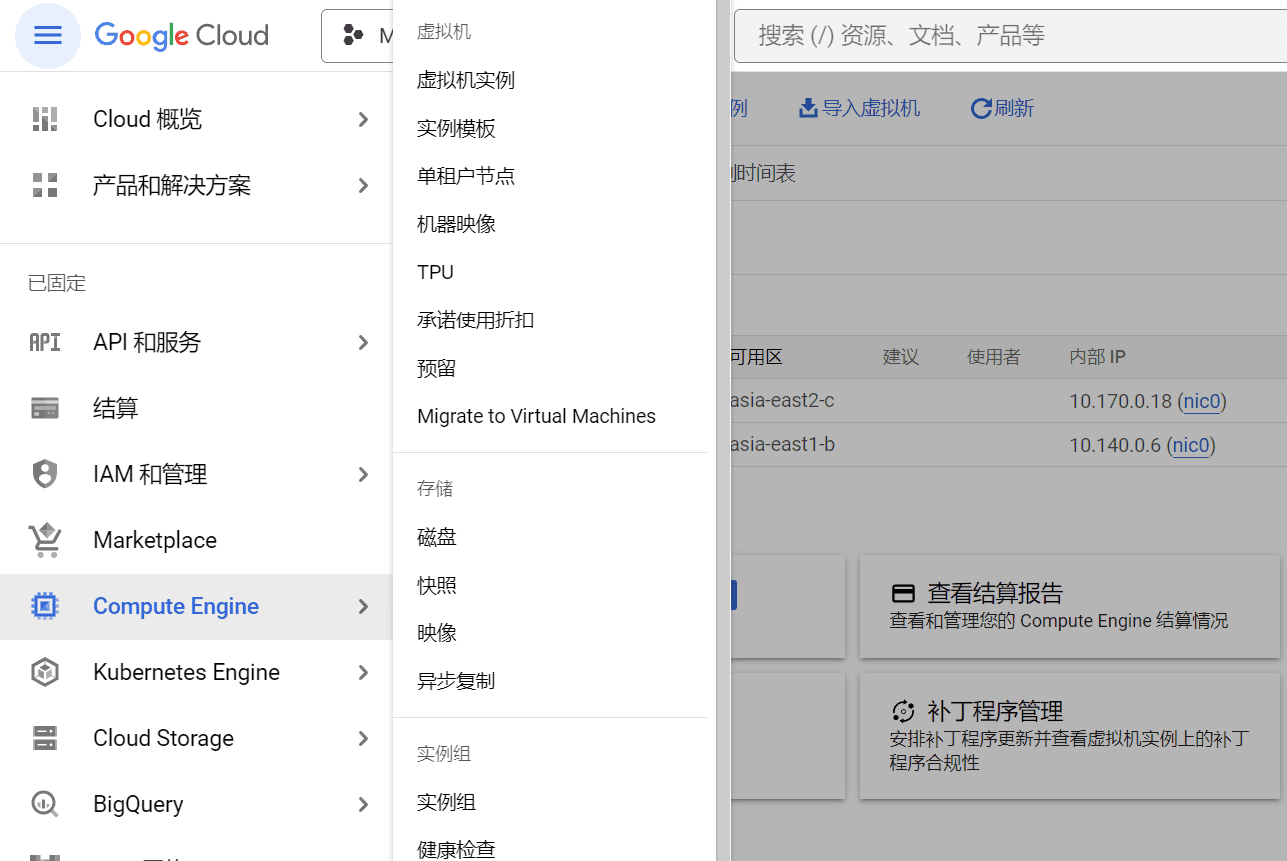
In Google Cloud, click Compute Engine in the menu and click VM Instances.
Click Create Instance in Virtual Machine Instances, then in Region and Availability Zone, select the country where the server is located. After selecting, select the machine configuration.
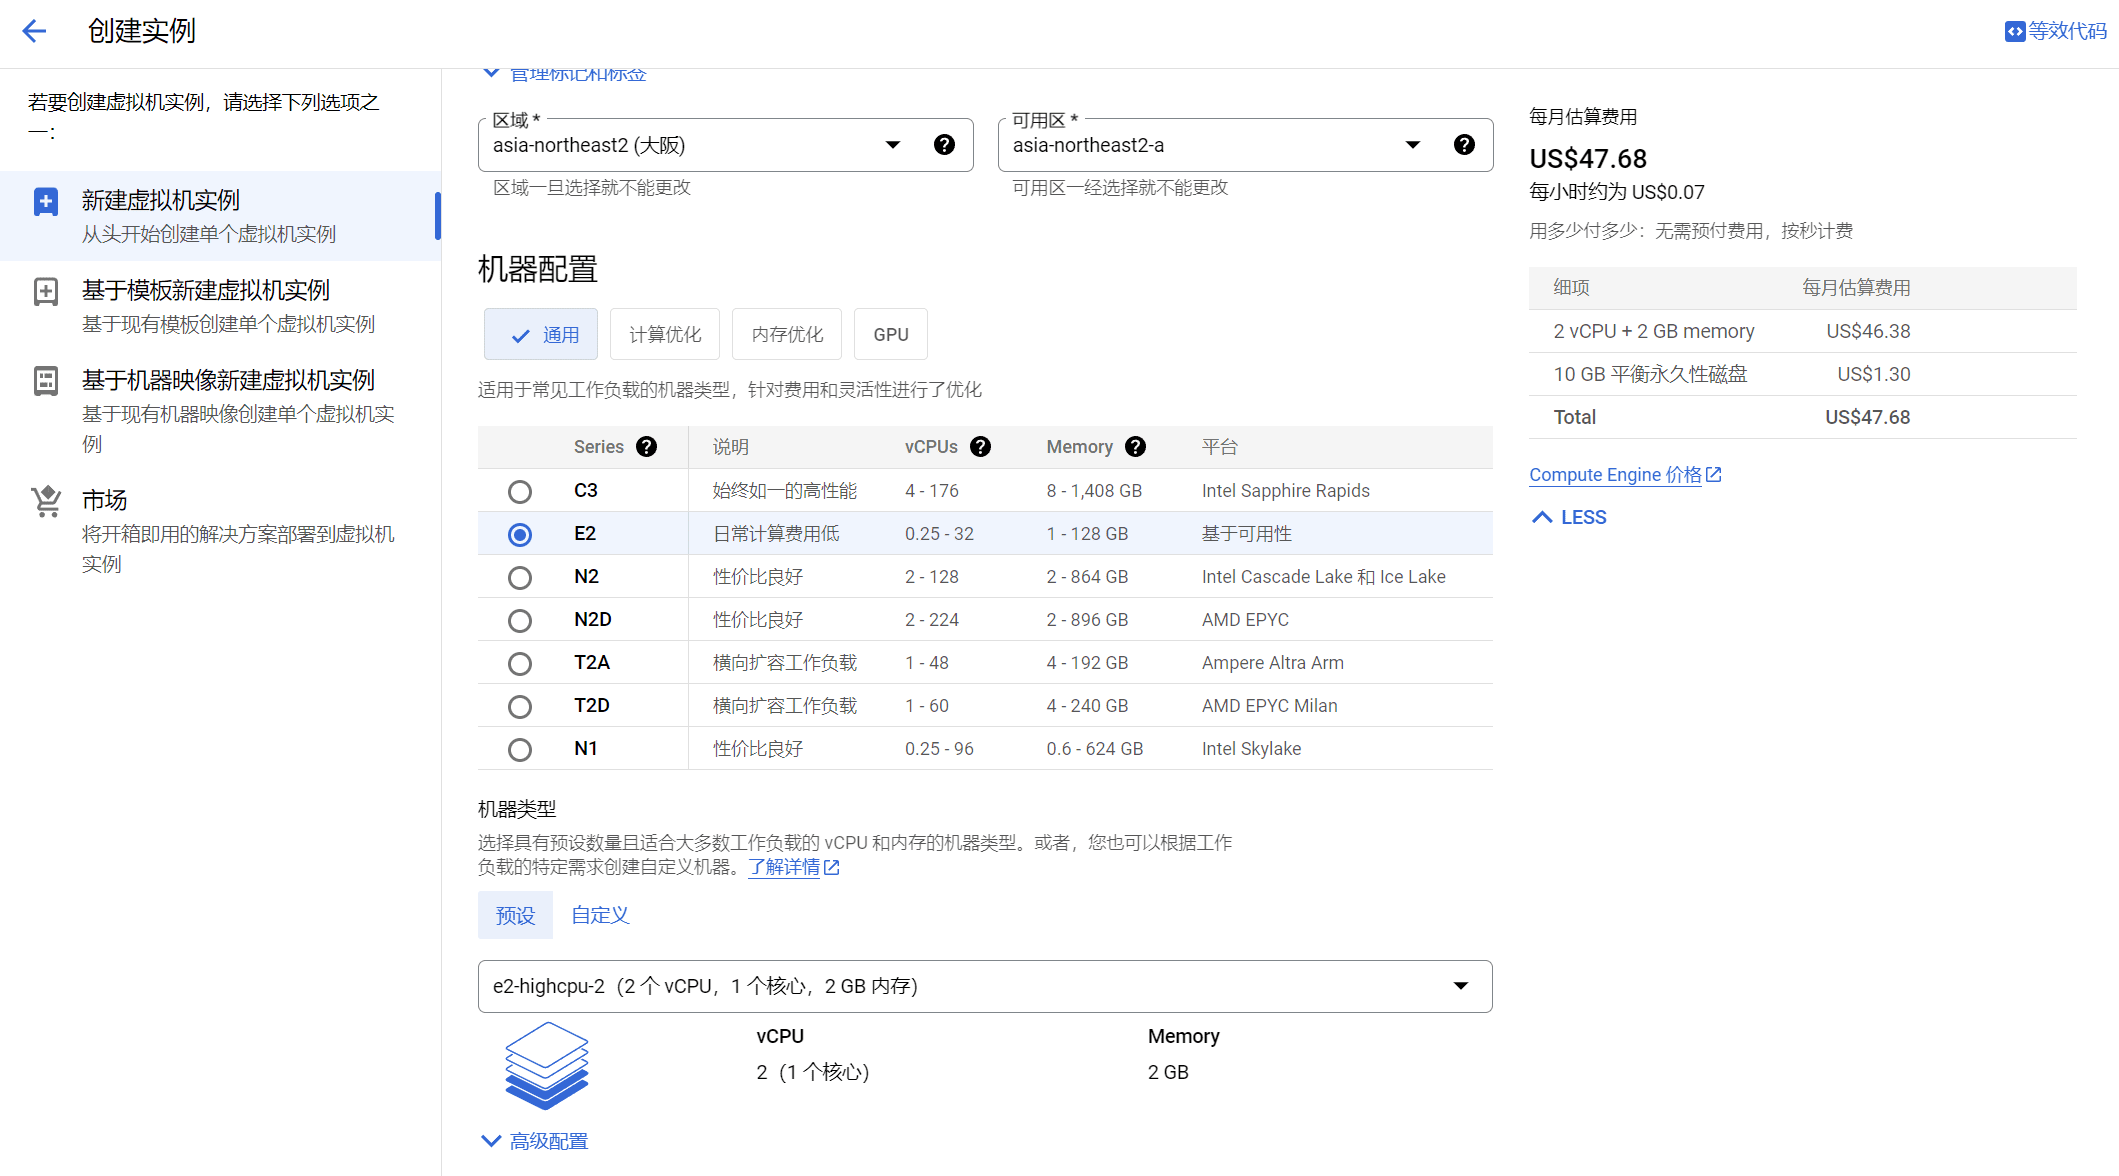
For entry-level server configuration, select E2 server. In the machine type below, select e2-highcpu-2. This configuration is the minimum configuration for independent CPUs, with 2 vCPUs, 1 core, and 2GB of memory.
Compared to users who are just starting to build a website, the configuration is sufficient. You also need to remember to block the collection of rogue spiders. Basically, it is enough for use.
By default, Standard is selected for the availability policy.
In the Startup Disk option, click Change to configure the disk size and the image to install the operating system.
Select Rocky Linux as the operating system and Rocky Linux 8 optimized for GCP or Rocky Linux 8 as the version. Remember to select the x86/64, x86_64 version.
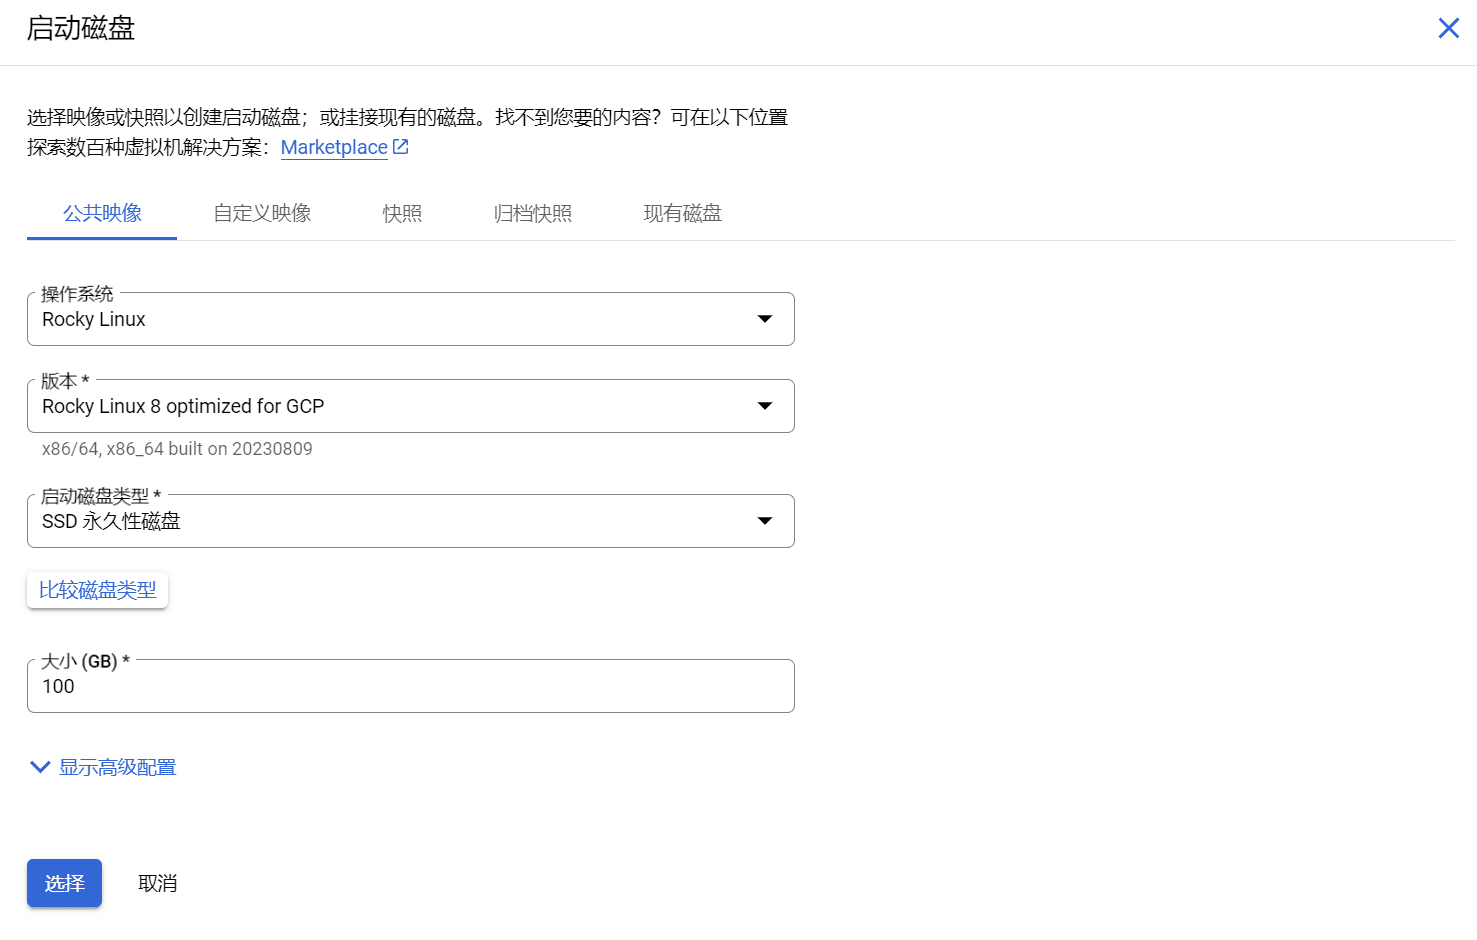
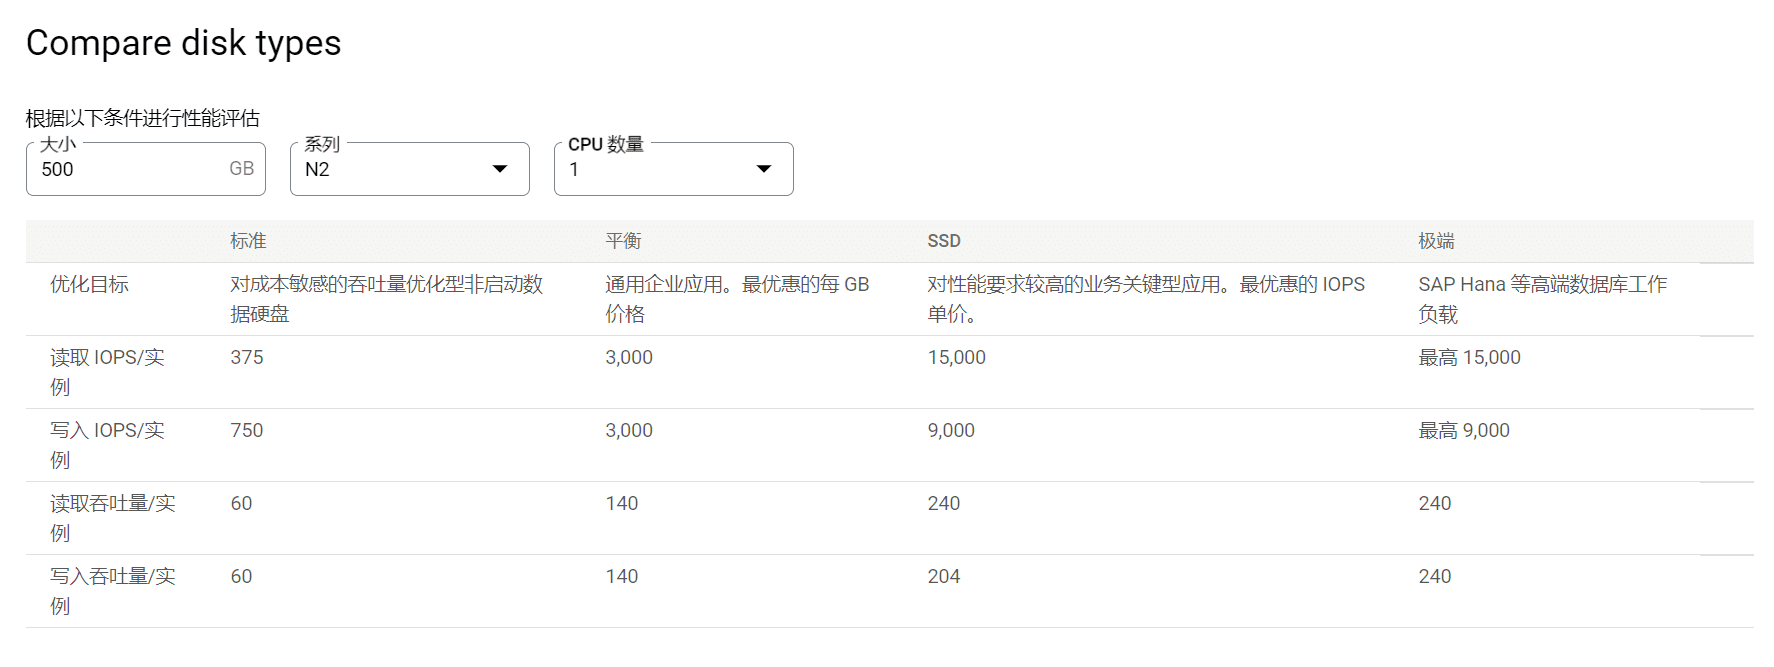
Select SSD persistent disk as the boot disk type and fill in 100GB for the size. The price of SSD persistent disk is not much different from that of balanced persistent disk. The price difference between 100GB SSD persistent disk and balanced persistent disk is only about US$10 per month.
After the settings are completed, click Select, enter the next option, check Allow HTTP and HTTPS traffic in the firewall, and then click Create!
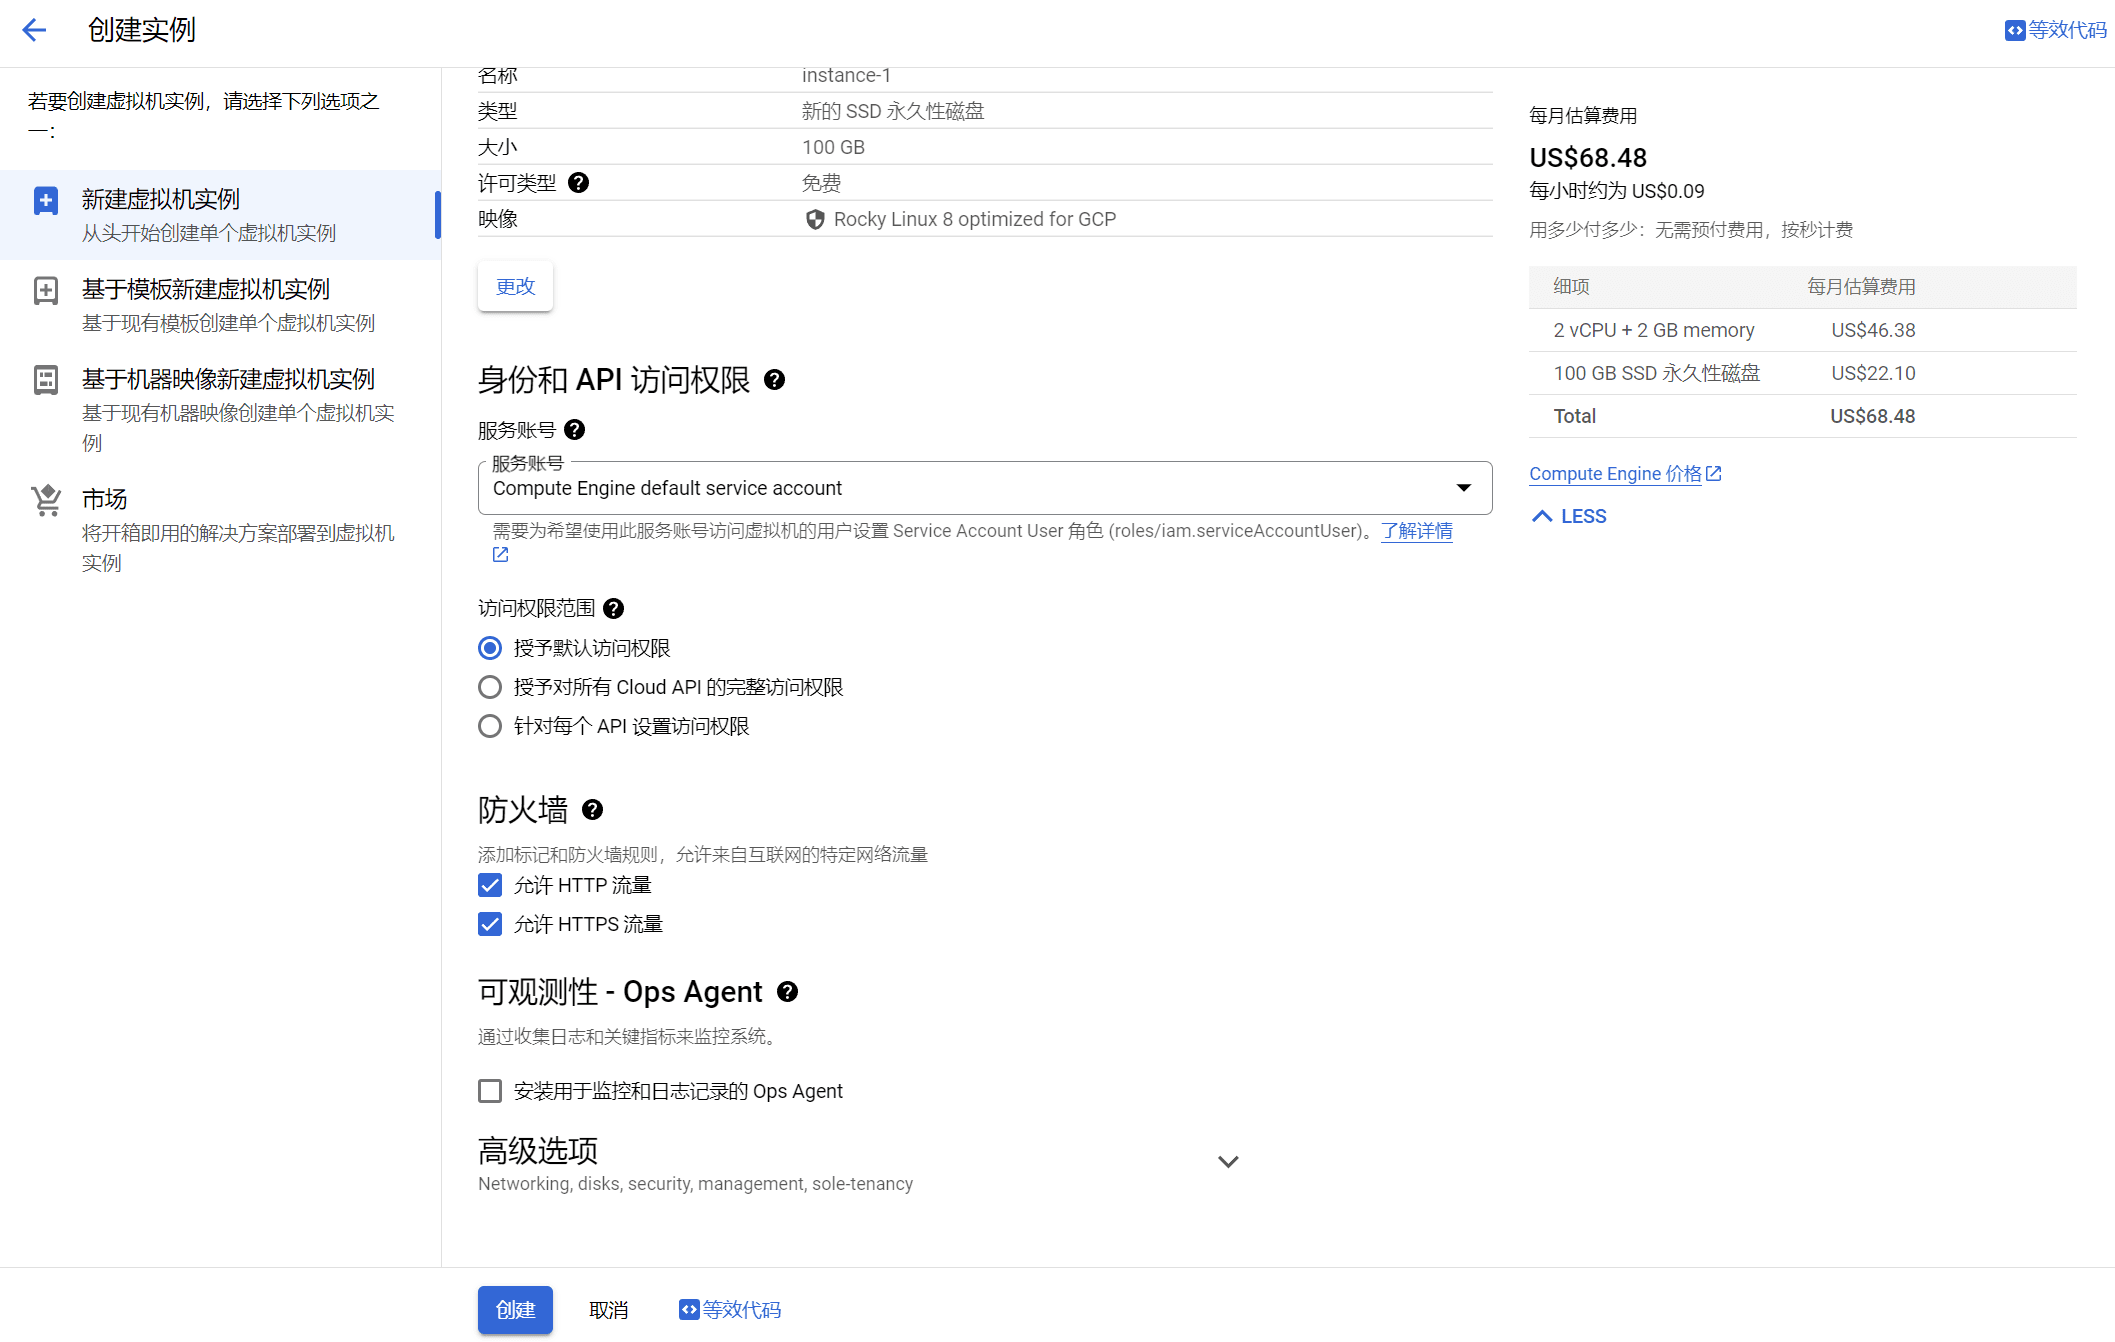
It’s about $70 per month, $210 for three months, and the free $300+100 is enough to maintain three months of free use.
After the server is created, you also need to configure a permanent IP address. Currently, the server's IP address is randomly assigned. Once the server is restarted, the IP address will change.
Create a static IP address
In the left menu, click VPC Network, then click IP Address.
On the IP Address page, click Reserve External Static Address.
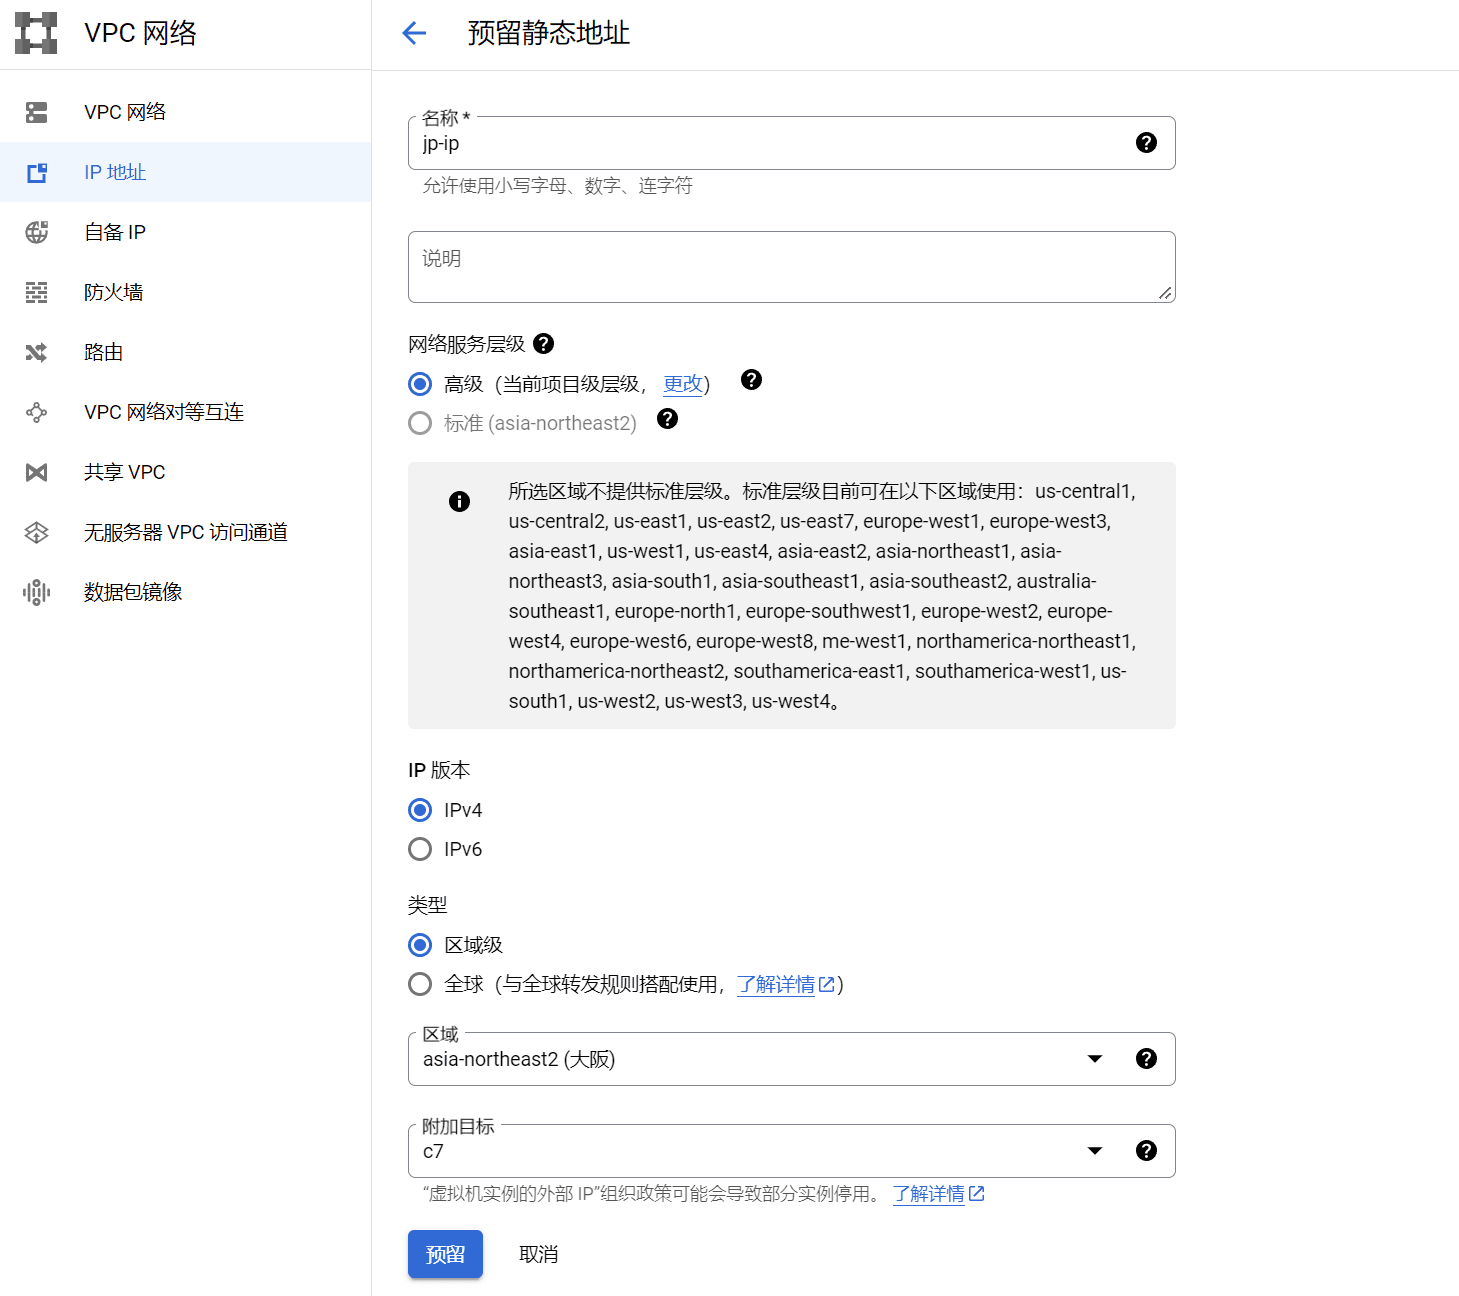
Fill in the static IP address name, and then select the region where your server is located in the region. Note that if you select the wrong region, you will not be able to bind the additional target server. After selecting the region, select the server name you created previously in the attached target.
Then click Reserve, and your static IP address has been bound and created!
The last step is to set up the firewall!
Configuring VPC firewall rules
When we created the server just now, we chose to open HTTP and HTTPS ports, that is, ports 80 and 443. Other ports are closed by default. If you want to configure a firewall on the server, you need toGoogle CloudThe firewall on the platform is set to transparent mode.
Click VPC Network in the left menu, then click Firewall. Go to the Firewall Policy page and click Create Firewall Rule.
Set a firewall rule name, then pull down. The default traffic direction is inbound, and the default action for matching items is allowed. In the target option below, click the drop-down menu and select All instances in the network.
Source filter condition, default IPv4 range, fill in 0.0.0.0/0 in the source IPv4 range
Finally, in the Protocol and Port options, select Allow All and click Create to create an ALL IN transparent rule that opens all ports.
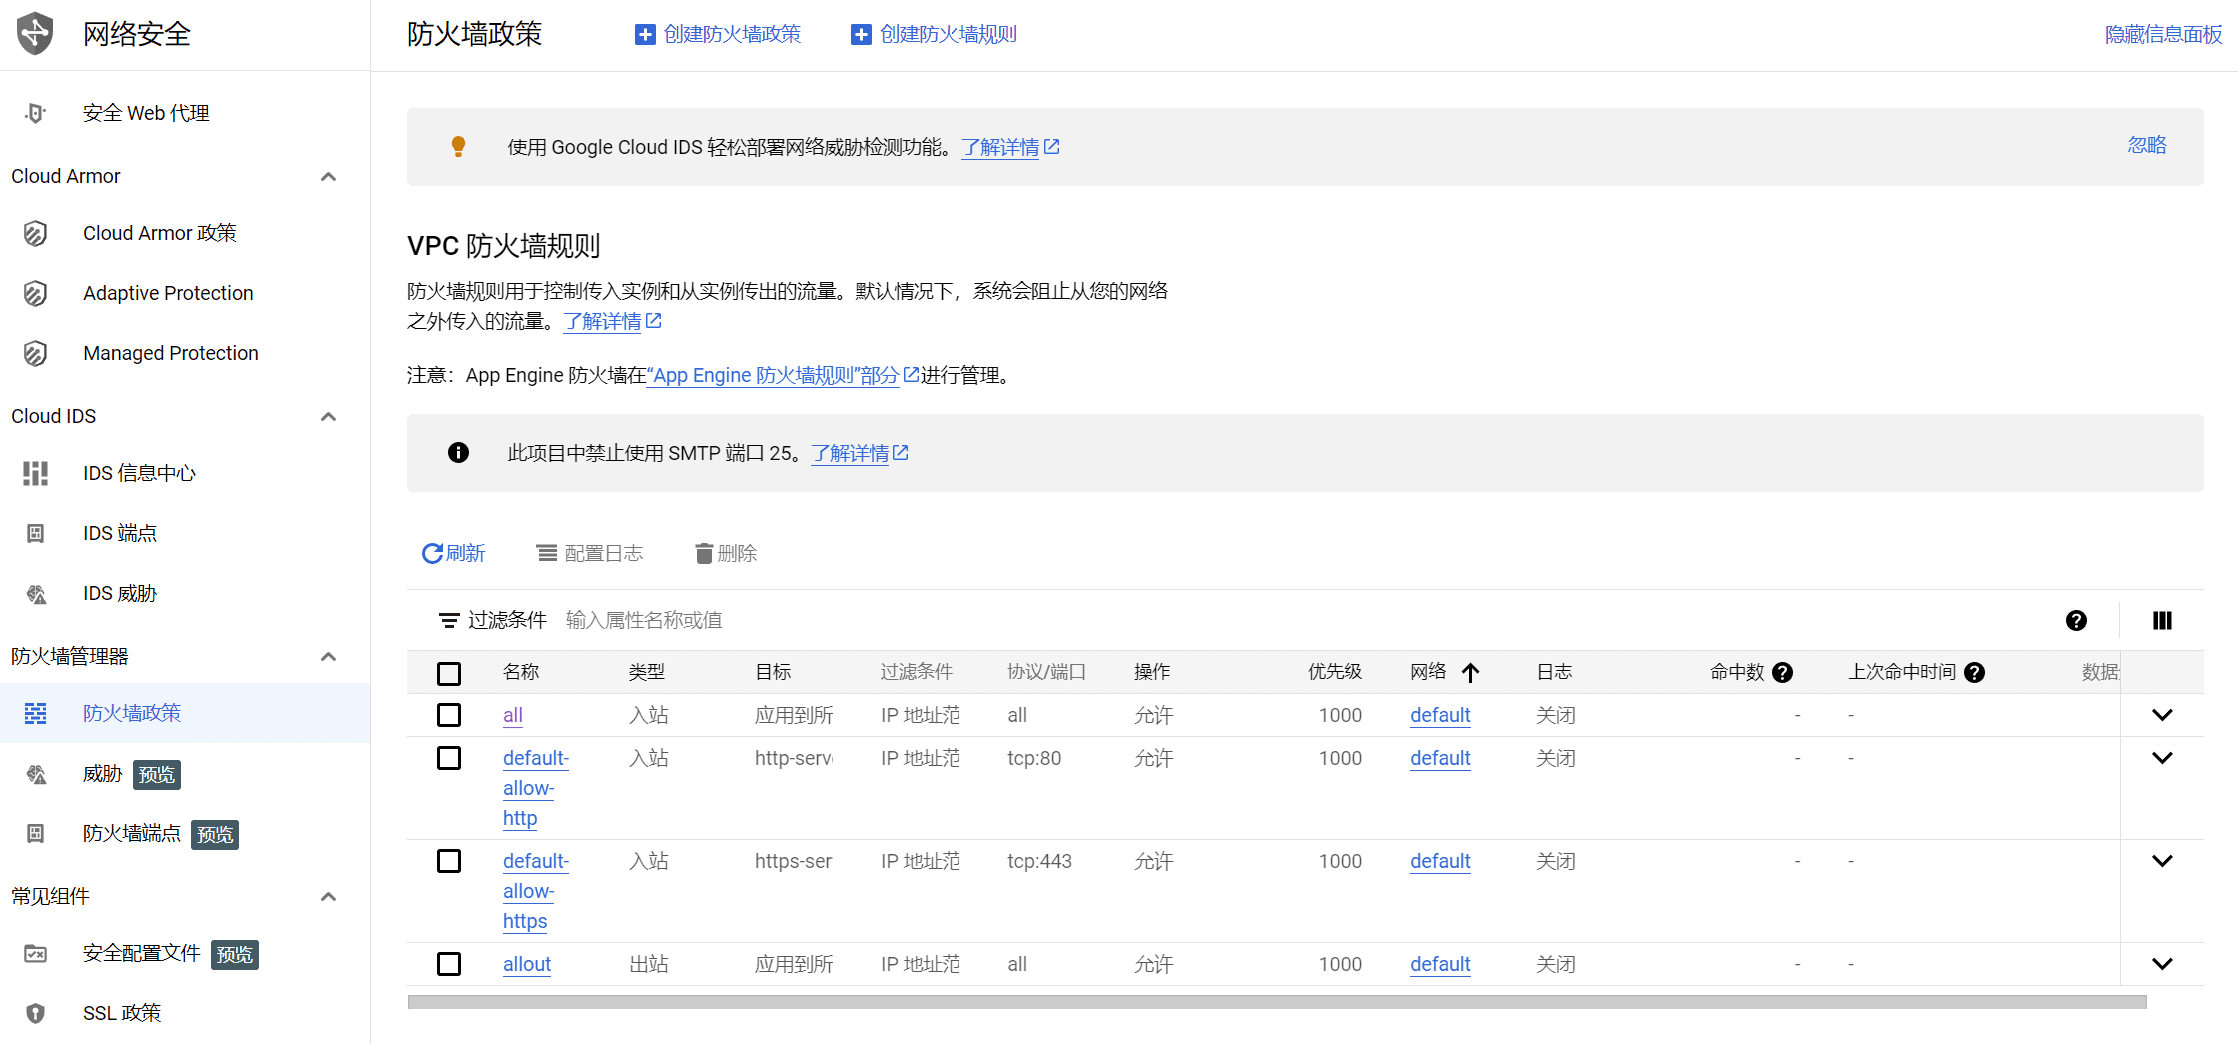
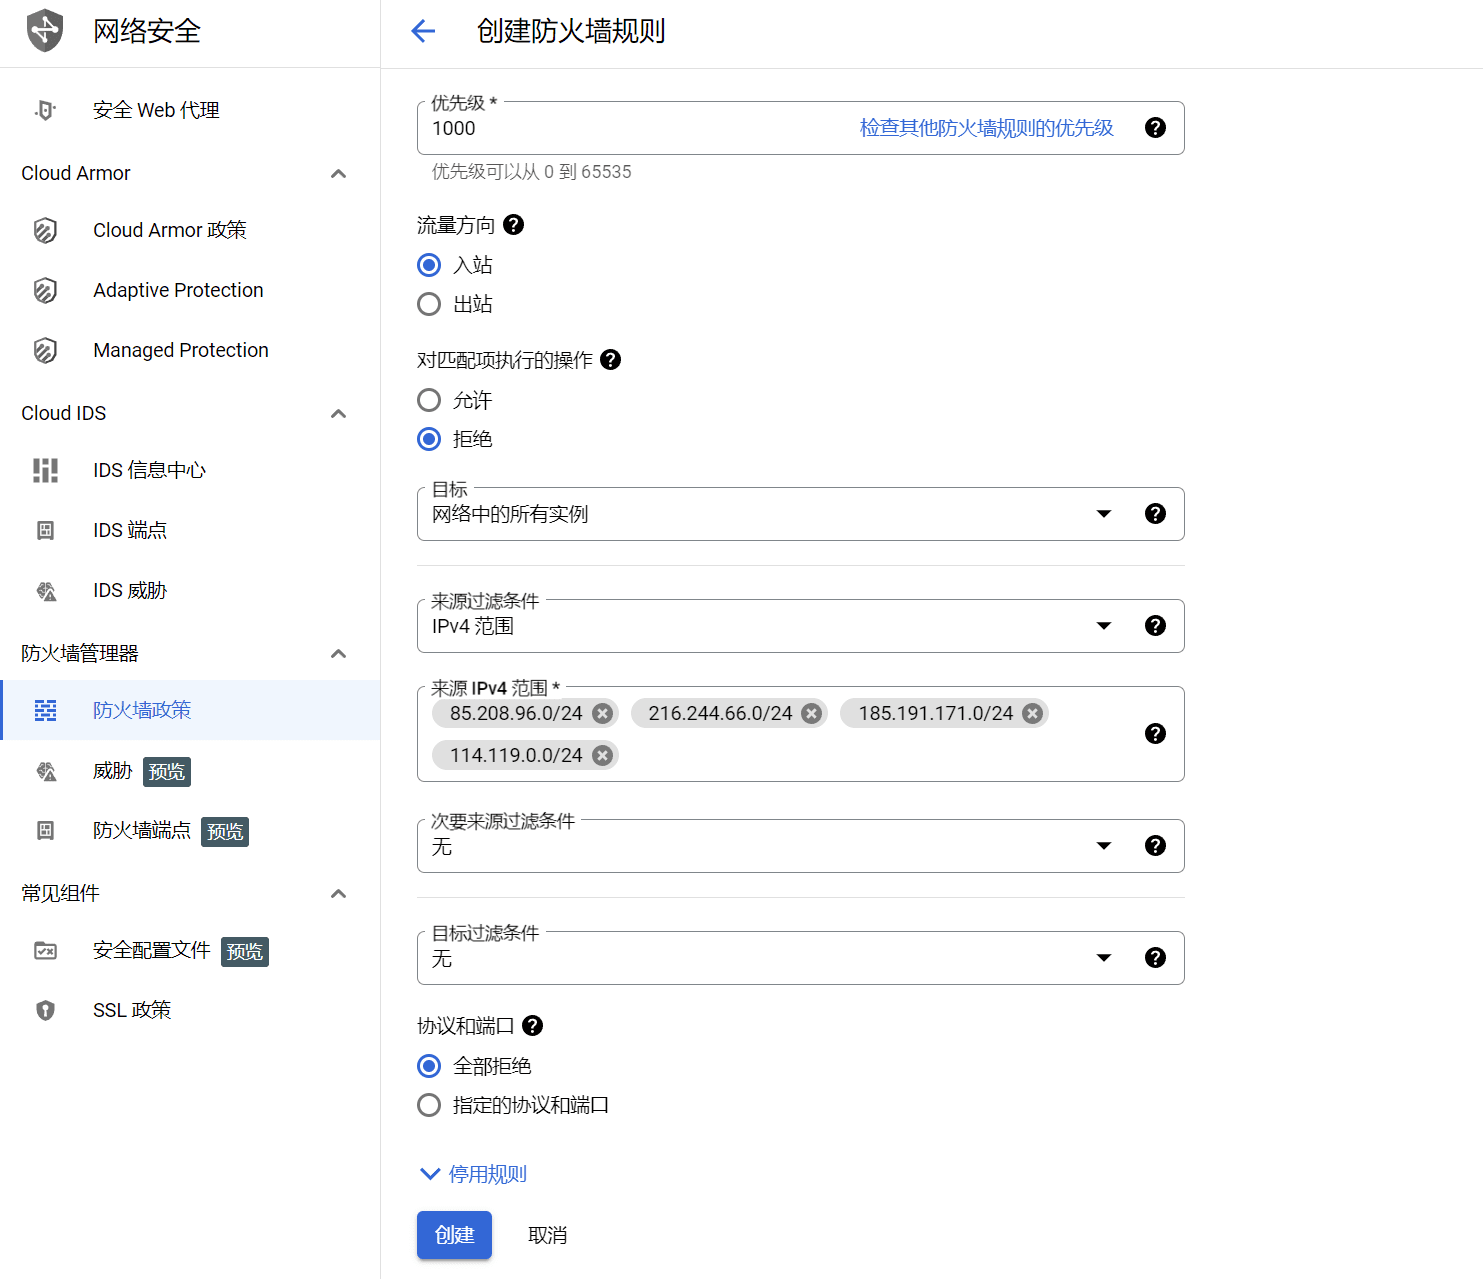
Here is an example of blocking the IP address segments of some rogue spiders.
Select Deny for Action on Matches and Deny All for Protocol and Port.
In Source IP address range, fill in the IP address segment that needs to be blocked.
216.244.66.0/24
85.208.96.0/24
185.191.171.0/24
114.119.0.0/24
216.244.64.0 - 216.244.95.255
185.191.171.0 - 185.191.171.255
114.119.128.0 - 114.119.191.255
85.208.96.0 - 85.208.96.255
 At this point, the Rocky Linux8 server has been created!
After the server is created, other operations are the same as those of the CentOS system.
set upSSHRemote login, installation of server panels, etc.
Here are some server configuration tutorials for reference:
- Google Cloud Google Cloud Server SSH Remote Configuration Tutorial 2023
- CyberPanel Linux Hosting Panel - OpenLiteSpeed Support Simple, Fast and Open Source Control Panel
- Install WordPress with CyberPanel and configure pseudo-static rules
- AMH-WP builds a personal blog website: using AMH hosting panel WordPress installation


