Excellent software and practical tutorials
Oracle automatically grabs server script and automatically notifies through airplanes!
ARM Servers Automatically grab server script, configure by installing Terraform and oci-cliOracle Automatic server grabbing script. Oracle provides lifetime free servers. In addition to the difficulty of registration, it is also difficult to grab a server even if the registration is successful. The following is an automatic server grabbing script for ARM servers to apply for ARM servers in real time.
Install Terraform
wget https://releases.hashicorp.com/terraform/0.15.5/terraform_0.15.5_linux_amd64.zip
Unzip and move the terraform file to the /usr/bin directory
unzip terraform_0.15.5_linux_amd64.zip mv terraform /usr/bin
Use the following command to check the version
terraform version
If the following is displayed, the installation is successful

Install oci-cli tool
Install the oci-cli tool using the following command
bash -c "$(curl -L https://raw.githubusercontent.com/oracle/oci-cli/master/scripts/install/install.sh)"
Just keep pressing Enter
When it appears:
![]()
At this time, you are prompted to enter y and press Enter, and the environment variable will be automatically added.
Then keep pressing Enter. The following prompt appears, indicating that the installation is successful. You can use: oci -v to query the version

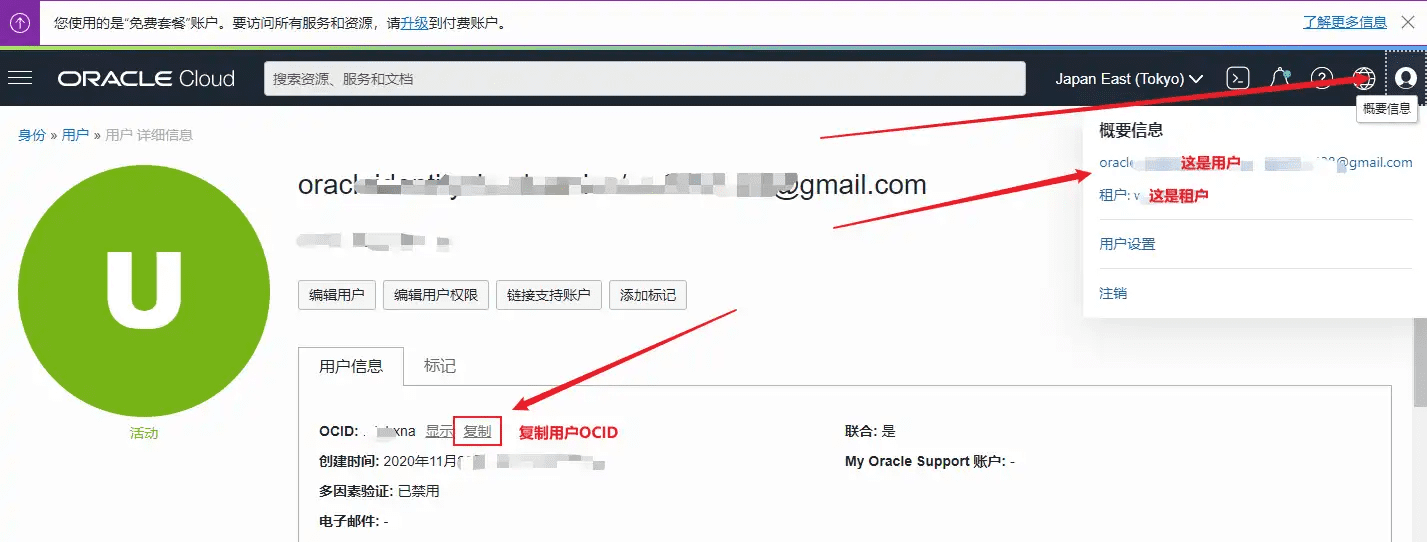
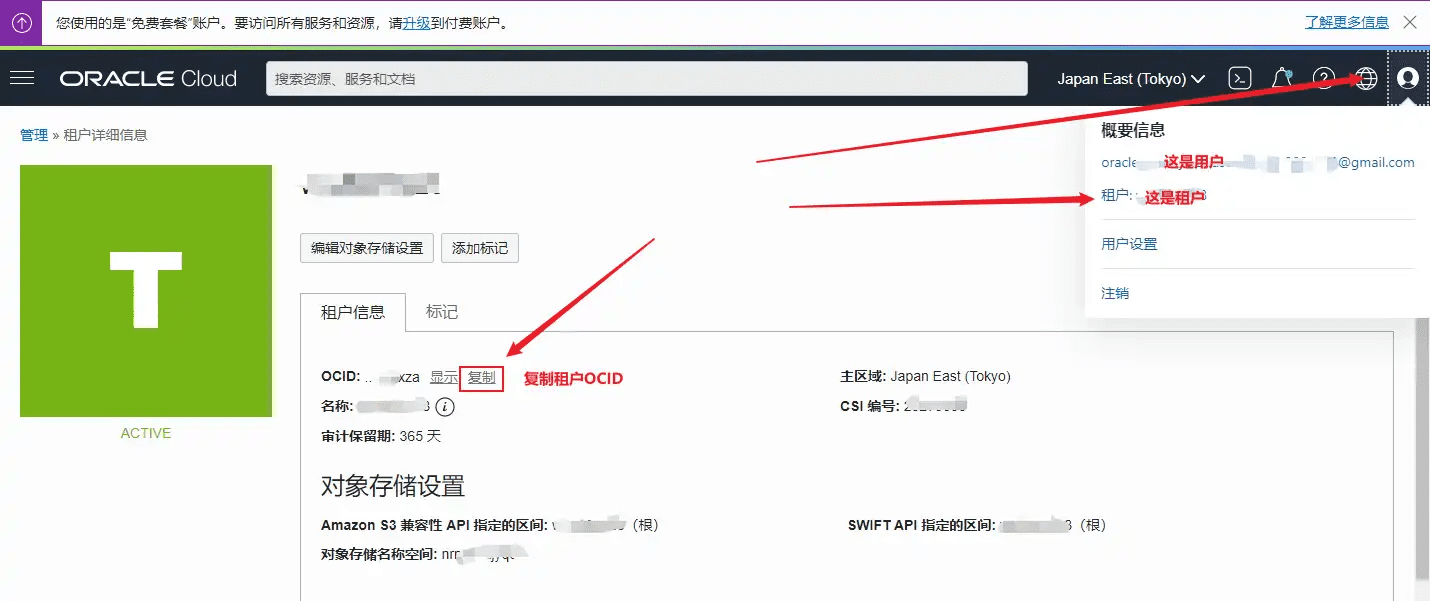
Copy the ocid of the user and tenant
In the upper right corner of Oracle Backstage - User Settings - Click User and Tenant. In the information bar, there is the ID we need. Click Copy respectively. You can save it in Notepad for backup.
Oracle Oracle ARM server automatically grabs server script!
Configure the cli
Enter the following code to start configuration. The default configuration path is in the root directory.
oci setup config
See below for specific configuration
Enter a location for your config [/root/.oci/config]: Enter a user OCID: # Enter a tenancy OCID: # Enter a region by index or name(eg 1: ap-chiyoda-1, 2: ap-chuncheon-1, 3: ap-hyderabad-1, 4: ap-melbourne-1, 5: ap-mumbai-1, 6: ap-osaka-1, 7: ap-seoul-1, 8: ap-sydney-1, 9: ap-tokyo-1, 10: ca-montreal-1, 11: ca-toronto-1, 12: eu-amsterdam-1, 13: eu-frankfurt-1, 14: eu-zurich-1, 15: me-dubai-1, 16: me-jeddah-1, 17: sa-santiago-1, 18: sa-saopaulo-1, 19: uk-cardiff-1, 20: uk-gov-cardiff-1, 21: uk-gov-london-1, 22: uk-london-1, 23: us-ashburn-1, 24: us-gov-ashburn-1, 25: us-gov-chicago-1, 26: us-gov-phoenix-1, 27: us-langley-1, 28: us-luke-1, 29: us-phoenix-1, 30: us-sanjose-1): 9 #Select your region hereDo you want to generate a new API Signing RSA key pair? (If you decline you will be asked to supply the path to an existing key.) [Y/n]: y # Enter y to generate a public key Enter a directory for your keys to be created [/root/.oci]: Enter a name for your key [oci_api_key]: Public key written to: /root/.oci/oci_api_key_public.pem Enter a passphrase for your private key (empty for no passphrase): Private key written to: /root/.oci/oci_api_key.pem Fingerprint: Config written to /root/.oci/config If you haven't already uploaded your API Signing public key through the console, follow the instructions on the page linked below in the section 'How to upload the public key': https://docs.cloud.oracle.com/Content/API/Concepts/apisigningkey.htm#How2
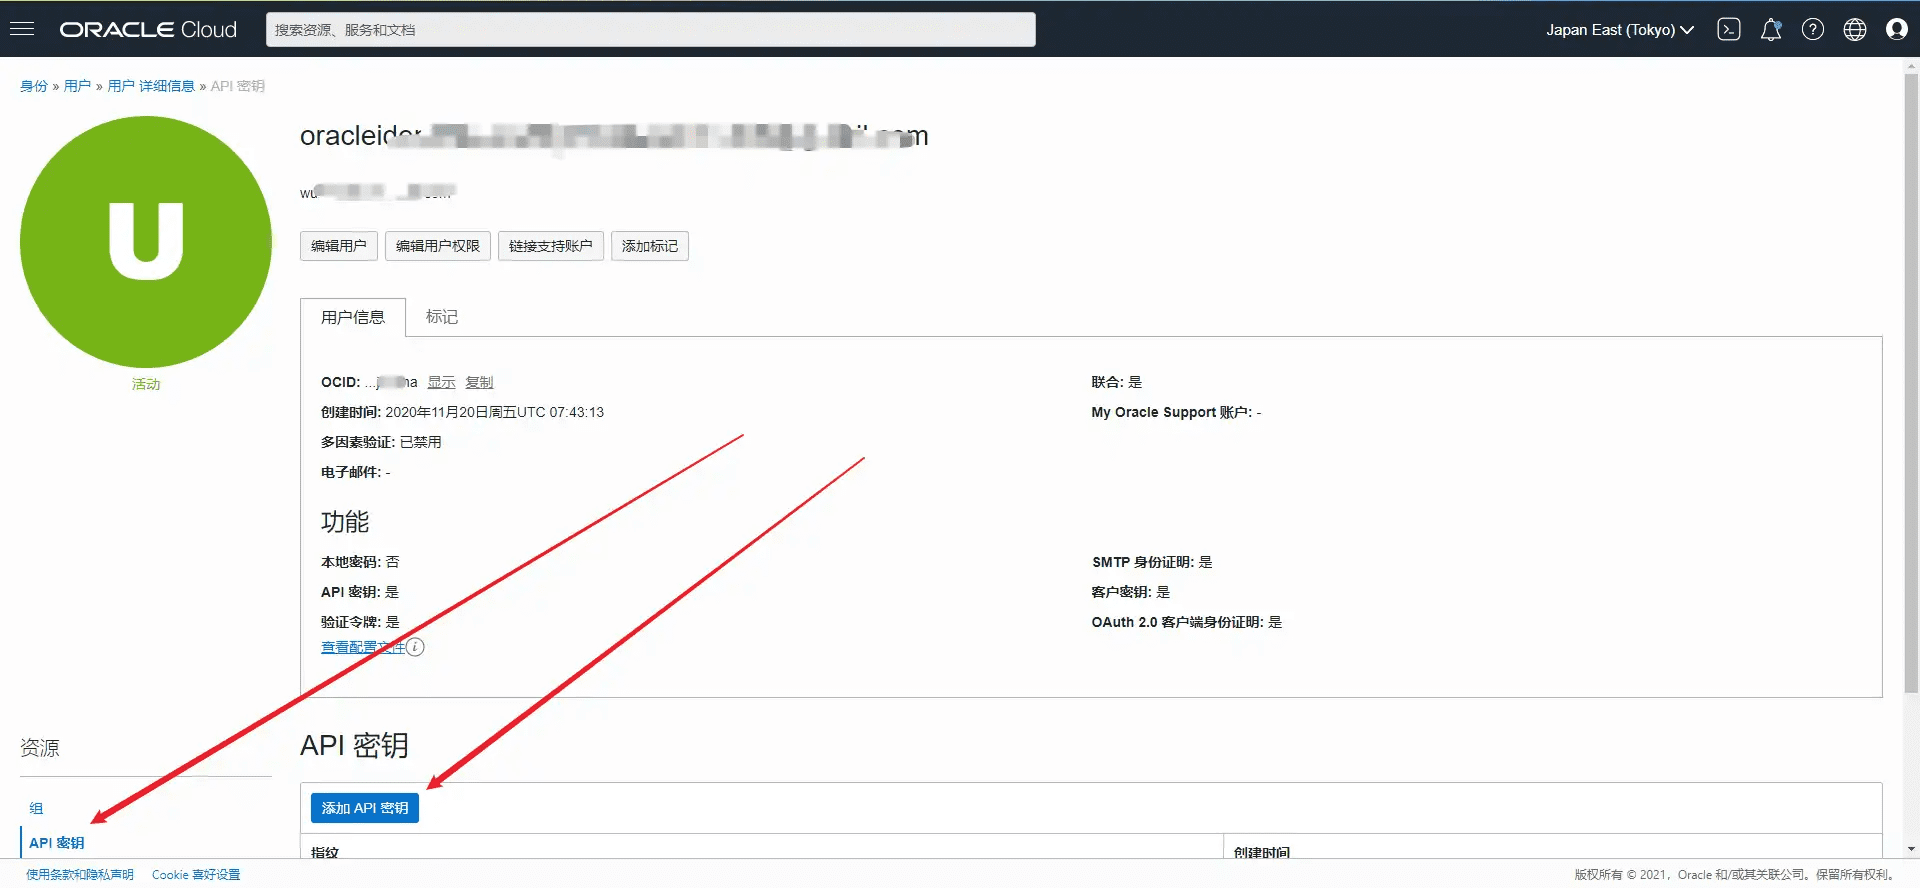
Copy the generated public key and use the following command to obtain the public key
cat /root/.oci/oci_api_key_public.pem
Copy the displayed content and add it to
Oracle Backend - User Settings - Resources - API Key - Add API Key
Use the following command to test whether the oci configuration is correct
oci iam availability-domain list
The following content is prompted to be configured correctly

Terraform environment initialization
1. Let’s get Oracle’s Terraform script first
Click Create VM Instance
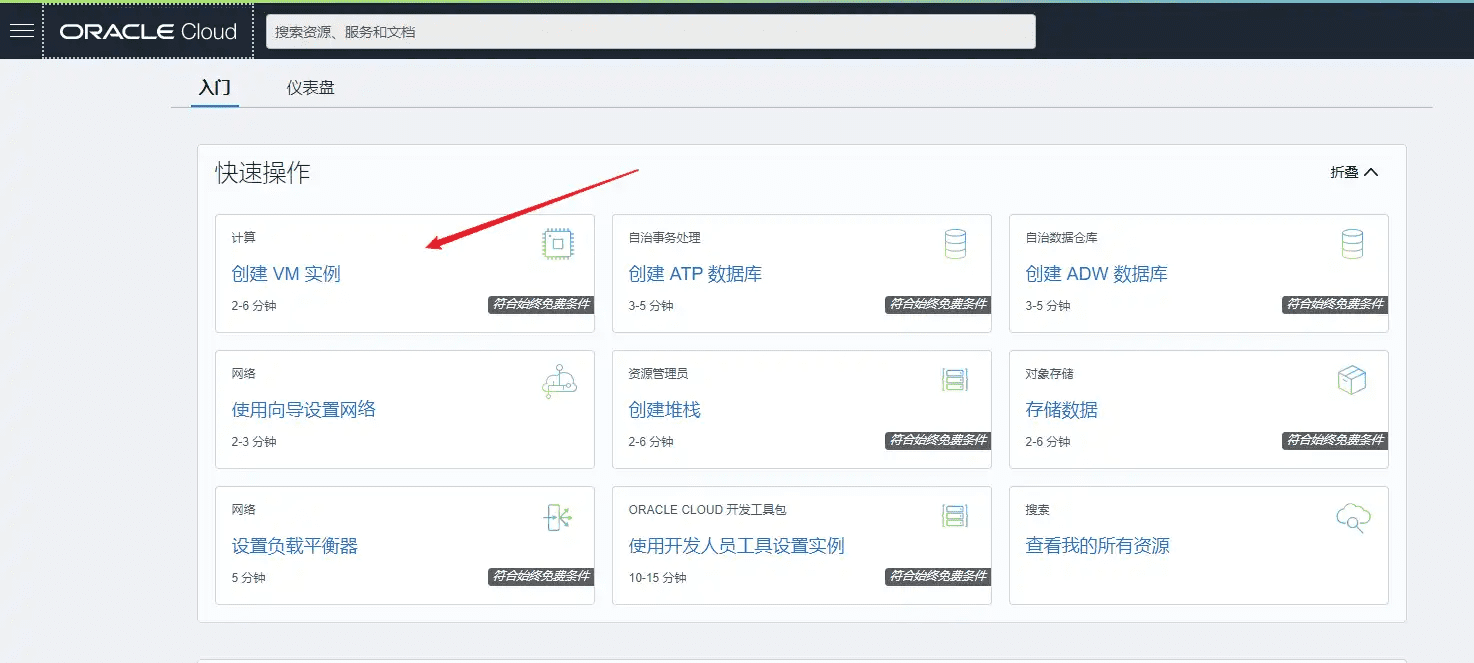
Select the configuration you need here
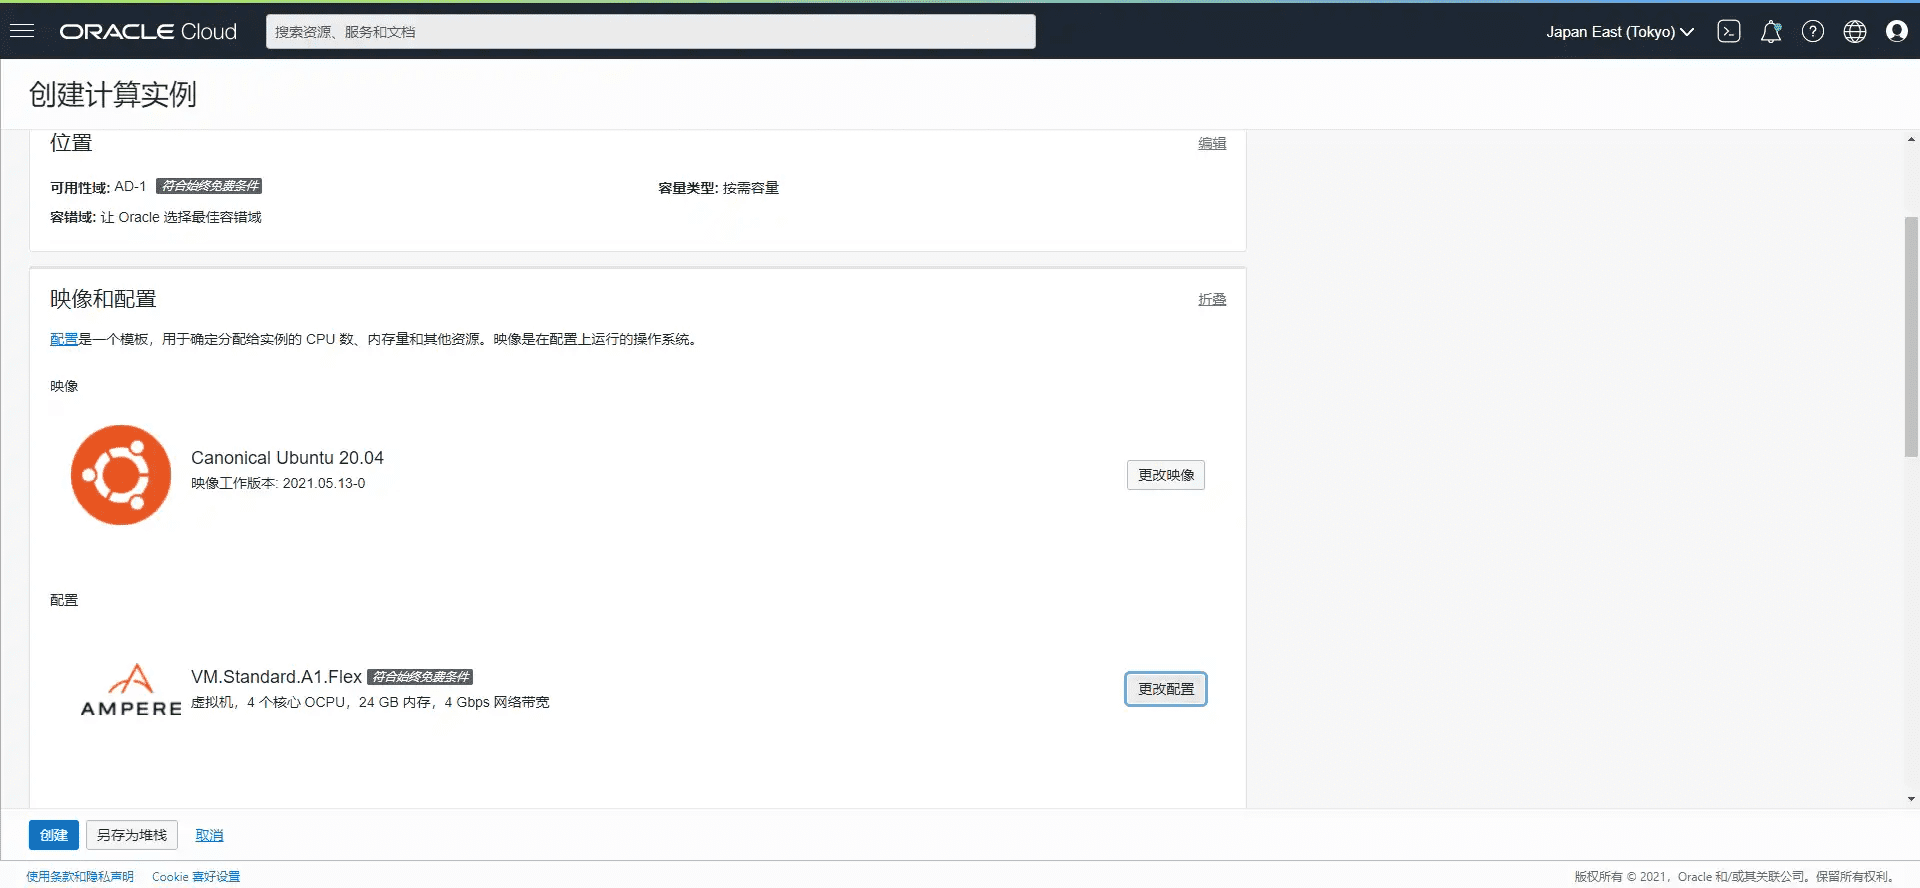
Remember to save the private key
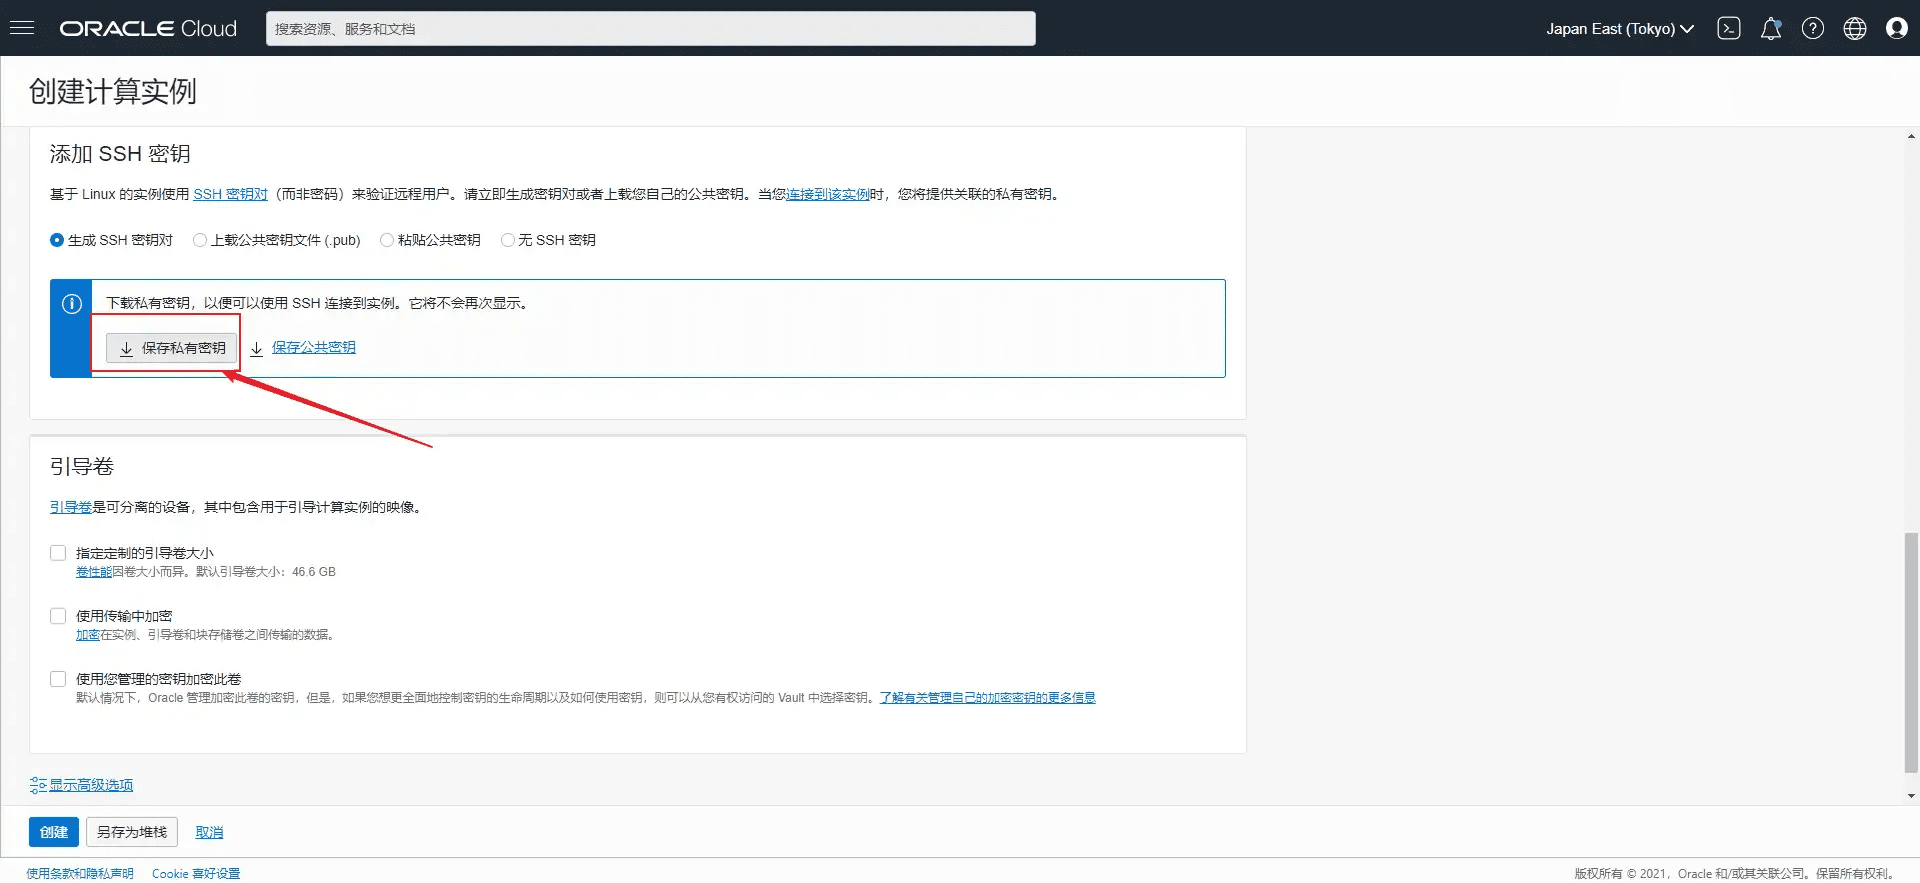
Click Save as Stack
Keep going to the next step
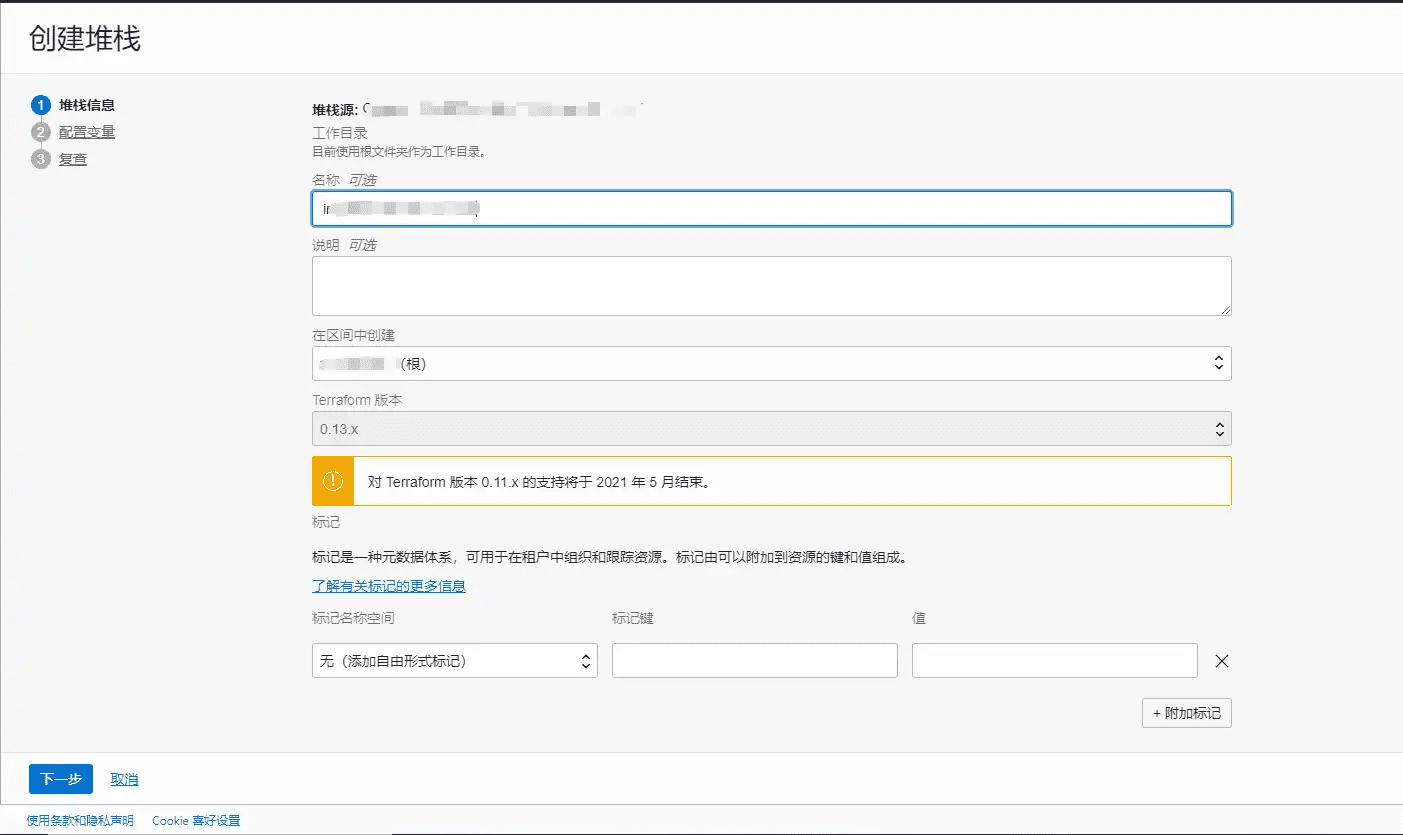
Click to download
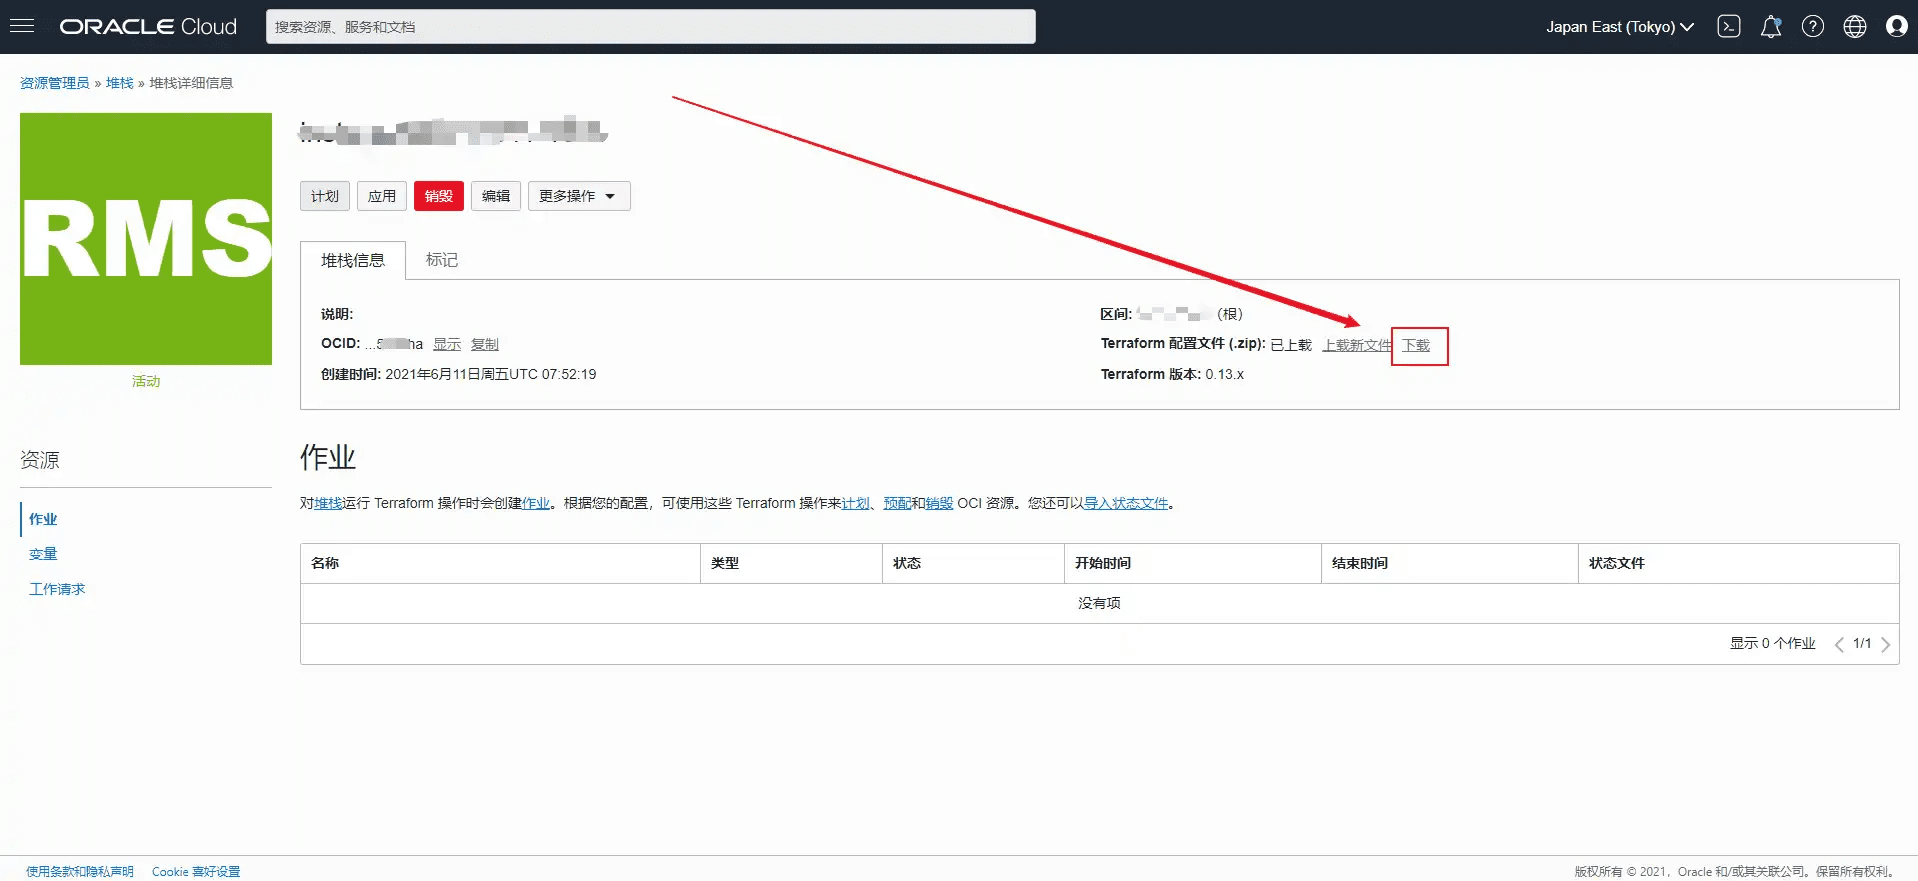
Unzip the compressed package to the desktop for later use
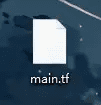
2. Configure Terraform
Create a Terraform run directory using the following command
cd /opt/ mkdir terraform-learning && cd terraform-learning
Upload the main.tf file just unzipped to the desktop to this directory
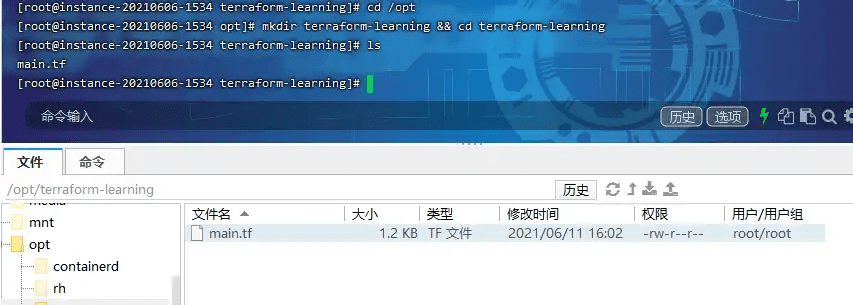
Set the directory to the Terraform run directory
terraform init
After completing the above, start creating tasks with the command: (note that it is still in /opt/terraform-learning)
terraform apply
After executing the above command, you will be prompted to enter yes
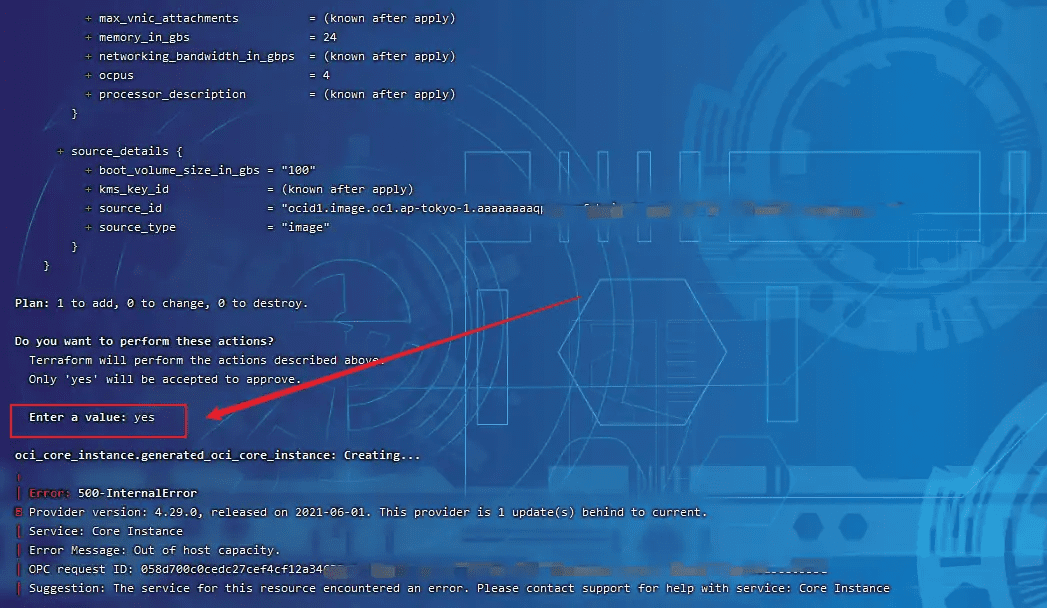
In the above figure, you can also see that the API returns Error Message: Out of host capacity, indicating that the host capacity is insufficient. Now just use the script to refresh it continuously.
Deployment Scripts
Finally, you can deploy the script to grab the server. Please get the telegram account ID first and follow the notification robot @oracle_message_bot
Please obtain TG id through @userinfobot robot
Create a new terraform.sh in the root directory
cd /root vi terraform.sh
Write the following content
#!/bin/bash path='/opt/terraform-learning/' FIND_FILE="/root/terraform.log" #Log file locationFIND_STR="Apply complete!" cd $path && while true do echo 'yes' | terraform apply -lock=false sleep 1s done if [ grep -c "$FIND_STR" $FIND_FILE -ne '20' ];then curl --location --request POST 'https://api.telegram.org/bot2124631392:AAHtVpEm7KRWo6ulYNG_Zbz98irpmTSIf8o/sendMessage' \ --form 'text=Server created successfully! ' \ --form 'chat_id=your tg id' \ --form 'parse_mode=markdown' pkill terraform exit 0 fi
Grant execution permissions to the Shell script:
chmod +x terraform.sh
Run the script in the background using the following command
nohup ./terraform.sh >> terraform.log 2>&1 &
How to end the script?
End the script with the following command
pkill terraform


