Excellent software and practical tutorials


What configurations need to be modified after CyberPanel installation
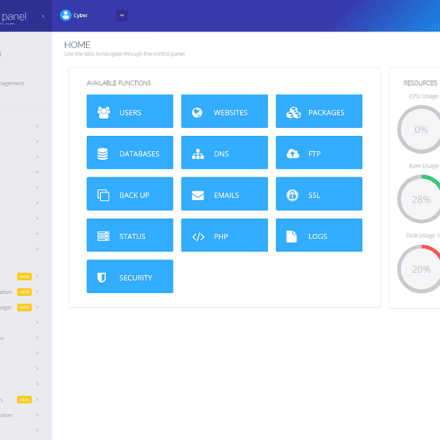
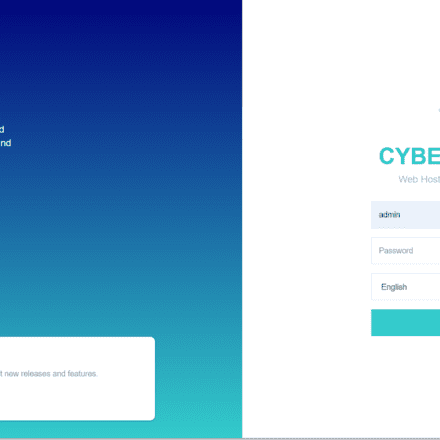
After installing CyberPanel, there are some important configuration adjustments that can be made to ensure its performance and security. The following are some recommended configuration steps.

Changing the Default Port
By default, CyberPanel is accessed using port 8090. This port can be changed for increased security.
In CyberPanel, go to Security > Firewall, open the new port you want to use, and configure it as the new Panel access port.
Configure Firewall
CyberPanel comes with basic firewall settings, and you can configure specific port access rules as needed.
In CyberPanel's Security > Firewall, restrict unnecessary ports and open only SSH, HTTP, HTTPS, and Panel management ports.
CSF (ConfigServer Security & Firewall) firewall on Ubuntu
Enable SSL
Enable SSL protection for CyberPanel to ensure encrypted transmission of data when accessing the panel.
In SSL > Hostname SSL, enter your domain name and request an SSL certificate to enable HTTPS access to the panel.
Configuring the Mail Server
If you need to use the built-in mail server of CyberPanel, go to Mail Server and make sure it is configured correctly.
Set up anti-spam filtering and DKIM to increase email deliverability and security.
Optimizing PHP settings
Go to PHP > Edit PHP Configuration and adjust the PHP version, memory limit, execution time, etc. according to the needs of the website.
If you have multiple sites, you can assign different PHP versions to different sites.
Configuring backup policies
In the Backup section, set up automatic backups to protect important data. You can choose to store the backups locally or remotely.
It is recommended to perform regular backups, especially of business data or customer data.
Setting up ModSecurity
CyberPanel supports ModSecurity. You can enable the Web Application Firewall (WAF) in Security > ModSecurity configuration to prevent common web attacks.
Choose the appropriate rule set to ensure proper protection while minimizing false positives.
Turn on explosion protection
CyberPanel supports Fail2Ban, which can be configured in Security > Brute Force Protection to limit brute force attacks on SSH and the CyberPanel management interface.
Optimizing MySQL Configuration
Optimize the MySQL configuration file /etc/mysql/my.cnf according to the server resources and website traffic.
Increasing parameters such as buffer size, connection limits, and query cache can help improve database performance.
Setting up log monitoring
Make sure error logging and access logs are turned on to monitor and troubleshoot issues in a timely manner.
In CyberPanel, you can directly view Logs > Error Logs, or configure logrotate to clean up log files regularly.
Update CyberPanel regularly
Update CyberPanel regularly to ensure the latest security patches and feature improvements are installed. You can update using the following command:
sudo apt update && sudo apt upgrade cyberpanel
After completing the above configuration, the security and performance of CyberPanel will be significantly improved. Regular review and maintenance of these settings will help ensure the long-term stable operation of the panel.
LiteSpeed Settings
In the LiteSpeed admin panel, there are multiple configurable parameters that can be adjusted according to the specific needs of the website. Below are the detailed parameters and their functions in the common settings of LiteSpeed.
Listeners
Port: The default HTTP port is 80 and the default HTTPS port is 443. You can customize the port (eg 8080, 8443).
Bind address: The IP address of the binding server, usually 0.0.0.0 (all available IPs).
SSL Settings: Configure the SSL certificate, private key path, and protocol version (for example, support for TLS 1.2 and 1.3).
Redirect: Enable automatic redirection of HTTP to HTTPS.
Virtual Hosts
Root Directory: Set the root directory path of the website.
Domain name binding: Bind one or more domain names to the virtual host.
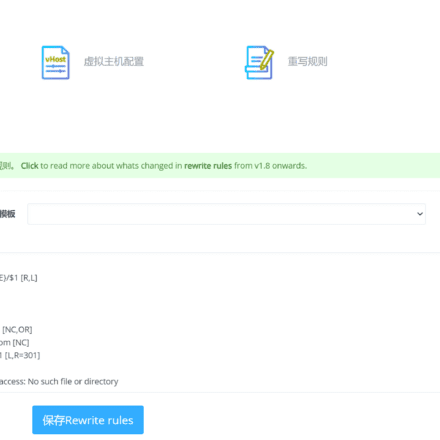
Rewrite rules: Enable .htaccess files and URL rewrite rules to implement SEO friendly links or other rules.
PHP Processor: Set the path to the PHP processor and the PHP version (such as PHP 7.4, PHP 8.0).
Error page: Customize 404, 403 and other error page paths.
Performance Settings
Max Connections: This is the maximum number of connections that can be processed at the same time. Properly increasing this value can support more concurrent access.
Request Timeout: Setting the request timeout (in seconds) can reduce the probability of server blocking.
Keep-Alive timeout: Set the HTTP Keep-Alive timeout. Properly increasing it can reduce connection overhead.
PHP Process Pool:
Maximum number of processes: The number of PHP processes allowed to run simultaneously.
Process Idle Timeout: The amount of time that a PHP process is recycled when idle to free up resources.
Caching
LiteSpeed Cache (LSCache):
Cache Lifetime: Set the validity period of cached content (in seconds).
Cache clearing rules: Configure rules for automatically clearing the cache when content is updated or under specified conditions.
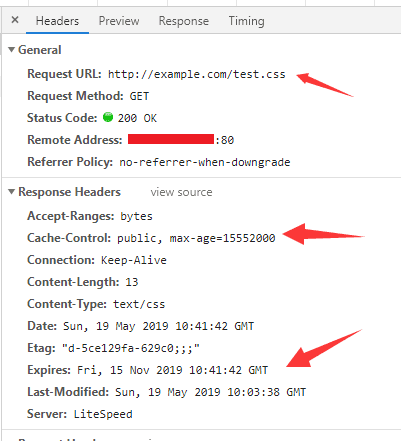
Browser Cache: Set the browser cache control header to let the browser cache static resources.
Object caching (Redis, Memcached, etc.):
Enable object caching: Turn on Redis or Memcached to improve database performance.
Connection configuration: Set the server IP and port of Redis or Memcached.
Security Settings
SSL/TLS settings:
Protocol Version: Select a supported TLS version (such as TLS 1.2 and 1.3).
Certificate and Key: Configure the SSL certificate and private key path.
OCSP Stapling: Enable OCSP Stapling to speed up the HTTPS handshake.
HSTS (HTTP Strict Transport Security): Forces browsers to access websites only through HTTPS to improve security.
Firewall Rules:
ModSecurity: Enable ModSecurity and load the rule set to defend against common web attacks.
IP Access Control: Set up IP addresses to allow or deny access to the panel or website.
Brute force protection: Use Fail2Ban to limit brute force attempts on SSH or panel logins.
Log Management
Access Log: records information about all access requests, such as client IP, request URL, and status code.
Error Log: Records all error messages for easy troubleshooting. You can set the log level (such as WARN, ERROR).
Log Rotation: Enable log rotation to prevent log files from becoming too large.
Resource Limitations
Bandwidth Throttling:
Global bandwidth limit: Set a bandwidth cap for all virtual hosts.
Per-User Limits: Set independent bandwidth limits for each user.
Request rate limit: Set the upper limit of request frequency for each IP to prevent DDoS attacks.
Connection Limitation: Limit the number of concurrent connections per IP to prevent malicious visitors from exhausting resources.
PHP settings
PHP Version Management: Specify PHP version for each site.
PHP configuration file: You can edit the PHP.ini file directly in the LiteSpeed panel (such as memory_limit, upload_max_filesize, max_execution_time, etc.).
OPcache: Enable OPcache to cache PHP bytecode, reducing script parsing time and improving performance.
Other settings
Compression settings:
GZIP Compression: Enable GZIP compression transmission to reduce page size.
Brotli compression: A more efficient compression method suitable for browsers that support Brotli.
Statistics and Monitoring:
Real-time monitoring: View real-time access, resource usage, and connection status.
Statistics: Generate and view daily, weekly, and monthly visit statistics reports.
Through these detailed configurations, LiteSpeed can be optimized according to server resources and access requirements to improve the site's response speed, security, and stability.