Excellent software and practical tutorials


Which free CDN acceleration is the best? Amazon AWS is here to help and teach you how to configure CDN in AWS
What is Free CDNaccelerate In the early stage of building a website, the priority is how to improve the access speed of the website and give users a good network experience.LCPThe index cannot exceed 2.5. So how can we control the LCP index to a safety index below 2? AWS Free CDN acceleration , is your best choice. Let's learn in detail how to configure CDN in Amazon AWS and use the freeCDN acceleration.

What is AWS Free CDN Acceleration?
Before using AWS's free CDN acceleration, first understand what AWS free CDN acceleration is.
First you need to know what is AWS?
AWS Cloud Computing Amazon AWS is the world's most comprehensive and widely used cloud platform, delivering over 200 fully featured services from data centers around the world. Millions of customers, including the fastest-growing startups, largest enterprises, and leading government agencies, use AWS to lower costs, increase agility, and accelerate innovation.
AWS is the cloud computing service provided by Amazon, which is what we often call Amazon Cloud.
- Amazon Web Services official website:https://www.amazonaws.cn
- AWS China official website: https://aws.amazon.com/cn/
What is Free CDN Acceleration?
Free CDN acceleration service is a free service provided by AWS to registered users. CloudFront It is a product under AWS cloud computing, which delivers content securely with low latency and high transmission speed!
Amazon CloudFront is a content delivery network (CDN) service designed for performance, security, and developer convenience.
For free registered users, Amazon provides 1 TB of outbound traffic per month. This CDN service is permanently free. The specific usage of free CDN acceleration can be viewed in AWS Free Tier for Amazon users.
Amazon CloudFront Free Tier includes:Get 1 TB of outgoing data traffic, 10 million HTTP or HTTPS requests, and 2 million function calls for free.This free package is valid foreverOnly when the monthly usage exceeds the package quota will the excess be charged according to the actual usage. The specific charging method and rates of Amazon CloudFront can be found here:https://aws.amazon.com/cn/cloudfront/pricing/ .
Amazon CloudFront official website:https://aws.amazon.com/cn/cloudfront/

Next, start configuring the free CDN acceleration service.
If you haven't registered for AWS yet, please visithttps://www.amazonaws.cnSign up now.
How to use free CDN to speed up your blog
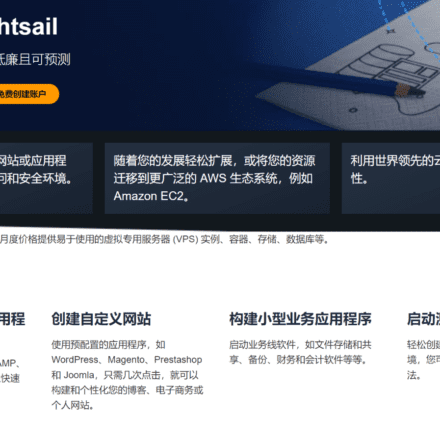
Open Amazon's official website.Sign up for an AWS accountAfter successful registration, you can enjoy many free services, such as one year of free EC2 server, 1TB of global CDN acceleration per month, and three months of freeLightsailCloud desktop.
After successfully registering with AWS, open the console interface and create an Amazon CloudFront user, which will be needed when configuring CDN acceleration. The blog website needs to use this CloudFront user to access Amazon CloudFront's CDN service.
On the AWS console home page, clickServe, found under the Services menuSecurity, Identity and Compliance In the expanded menu, clickIAM.

IAM is used to manage access to AWS resources. Next, register a user to manage CDN services.

In IAM, click on the leftuser, click on the user pageAdding Users. Enter CDN as the user name, or any custom name.
Note: Do not check Provide users with access to the AWS Management Console.

Click Next to set permissions.
Permissions option selectionDirect Attach Strategy, enter in the permission policy search box CloudFront , selectCloudFrontFullAccess, then click Next to create a user.
 Review and create users to review your selections. After creating a user, you can review and download the automatically generated password (if enabled).


After clicking Create User, your user with the user name CDN has been successfully created.
After the user is successfully created, click the user name to enter the user settings page to generate a CDN access key.

Click Security Credentials, scroll down, find Access Keys, and click Create Access Key.

In order to improve the security of access keys, AWS has added use cases and alternatives for access keys in the new version of AWS.
chooseApplications running outside of AWS, and then click Next to create a key.


After clicking Create Access Key, your CDN access key has been created successfully.

After the access key is created successfully, copy the access key and secret access key, which are located in the followingBlogIt is needed when configuring CDN for blog websites.
The following is an example of an access key. The key has expired, so please do not use it. If you need it, please register for the Amazon Cloud to obtain a key.
Access Key: AKIASZMVEAFP2D3JIZNV
Secret Access Key: 17yJyHiWjQqMBsFoLtMnKzmhBbN3MIM+MD875fg6
- Never store access keys in plain text, in code repositories, or in code.
- Disable or delete access keys when they are no longer needed.
- Enable least privilege.
- Rotate access keys regularly.
At this point, the Amazon Cloud operation has come to an end. Next, open the backend of the blog website and configure the CDN.
Blog website configuration AWS free CDN service
The free CDN key for Amazon Cloud has been applied for. Now let’s start configuring CDN acceleration on the blog website.
The most popular blog building program now isWordPressThis is the best way. Let’s take WordPress as an example to provide free CDN acceleration for blog websites, so that netizens on the other side of the world can access your blog website at high speed.
The Internet has no borders. In the global network, AWS's CDN service is the link bridge in this network, connecting various plates on the earth. Even users on the other side of the ocean can access your blog as fast as opening their own local website. There is no need to wait, and the wonderful content will be presented immediately.

Next, start configuring the CDN service to make your website's access speed soar!
Step 1: Install W3 Total Cache plugin
Open the WordPress backend and install a cache plug-in that supports Amazon CDN acceleration service.
The following uses W3 Total Cache as an example to configure AWS's CDN acceleration service.W3 Total Cache Configure Amazon CloudFront
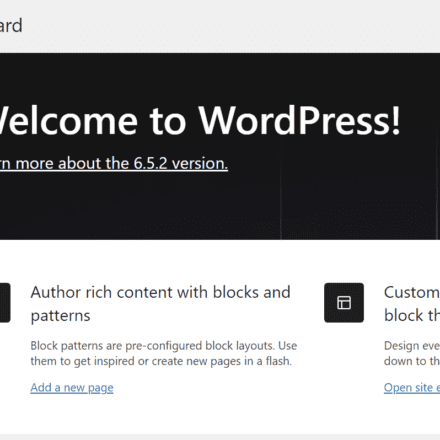
To install the W3 Total Cache plugin, log in to your WordPress dashboard and click on the Plugins > Install Plugin link. In the search field, search for W3 Total Cache and click on the Install Now button to start the installation.
 W3 Total Cache (W3TC) is one of the top caching plugins for your WordPress site. It will help you with caching and minification out of the box with CDN support for popular services.

W3 Total Cache is a popular WordPress caching plugin that helps you improve your website speed and performance… W3 Total Cache will now start serving your static assets from the CDN servers.
Step 2: Enable CDN acceleration in W3TC.
In the W3 Total Cache plugin directory, click General Settings, and then find the CDN settings interface.

In the CDN content delivery network interface, enable CDN, select Amazon CloudFront in CDN type, and click Save all settings after selecting.
CDN: Use CDN to accelerate theme files, media library attachments,CSS,JSDocuments, etc.

FSD CDN: This is the acceleration of the entire site, including HTML files. If you want to use CDN acceleration for the entire site, you can check FSD CDN
FSD CDN provides visitors with the fastest possible response and loading times for all website content, including HTML, media (such as images or fonts), CSS, and JavaScript.
Want even more speed? Full Website Delivery Content Delivery Network will make your website 60% faster to increase conversions, revenue and reach your website visitors globally. With a full-site content delivery network (CDN), your website and all its assets will be instantly available to visitors around the world at blazingly fast speeds.
For even better performance, combine FSD with other powerful features like browser caching, minification, fragment caching, or lazy loading!
See alsoAmazon's CloudFront documentation - Paying for file expiration.
The first 1,000 invalidation paths you submit each month are free; you are charged for each invalidation path above 1,000 in a month.
You can enableManual CDN purge onlyto disable automatic clearing.
Step 3: Configure CDN acceleration service in W3TC
Select the content you need to accelerate. The default options do not need to be changed. If there is no project content that does not need to be accelerated, you can uncheck the items in front of them.

- Host accessories
If checked, all attachments will be hosted on the CDN. - Host wp-includes/ files
If selected, in the "wp-includes file types to upload” field will host the WordPress static core file types that you specify in the CDN. - Host theme files
If checked, all theme file types specified in the "Theme file types to upload" field below will be hosted by the CDN. - Hosting minified CSS and JS files
If checked, minified CSS and JS files will be hosted by the CDN. - Hosting Custom Files
If checked, any file names or paths specified in the Custom File List field below will be hosted by the CDN.
The above is the default CDN acceleration project content. Next, configure the CDN acceleration service. Prepare the CDN access key ID and key that you applied for previously.
Enter the key ID in Access key ID and the key in Secret key, then click Created distribution below. If it shows green Created successfully, it means the creation is successful. If the creation fails, please check whether your key ID and key are correct.
SSLThe option uses the automatic mode by default. The following Replace site's hostname with a custom domain name is the default. If you want to use your own secondary domain name as the CDN distribution domain name, you can refer to:Use custom URLs by adding an alternate domain name (CNAME)

Finally, click Test CloudFront distribution below to test the distribution. The green Test passed means the test has passed. Through these three simple steps, you have successfully enabled Amazon CloudFront's CDN service.
Next, publish an article on your blog and upload some pictures to test the speed of the CDN!
The image address on the front end has taken effect and points to the CDN domain name of Amazon Cloud. The images displayed now are all images accelerated by the CDN. Do you think the website opens faster?