Excellent software and practical tutorials
AMH-WP How to install WordPress online using AMH hosting panel
use AMHHost panel, the LNMP environment has been successfully built on the server. After the environment is deployed, the next step is to use the AMH panel to install a PHP programWordPressBlog site. WordPress, a PHP-basedMySQLFree and open source content management system. The world's most widely used CMS software, with more than 8,000 free themes, more than 50,000 free plug-ins, and powerful ecological support. It is not only suitable for programmers to build their own websites, but also for ordinary users without technical background to build personal blog websites or company portals.
Official Website:https://wordpress.org
In addition, some popular blog frameworks includeJekyll,Hexo,Hugo,Soloetc.
Let's take WordPress as an example.AMH Hosting PanelInstall WordPress.
AMH-WP Online WordPress Installer
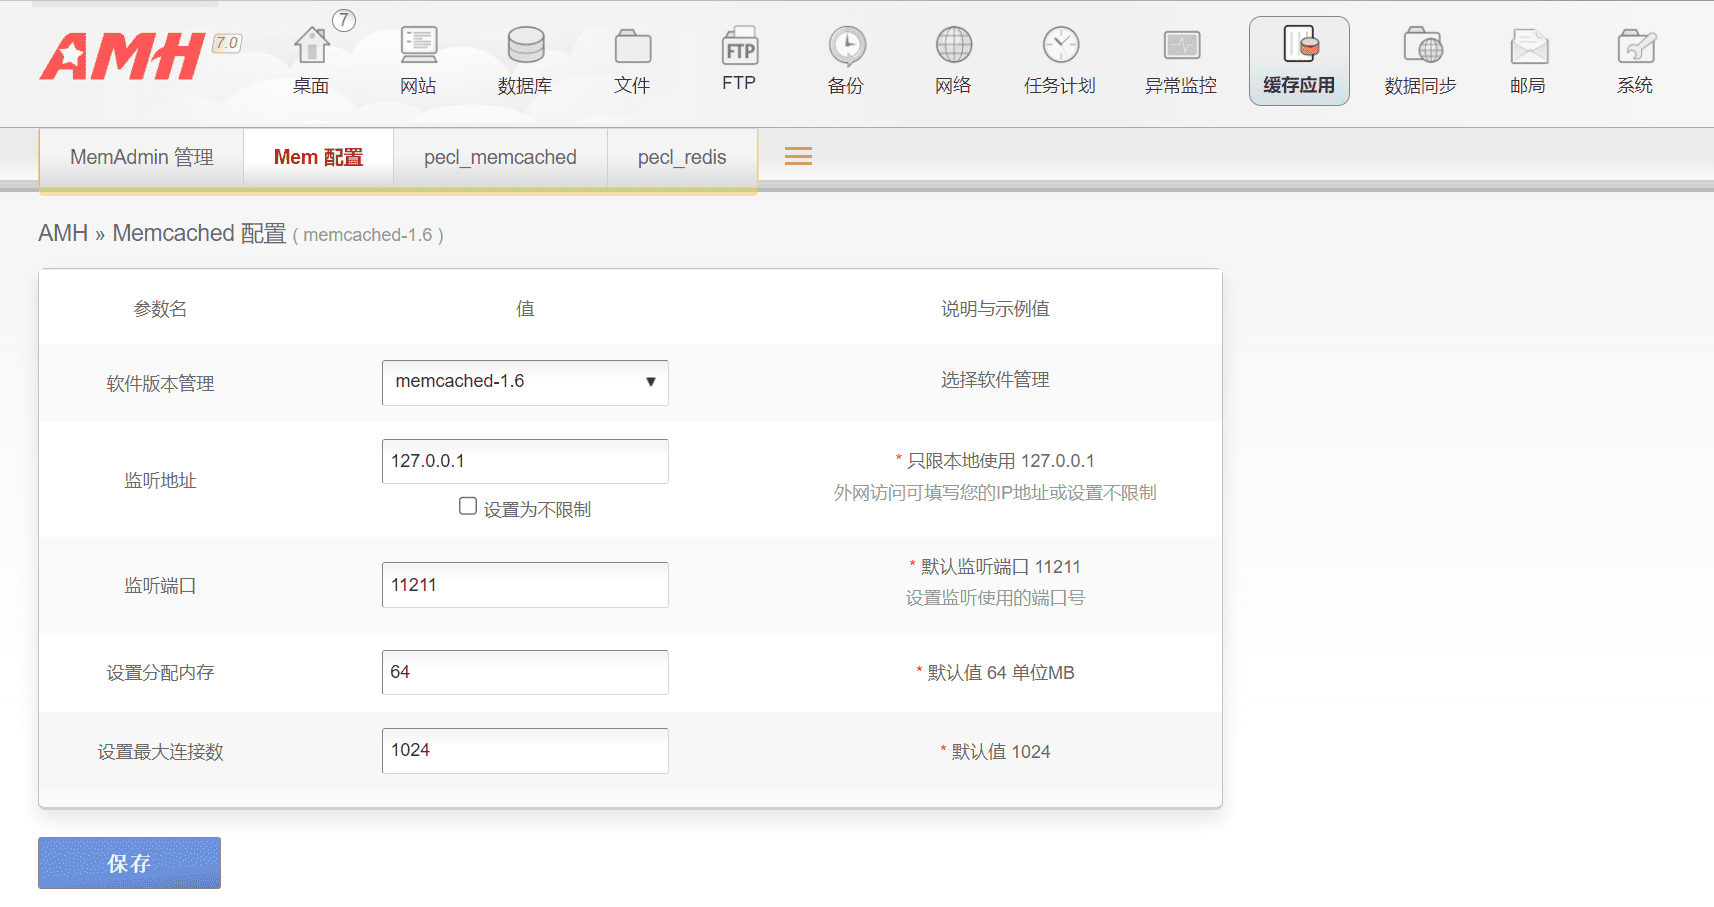
Before installing WordPress, in the AMH panel, install the software in the software store as needed. The PHP extension installation needs to be completed in the software store before it can be installed on the website, otherwise the installation will fail. Configure the cache application.
 Configure website related content
Step 1: Resolve the domain name to the IP address of the server.
If you haven't registered a domain name yet, you can go to the NameSilo website to register. There will be discounted domain name activities every day.
For domain name registration, please refer to:NameSilo Domain Name Registration Tutorial NameSilo Cheap Foreign Domain Name Registrar
Step 2: Add a new virtual host
In the AMH host panel, clickwebsiteMenu, inVirtual HostAdd a new virtual host under the menu.
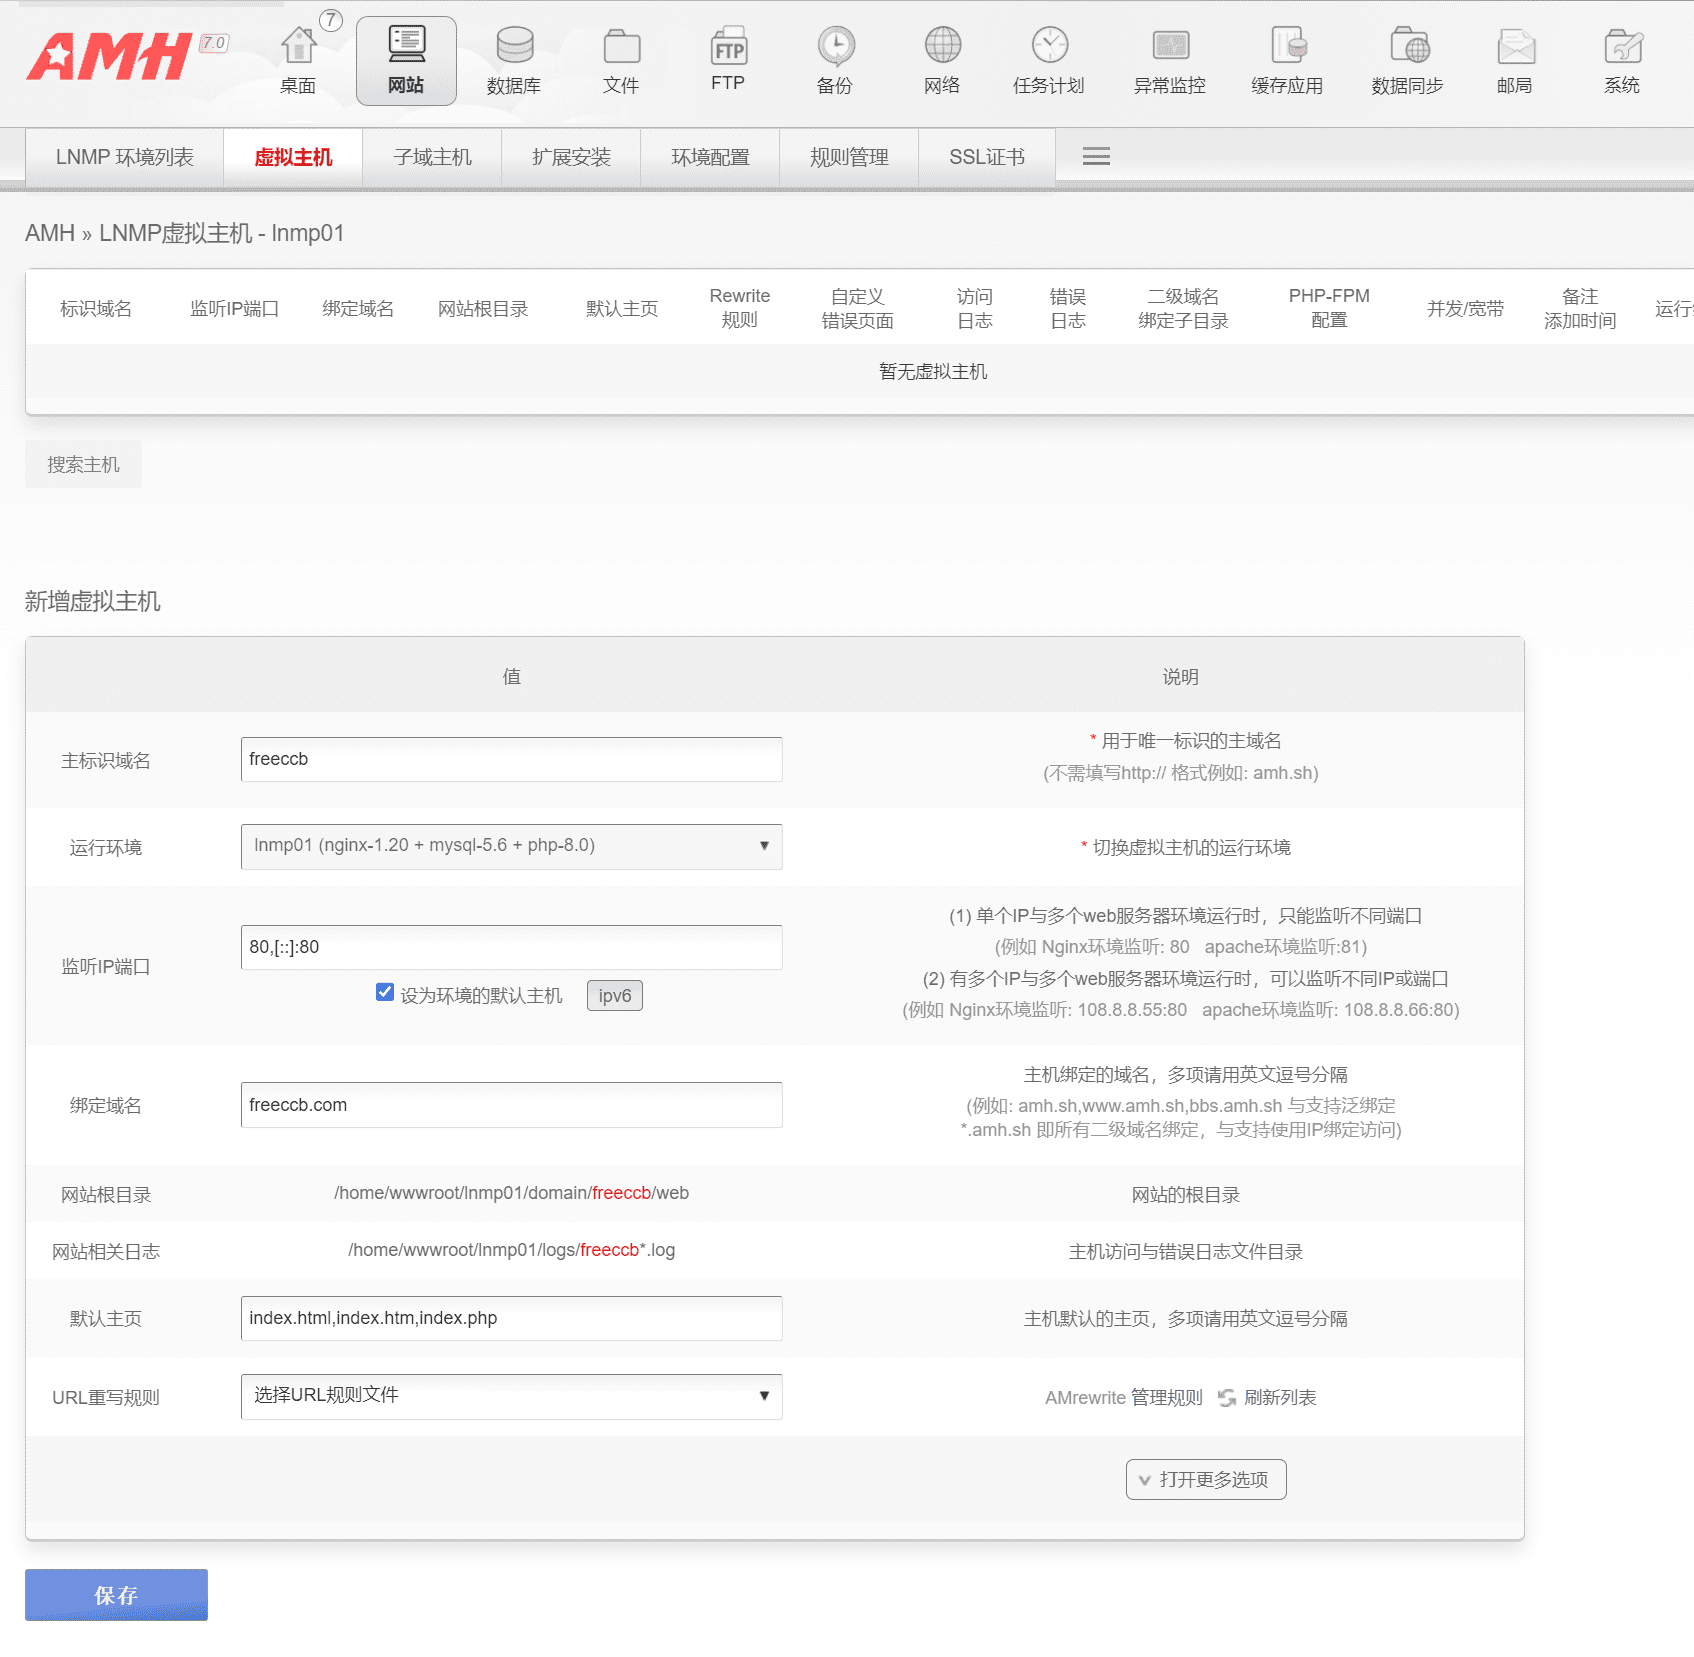
When adding a virtual host:
- Primary domain name: Fill in your domain name, which is used to create a website storage directory on the server.
- Operating environment: The default selection is the previously installed lnmp environment, lnmp01 (AMH can create multiple environments at the same time.)
- Listening IP port: The default port is 80, check Set as the default host for the environment, and then click the IPV6 button.
- Bind domain name: Bind the domain name you resolved previously here, and support wildcard domain name binding.
- Default homepage: No need to change, default static page and PHP
- URL rewriting rules: If you have installed the rewriting rules software in the AMH panel before, click Manage Rules to create a URL rule file.
Add a new management rule. In the optional rules, select wordpress2. This rule is a pseudo-static rule for WordPress. If you do not want to use static page access for the WordPress you created, you can ignore this rule.
location / { try_files $uri $uri/ /index.php?$args; } # Add trailing slash to */wp-admin requests. rewrite /wp-admin$ $scheme://$host$uri/ permanent;The rules here are actually the rules in the server module in the Nginx.conf file. You can customize other rules in wordpress2, such as anti-hotlink, reverse proxy, etc.
You can also add rules for browser caching.
location ~* \.(css|js|png|jpg|jpeg|gif|gz|svg|ttf|webp|woff|woff2)$ { access_log off; add_header Cache-Control max-age=36000; }Let's start configuring nginx rules.
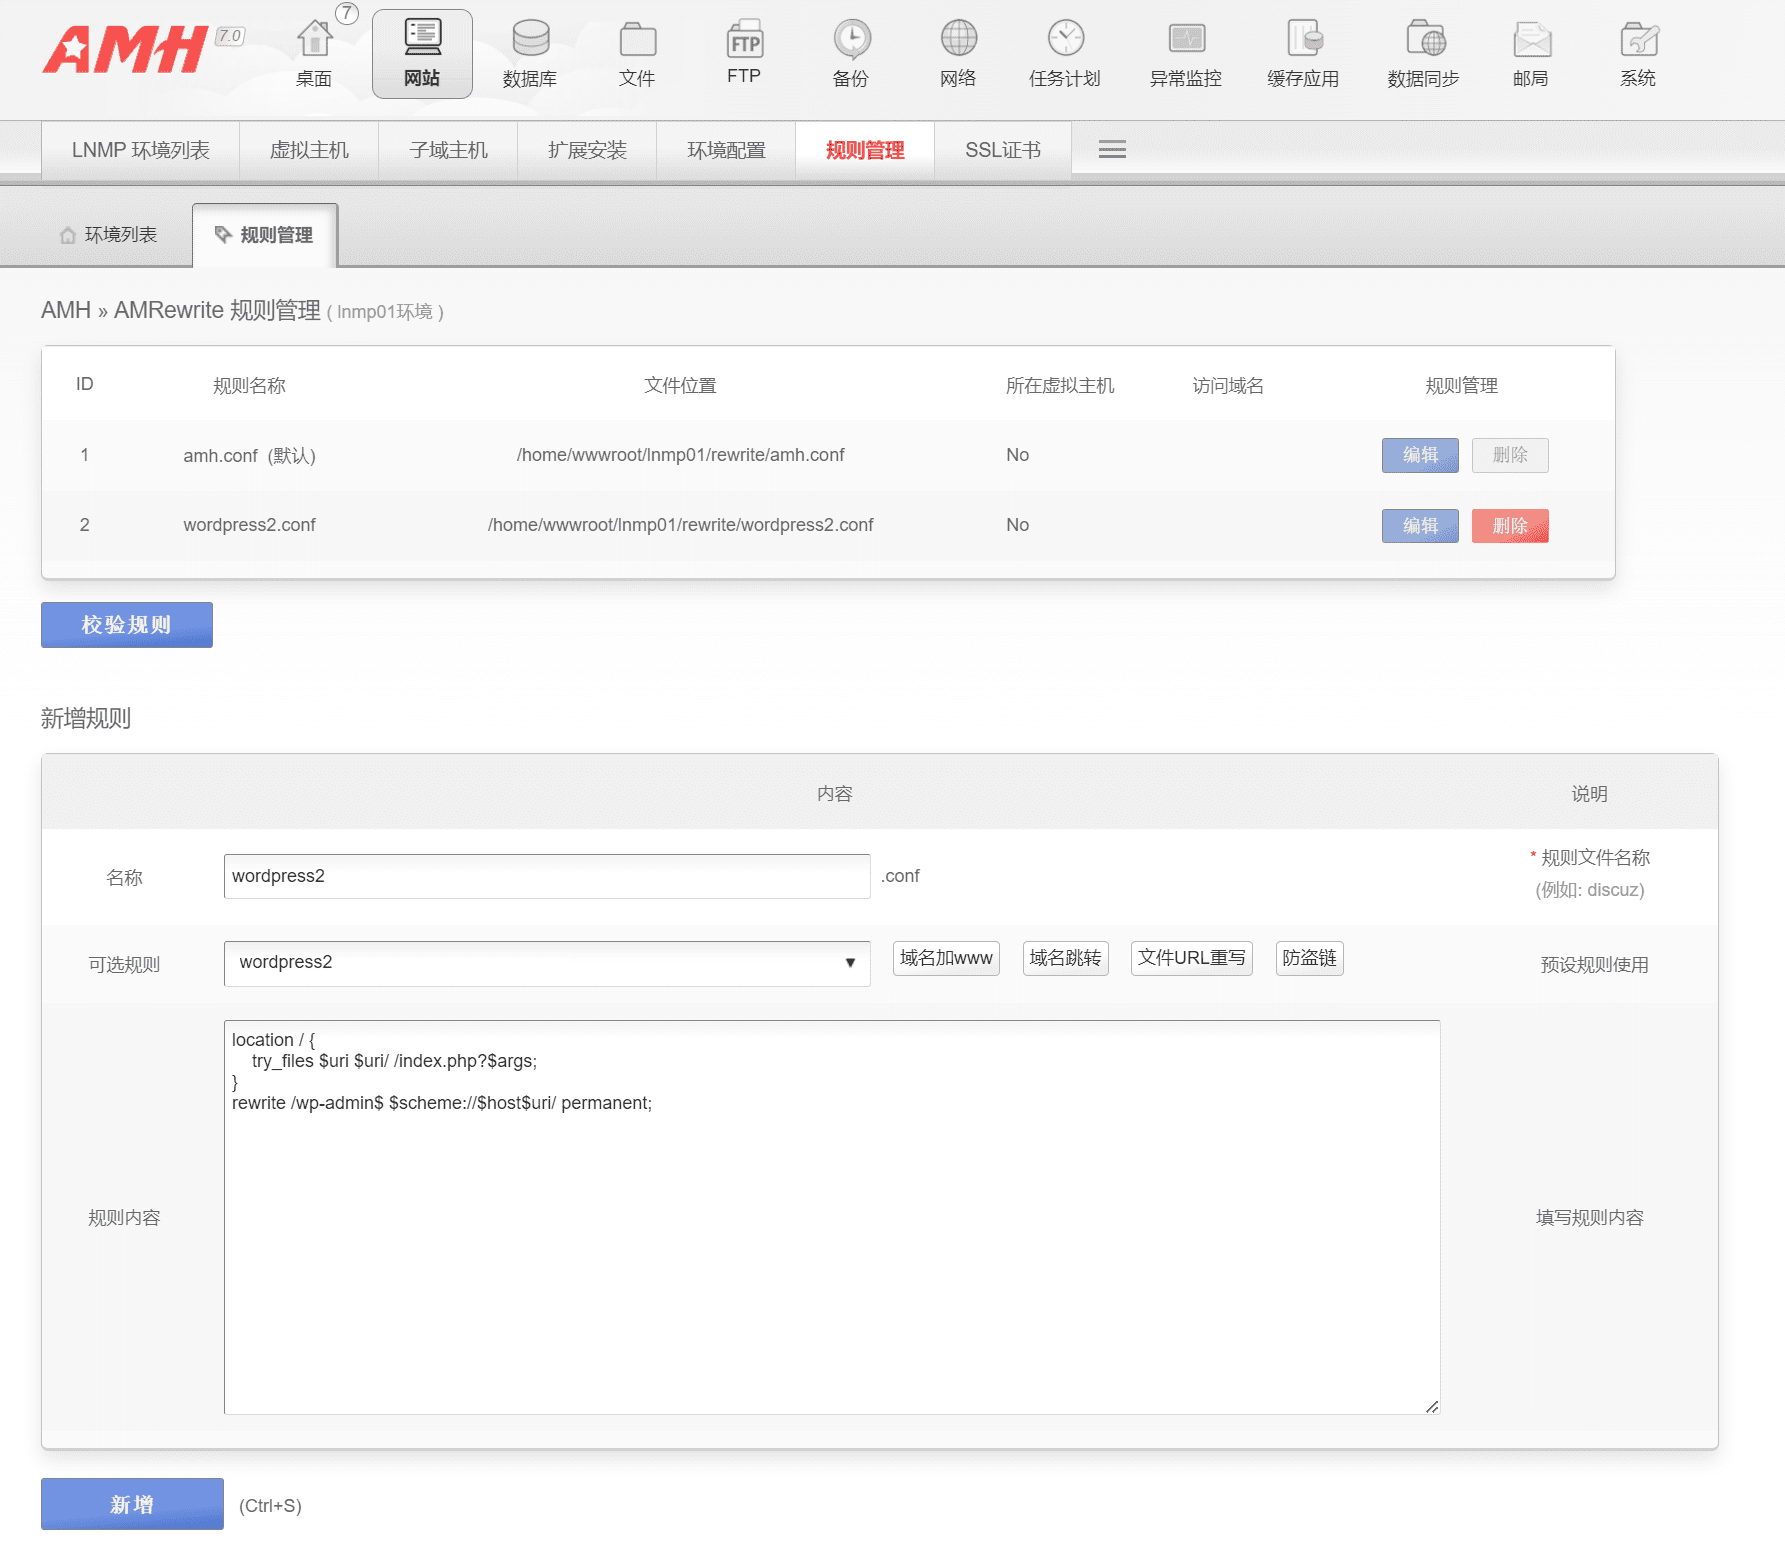
After the rules are added, close the window. In the previous window, click Refresh List, then select wordpress2.conf and save it. The virtual host is created successfully.

Step 3: Install some commonly used PHP extensions.
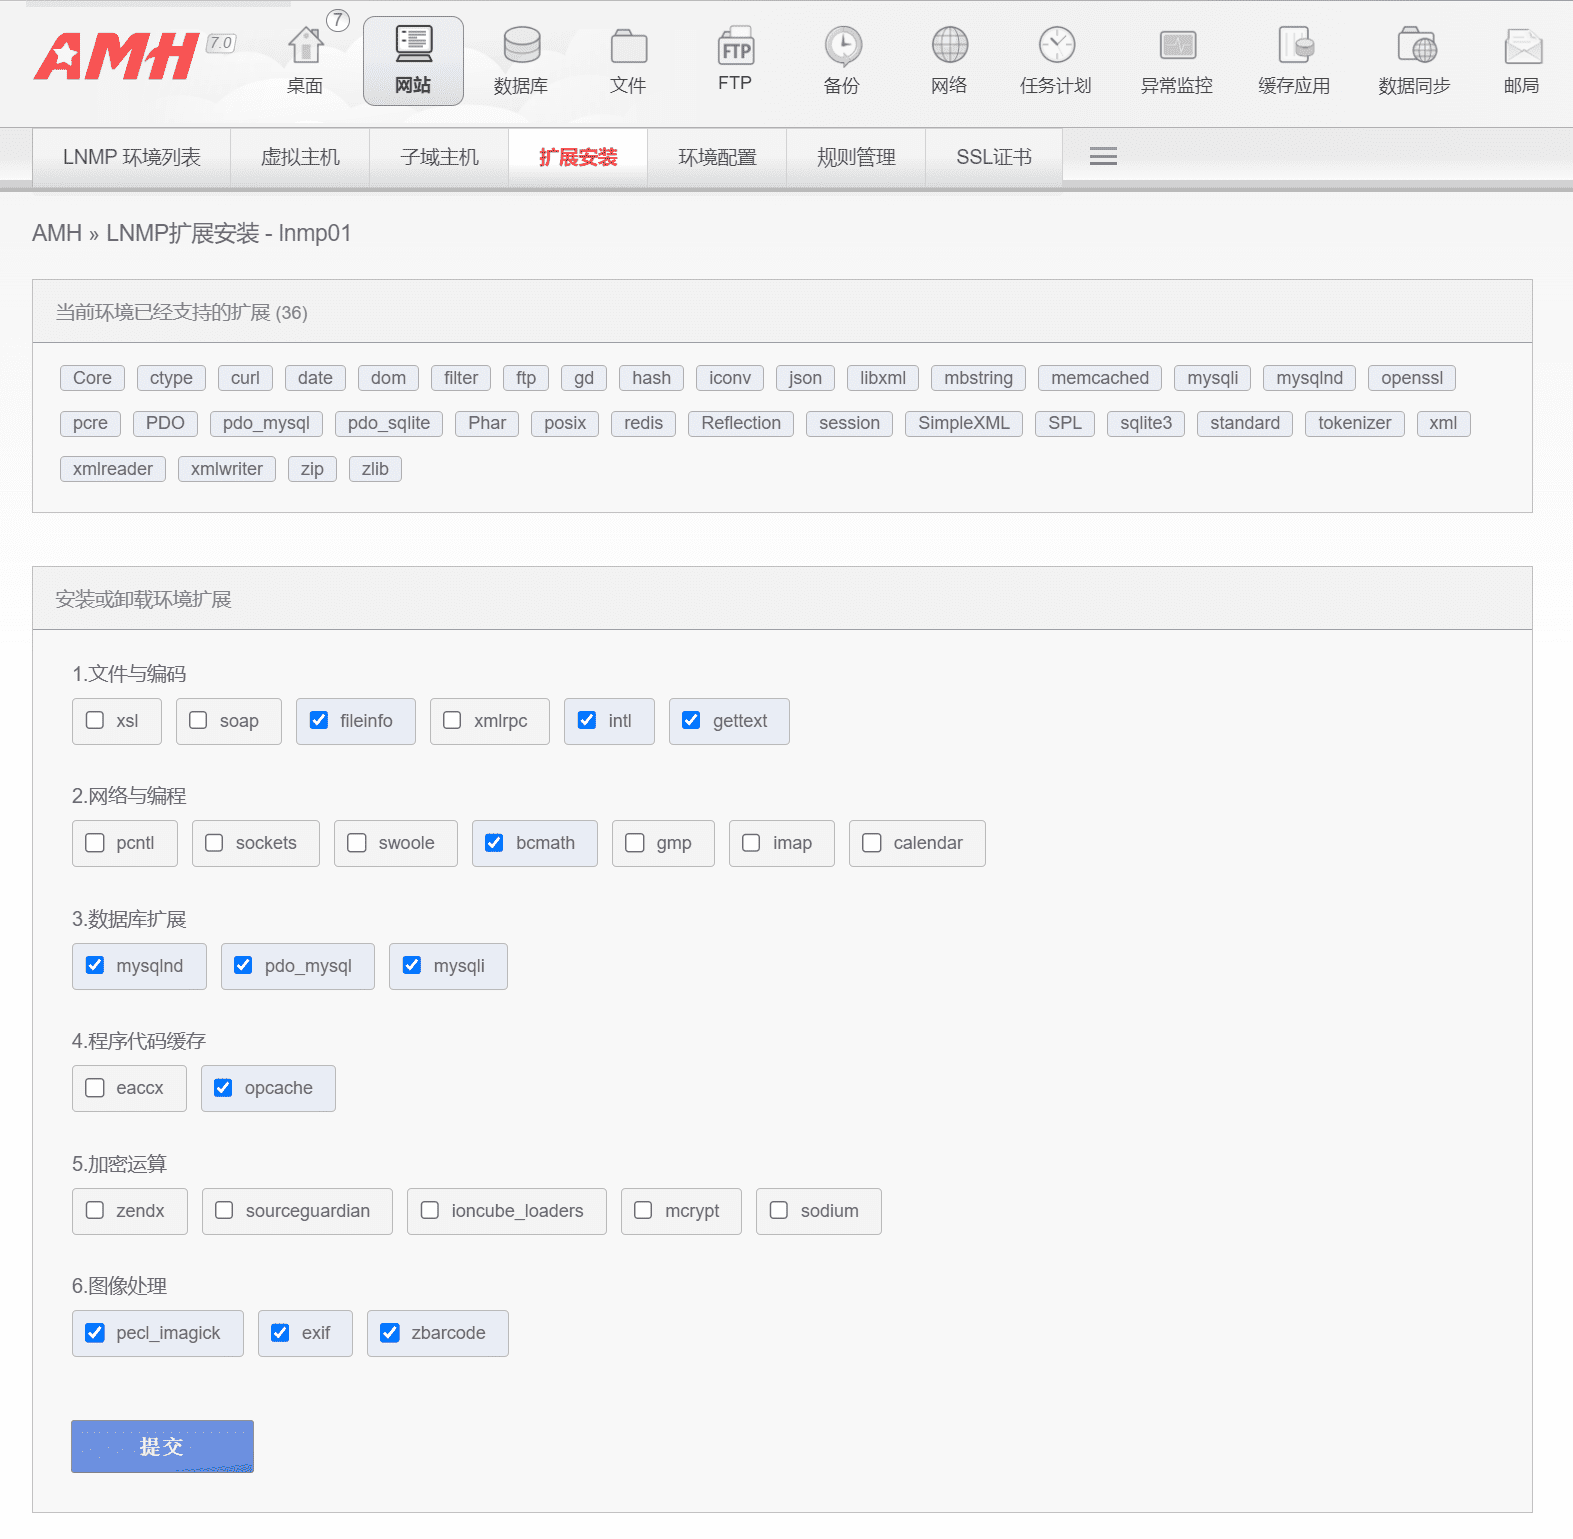
Under the website menu, click Extension Installation, check the PHP extension below and click Submit to install the extension (fileinfo, intl, gettext, bcmath, opcache, pecl_imagick, exif, zbarcode).
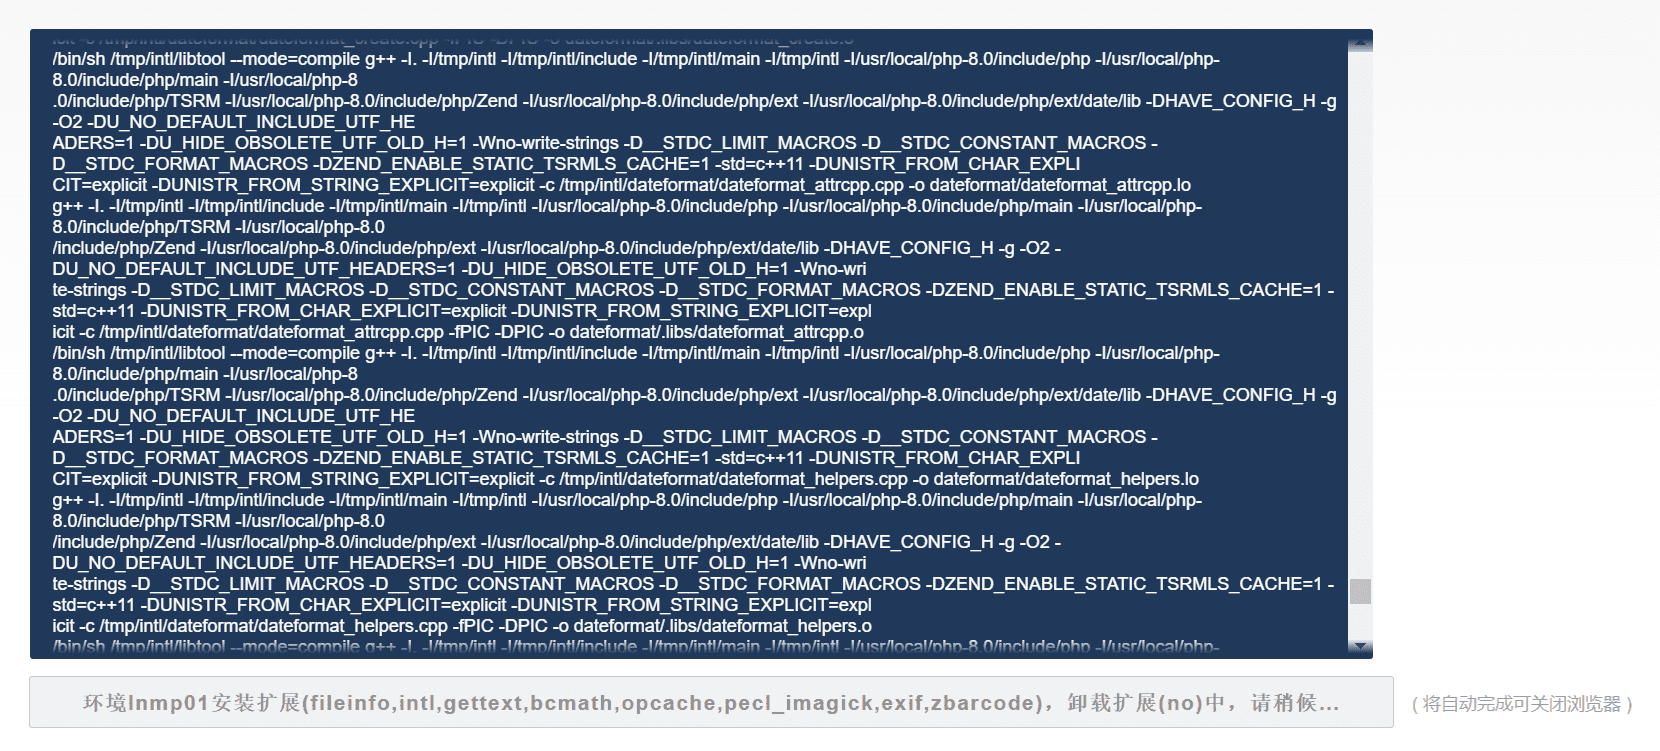
Wait patiently for all the codes to run and all PHP extensions to be installed before you can proceed to the next step.
Step 4: Apply for SSL certificate
Click SSL Certificate under the Website menu to create an AMSSL website certificate.
- Select one-click automatic configuration application.
- Select Use file verification for the creation method.
- Select lnmp01 for the environment
- Select the host name you created.
- Click Create
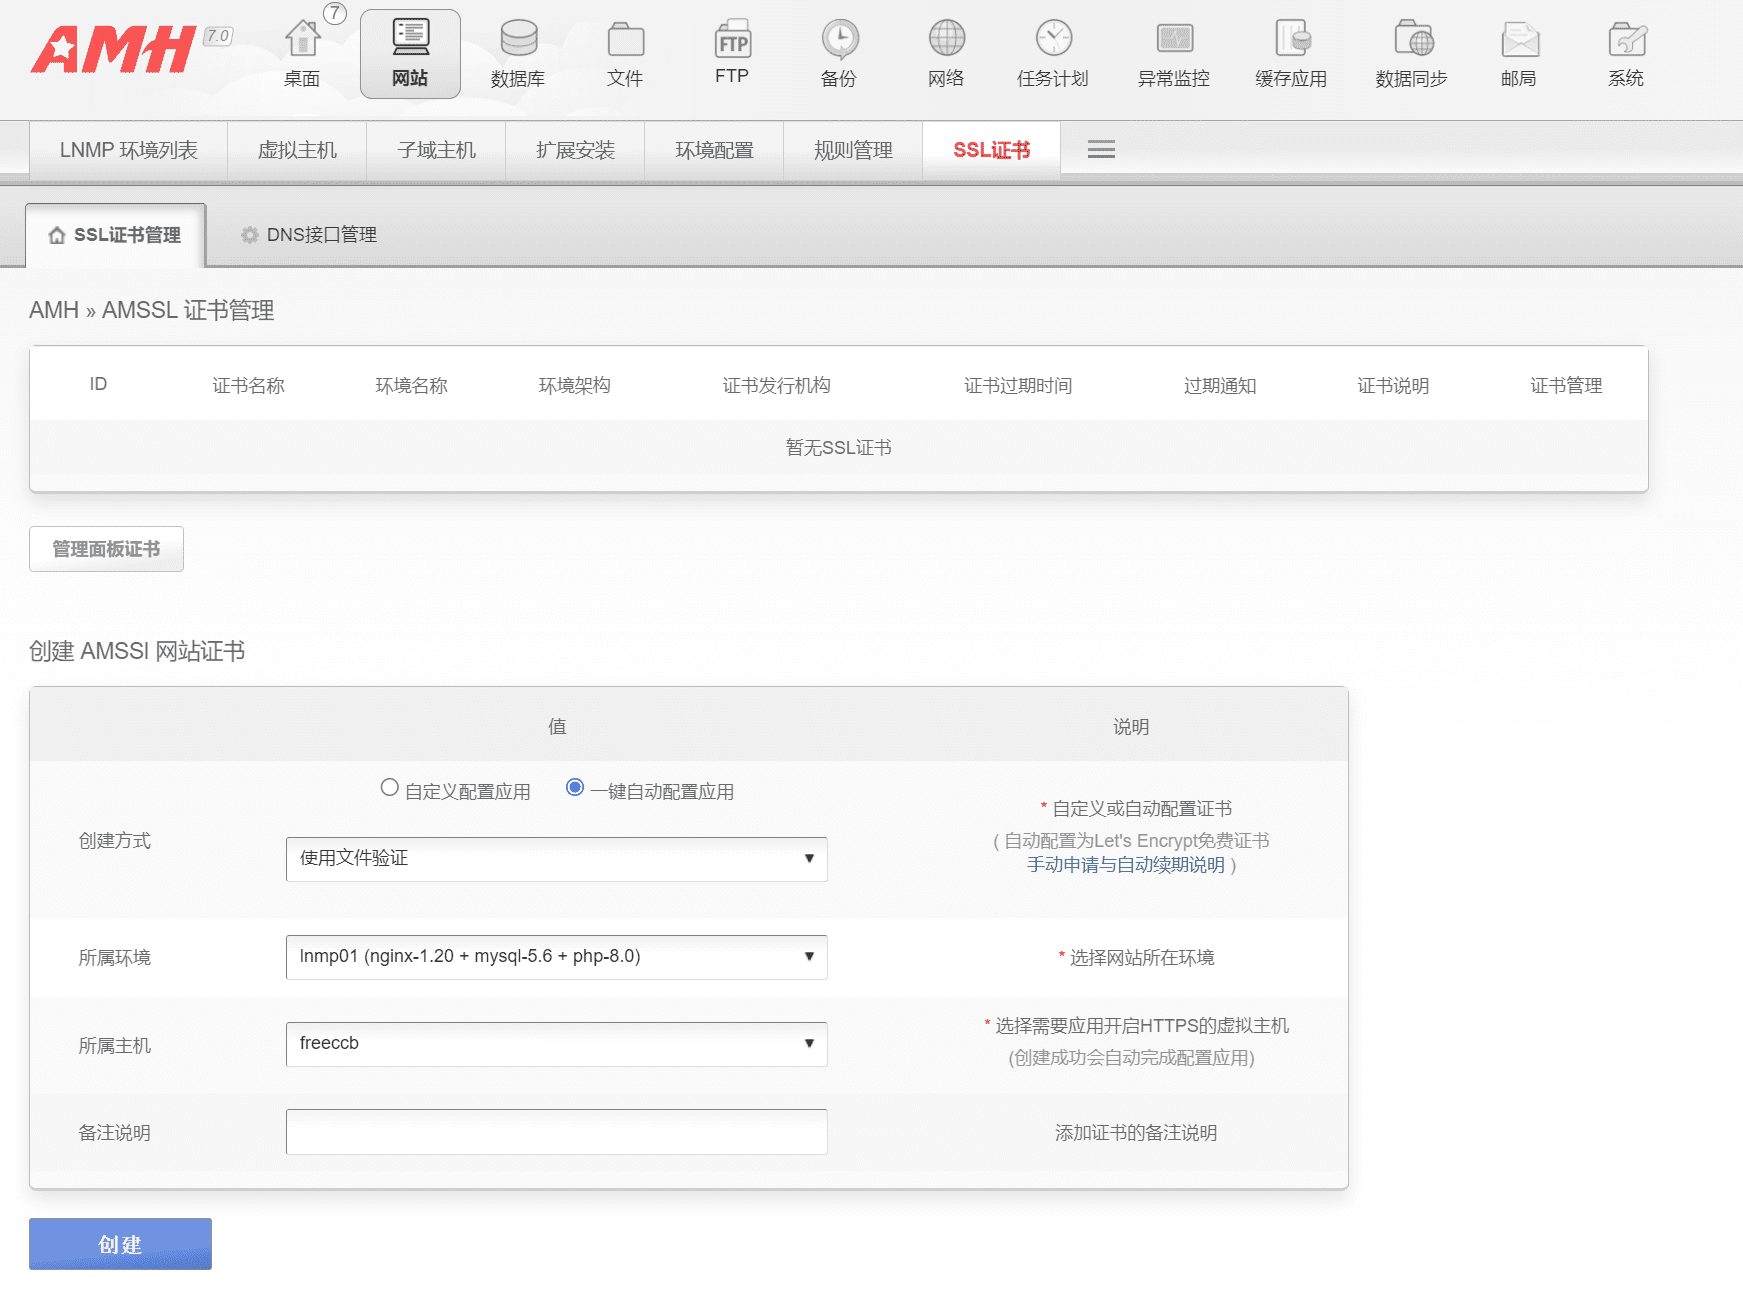

The SSL certificate has been created successfully. Click on theapplication, enable the certificate.
After the certificate is successfully enabled, you still need to perform simple configuration, enable forced https, optimize and speed up, and automatically renew the certificate.

The SSL certificate has been successfully applied for. It is valid for three months and will be automatically renewed every three months. No manual operation is required.
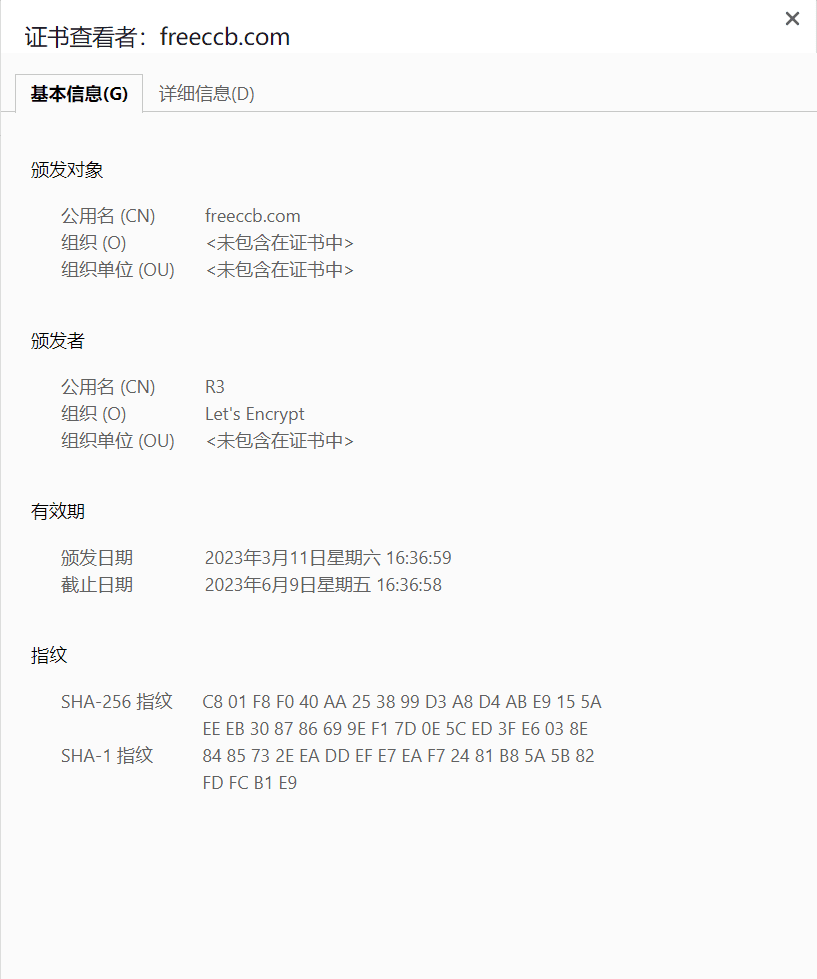
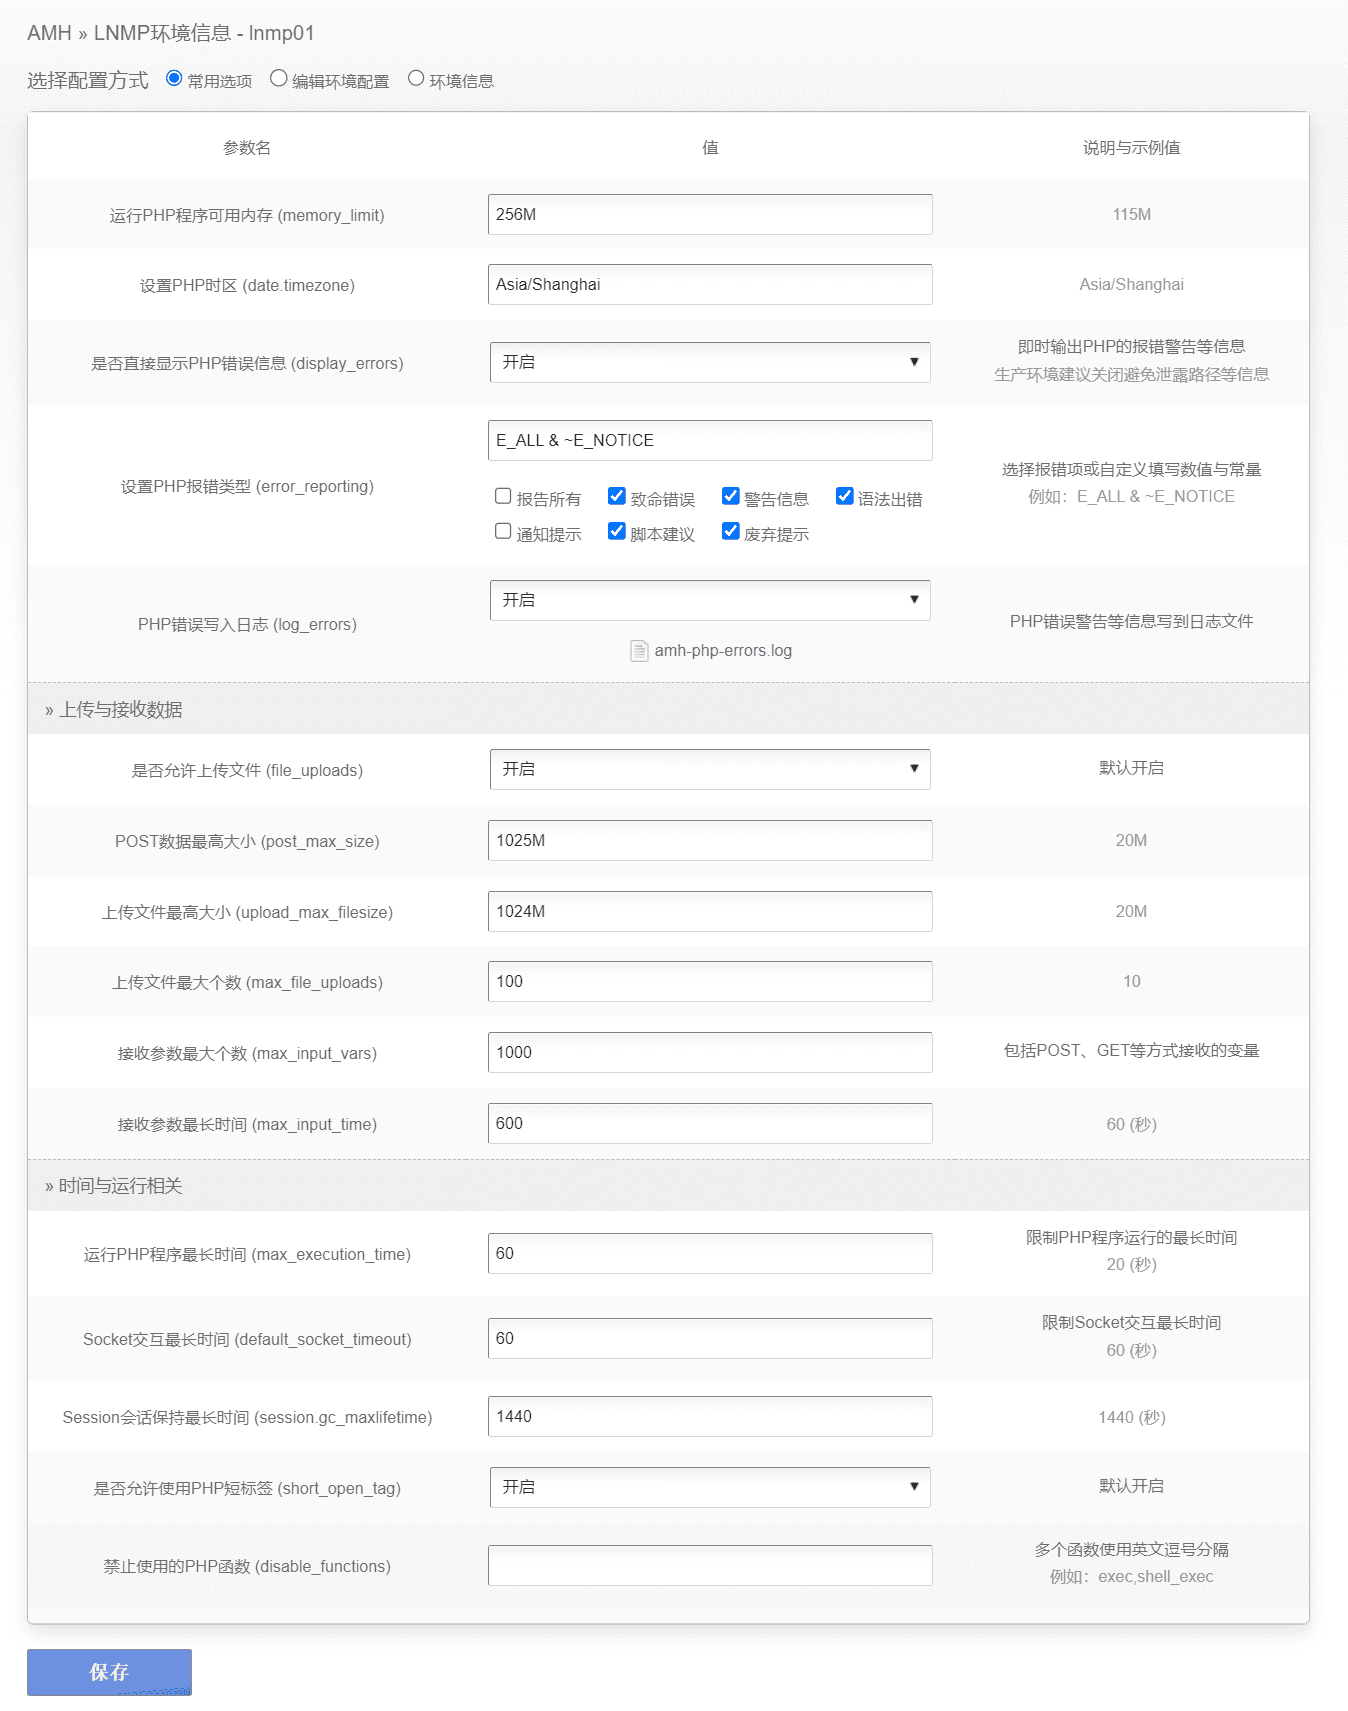
Finally, make some more settings in the environment variables. These settings vary from person to person and there is no rigid requirement on how to modify them.
The website setup has come to an end here, and next you need to install the WordPress program.
Install WordPress
ClickdocumentMenu, which can be seen in file management,/home/wwwroot/lnmp01/domain/freeccb/web/ It is the path of the currently stored web files. Download the WordPress program to the web folder.
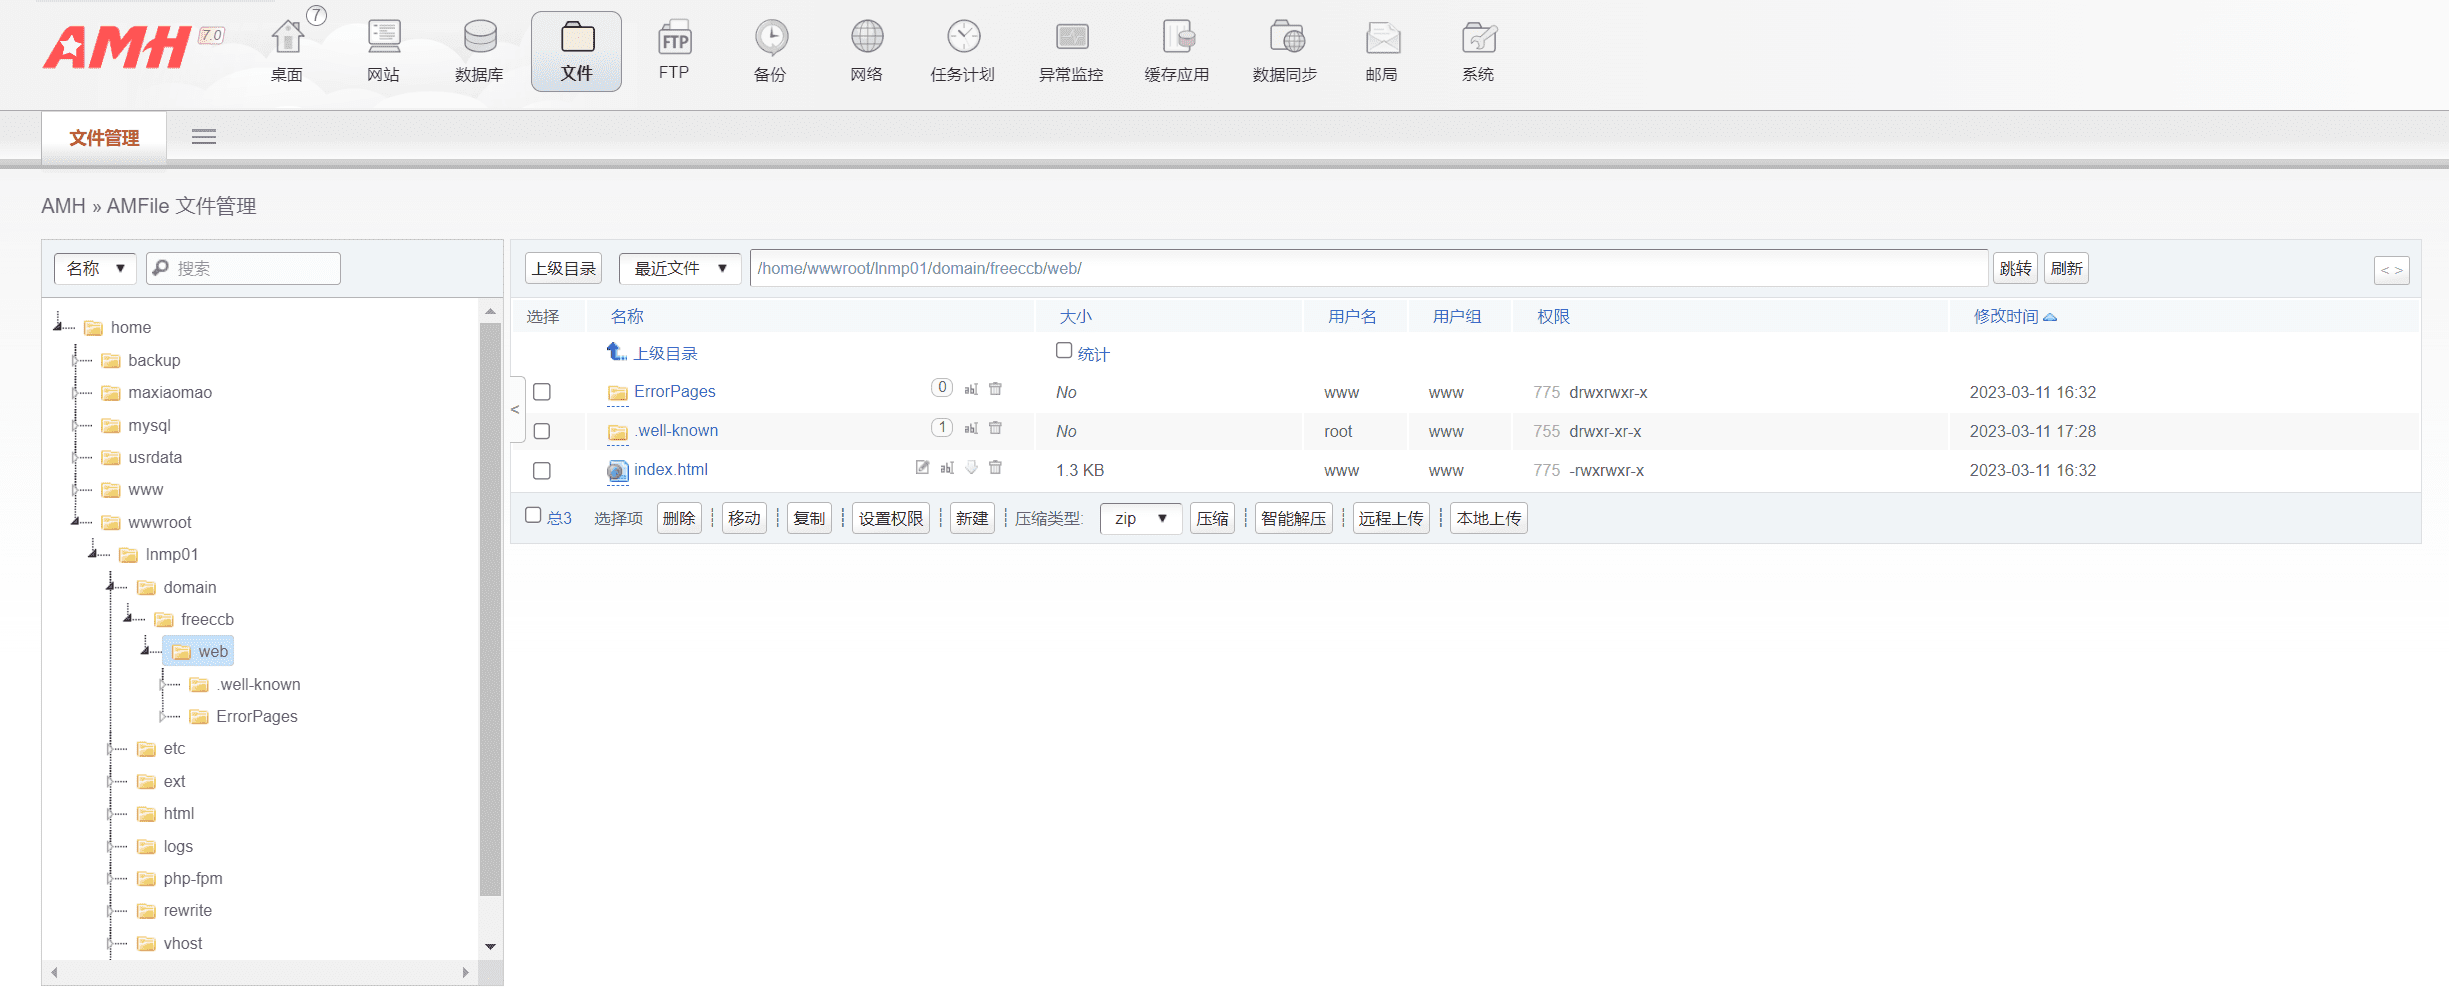
In the web folder, click the remote upload button below and paste the download address of the WordPress program in. Click OK to start downloading the WordPress program.
#wordpress latest version download address, copy the link below. https://cn.wordpress.org/latest-zh_CN.tar.gz

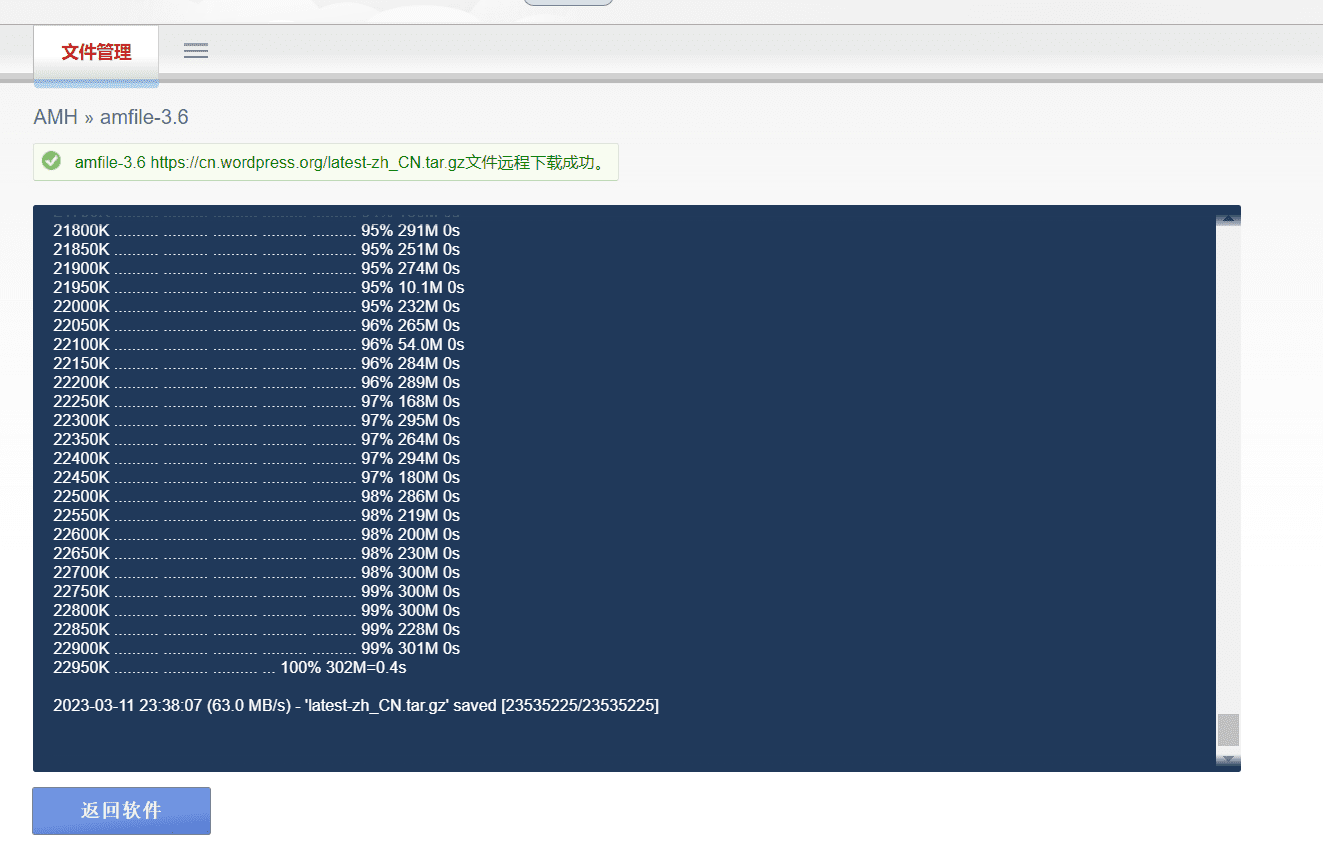
After the WordPress program is downloaded, unzip it.
Check latest-zh_CN.tar.gz file, then in the followingCompression TypeSelect tar.gz, the compression type should be consistent with the extension of the decompressed file. Then clickIntelligent decompression.

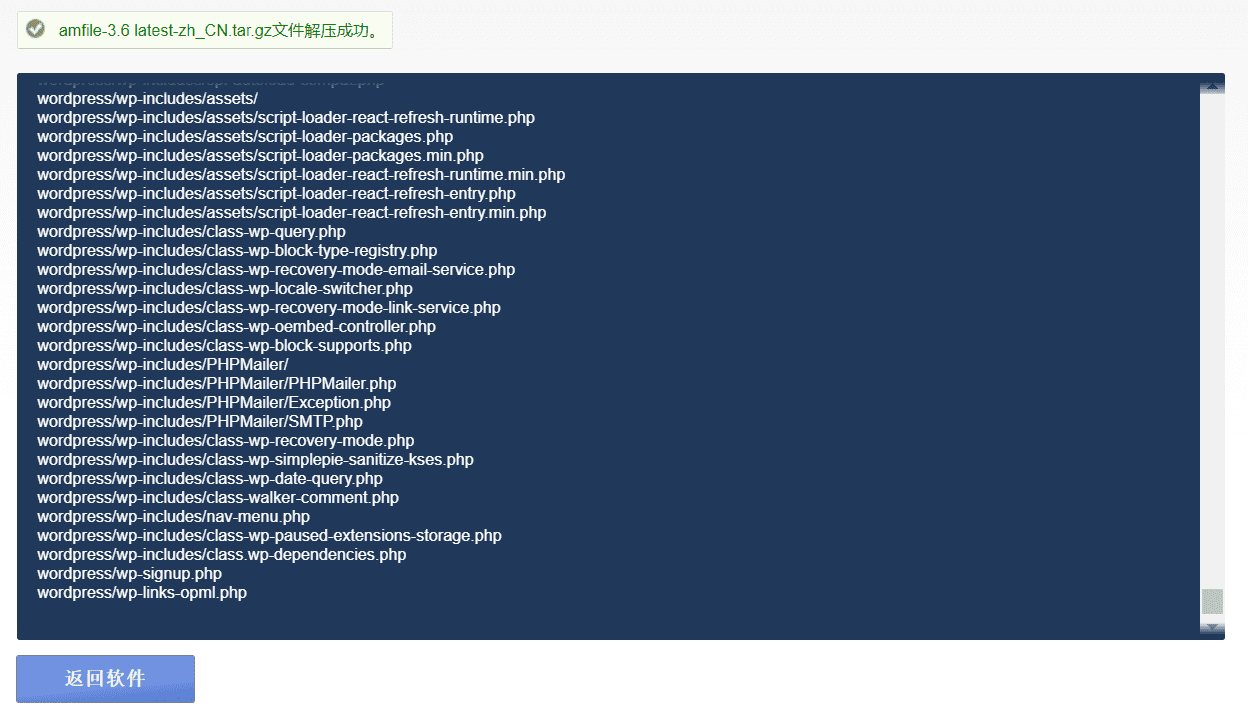
After decompression, you need to move the files in the wordpress folder to the web folder, and delete the index.htm file in the web folder.

Select the file in the web folder and clickdelete, you can delete the files, visual deletion, very simple.
Select all files in the wordoress folder, then clickmove
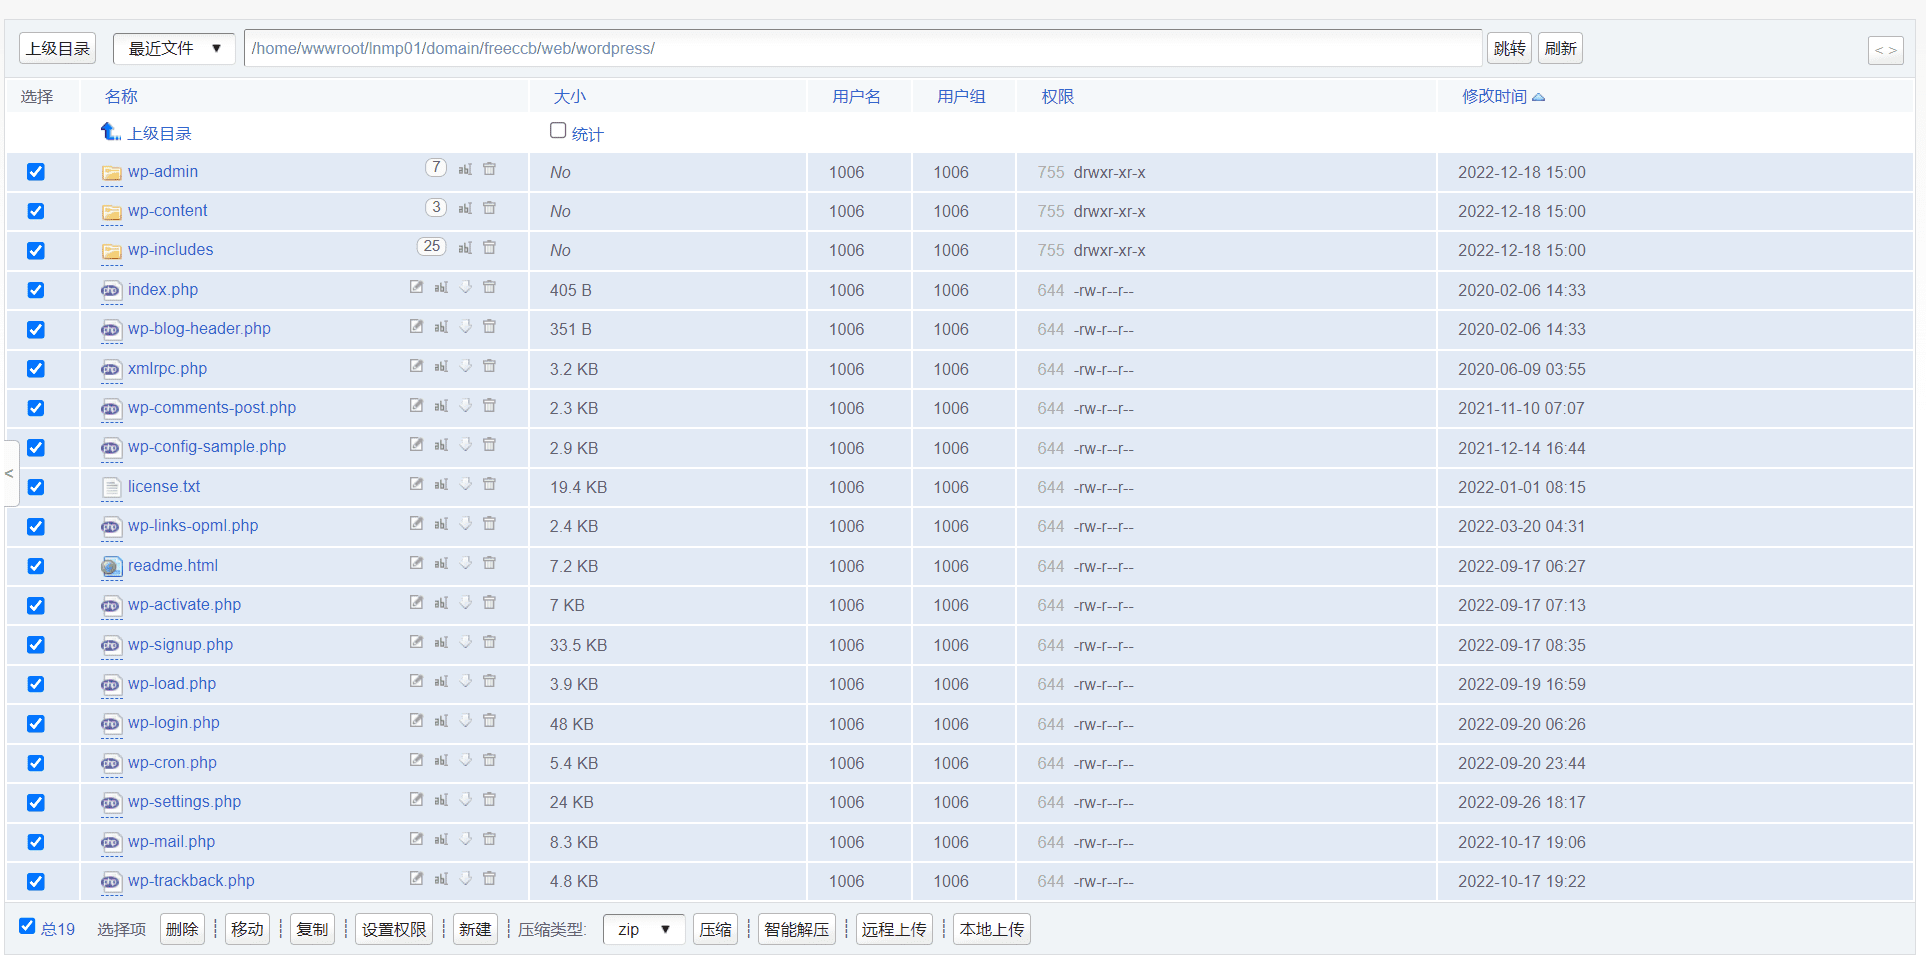
Click Move to move the file to the parent directory web. Click Parent to automatically switch to the web directory. Then click Confirm to move the file.

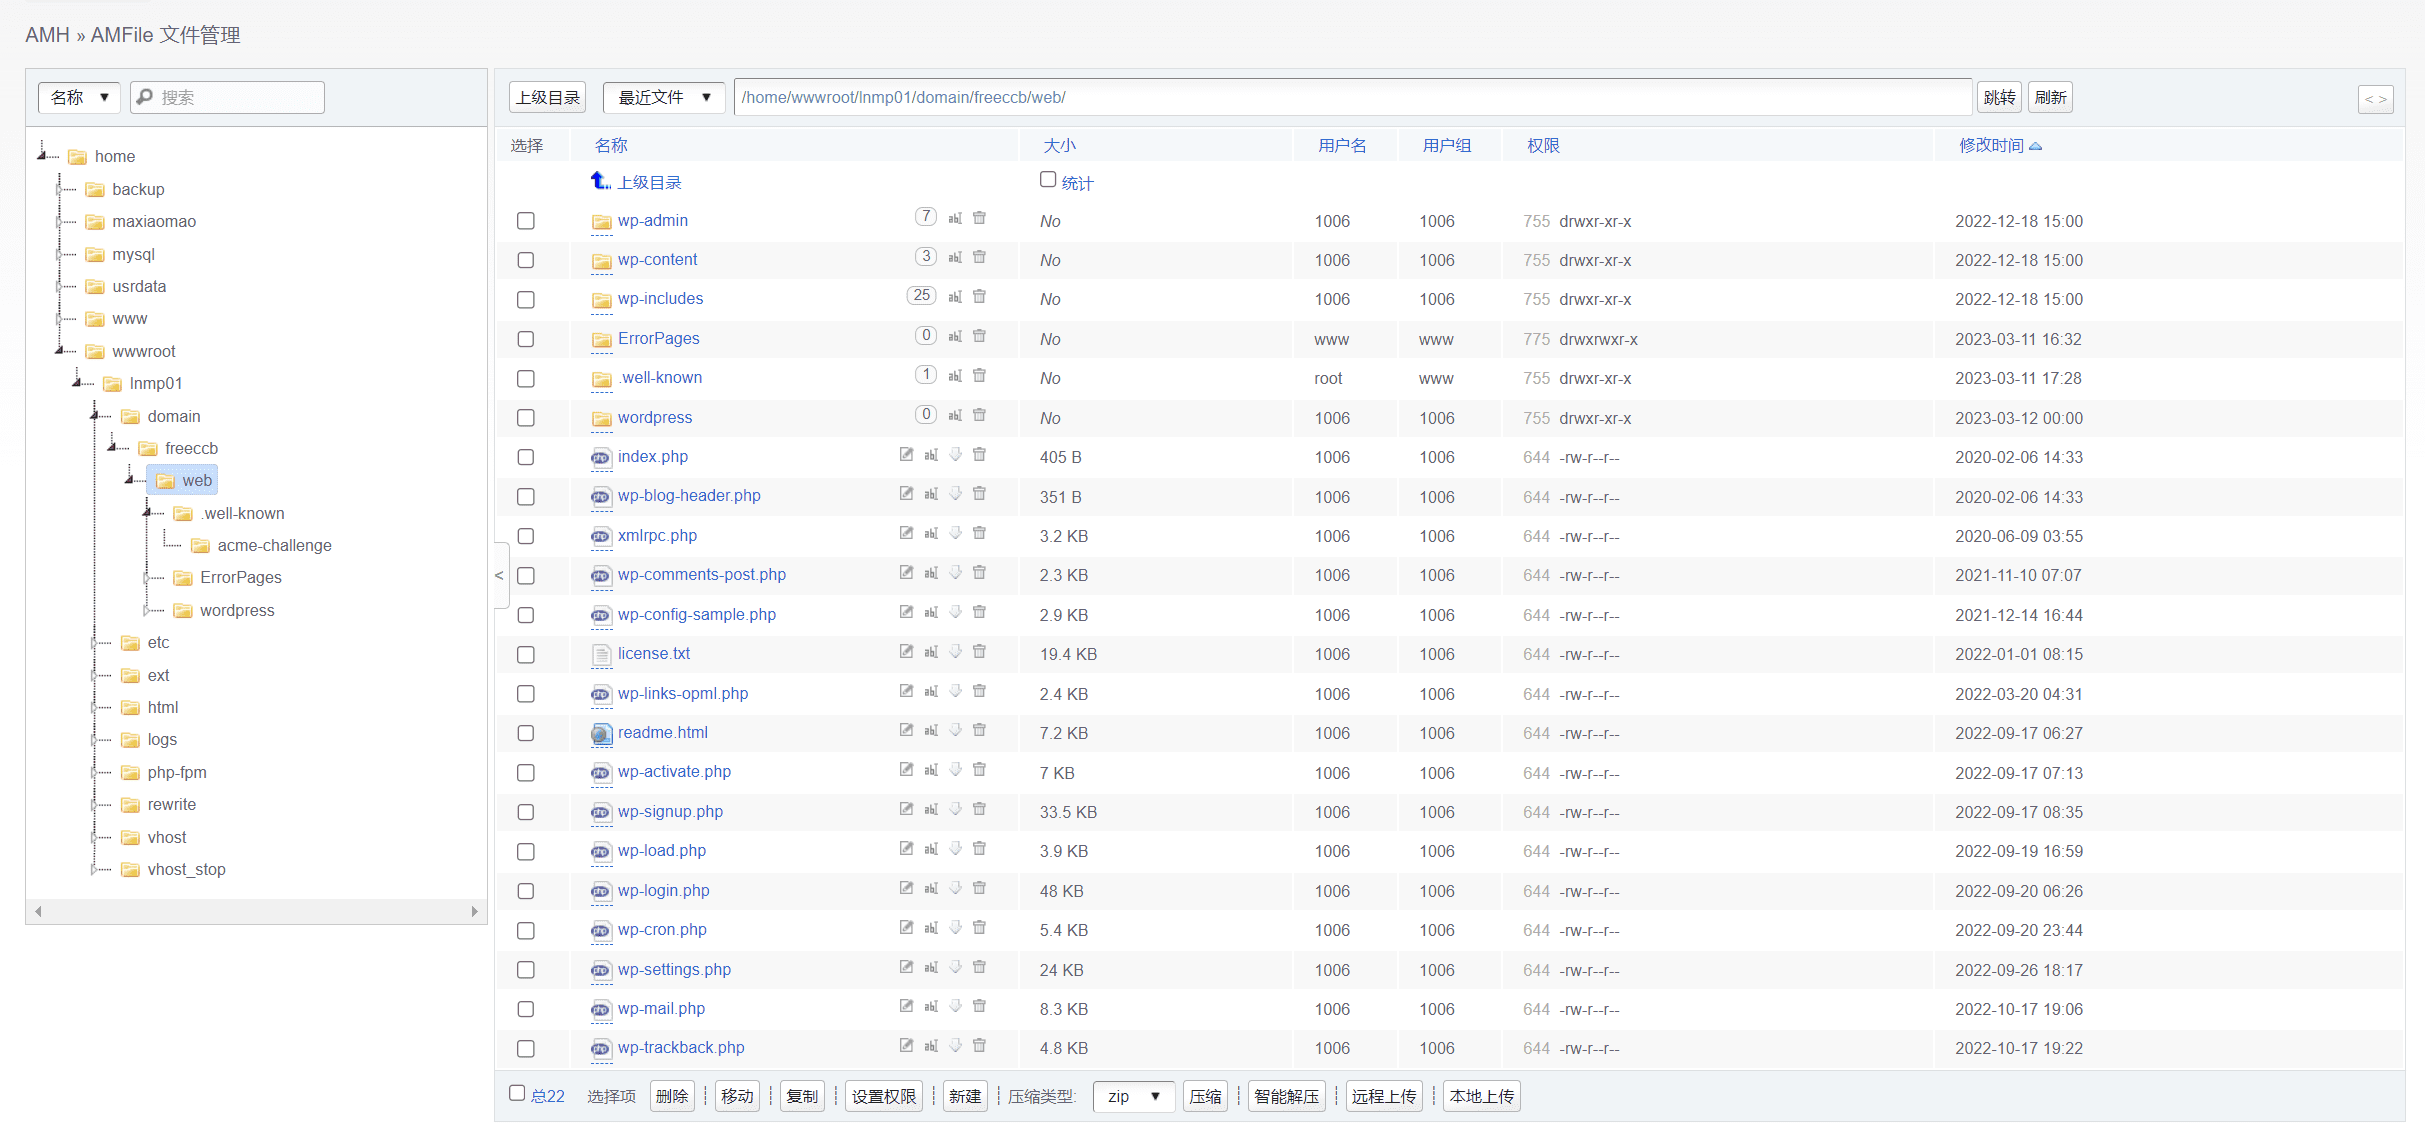
The file has been moved successfully. Next, copy wp-config-sample.phpChange of nameFor wp-config.php, click on the back of the wp-config-sample.php file.RenameMake modifications.
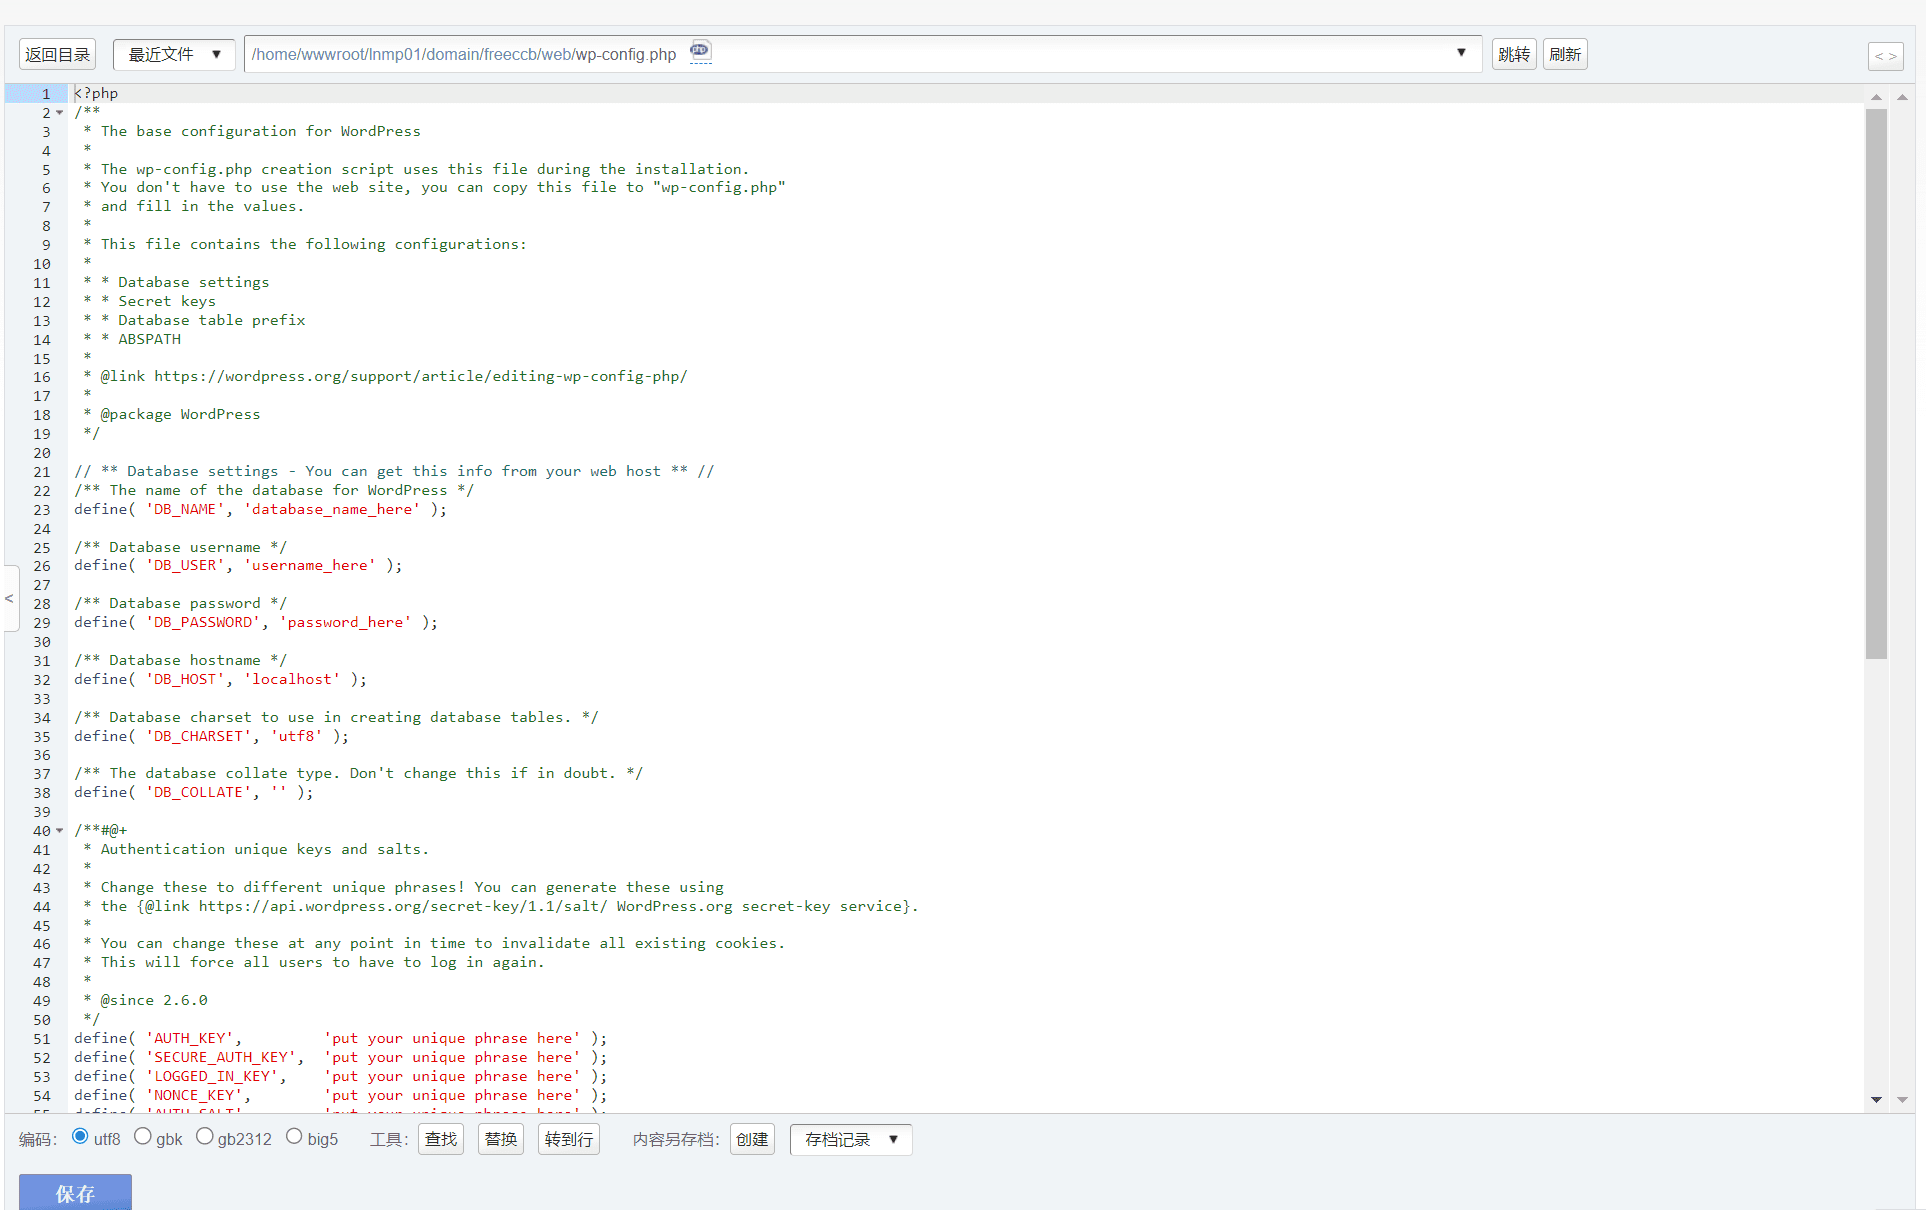
After the modification is completed, click to open the wp-config.php file and edit the following content.
WordPress database name: define( 'DB_NAME', 'WordPress' ); MySQL database username: define( 'DB_USER', 'root' ); MySQL database password: define( 'DB_PASSWORD', 'mysql password' ); MySQL host: define( 'DB_HOST', 'localhost' ); Default text encoding when creating a data table: define( 'DB_CHARSET', 'utf8' );
Add wp memory size at the end of the file, it is recommended to set it to 128M or higher, and update plugins without logging in to ftp
define('WP_MEMORY_LIMIT', '128M'); define('FS_METHOD','direct');
The current MySQL password is still the default password. You need to change the MySQL password here. Click the database, and in the user management under the database menu, select Change Password and enter the MySQL password you set. The user is the default root. After entering the password, click Submit.
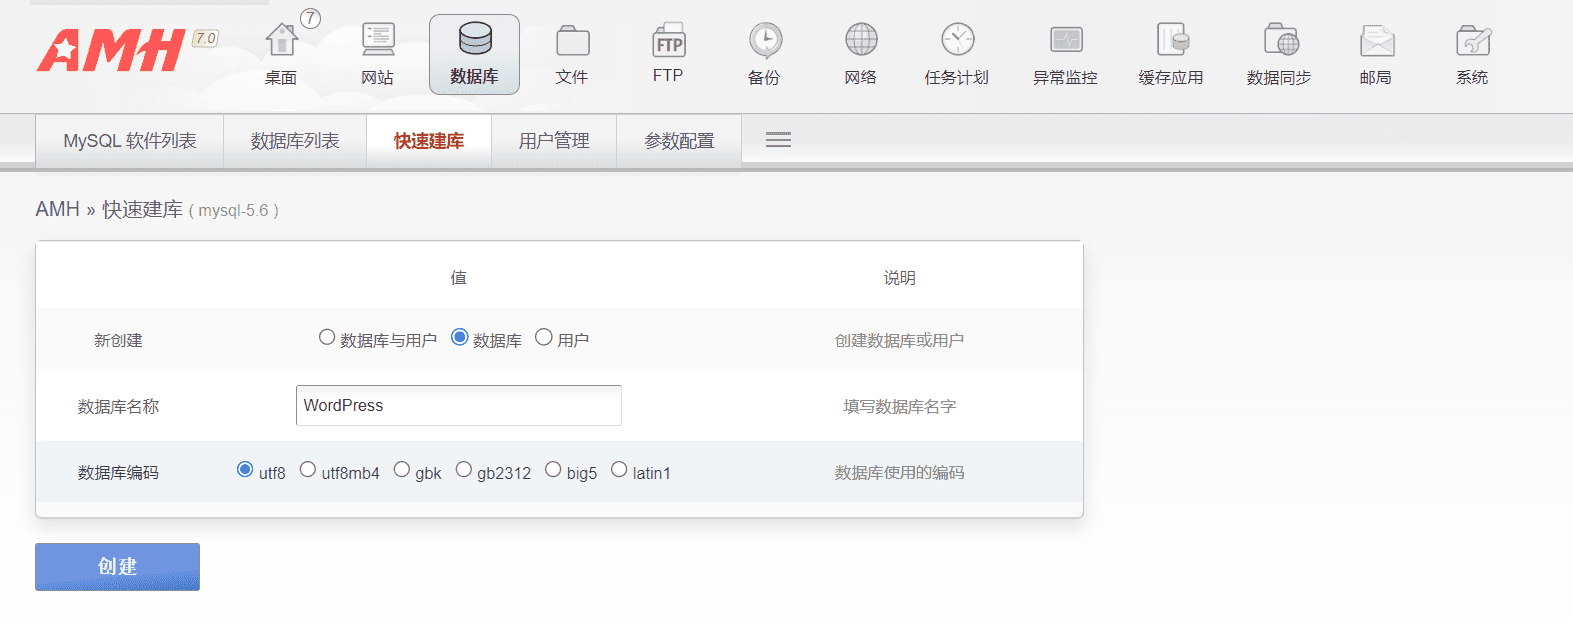
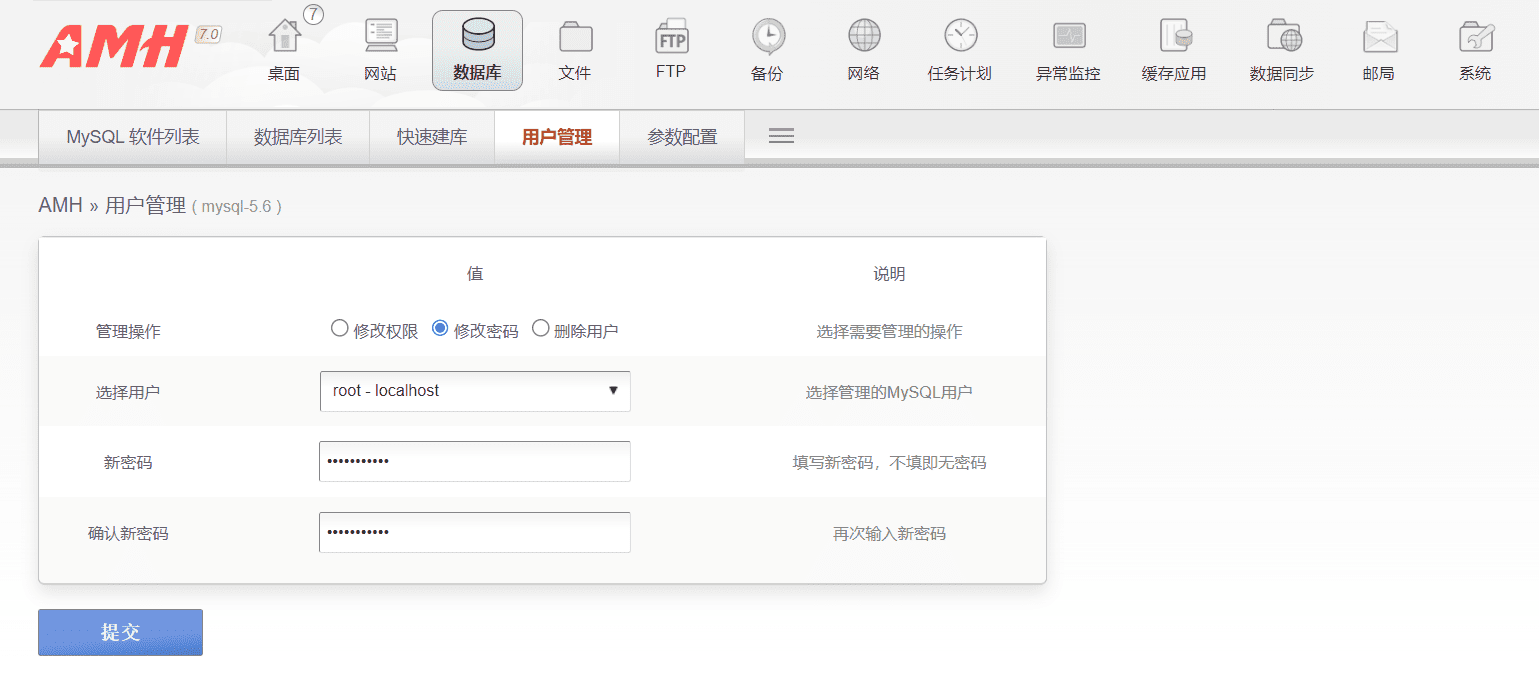 After the modification is completed, save the file and thendatabaseIn the menuQuick database construction, click Database and enter the database name:WordPress, just create an empty library.
Note: This database name must be the same as configured in wp-config.php above.
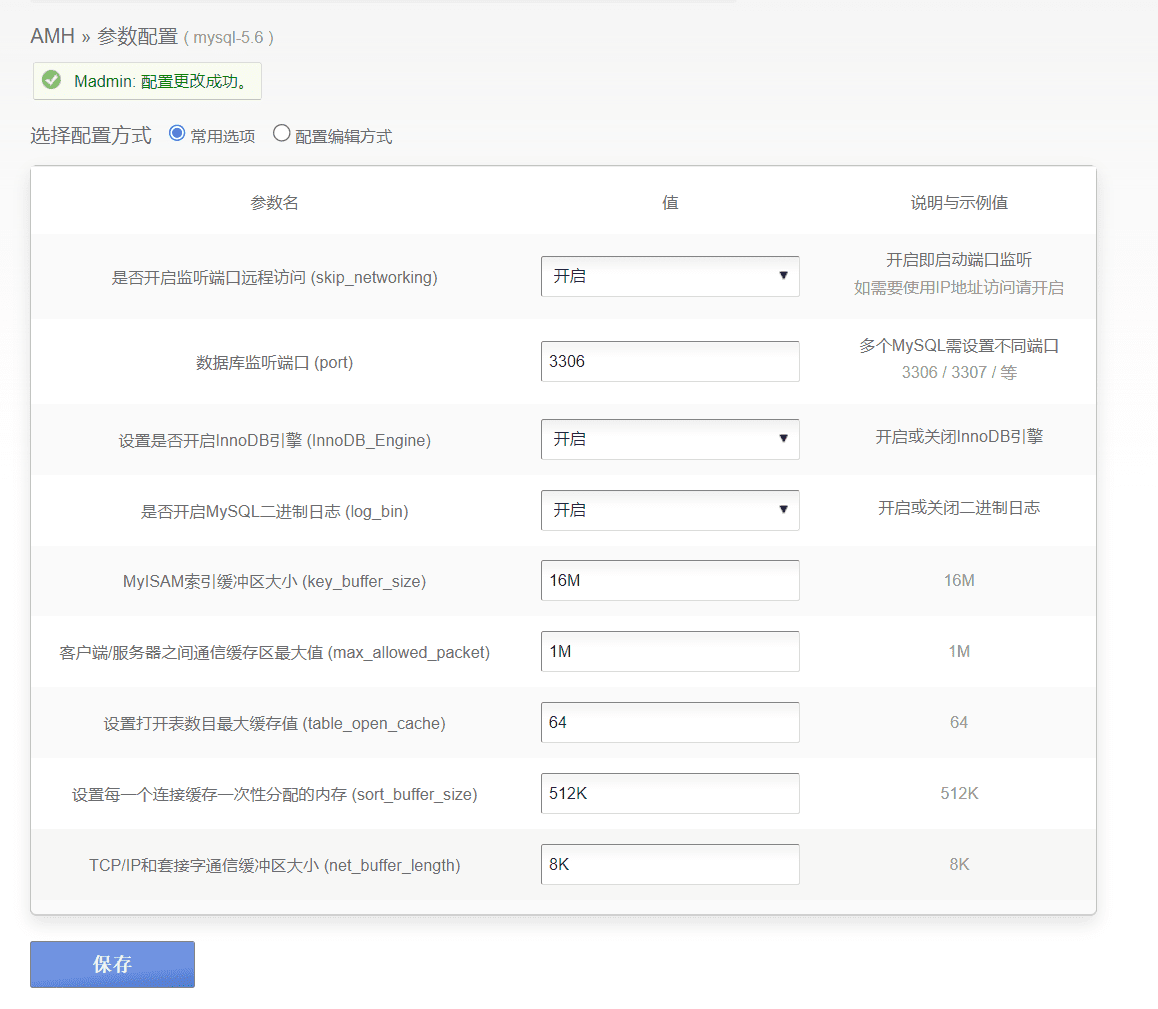
Finally in the databaseParameter configurationIn the "Enable remote access to the listening port" section, selectOpen, it is closed by default. If it is not turned on here, the program cannot connect to the database.
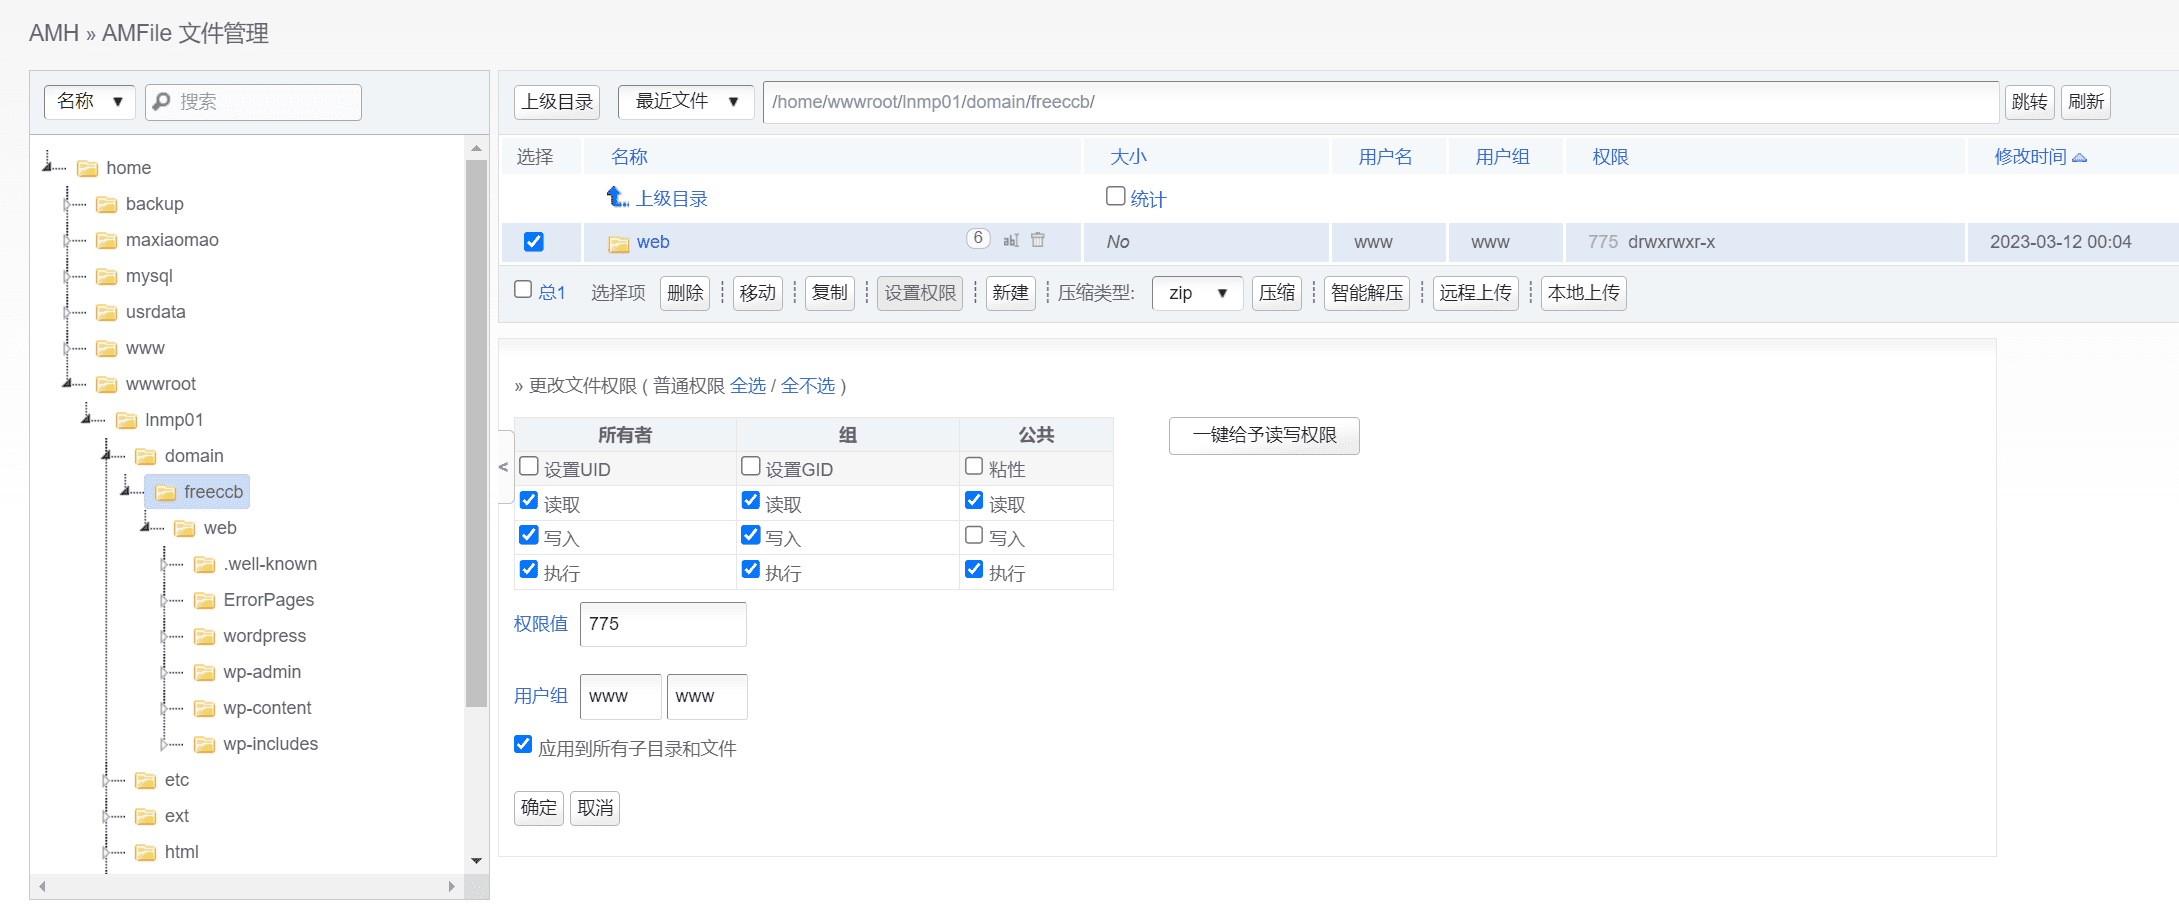
Set the web directory permissions. After decompressing wordpress, the user and user group of the file need to be changed to www.
Check the web directory and set permissions, otherwise you will not be able to install plugins and themes in WordPress.
Well, the server-side configuration of WordPress is now complete.
How to redirect the www domain to the main domain
Many people are accustomed to using www+domain name to visit websites. This is a problem left over from history and also a very bad habit.
In the browser, enter the domain name and press ctrl+Enter to automatically jump to www.yourdomain.com
In SEO, the search engine will default the main domain name and the domain name with www to two websites. In fact, the www domain name is the second-level domain name of the main domain name. In AMH, the www domain name needs to be jumped to the main domain name.
You need to build aSubdomain Hosting:
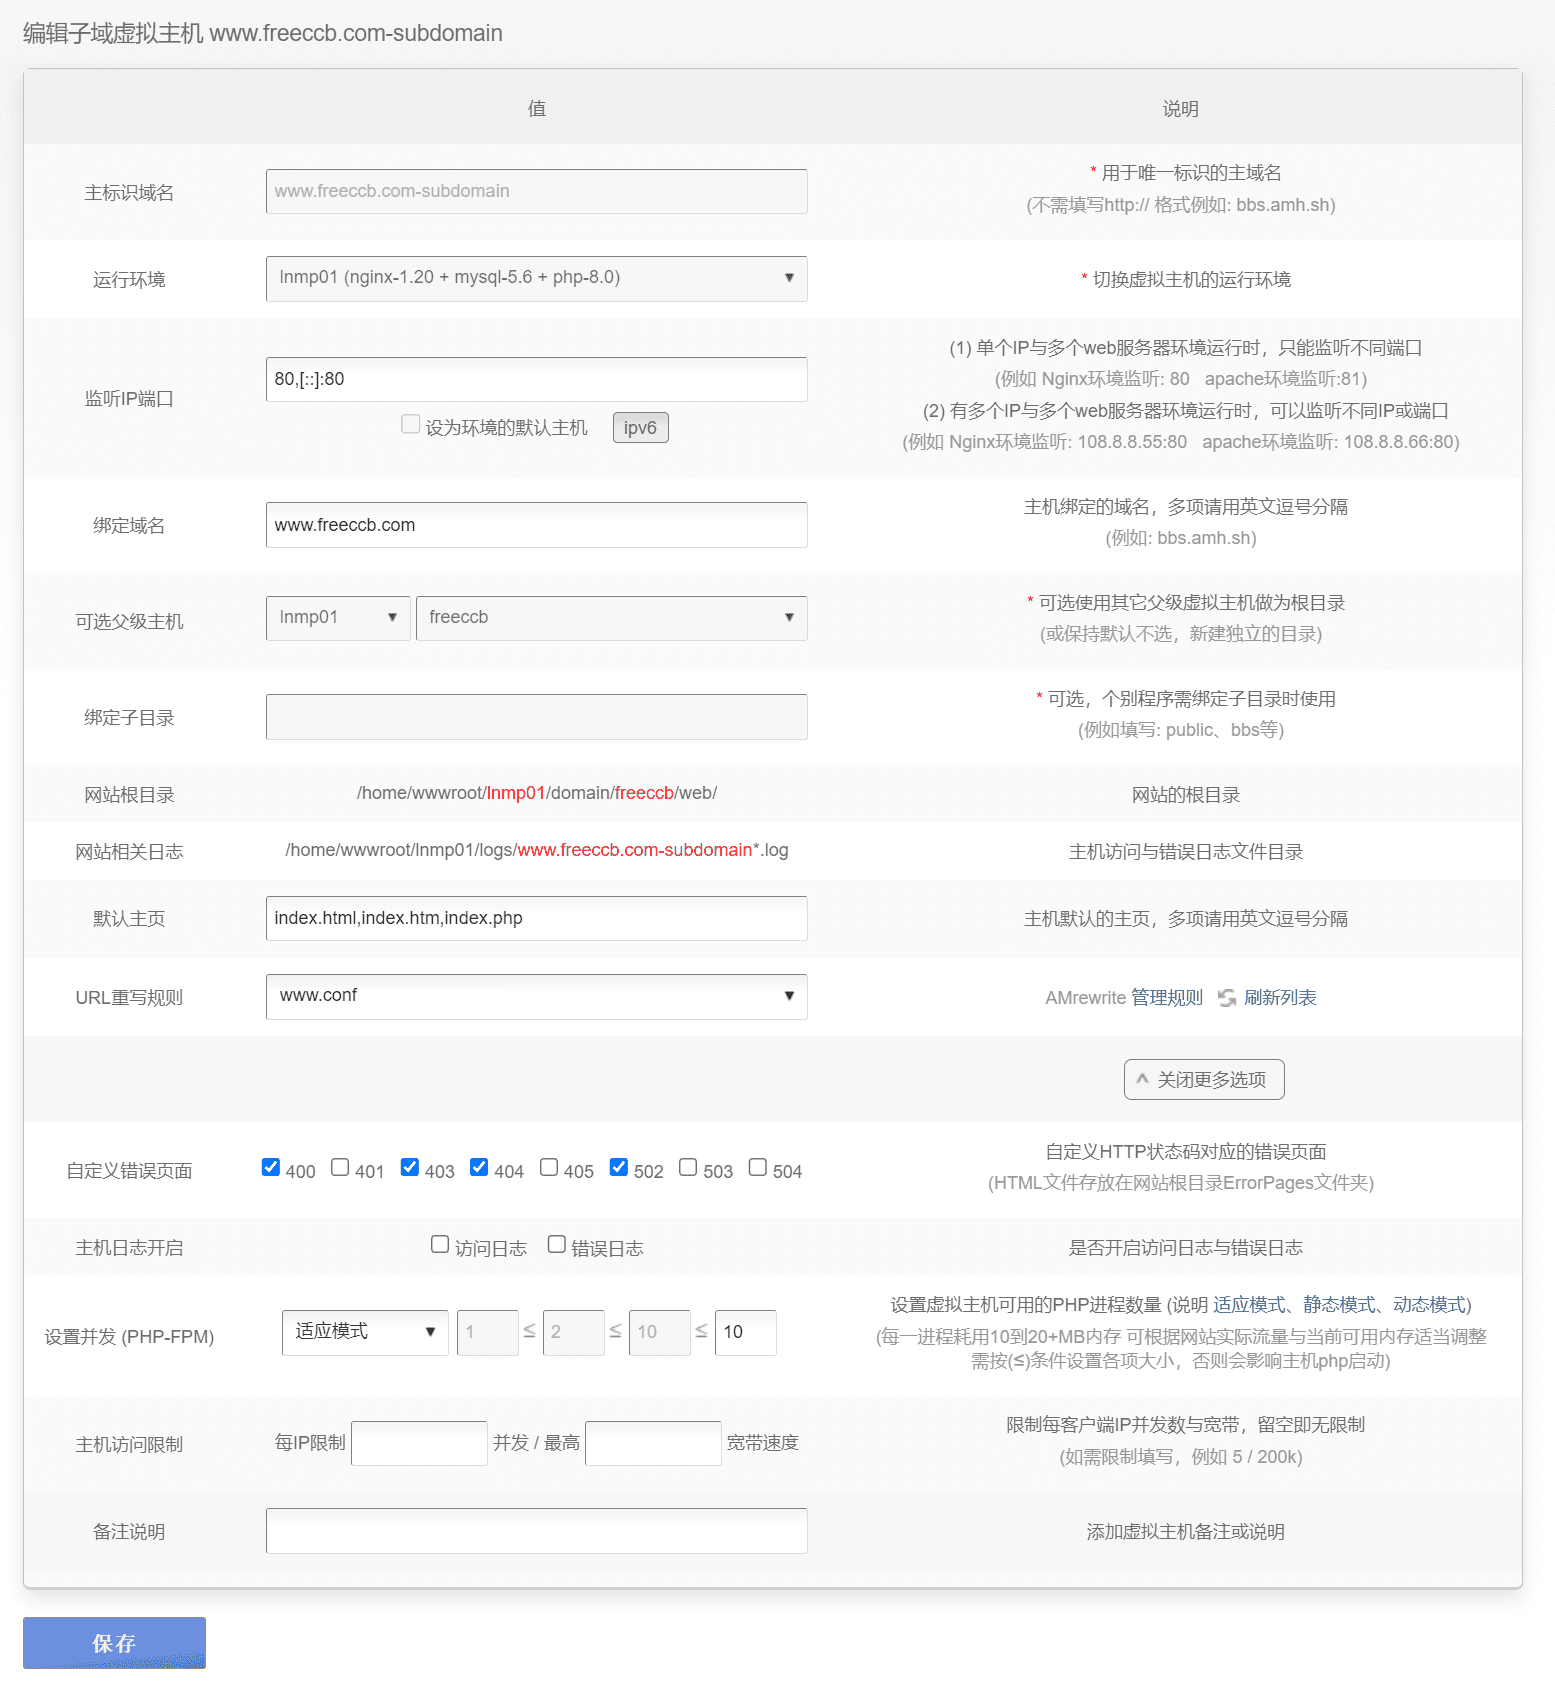
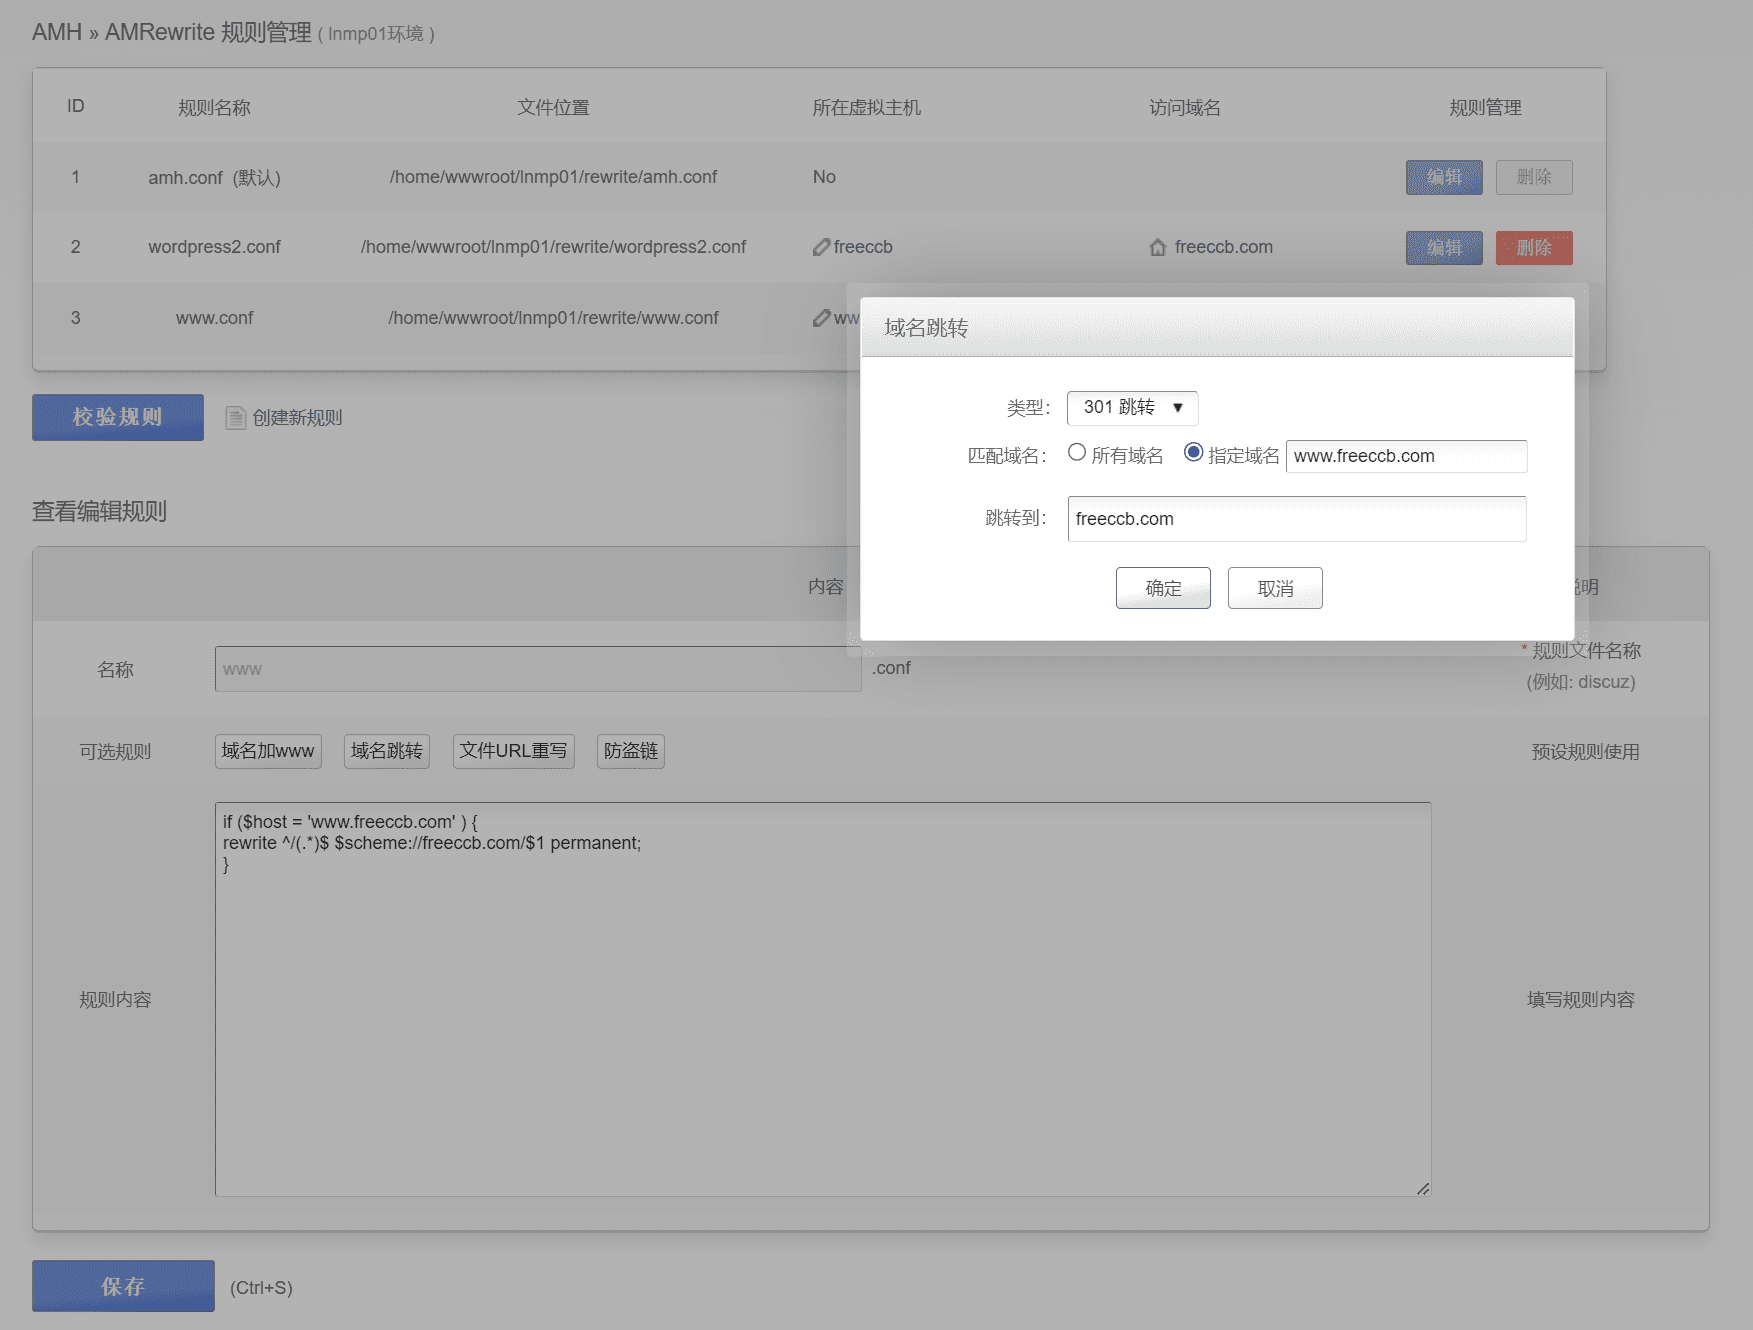
In URL rewrite rules, click Manage Rules and create a new www.conf rule for redirection. Create a new domain name redirection, select 301 for type, select Specified domain name for Match domain name, enter your www domain name, and then jump to the primary domain name without www.
After the rule is created, create a subdomain host in the subdomain host. After the establishment is completed, you also need toSSL Certificate, apply for a certificate for the www domain name.
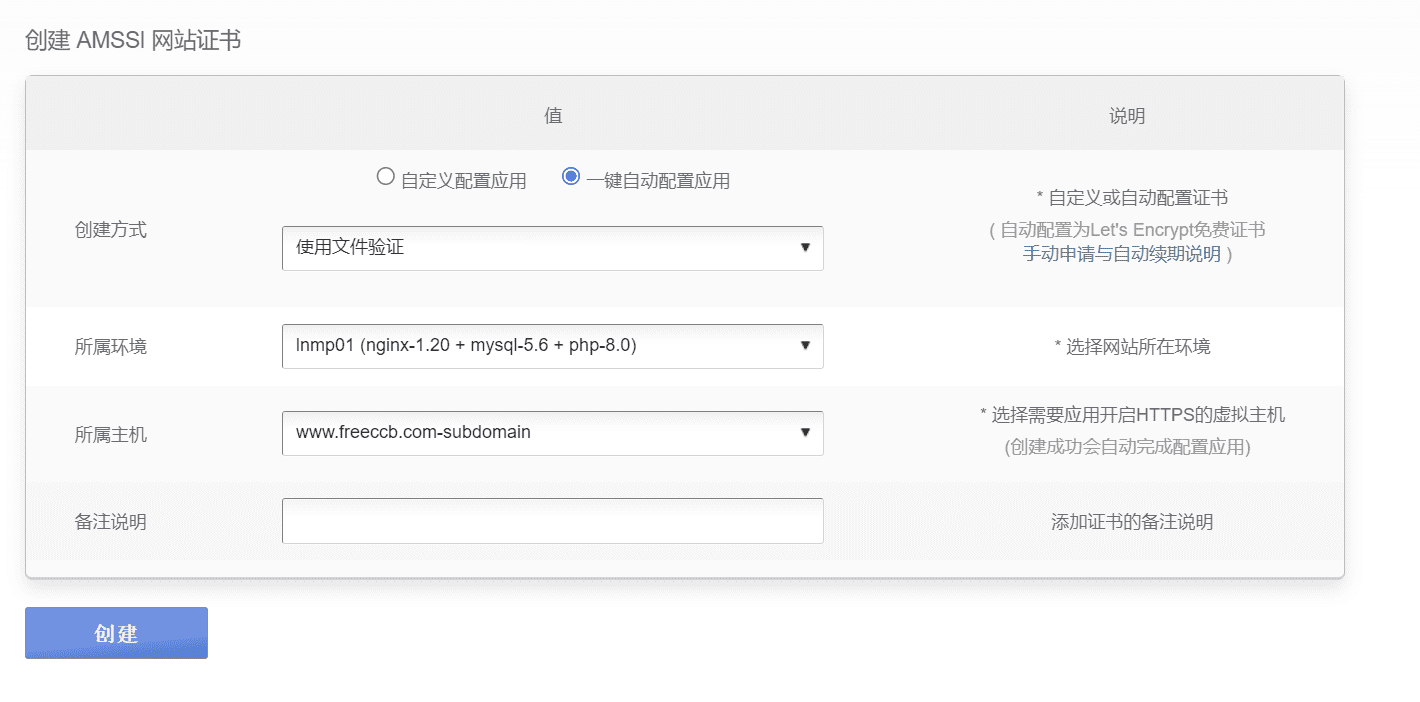
After the SSL certificate for the subdomain WWW is created, clickapplication, turned on forced https and optimized access, and turned on automatic renewal, and it was successful.
At this time, whether you enter the www domain name of http or https in the browser, it will jump to the main domain name by default.
Browser Settings for WordPress Site
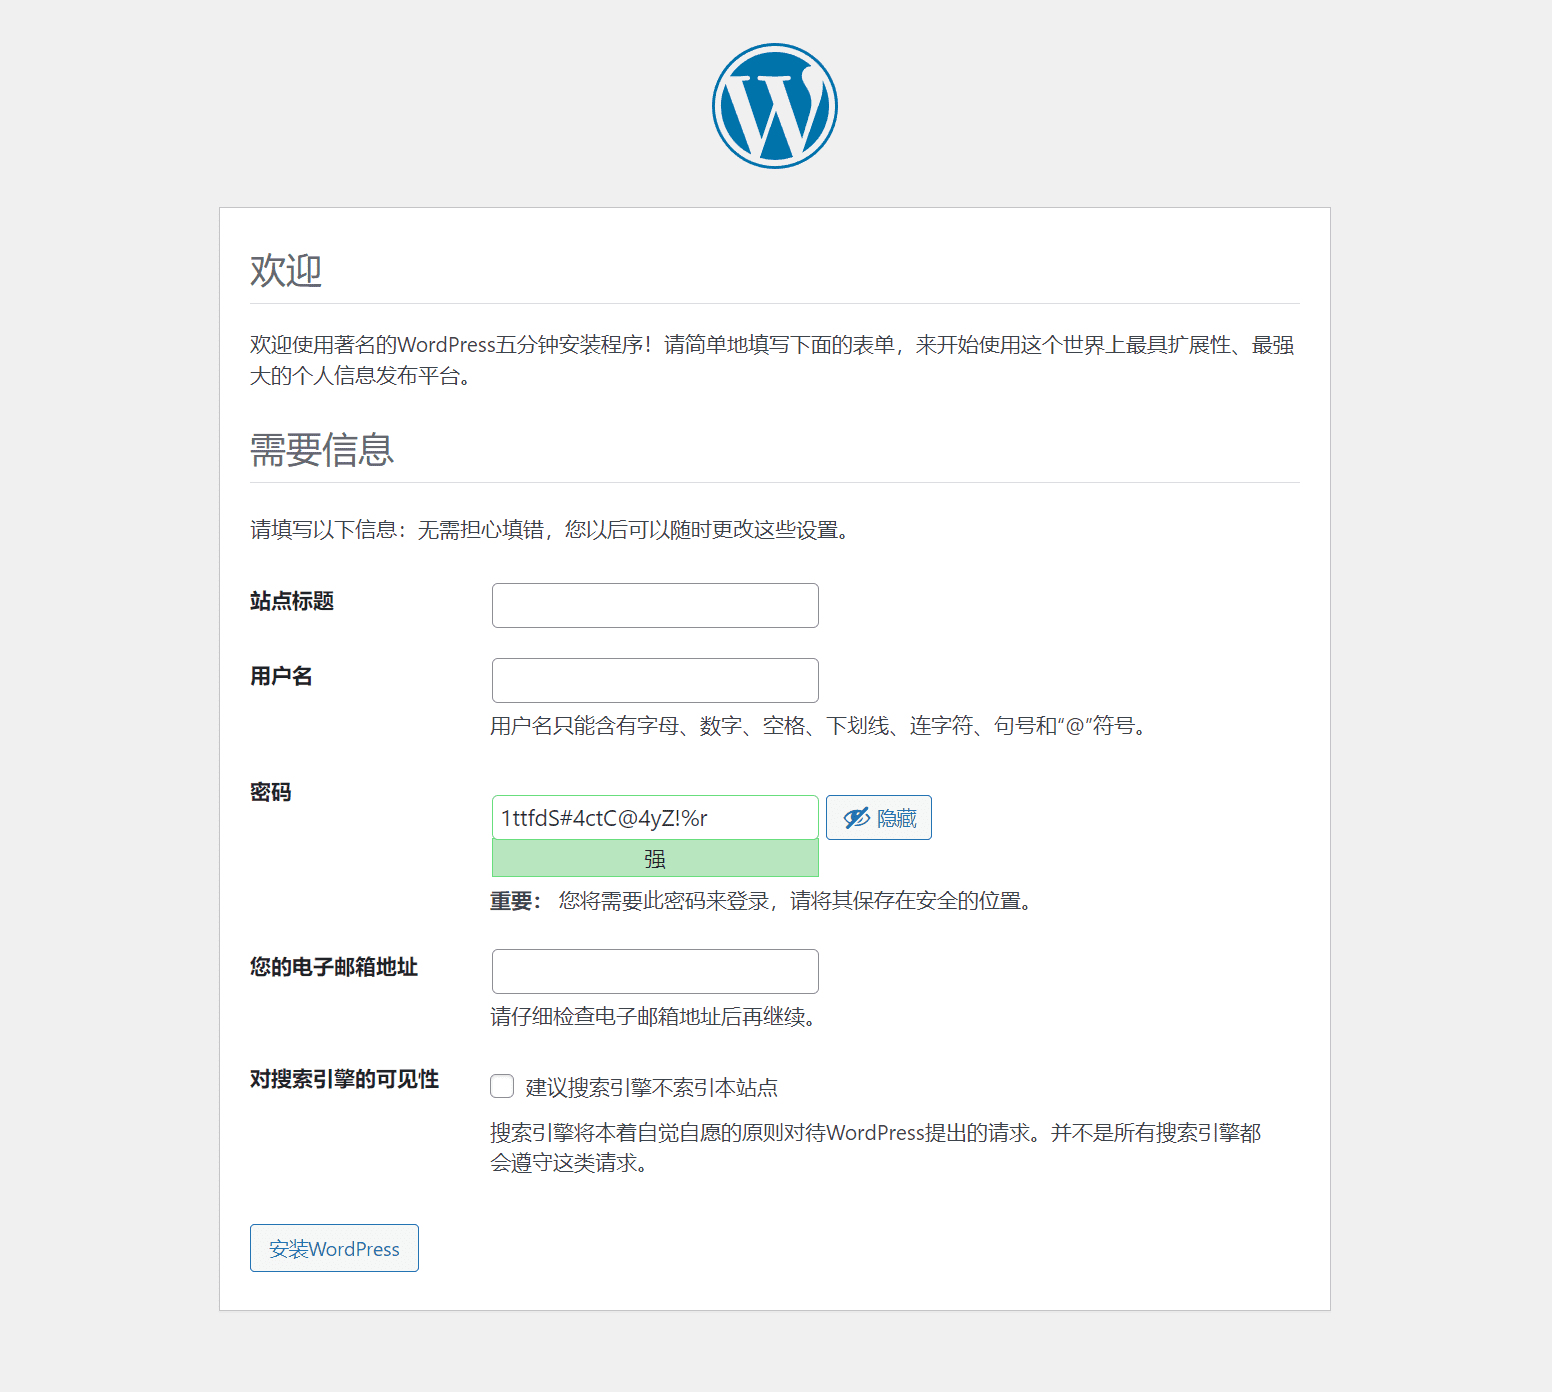
Next, access the website domain in the browser, configure the WordPress website on the web, and follow the steps to install it step by step. It is recommended to use Google Chrome to access it.

LinuxFor server environment construction, please refer to:AMH Cloud Host Management Panel Linux Automatic Deployment LNMP Environment WebUI Open Source Host Panel
Written at the end
The AMH hosting panel is easy and convenient to use, and each step of the operation seems familiar, which reminds people of the 8U8 website more than 20 years ago. That was a green era. It cost 10 yuan to book an all-night internet cafe. When you opened 8U8, lines of HTML code came into view, you could edit web pages online, apply for the second-level domain names of y365 and 8u8, and after a series of operations, a beautiful personal website was established. Time flies so fast, and more than 20 years have passed. Everything in the past is no longer the same.
AMH is more suitable for novice users to get started. It is very simple to create a website, all management is visual, the server can be easily managed, and a WordPress blog website can be easily built!
This era is so great!
Those old rookies who still stick to their computers rely not on persistence or hobbies, but on unspeakable poverty.
It feels so good to be alive!


 Configure website related content