Excellent software and practical tutorials
IBM LinuxONE Virtual Server Deployment Guide
Overview
This tutorial will guide you through accessing LinuxONE Community Cloud, deploy a virtual server, and the steps to start using it in your project or in one of the quick start guides.
step
Request access to LinuxONE Community Cloud
First time setup
Deploy your LinuxONE virtual server
Log in to your LinuxONE virtual server
Step 1. Request access to the LinuxONE Community Cloud.
In your browser, go to the LinuxONE Community Cloud website.

ClickTry out virtual machines on LinuxONE Community Cloud".
Complete the required fields on the registration form.Notice:If you getActivity code,Please enter, if not, please leave blank)

Click Request TrialThe registration is complete.

Check your email for a registration confirmation message similar to the one below. You will need the User ID and Password from this email to log in to the Self-Service Portal.

First time setup
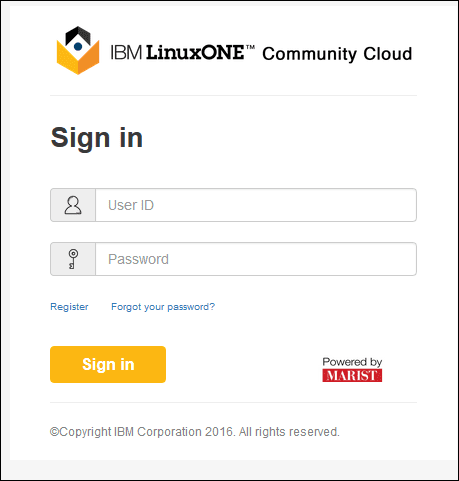
- After activating your account, please log in https://linuxone.cloud.marist.edu/#/login
Enter yourUser IDand created during registrationpassword.
Click"Log in".

- Now is also a good time to create or import an SSH key. An SSH public key is required to deploy a Linux instance. The instance can only be accessed using the private key that matches the public key. You can generate one now or wait until you deploy your first instance.
ClickVirtual servers.
Next, click yourusername.
chooseManaging SSH key pairs.

If you already have a public SSH key that you want to use with this cloud:
ClickImport.
Enter this keyKey Name.
Browse your local file system to selectPublic key path.
Click"Upload your public key".

If you want to create a new SSH key pair:
Click"create".
Enter this keyKey Name.
ClickCreate a new key pair".
A pop-up window will appear asking you to saveyourkey.pemfile. This is your private key. Please save it to a safe location. Once this is done, you cannot retrieve this key. Click"Sure"Save the file.


Deploy your LinuxONE virtual server
- Go toHome,Service CatalogPartial andVirtual ServersServe.
ClickManage Instances.

Click"create".

Your virtual server type will automatically be a General Purpose Virtual Machine.
Provides detailed information for this instance.
- Examplesname, without any spaces or special characters.
Select the desired Linux image.

Choose a flavor (currently only one).

Select the SSH key you want to use.

After confirming that all information is correct, click"create".

- Your instance will now appear in the list of instances and will begin booting. This process will take approximately 5 to 10 minutes.
Log in to your LinuxONE virtual server
From Mac OS X or Linux using Terminal
- Open the Terminal application.
- Make sure you have the private SSH key for your deployment server.
- If you haven't already, change the permission bits of this key to 600.
# chmod 600 /path/to/key/keyname.pem
- Use SSH to access the Linux client.
- User ID: linux1
-iLet SSH know which identity file to use to access the Linux client.- Serveripaddress: This is noted down from the Management Instance page of LinuxONE Community Cloud.
# ssh –i /path/to/key/keyname.pem linux1@serveripaddress
Using PuTTY from Windows
- Set up PuTTY to use the server's SSH keys.Setting up PUTTY on Windows to use ssh private keysTutorial.
- Log in as the linux1 user ID.
Important notes about your server:
- You must log in as user "linux1" using your SSH private key. No modifications are allowed (for example, using password authentication).
- For security reasons, login for user 'root' is disabled. No modifications are allowed.
- You can use "sudo" to execute commands that require root privileges.
- There is no backup of your virtual server. It is the end user's responsibility to back up all critical data.
- The firewall is enabled via iptables rules. By default, only the SSH port is open. If you need to open additional ports, modify the firewall rules using iptables. To check the currently enabled iptables rules, issue the following command:
# sudo iptables -L
For SLES:
# sudo iptables -I INPUT -p tcp --dport -j ACCEPT
If you want to make the changes permanent, issue the following command:
# sudo bash -c "iptables-save > /etc/linuxone/iptables.save"
Note: If you want to use a firewall management tool like firewalld, you need to delete the saved iptables files.
For RHEL:
# sudo iptables -I INPUT -p tcp --dport -j ACCEPT
If you want to make the changes permanent, issue the following command:
# sudo bash -c "iptables-save > /etc/sysconfig/iptables.save"
Note: If you want to use a firewall management tool like firewalld, you need to delete the saved iptables files.
For Ubuntu:
# sudo iptables -I INPUT -p tcp --dport -j ACCEPT
If you want to make the changes permanent, issue the following command:
# sudo bash -c "iptables-save > /etc/iptables/rules.v4"
Note: If you want to use a firewall management tool such as ufw, you need to delete the saved iptables file.


