Excellent software and practical tutorials
CloudflareNot only can it provideDomain name resolutionservice, and can also provide one-click activationFree CDNIn order to increase website security and improve website access speed, this article will introduce how to replace your domain name resolution server with Cloudflare and use Cloudflare's free CDN.
Using Cloudflare to resolve domain names and enable free CDN services is very simple. First,Domain HostingGo to the Cloudflare platform and update the DNS server at the domain name registrar to point to the DNS server address provided by Cloudflare. Cloudflare will automatically scan and import existing DNS records, and users can manually modify or add custom records as needed. After turning on the free CDN, Cloudflare will accelerate the static content delivery of the website through its globally distributed server network, and through DDoS protection and Web Application Firewall (WAF) to improve the security of your website. The entire process not only improves your website’s performance, but also enhances security at no additional cost.

Summary of steps:
- Sign up for a Cloudflare account;
- Add your website to Cloudflare and get Cloudflare's domain name resolution server (NS);
- Go to your domain name registration website and change the domain name resolution server (NS) to Cloudflare. Cloudflare will automatically obtain the existing resolution records, but sometimes it may not be complete, so you need to check it manually.
- Add website resolution records in Cloudflare as needed. The commonly used resolution record is the A record, which is used to point the domain name to the website's server IP.
Important Notes:
- After changing the domain name resolution server, if your domain name needs to be renewed, it will still be at the original place of purchase.
- The function of a domain name resolution server is to help you point your domain name to different addresses (hosts), which is equivalent to providing guidance, letting visitors know which host the content behind your domain name is located on.
- Once you change the domain name's resolution server to Cloudflare, all resolution records of the domain name need to be transferred to Cloudflare, that is, all the resolution records you see at the original domain name resolution. Especially if you already have resolution records for a website or email, you should pay special attention to whether the resolution records are transferred correctly.
- At the same time, you should not add or modify the resolution record at the original domain name resolution. It will be useless because you have already changed the resolution server.
- Replacing the resolution server generally requires 24-48 hours of global synchronization (but it will take effect in most areas within half an hour). During this period, if you also move the mailbox resolution records or website resolution records, the mailbox and website will not be affected, and users can still access and send and receive emails normally. However, during this period, if you want to modify the website and find various anomalies (for example, it can be accessed for a while, but not for a while), then I do not recommend you to modify the website. Wait a day before making any changes to the website.

Sign up for a Cloudflare account
- Go to the registered address:https://dash.cloudflare.com/sign-up
- Enter your email address and password, and click Create Account.
- Receive the verification email in your mailbox and click the verification link.
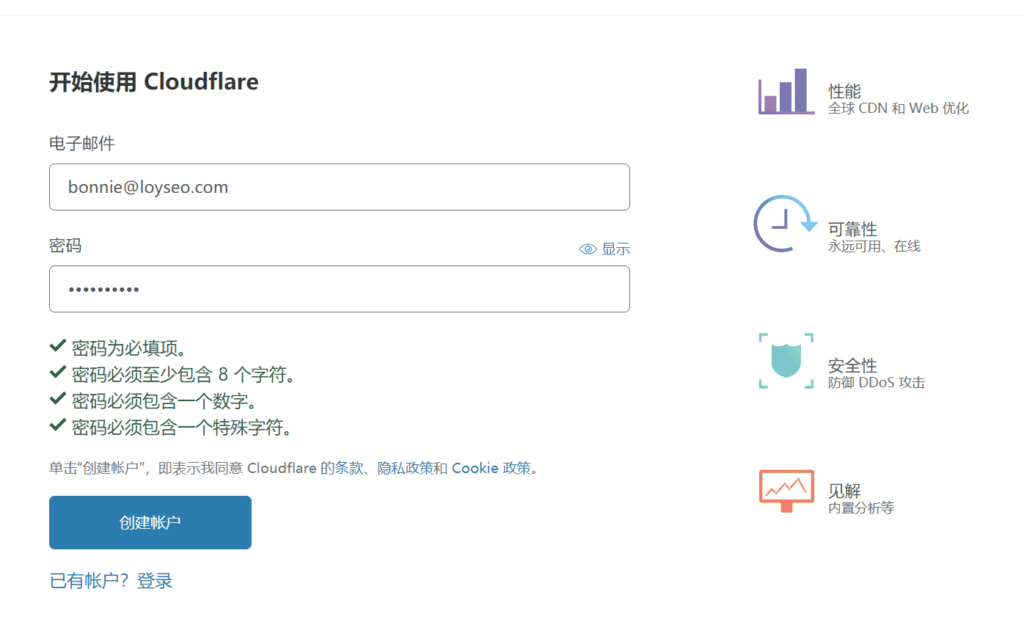
Add your website to Cloudflare
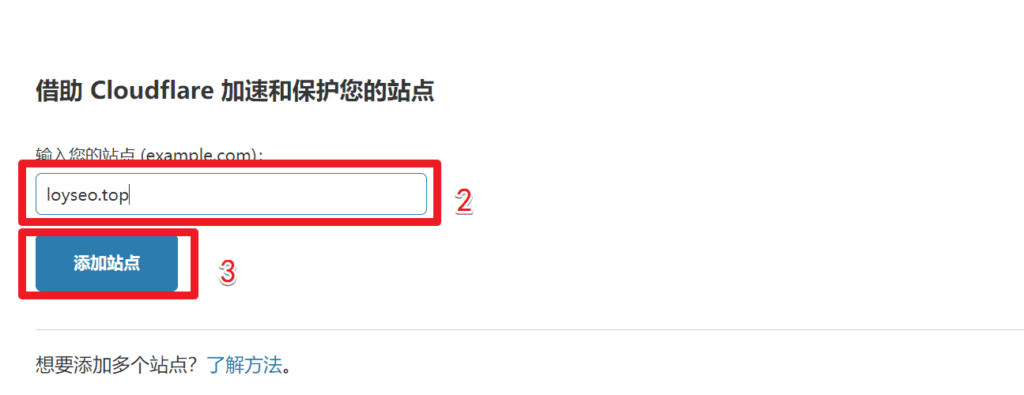
After the account is created, please add your website domain to cloudflare
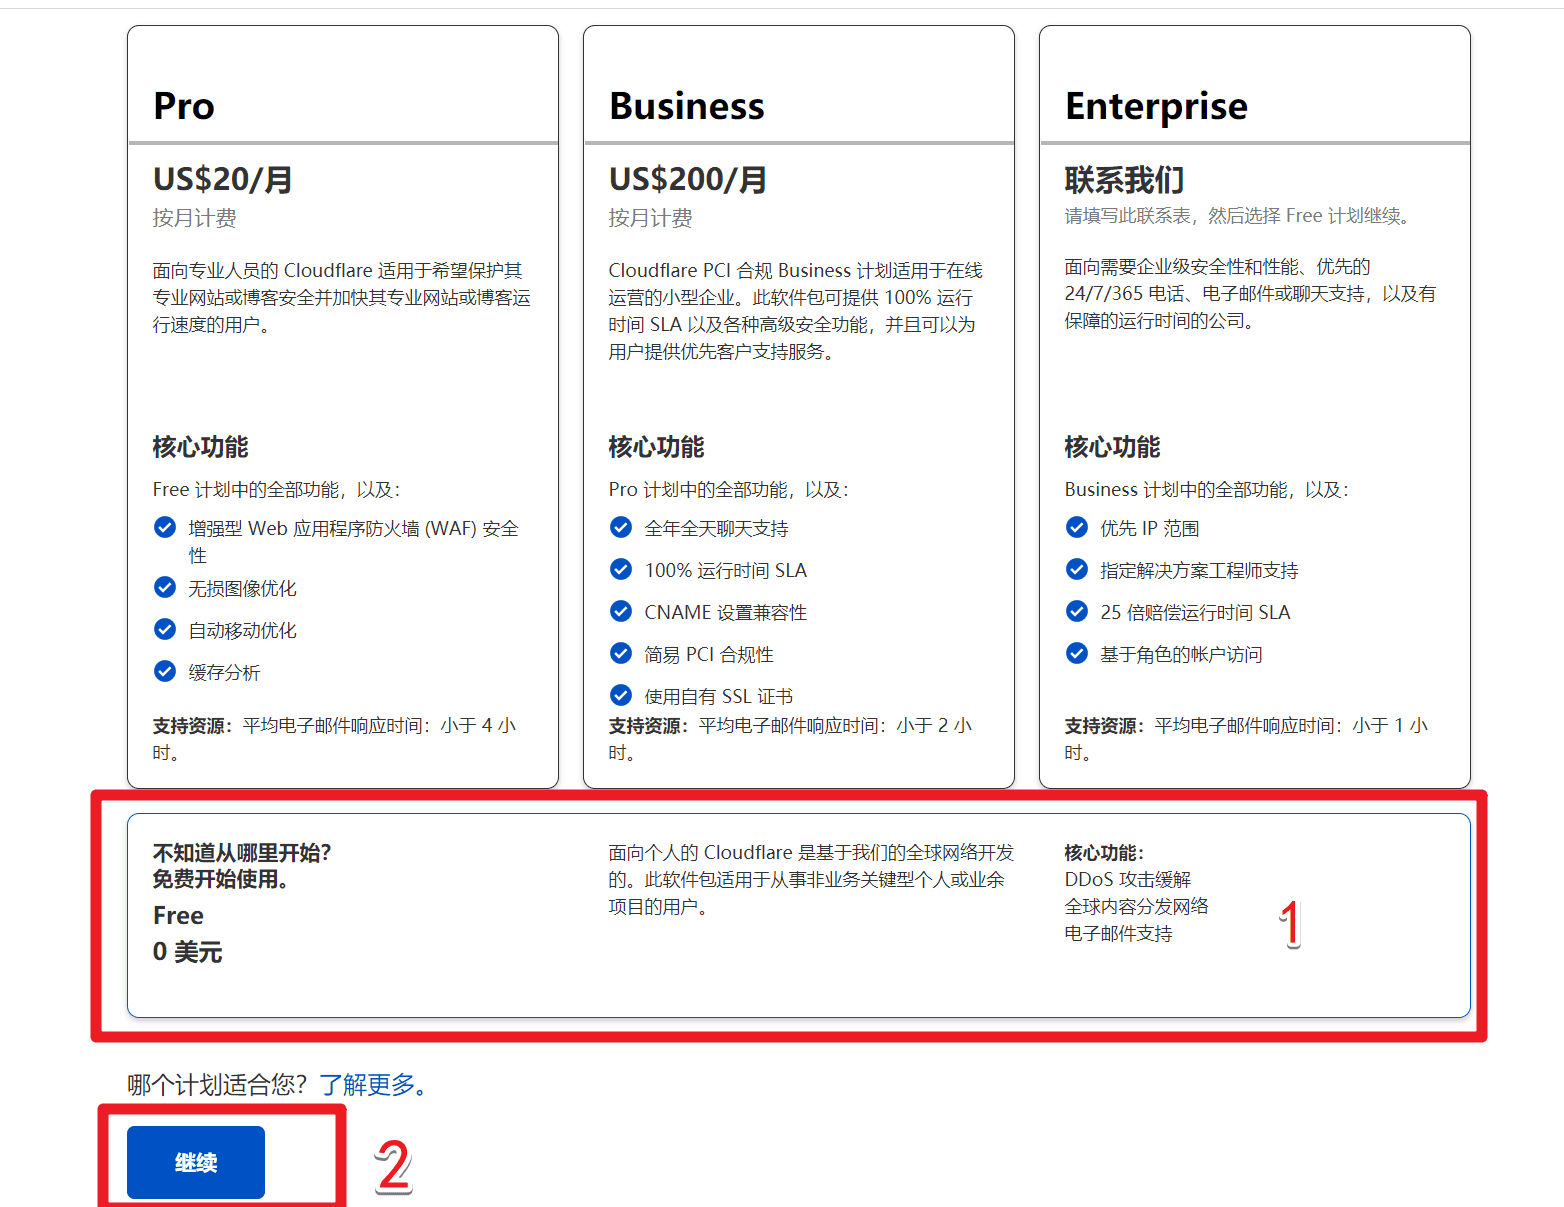
Next, we select the free plan and continue. The free plan includes total DDOS mitigation and a global content distribution network (cdn).
The system will then automatically scan your site for existing DNS records, also known as resolution records, and import them into Cloudflare, saving you the effort of repeated configuration. However, you should also check that the scan may not be complete.
When the scan is complete, you will enter the following interface, which will display your existing resolution records. If your website does not have a resolution record, you can click Add Record in the interface to add one (the method of adding is described below). If you see that the proxy status of the resolution record is an orange cloud, it means that CDN is turned on; if it is a gray cloud, it means that it is only used for resolution purposes and will not provide protection and CDN.Click the Continue button.
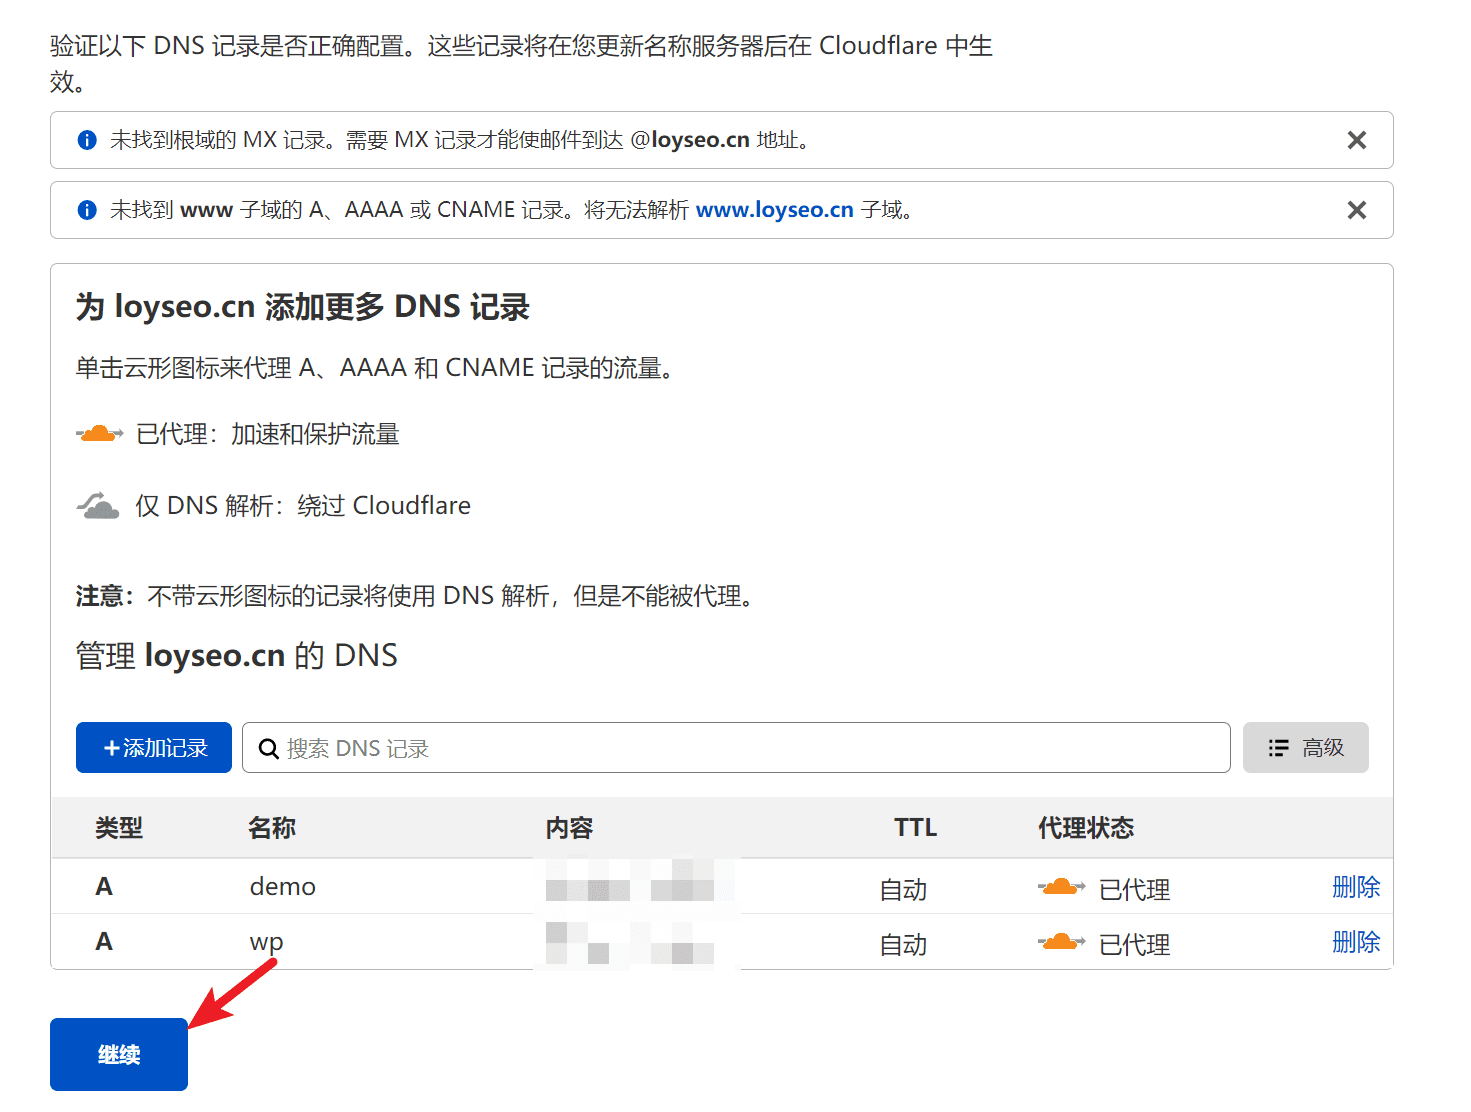
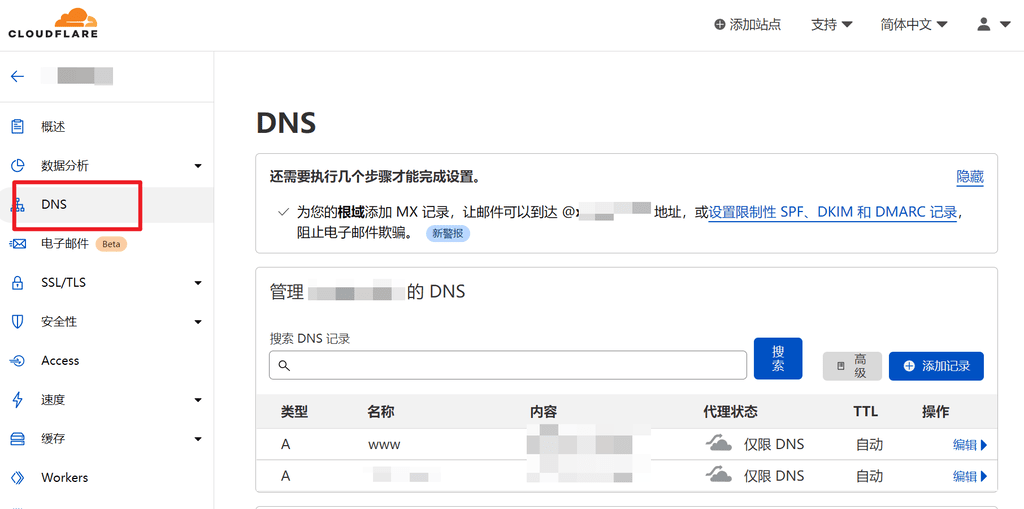
If you accidentally exit this page and can't find the entrance, you can find it by following the steps shown in the picture below.

Finally, Cloudflare tells you how to modify the name server, also known as the domain name server (NS). Please log in to your existing domain name registration office, delete the existing NS, and add the NS provided by Cloudflare. It usually takes 24 hours for the NS to take effect. Once it takes effect, Cloudflare will also send you an email notification.
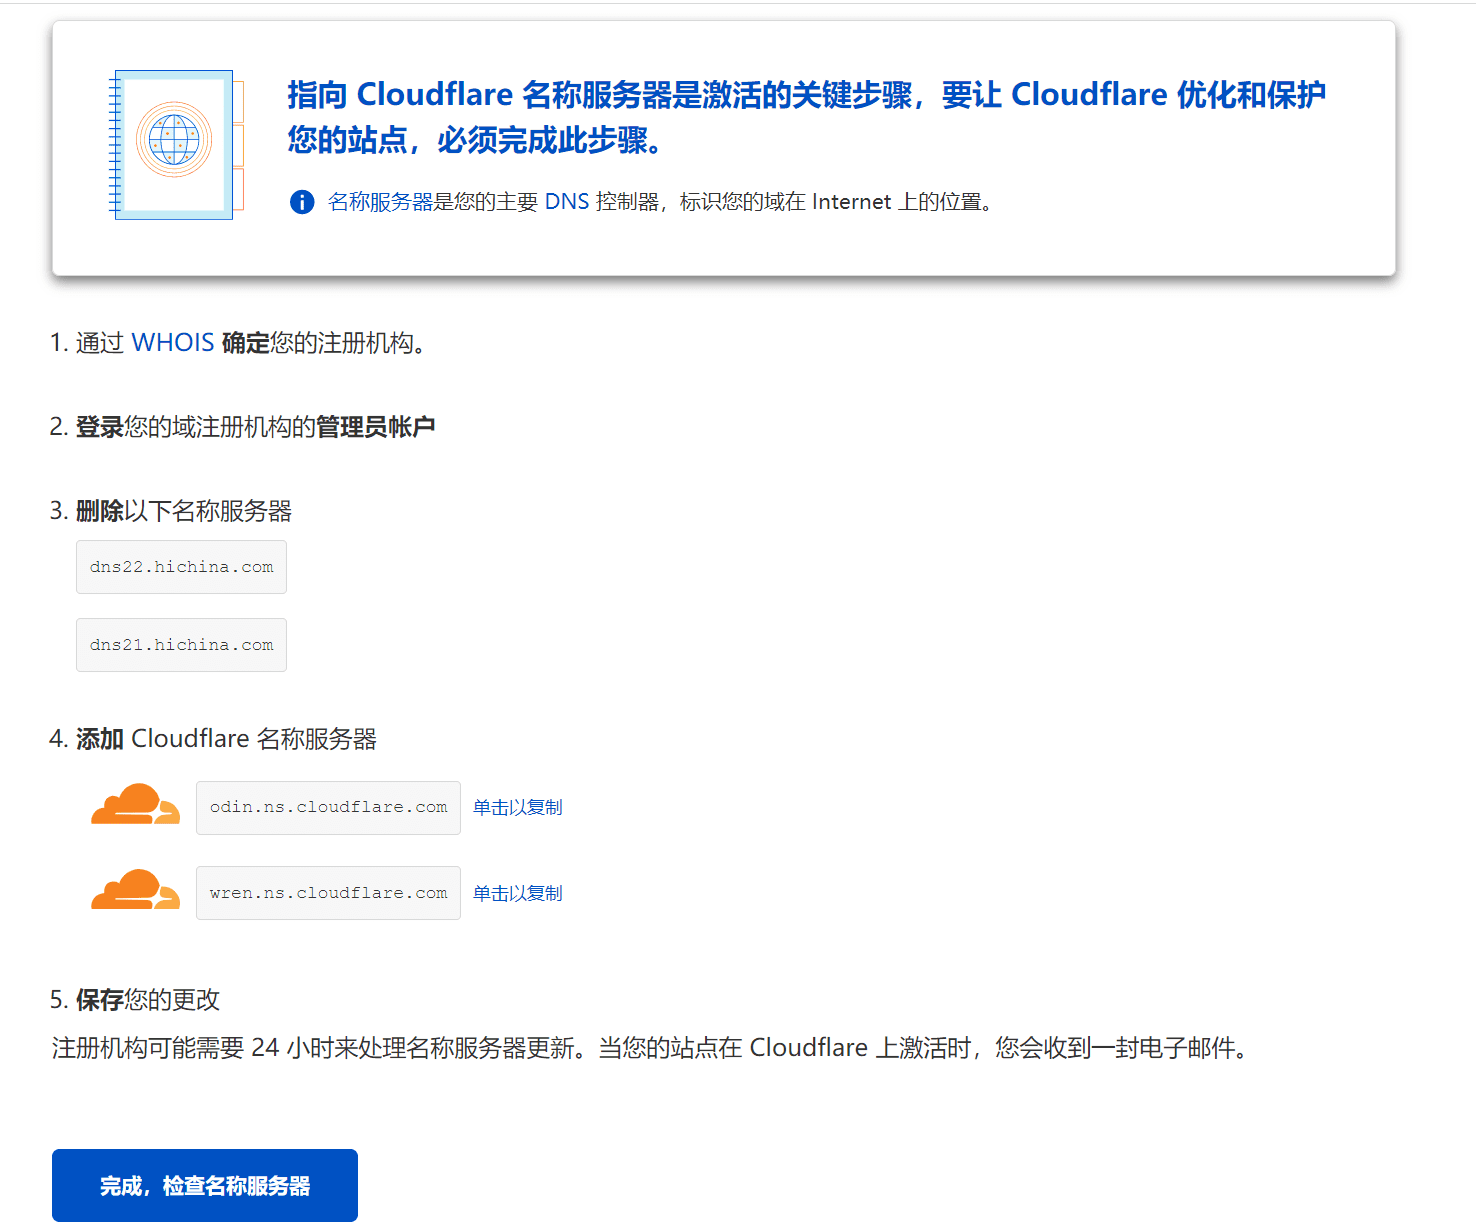
Modify the domain name server (NS)
Taking Namesilo as an example, let’s learn how to modify the domain name server.
First, after logging in to namesilo, click on my account on the navigation. After entering, as shown in the figure below, click on the domain name statistics to enter the domain name list
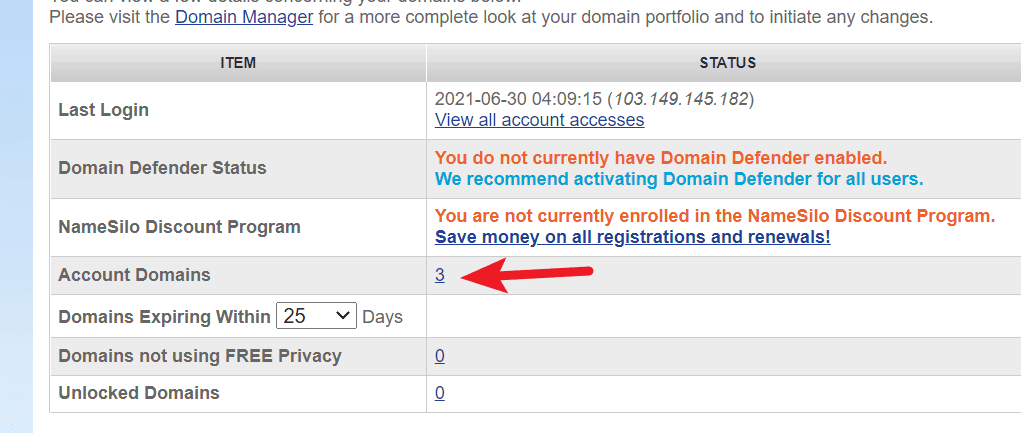
In the domain name list, check the domain name to be changed to NS, then click the change nameserver button above the list to enter the NS modification interface

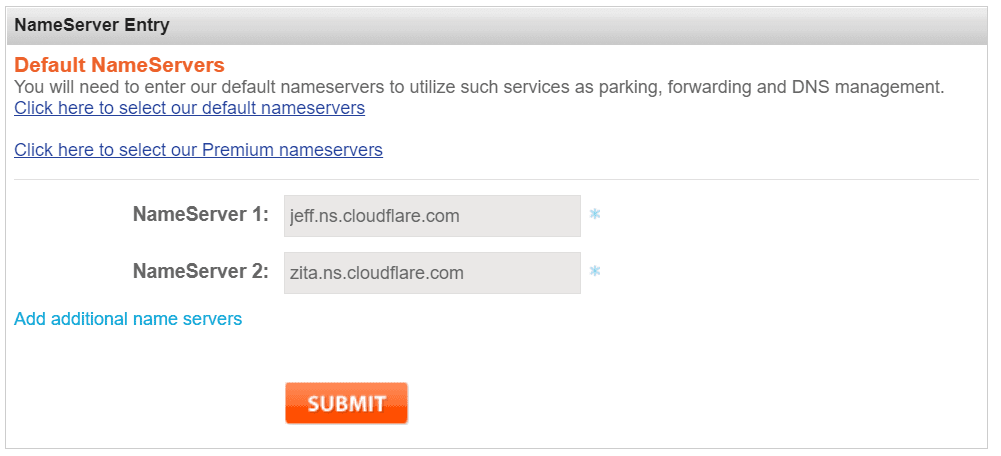
Then in the NS interface, delete the existing NS record, fill in the two NS records provided to you by cloudflare and confirm to save.
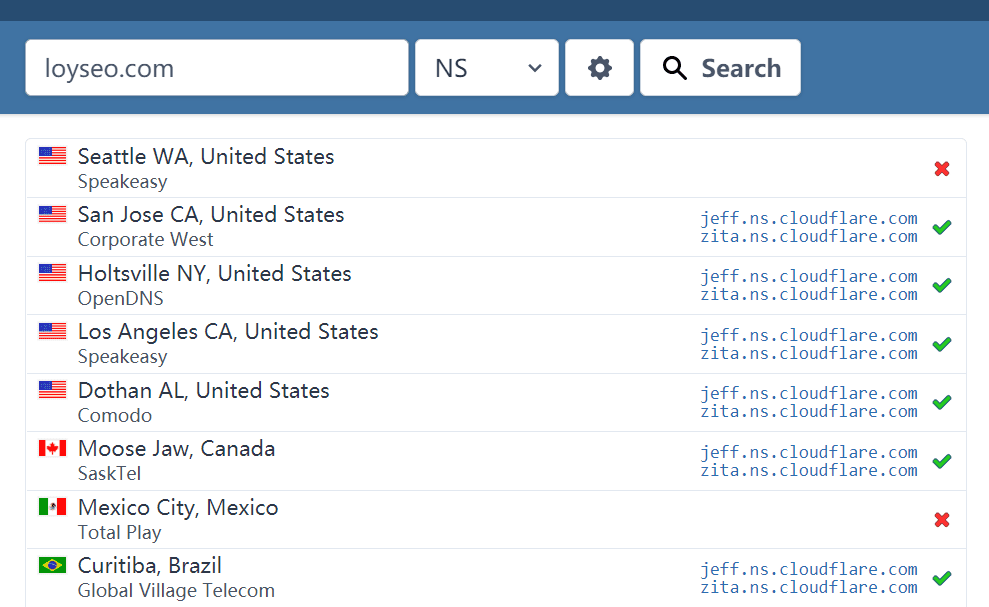
If you want to check whether the domain name resolution is effective, you can go to the websitehttps://www.whatsmydns.net/#NS/, enter the domain name to check whether NS is effective or not.
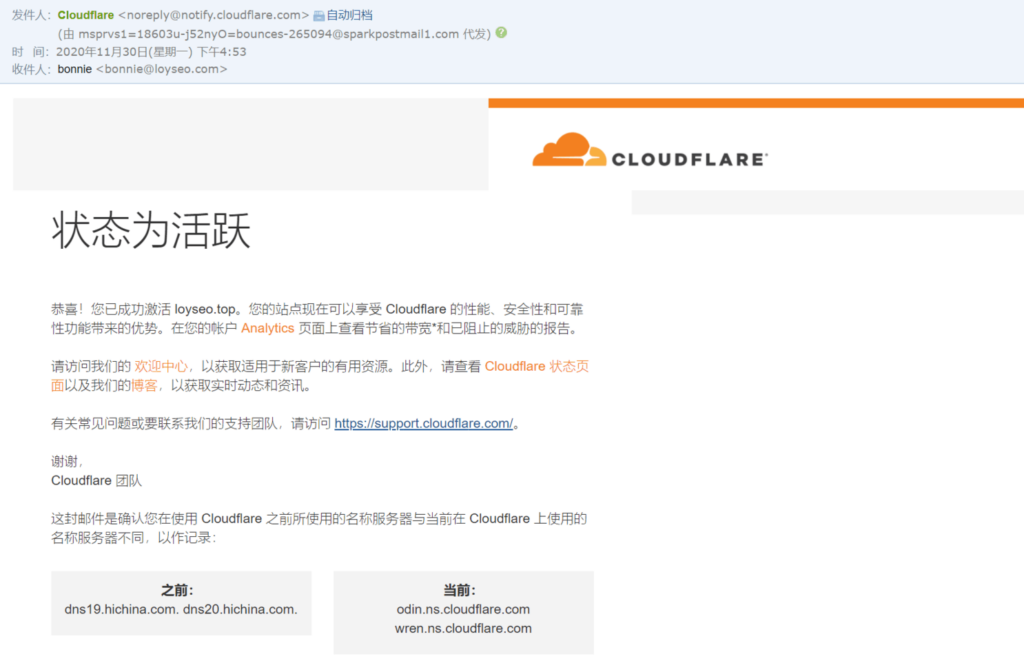
If the domain is successfully added to Cloudflare, you will receive an email notification.
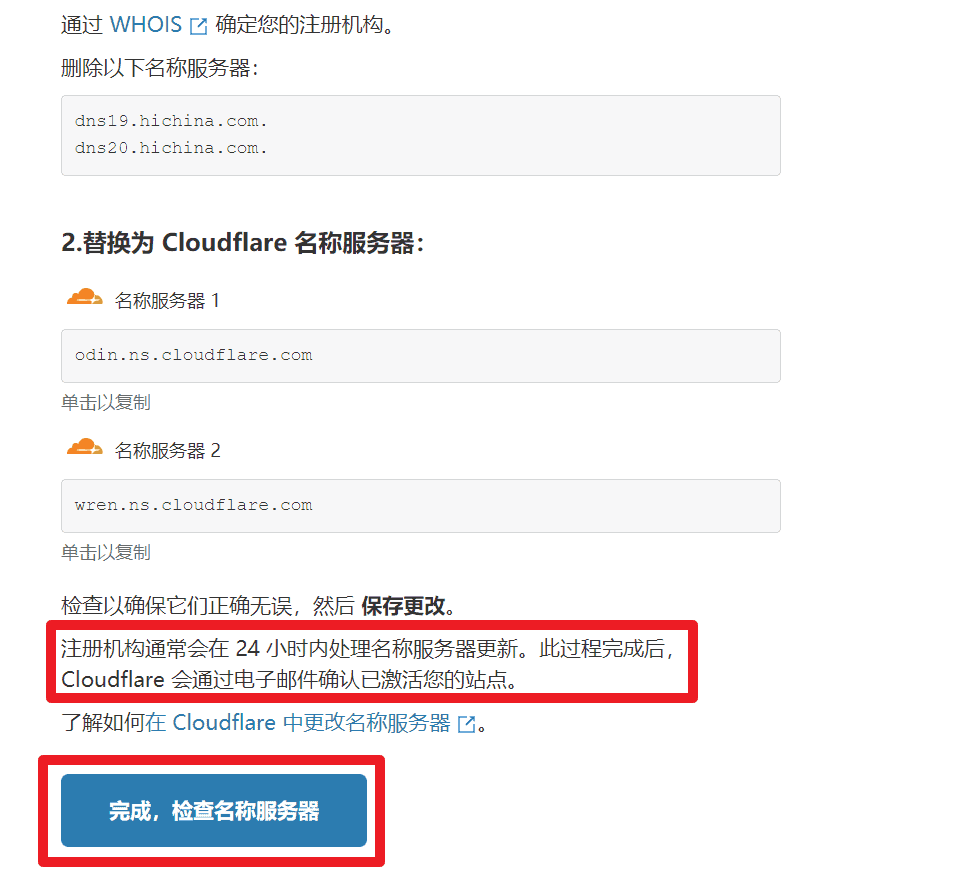
After completing the domain name server modification, return to cloudflare and click on theDone, check name serversbutton to continue.
Here is a quick start guide
Cloudflare Quick Start Guide
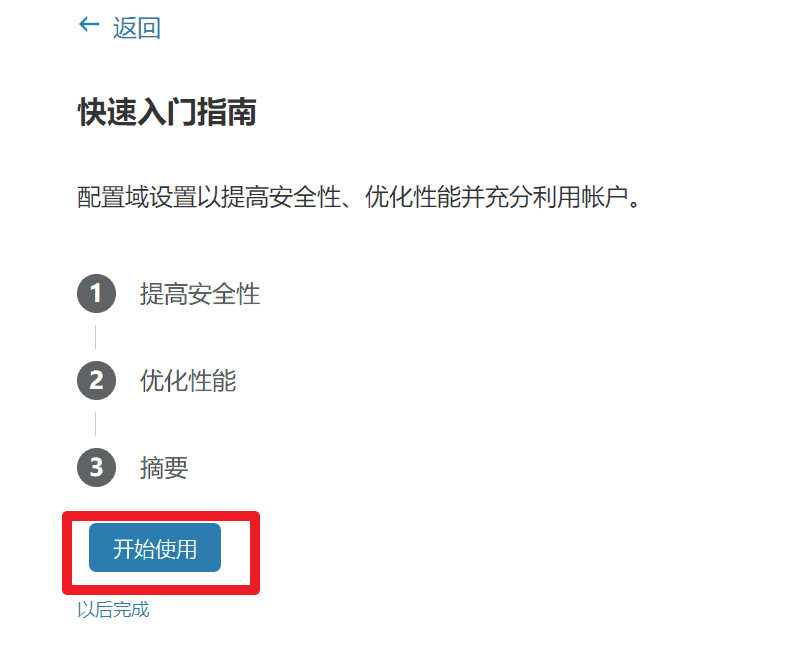
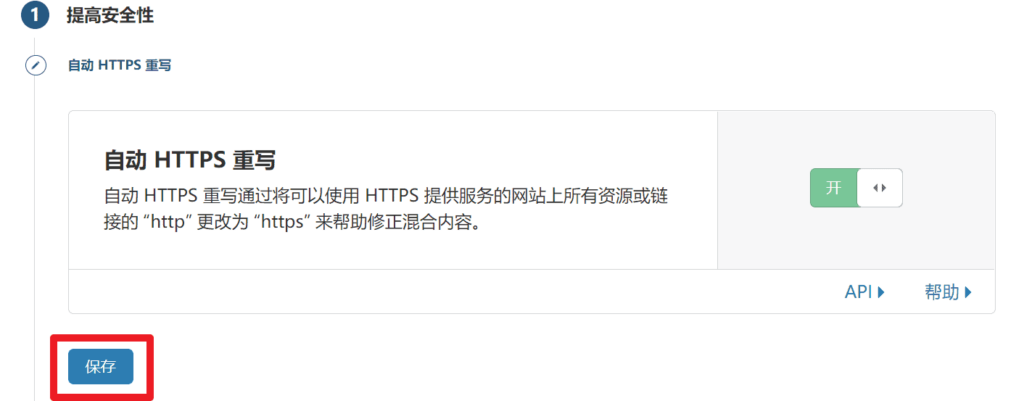
Item 1: Improve safety.
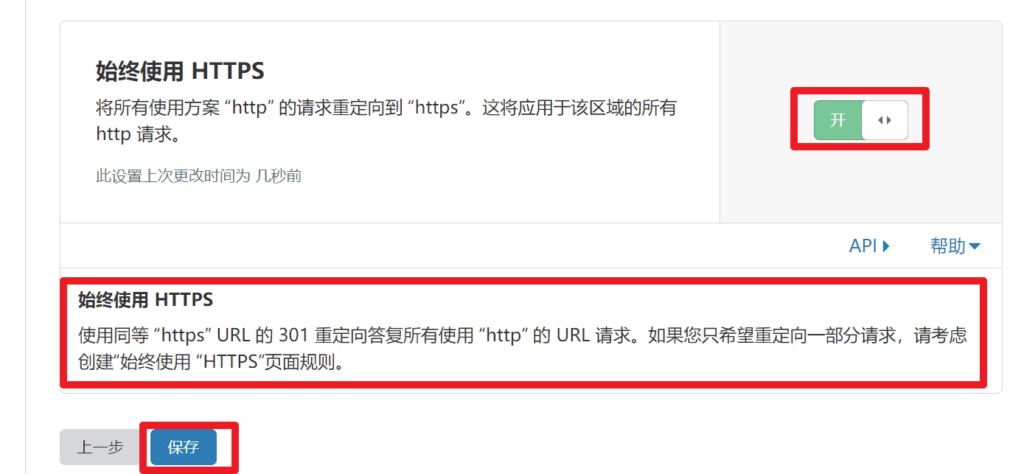
This is related to HTTPS. After you install an SSL certificate for your website, you can enable automatic HTTPS rewriting to avoid mixing http and https on the website.If you don’t plan to install an SSL certificate on your website for the time being, wait until after the SSL certificate is installed before enabling it.If you are about to install an SSL certificate, enable it.
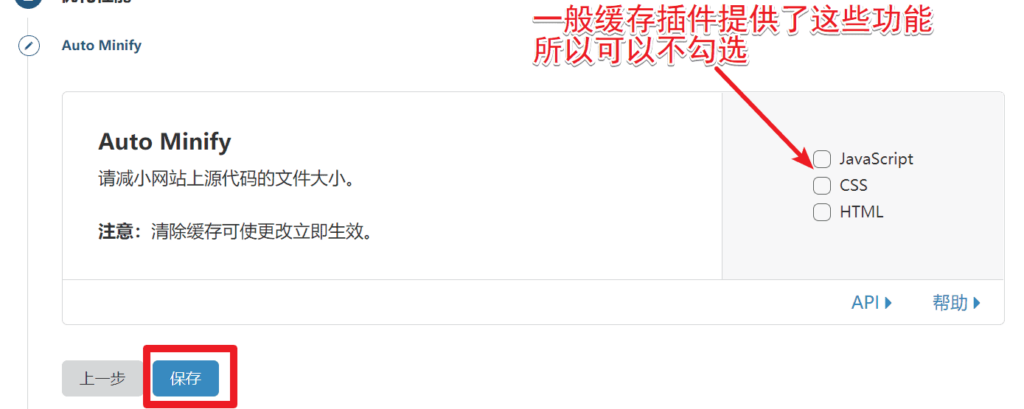
Item 2: Optimize performance.
Usually we useWordPress website buildingIf so, it is recommended to installWP RocketCache plug-ins, they all provide js, css, and html file minification functions, so you can uncheck them.
Updated in 2022. When studying the speed optimization articles of foreign masters, the masters suggested that you can check this option to allow users to get the compressed files directly from cloudflare instead of getting them from the source server, which can improve the speed, but in fact, this improvement is not so obvious. So, it is acceptable to check or not check this option.
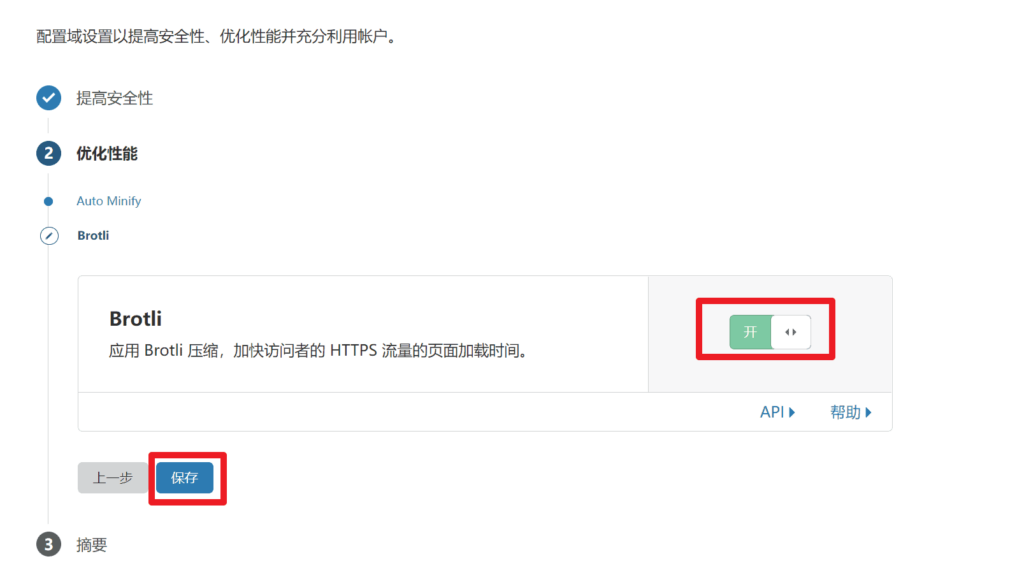
Item 3, SummaryThis is a summary of the previous two configurations. After confirming that everything is correct, click Finish.
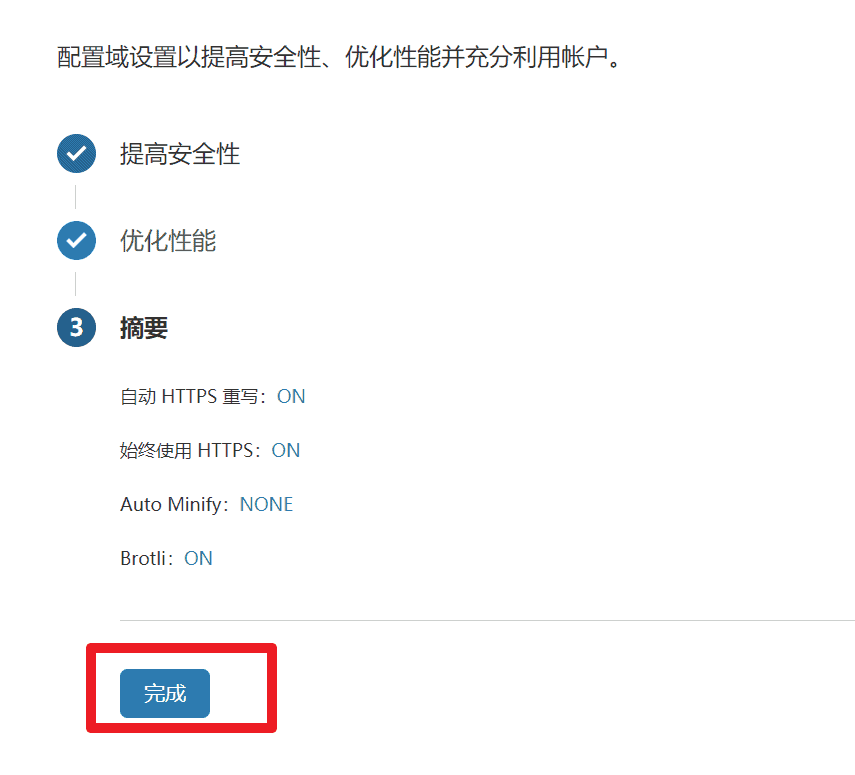
At this point you will be redirected to the configuration management interface for these domain names. Please click on the DNS in the picture to configure the resolution record.

Add A resolution record to the website
Since my domain name is a brand new one without any resolution record, there is no resolution record on the DNS page. If your domain name has a resolution record at the original resolution, Cloudflare will scan the existing resolution record for synchronization, but sometimes the scan is not accurate, so you need to check it manually.
Next, if we want to point the domain name to the server where the website is located, let's add an A record. As shown in the figure below, I will configure loyseo.top to point to the cloudways server
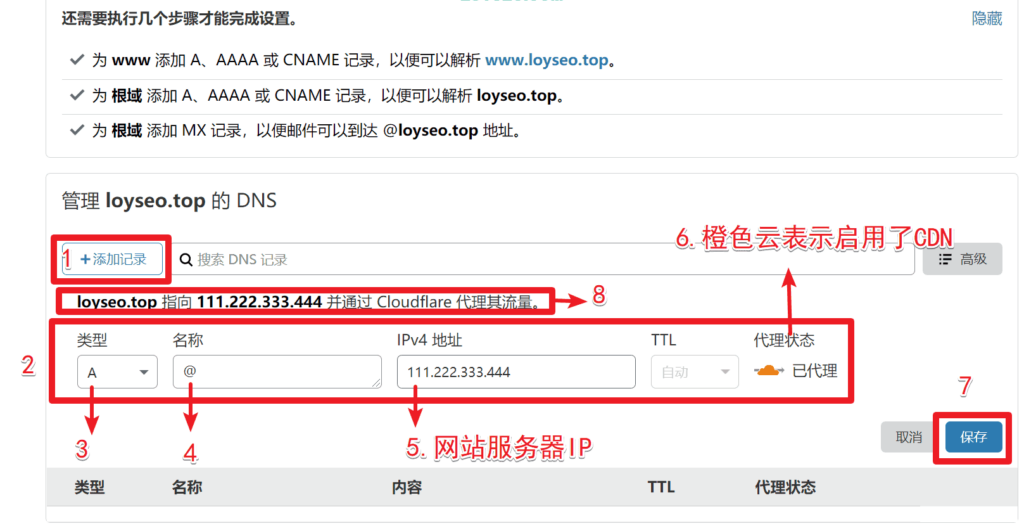
- ClickAdd a recordButton
- You will see a form
- existtypeSelectA
- existnameFill in @ here to indicate that you will use a domain name without www, also called a root domain, such as loyseo.com instead of www.loyseo.com; if you want to use a www domain name, just fill in www here
- IPv4 address: Fill in the IP address of your server, which is usually provided in the server management panel
- Agent Status: The default is oneOrange cloud means CDN is enabled; If you click on it, it will turn into a gray cloud, indicating that CDN is not enabled.
- ClicksaveJust submit it.
- Here is the explanation of the current parsed record. When you modify the record form, the explanation here will change accordingly.
Examples of common parsing record errors
As shown in the figure below, the same name (i.e. domain name, such as loyseo.com) has 3 type A resolution records. This is wrong. There can only be 1.

Similarly, if your mailbox is NetEase, Tencent or Alibaba corporate mailbox, you will also get mailbox resolution records, just add them to Cloudflare.
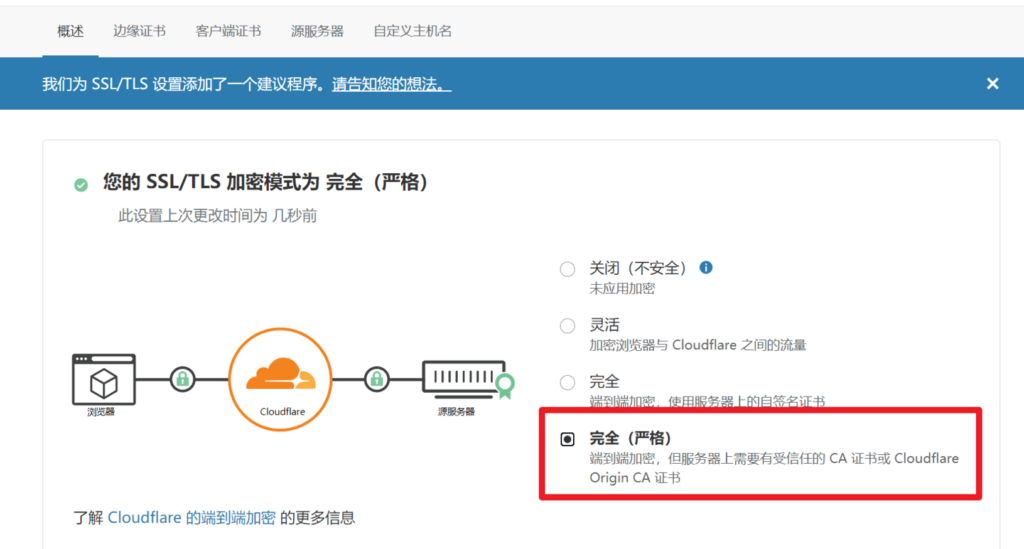
Finally, if your website has SSL installed and https enabled, change the mode on the SSL/TLS page toDo not setFull (strict), because this will increase the SSL response time. Keep the default flexible, or full.
