Excellent software and practical tutorials


What is Certbot?
Certbot is a free and open source software tool for automating the use of Let's Encrypt certificates to enable HTTPS on manually managed websites.
Certbot was developed by the Electronic Frontier Foundation (EFF), a 501(c)3 nonprofit organization based in San Francisco, California, that defends digital privacy, free speech, and innovation.
Free SSLCertificate Robot Website:https://certbot.eff.org/
Quickly apply for a free SSL domain name certificate
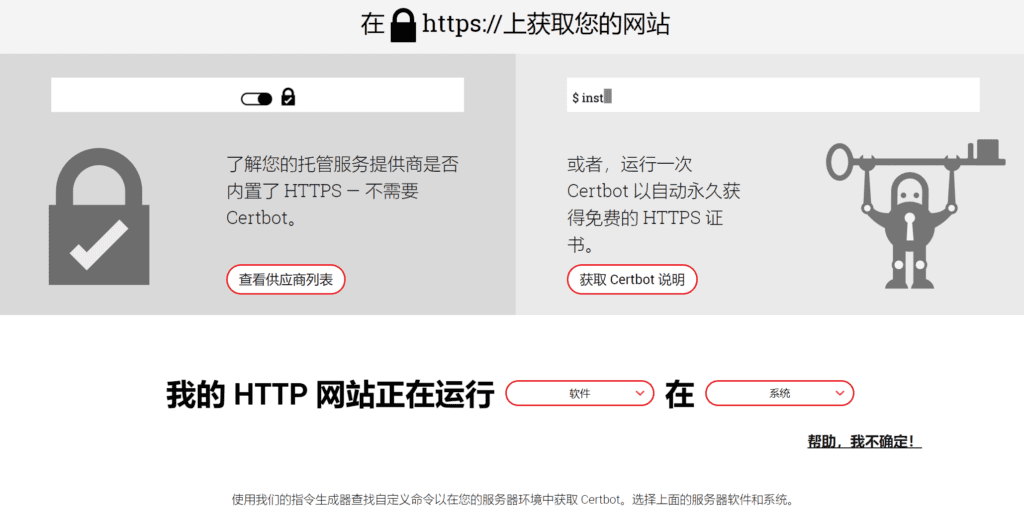
First open the EFF official websitehttps://certbot.eff.org/
Clickcertbot instructions, enterhttps certificateOn the application page.
In Software, select the HTTP server used on your server, and in System, select the operating system of your server. Below, we take Nginx under Centos8 as an example to quickly apply for an https domain name certificate.
Apply for a free SSL certificate for Nginx under CentOS 8
The Certbot snap supports x86_64, ARMv7, and ARMv8 architectures. While we strongly recommend that most users install Certbot via snap, you canHereFind alternative installation instructions.
1.SSH into the server
Connect via SSH to the server running your HTTP website as a user with sudo privileges.
2. Install snapd
You'll need to install snapd and make sure to enable classic snap support by following any instructions.
according tosnapcraft websiteThese instructions onInstall snapd.
Install snap on CentOS8
Snap is available for CentOS 8 and CentOS 7 starting from version 7.6. It is also available for Red Hat Enterprise Linux (RHEL) 7.6+.
Packages for CentOS 8 and CentOS 7 are located in each distribution's respective Extra Packages for Enterprise Linux (EPEL) repository. The instructions for adding this repository differ slightly between CentOS 8 and CentOS 7, which is why they are listed separately below.
If you need to know which version of CentOS you are running, type:
cat /etc/centos-release
If you haven't added the CentOS repository to your distribution, you can add it as follows.
The EPEL repository can be added to your CentOS 8 system using the following command:
sudo dnf install epel-release sudo dnf upgrade
Install snapd
After adding the EPEL repository to your CentOS installation, simply install the snapd package:
dnf -y install snapd
After installation, you need to enable the systemd unit that manages the master snap communication socket:
sudo systemctl enable --now snapd.socket
To enable classic snap support, enter the following to create a symbolic link between /var/lib/snapd/snap and /snap:
sudo ln -s /var/lib/snapd/snap /snap
Notice:Reboot your system to ensure the snap path is updated correctly. Snap is now installed and ready to go!
3. Make sure your snapd version is up to date
Execute the following instructions from the command line on your machine to ensure you have the latest version of snapd.
sudo snap install core
4. Remove certbot-auto and any Certbot OS packages
If you installed any Certbot packages using your operating system package manager (such as apt, dnf, or yum), you should remove them before installing the Certbot snap to ensure that the certbot used when running commands is the snap, not the one installed from the operating system package manager. The specific command to do this depends on your operating system, the uninstall command for centos8 is:
sudo dnf remove certbot
If you have previously used Certbot via the certbot-auto script, you should also remove its installation following the instructions here.
5. Install Free SSL Certificate Robot
Run this command on the command line on your machine to install Certbot.
sudo snap install --classic certbot
6. Prepare Certbot command
Run the following command on the command line of the machine to ensure that the certbot command can be run.
sudo ln -s /snap/bin/certbot /usr/bin/certbot
7. Choose how you want to run Certbot
To manually set up the certificate:If you just want to request a certificate and want to change the nginx configuration manually, run this command.
sudo certbot certonly --nginx
Automatically set up certificates:Run the following command to obtain a certificate and let Certbot automatically edit your nginx configuration to provide services, opening HTTPS access in just a few steps.
sudo certbot --nginx
If you want toDomain Name CertificateAfter setting the domain name in nginx, you can use the automatic certificate setup command to add the domain name to the original certificate.
Step 1: Enter email address (for urgent renewals and security notifications) (Type 'c' to cancel): Enter your email, or press C to cancel.
Step 2: Please read the Terms of Service at https://letsencrypt.org/documents/LE-SA-v1.2-November-15-2017.pdf. You must agree to register with ACME Server. Do you agree? Select: Y

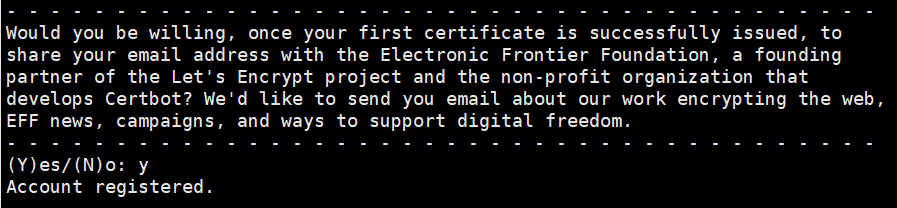
Step 3: Once your first certificate is successfully issued, would you like to share your email address with the Electronic Frontier Foundation, the Let's Encrypt project and nonprofit partner developing Certbot? We would like to send you emails about our work on the encrypted web, EFF news, events, and ways to support digital freedoms. Select: Y
Step 4: For which names do you want to activate HTTPS? Select the appropriate numbers separated by commas and/or spaces, or leave the input blank Select all options shown (type "c" to cancel): Press Enter to startApply for a domain name certificate

Successfully obtained the certificate.
The certificate is saved in: /etc/letsencrypt/live/uzbox.tk/fullchain.pem
The key is saved in: /etc/letsencrypt/live/uzbox.tk/privkey.pem
This certificate will expire on 2022-03-07. These files will be updated when the certificate is renewed. Certbot has set up a scheduled task to automatically renew this certificate in the background.
Deployment Certificate
The uzbox.tk certificate is successfully deployed to /etc/nginx/nginx.conf
Congratulations! You have https://uzbox.tk HTTPS is successfully enabled on
8. Free SSL Auto-Renewal Test
The Certbot package on your system comes with a cron job or systemd timer that automatically renews your certificates before they expire. You should not need to run Certbot again unless you change the configuration. You can test automatic renewal of your certificates by running the following command:
sudo certbot renew --dry-run
The command to update certbot is installed in one of the following locations:
- /etc/crontab/
- /etc/cron.*/*
- systemctl list-timers
9. Confirm that Certbot works
To confirm that your site is set up correctly, visit your website and look for the lock icon in the URL bar of your browser.
10. How to add a domain name to the SSL certificate
When building multiple websites on the same server, each website's domain name needs to be applied forssl certificate. Certbot certificate robot can store all domain names in nginx in a set of SSL certificates. It is convenient for SSL certificate management, update and maintenance!
How to add a new domain name to the SSL certificate:
Configure nginx to bind the new domain name for which you need to apply for a certificate. After the domain name is bound, restart the nginx service or restart the server to make the nginx configuration take effect.
Restart (do not stop nginx to make the modified configuration take effect):
systemctl reload nginx
Restart:
systemctl restart nginx
Check the service status:
systemctl status nginx
Then enter the following command on the server to use the Certbot certificate robot to start applying for a certificate.
sudo certbot certonly --nginx
Use the above command to manually set up the SSL domain name certificate.
Saving debug log to /var/log/letsencrypt/letsencrypt.log Which names would you like to activate HTTPS for? - - - - - - - - - - - - - - - - - - - - - - - - - - - - - - - - - - - - - - 1: The domain name you have configured to bind to nginx2: The domain name you have previously applied for in nginx - - - - - - - - - - - - - - - - - - - - - - - - - - - - - - - - - - - - - - - Select the appropriate numbers separated by commas and/or spaces, or leave input blank to select all options shown (Enter 'c' to cancel):
Press Enter to proceed to the next step of the application.
You have an existing certificate that contains a portion of the domains you requested (ref: /etc/letsencrypt/renewal/uzbox.tk.conf) It contains these names: You requested these names for the new certificate: Do you want to expand and replace this existing certificate with the new certificate? - - - - - - - - - - - - - - - - - - - - - - - - - - - - - - - - - - - - - - - - (E)xpand/(C)ancel: e
Press E to proceed to the next step.
Renewing an existing certificate for uzbox.tk and 4 more domains Successfully received certificate. Certificate is saved at: /etc/letsencrypt/live/uzbox.tk/fullchain.pem Key is saved at: /etc/letsencrypt/live/uzbox.tk/privkey.pem This certificate expires on 2022-04-19. These files will be updated when the certificate renews. Certbot has set up a scheduled task to automatically renew this certificate - - - - - - - - - - - - - - - - - - - - - - - - - - - - - - - - - - - - - - - - - - If you like Certbot, please consider supporting our work by: * Donating to ISRG / Let's Encrypt: https://letsencrypt.org/donate * Donating to EFF: https://eff.org/donate-le - - - - - - - - - - - - - - - - - - - - - - - - - - - - - - - - - - - - - - - -
New domain nameSSL certificate applicationWell, the domain name SSL certificate address is still the previous certificate address, and there is no need to change it in nginx.