Excellent software and practical tutorials
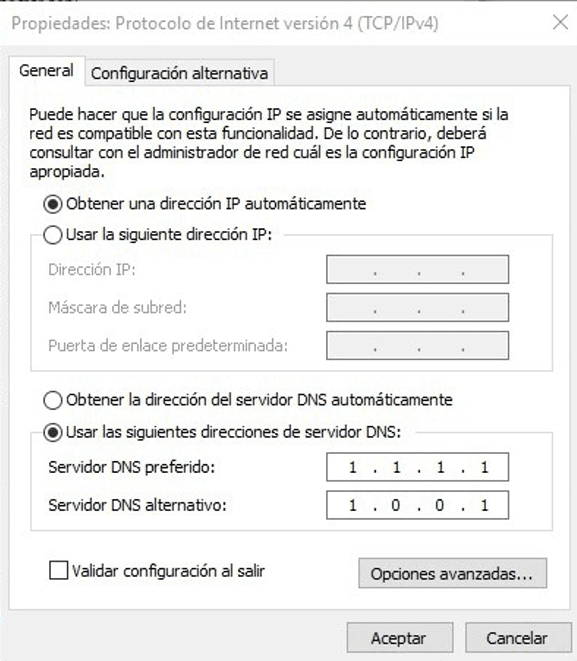
Changing IP and DNS in WindowsThe standard way is directly through the properties of the TCP/IPv4 protocol of the network card, through this window that we are probably very familiar with.
Although this is the typical method and the simplest, if we often change DNS or we want to configure more of the two DNS that Windows allows us to use without having to change fromIPv4 Protocol Propertieswindow, you can do more quickly by executing a simple command or even creating a script that does the task when executed with a double-click.
Next, we explain how to do this.
How to change the DNS of a network card from PowerShell in Windows 10
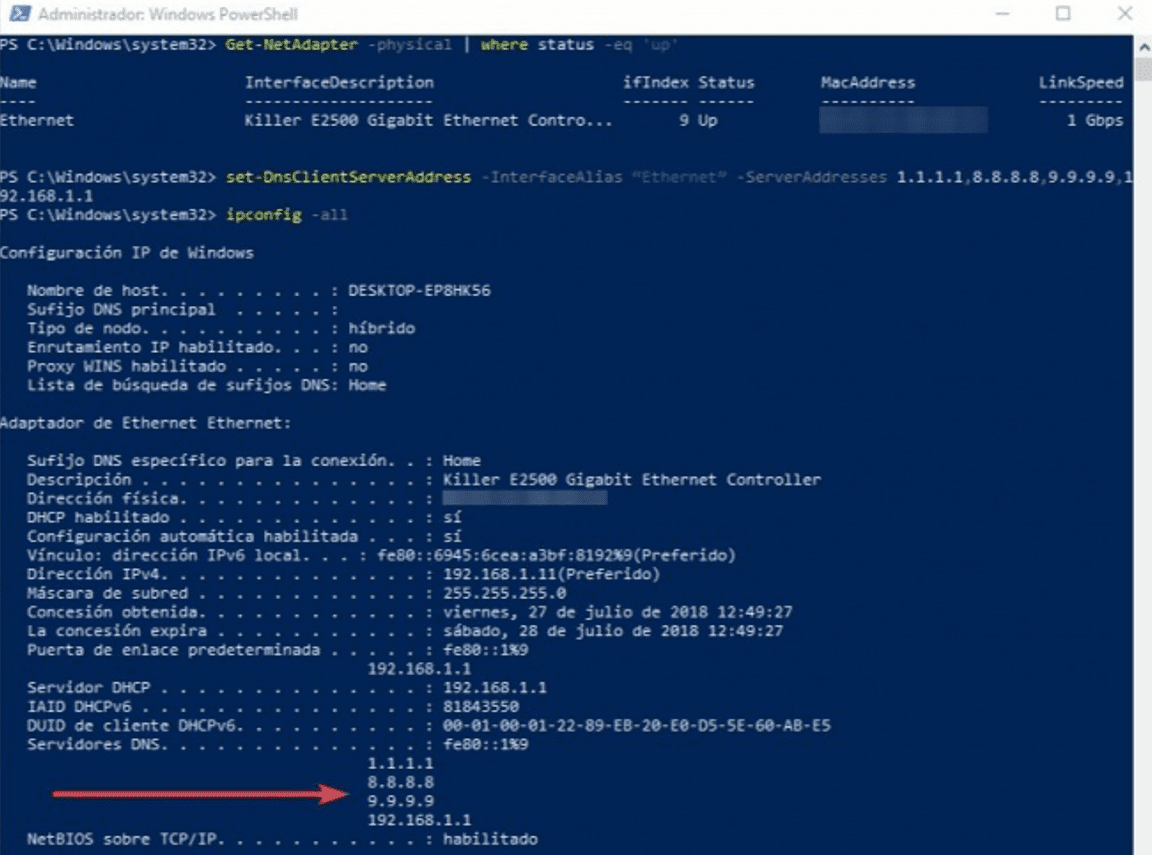
To do this, the first thing we will do is open a PowerShell window with administrator permissions. To do this, we will search in Cortana for"PowerShell", and by right-clicking in the console with administrator permissions. Once inside, the first thing we have to do is identify the name of the network card whose DNS we want to change. To do this we will execute the following command:
 Get-NetAdapter -Physical | Status -eq 'up'
We check the appearance"name"In the columnname,Because it will be the name that we will have to use. Once the network card has been identified, the next step will be to execute the command to change the DNS. To do this, we will change the configuration values of the DNS servers that we want to apply to the network, executing the following command:
- set-DnsClientServerAddress -InterfaceAlias "Ethernet" -ServerAddresses 1.1.1.1, 8.8.8.8, 9.9.9.9, 192.168.1.1
Once this command is executed, the DNS configuration of our network card will be changed. Now, we just need to execute the command " ipconfig -all to see that the changes were made.
 As we can see, changing the DNS of our computer is very easy thanks to this simple trick. In addition, if we already have some knowledge of PowerShell, we can easily create a script to change one DNS to another in a few seconds.


 Get-NetAdapter -Physical | Status -eq 'up'


