精品軟體與實用教程
甲骨文自動搶伺服器腳本,透過飛機自動通知!
ARM伺服器 自動搶伺服器腳本,透過安裝設定Terraform、oci-cli來配置甲骨文 自動搶伺服器腳本。甲骨文提供的終身免費伺服器,除了註冊難度玄學之外,即便是註冊成功,也很難搶到伺服器,以下透過這個ARM伺服器自動搶伺服器腳本,來即時申請ARM伺服器。
安裝Terraform
wget https://releases.hashicorp.com/terraform/0.15.5/terraform_0.15.5_linux_amd64.zip
解壓縮,並移動檔案terraform到/usr/bin目錄
unzip terraform_0.15.5_linux_amd64.zip mv terraform /usr/bin
使用以下命令查看版本
terraform version
顯示如下則安裝成功

安裝oci-cli工具
使用以下指令安裝oci-cli工具
bash -c "$(curl –L https://raw.githubusercontent.com/oracle/oci-cli/master/scripts/install/install.sh)"
一直回車即可
當出現:
![]()
這時候,是在提示你輸入y回車,會自動加入環境變量
之後又是一直回車。出現如下提示表示安裝成功。可用:oci -v 查詢版本

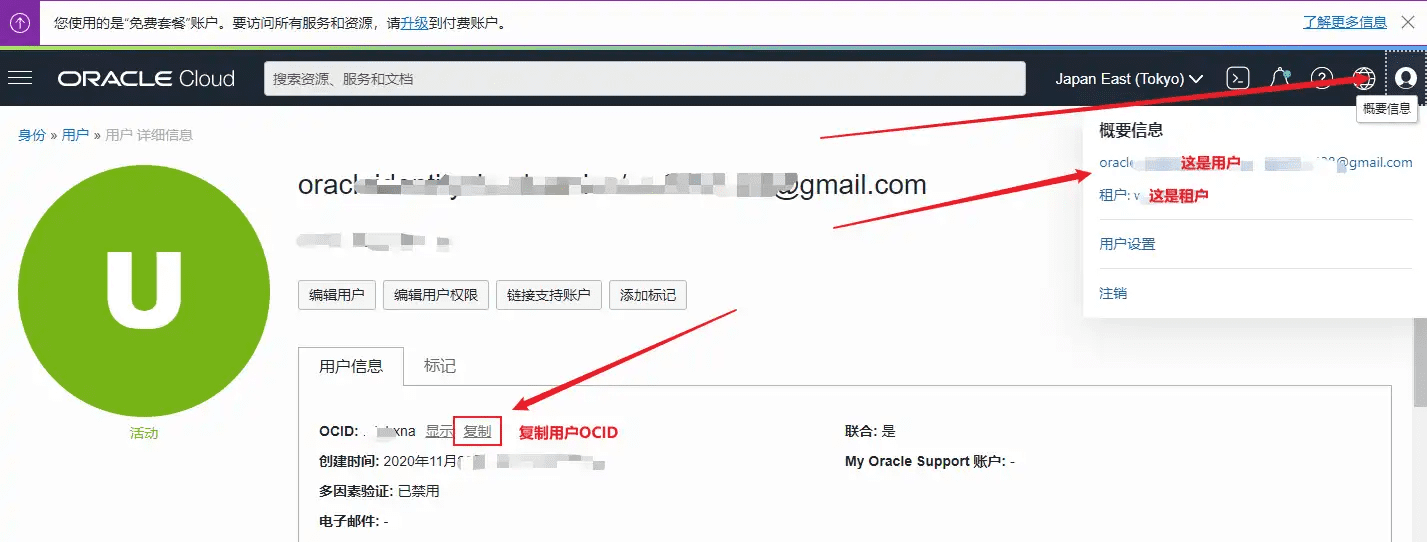
複製使用者和租用戶的ocid
甲骨文後台右上角—使用者設定—點選使用者以及租戶,在資訊欄中有我們需要的ID,分別點選複製,可以儲存在記事本備份好
甲骨文 Oracle ARM伺服器自動搶伺服器腳本!
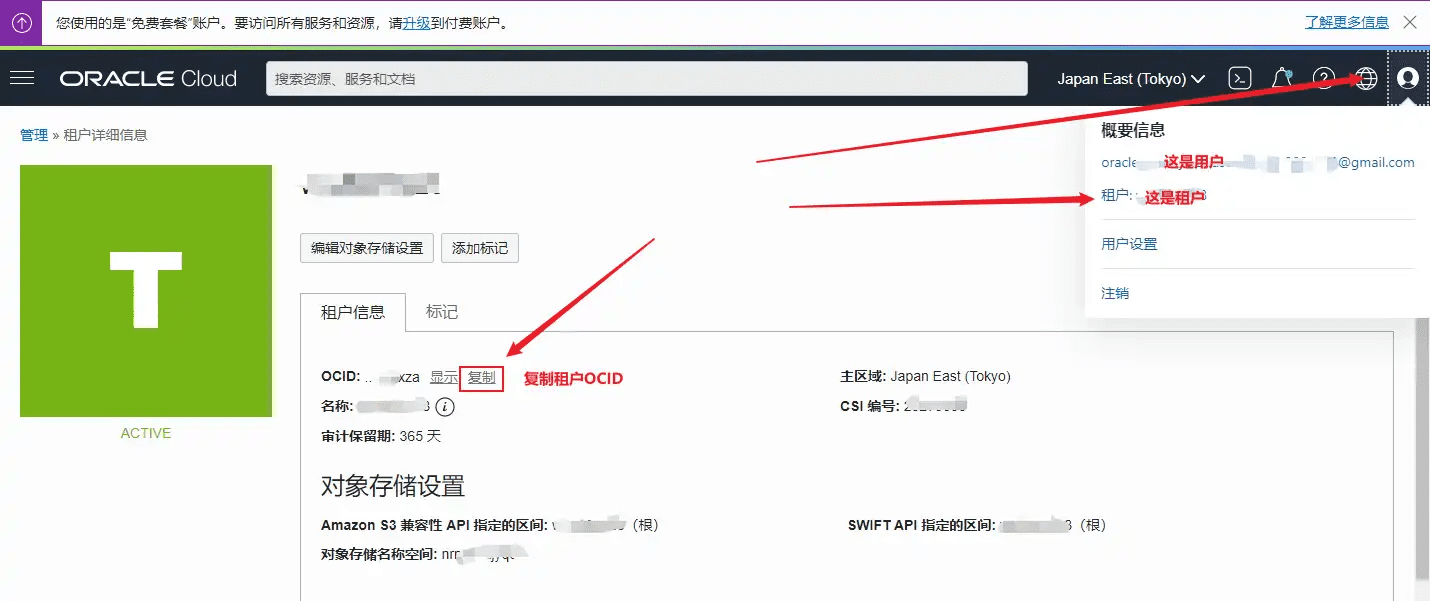
設定cli
輸入如下程式碼開始配置,配置的路徑預設在root目錄
oci setup config
具體配置看下面
Enter a location for your config [/root/.oci/config]: Enter a user OCID: #輸入你的使用者OCID Enter a tenancy OCID: #輸入你的租用戶OCID Enter a region by index or name(eg 1: ap-chiy-1, 4: ap-melbourne-1, 5: ap-mumbai-1, 6: ap-osaka-1, 7: ap-seoul-1, 8: ap-sydney-1, 9: ap-tokyo-1, 10: ca-montreal-1, 11: ca-tokyo-1, 10: ca-montreal-1, 11: ca-to eu-frankfurt-1, 14: eu-zurich-1, 15: me-dubai-1, 16: me-jeddah-1, 17: sa-santiago-1, 18: sa-saopaulo-1, 19: uk-cardiff-1, 18: sa-saopaulo-1, 19: uk-cardiff-1, 20: 22: uk-london-1, 23: us-ashburn-1, 24: us-gov-ashburn-1, 25: us-gov-chicago-1, 26: us-gov-phoenix-1, 27: us-langley-1, 28:us- us-sanjose-1): 9 #這裡選擇你的區域Do you want to generate a new API Signing RSA key pair? (If you decline you will be asked to supply the path to an existing key.) [Y/n]: y 1upply the path to an existing key.) [Y/n]: y 1upply the pathy [/root/.oci]: Enter a name for your key [oci_api_key]: Public key written to: /root/.oci/oci_api_key_public.pem Enter a passphrase for your private key (empty for no passphs): Private key/ckey /c f f f m盤/print: fpinger Config written to /root/.oci/config If you haven't already uploaded your API Signing public key through the console, follow the instructions on the page linked below in the section 'How to upload the public key': https://docs.cloud.oracle.com/Content/API/Concepts/apisigningkey.htm#How2
複製產生的公鑰,使用以下命令取得公鑰
cat /root/.oci/oci_api_key_public.pem
把顯示出來的內容複製,並且加到
甲骨文後台—使用者設定—資源—API秘鑰—新增API秘鑰
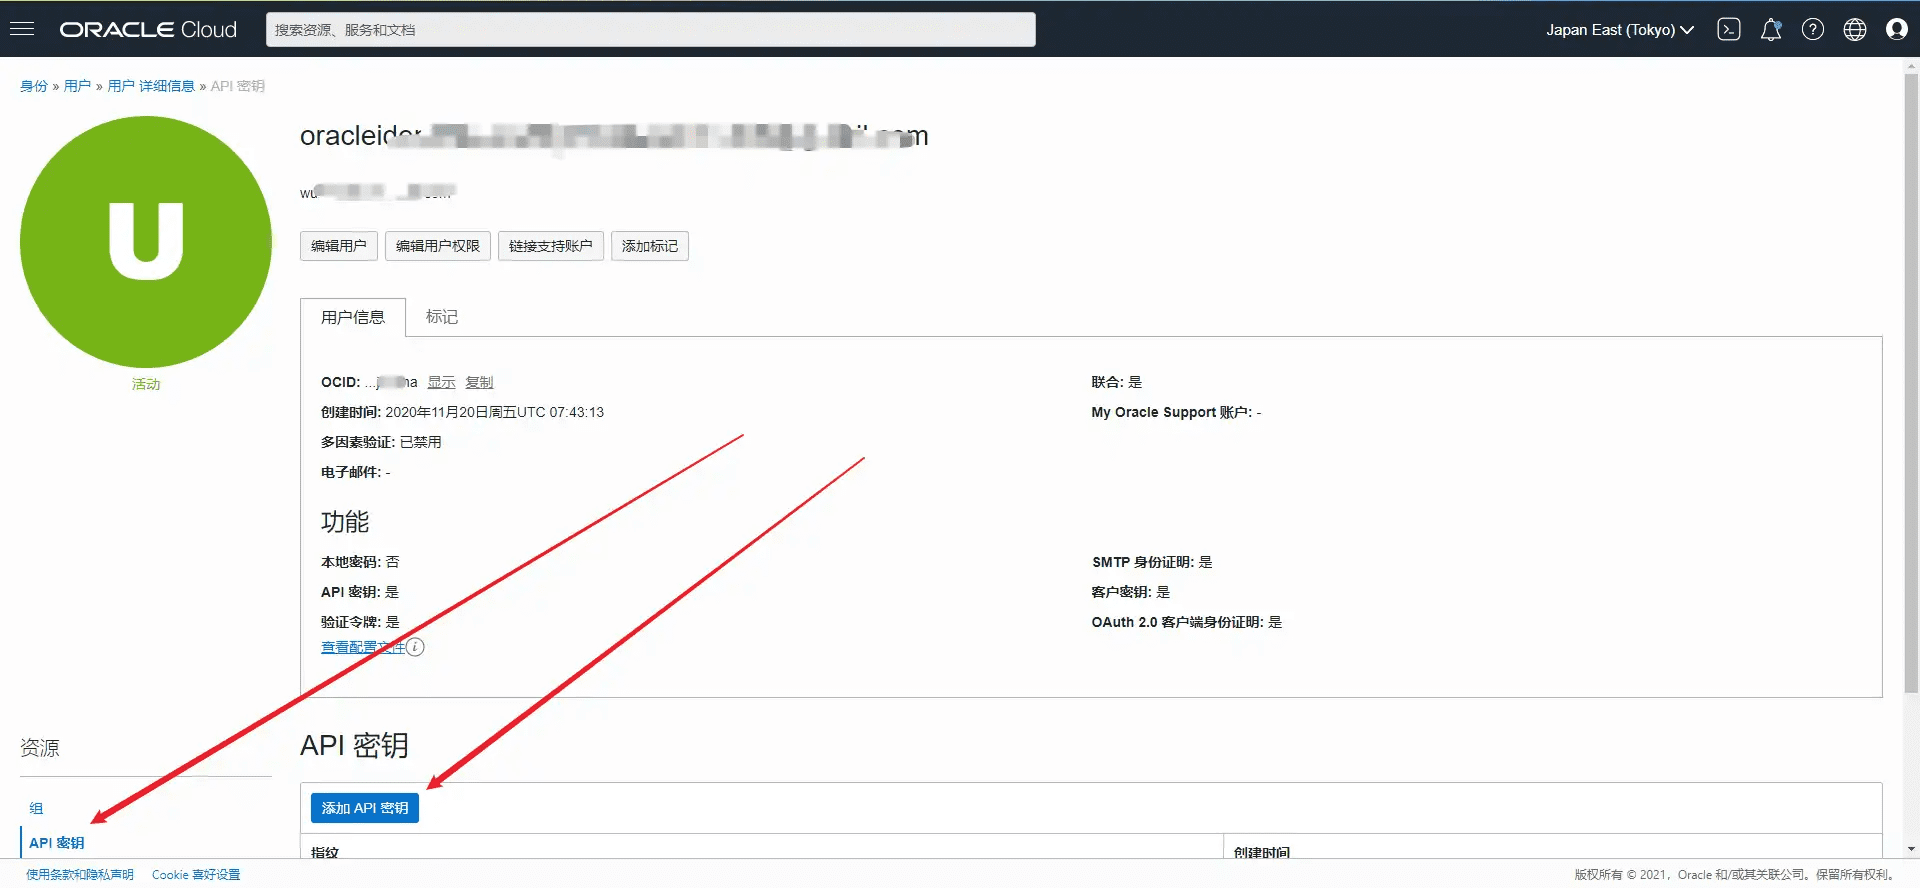
使用以下命令測試oci配置是否正確
oci iam availability-domain list
提示以下內容則配置正確

Terraform環境初始化
1.我們先取得甲骨文的Terraform腳本
點選建立VM實例
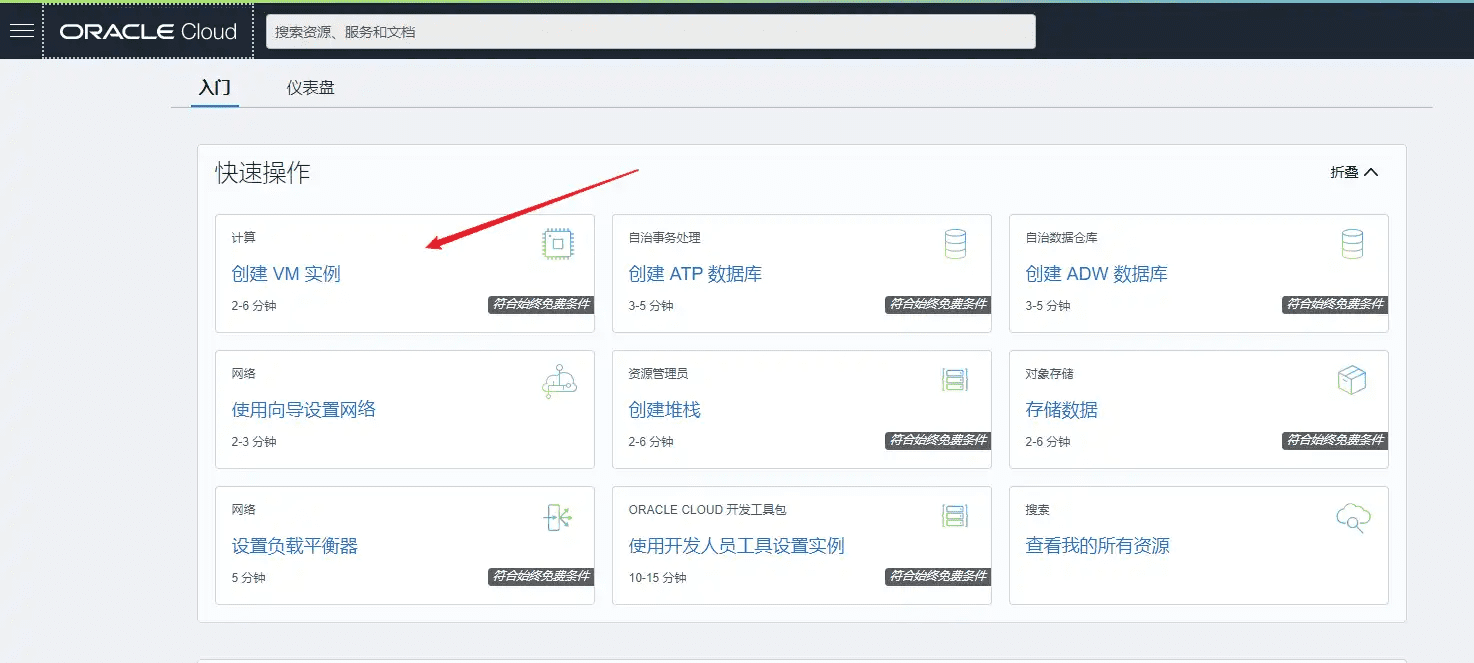
在這裡選擇你需要的配置
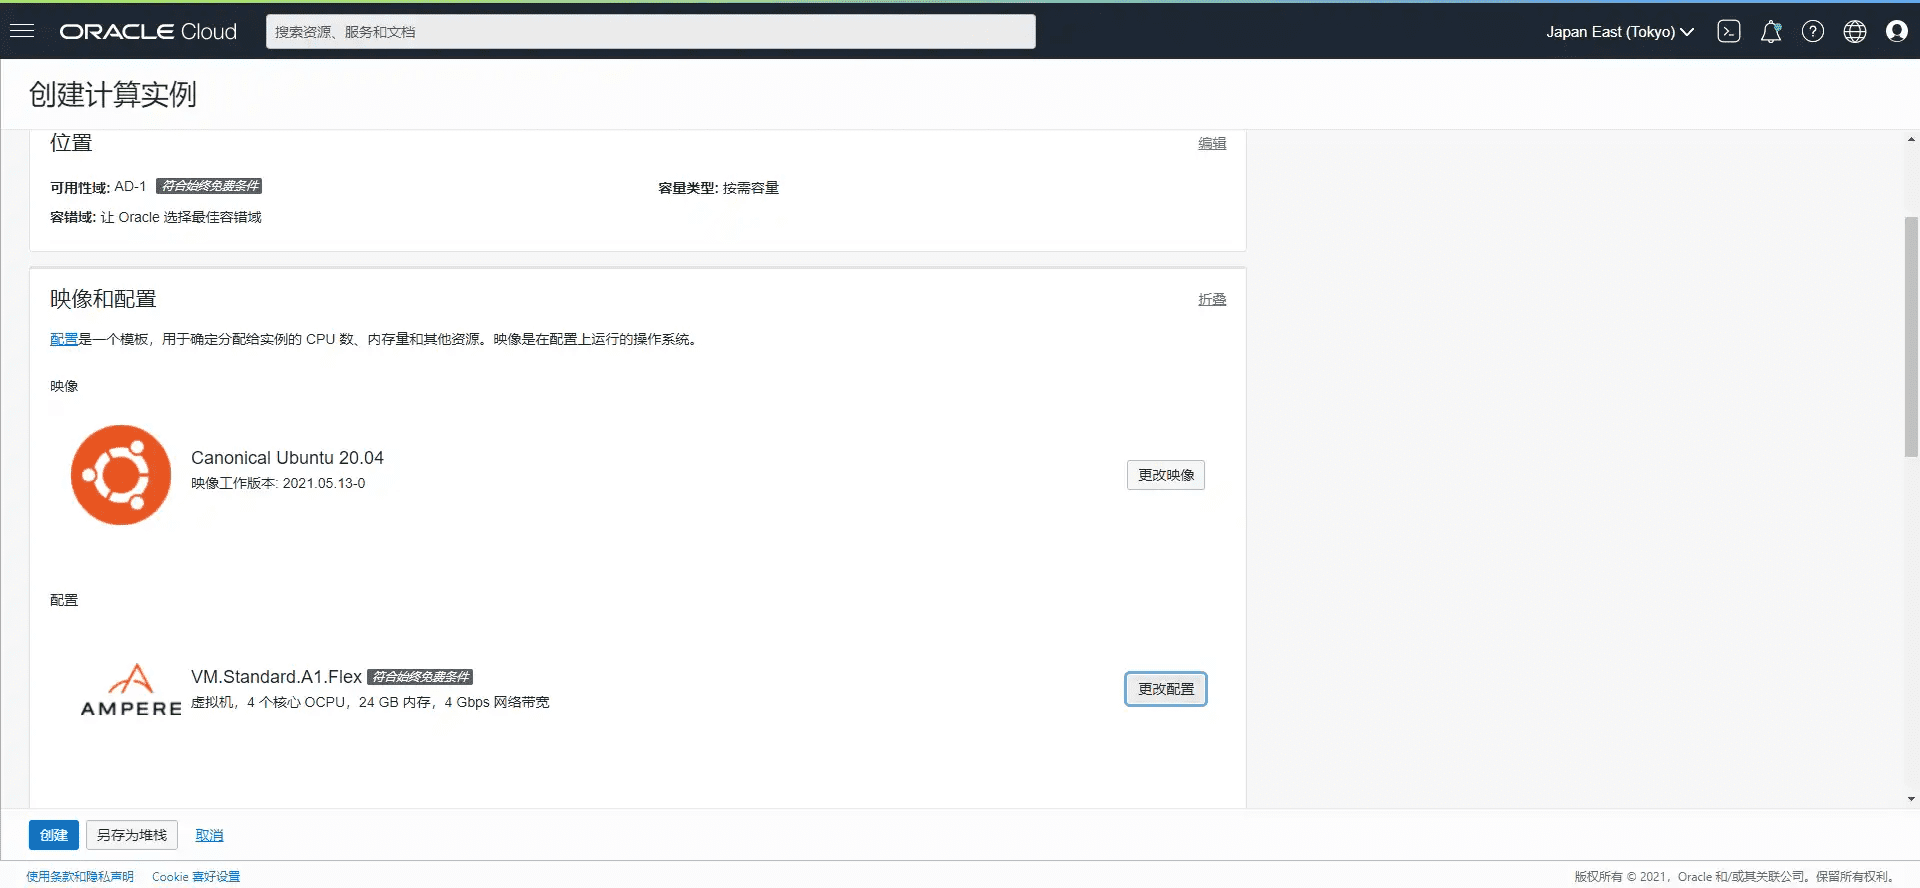
記得保存私鑰
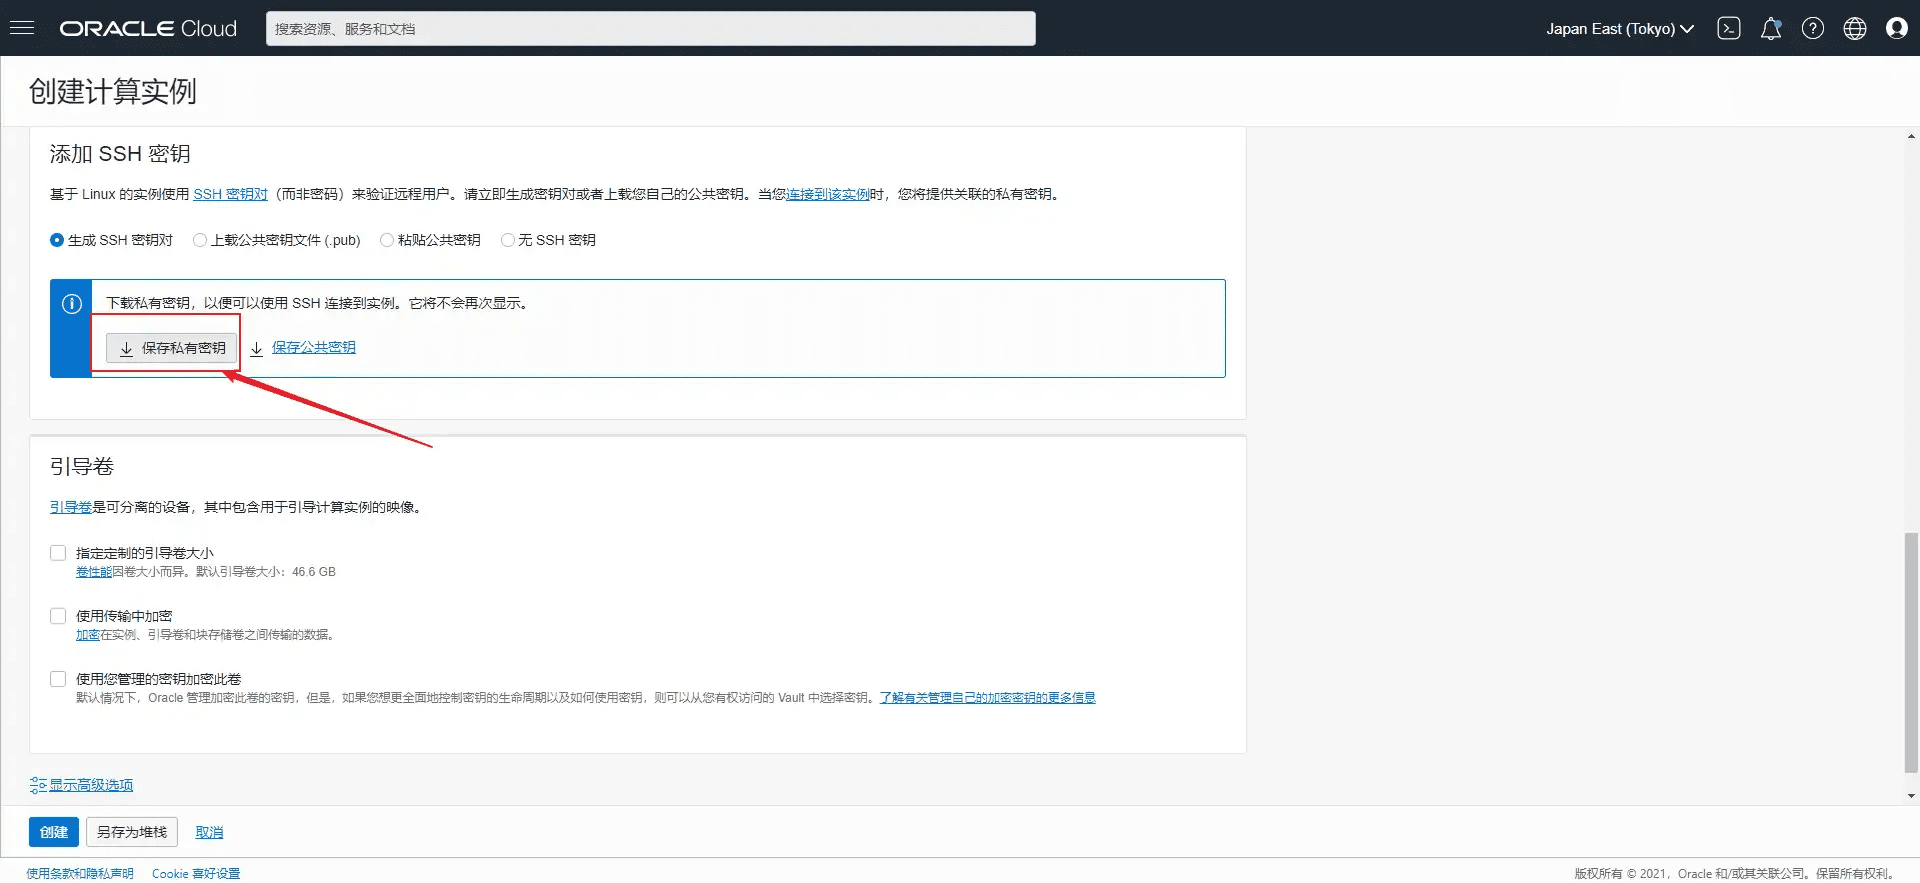
點擊另存為堆疊
一直下一步
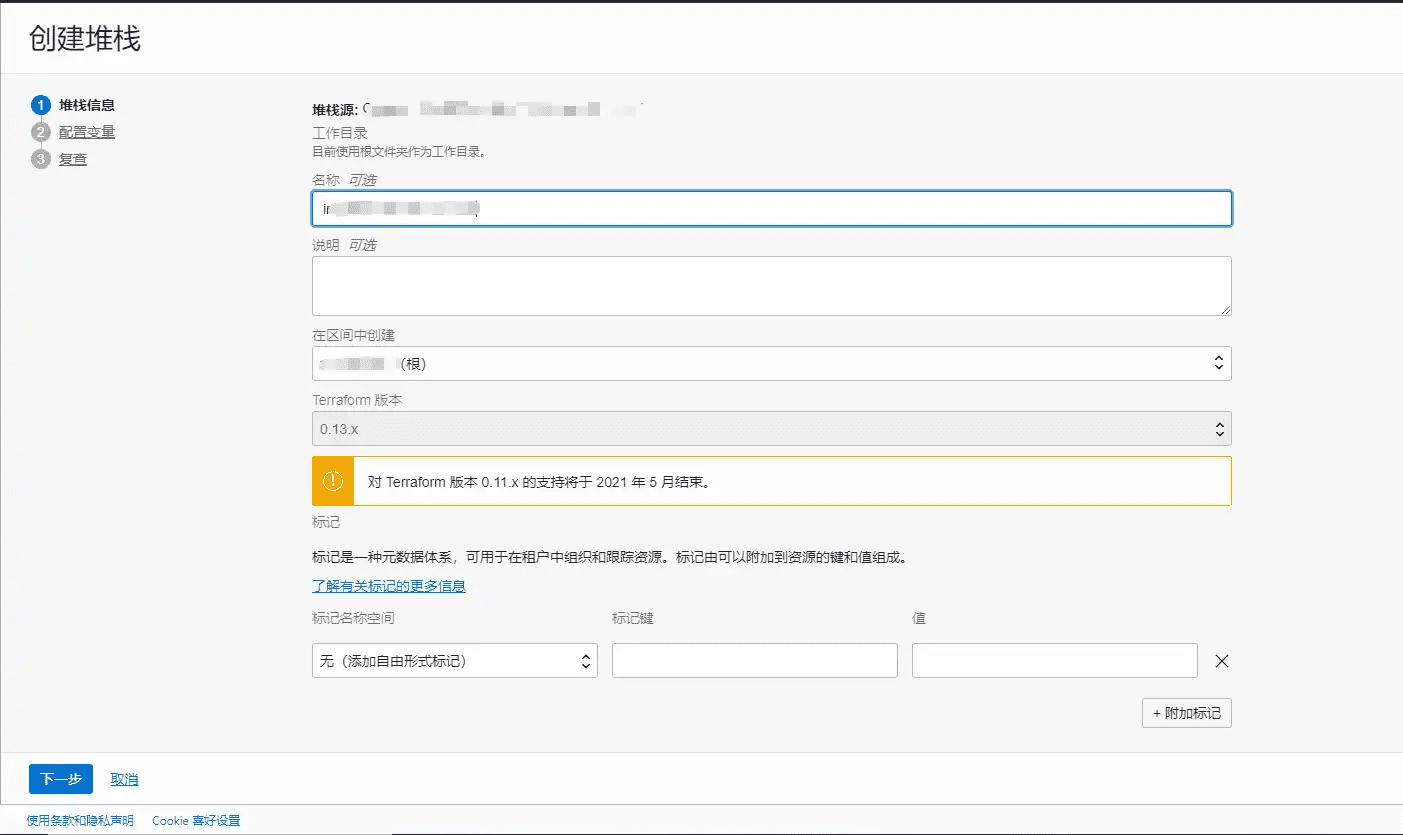
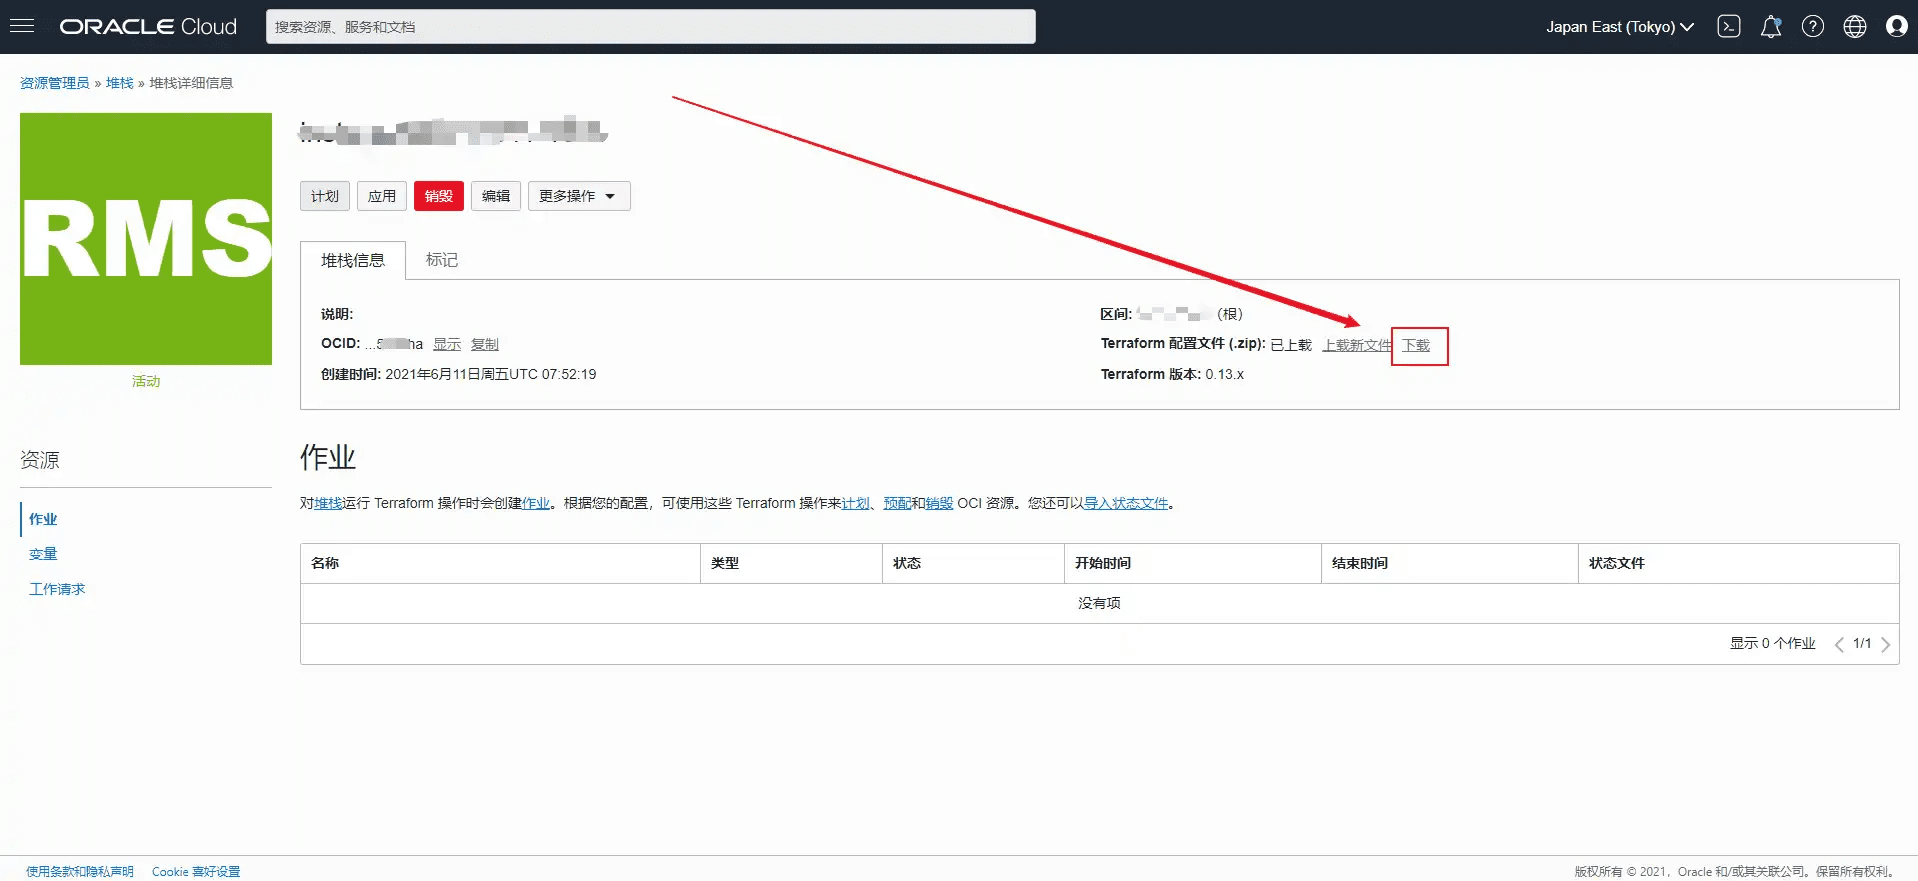
點擊下載
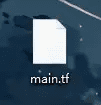
將壓縮包解壓縮到桌面備用
2、配置Terraform
使用以下指令建立Terraform運行目錄
cd /opt/ mkdir terraform-learning && cd terraform-learning
將剛剛解壓縮到桌面的main.tf檔案上傳到這個目錄
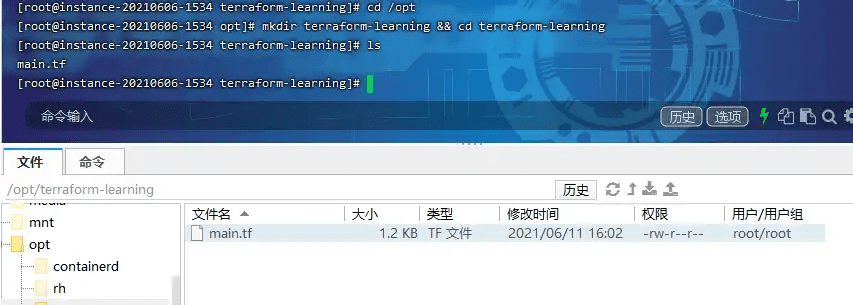
將目錄設定為Terraform運行目錄
terraform init
以上完成後,開始建立任務,用指令:(注意還是在/opt/terraform-learning)
terraform apply
執行完上面指令之後,會提示輸入yes
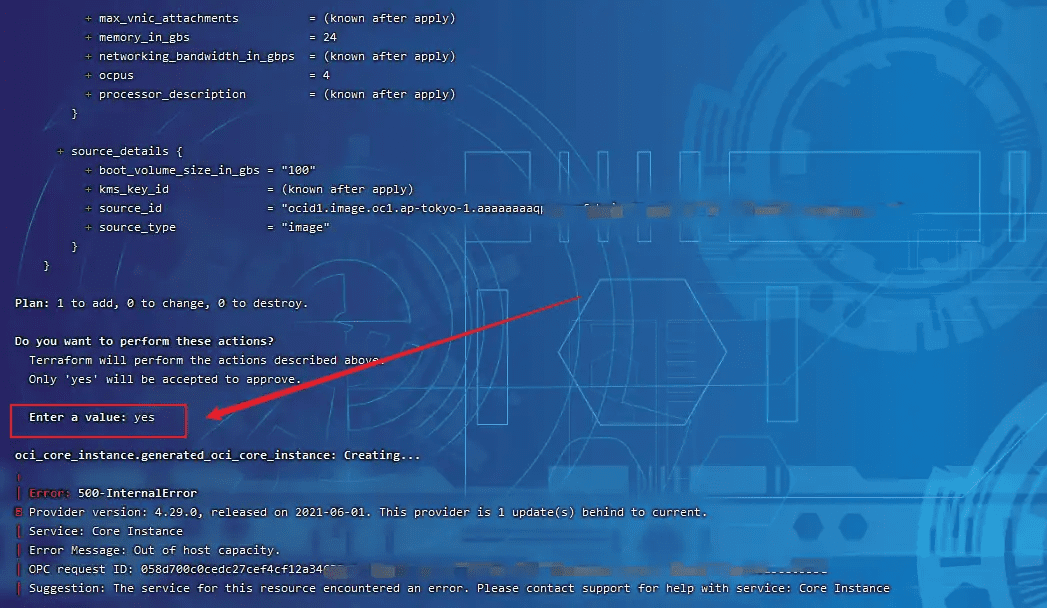
上圖還能看到API回傳Error Message: Out of host capacity,提示主機容量不足,下面就用腳本來不停刷就行了
部署腳本
終於可以部署腳本來搶伺服器了,請先取得telegram帳號id,並且追蹤通知機器人@oracle_message_bot
TG id請透過@userinfobot機器人獲取
在root目錄下新建一個terraform.sh
cd /root vi terraform.sh
寫入以下內容
#!/bin/bash path='/opt/terraform-learning/' FIND_FILE="/root/terraform.log" #日誌檔案位置FIND_STR="Apply complete!" cd $path && while true do echo 'yes' | do echo 'yes' - tappin "$FIND_STR" $FIND_FILE -ne '20' ];then curl --location --request POST 'https://api.telegram.org/bot2124631392:AAHtVpEm7KRWo6ulYNG_Zbz98irpmTSIf8o/sendiVpEm7KRWo6ulYNG_Zbz98irpmTSIf8/sendirpmTSIf8o/sendtext'Messessages --Messtexts=sendirpmTSIf8o/sendirpm)建立伺服器成功! ' \ --form 'chat_id=你的tg id' \ --form 'parse_mode=markdown' pkill terraform exit 0 fi
給Shell腳本賦予執行權限:
chmod +x terraform.sh
使用以下命令後台執行腳本
nohup ./terraform.sh >> terraform.log 2>&1 &
如何結束腳本?
使用以下命令結束腳本
pkill terraform


